
Related Manuals for Accuris W3101A-120


Summary of Contents for Accuris W3101A-120
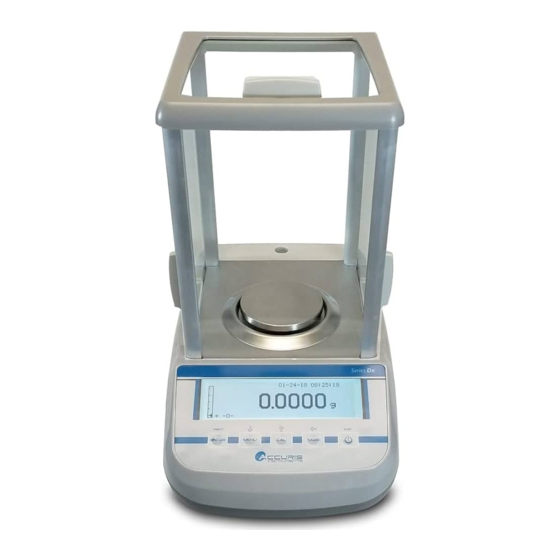
- Page 1 Operation Manual Analytical Balance Series Dx Models W3101A-120 / W3100A-220 (graphic dot matrix display) Revision 12-17...
-
Page 2: Table Of Contents
Table of Contents: INSTALLATION INSTRUCTIONS ....................4 STORAGE CONDITIONS ....................... 5 WEIGH PAN ASSEMBLY ....................... 6 KEYBOARD AND DISPLAY ......................6 INPUTS OUTPUTS ........................... 7 ..................... 7 ALANCE BACK AND NDERNEATH WEIGHING ............................8 ............................. 9 TAND ......................... 9 IMPLE WEIGHING CALIBRATION .......................... - Page 3 10.1.1 Manual insertion of the average unit weight ..............32 10.1.2 Automatic updating of the average unit weight ..............34 10.2 ......34 ROGRAM FOR THE DETERMINATION OF THE DENSITY OF A SOLID OR A LIQUID 10.2.1 Solid density determination ....................34 10.2.2 Liquid density determination .....................
-
Page 4: Installation Instructions
Installation instructions WARNING: Please carefully read these installation and use instructions before you begin using your new balance. The product’s safety and accuracy cannot be guaranteed if the instrument is used in a way that is different from that recommended in this manual. DO NOT DISCARD THE ORIGINAL PACKAGING MATERIAL. -
Page 5: Storage Conditions
▪ Do not drop objects of an excessive weight on the balance weigh pan, as doing so may damage to the weigh cell mechanism. ▪ Service should be carried out by trained personnel, and spare parts used must be original. Contact your distributor or Accuris Instruments for service. Storage conditions ▪ Storage temperature +5 °C to +40°C ▪... -
Page 6: Weigh Pan Assembly
Weigh pan assembly Weigh Pan Pan Support The weigh pan assembly consists of 2 pieces: the pan support piece is first gently placed onto the weigh cell, and then the weigh pan is placed gently onto the pan support. Keyboard and display... -
Page 7: Inputs Outputs
Stability indicator Zero indicator Percent weight Piece counting Data insertion mode Upper threshold Lower threshold Density measurement Ct, ozt, lb, GN, Dwt, kg, mg, g Unit of measurement Inputs outputs 5.1 Balance Rear and Underneath Figure 1 1. Weigh pan assembly 2. -
Page 8: Weighing
Figure 2 5. Balance closure screws 6. Weighing hook under the balance Note: to access, remove the cap 7. Shipping protection screw for auto calibration motor (only for models with internal calibration). ATTENTION: remove this screw by hand as soon as the balance is removed from its package Weighing After connecting the balance to a power outlet, a self-diagnosis of the electronic circuits is... -
Page 9: Stand By
0.0000 Calibration The Accuris Analytical Balance carries out mass measurements using gravity (g). Differences in geographical regions and altitudes will affect the gravitational acceleration (g). The balance must therefore be adapted to specific environmental conditions by calibrating to obtain accurate measurements. - Page 10 2. When the value of the calibration weight begins to flash, load the weight indicated by the display on the plate. 01-06-10 13:15:24 3. The display will stop flashing, indicating the value of the calibration weight with the stability indicator on.
-
Page 11: Balances With Internal Calibration
01-06-10 13:15:24 Load 2. Load a weight that is equal to or greater than the pre-set calibration weight on the plate; the balance will recognize a weight that is equal to or greater than the calibration weight as valid provided that it is a whole weight with respect to the most significant figure of the calibration weight. -
Page 12: Verification
01-06-10 13:15:24 2. At the end of the calibration, the balance will return to normal weighing conditions. 01-06-10 13:15:24 0.0000 If the calibration is not completed due to vibrations or drafts, the message “CAL bUT” will be displayed. Press the CAL button again, and if the problem persists, select external calibration and contact the supplier. -
Page 13: Tare Function
Verification of the balance is invalid without the "seal". Position of the seal mark for Verified balances models Balances with a verification requirement must be taken out of operation if: • The weighing result of the balance is outside the error limit. Therefore, in regular intervals load balance with known test weight (ca. -
Page 14: Manual Tare Function
3. Once stability has been achieved, the zero value “0.0000” will be displayed. In case stability is not achieved due to drafts, vibrations, or other types of disturbance, the dashes will continue to be displayed. 01-06-10 13:15:24 0.0000 4. Place the objects to be weighed in the container. Read the value of the net weight on the display. -
Page 15: Balance Parameters Setup Menu
Manual tare 01-06-10 13:15:24 90.0000 4. After having entered the desired value, press the PRINT button to confirm it. The value will remain in memory until the TARE button is pressed, or the instrument is disconnected from the power supply Balance parameters setup menu 1. -
Page 16: Weight Units
… … … - Language - Calibration mode - Calibration data 4. Position the cursor on the desired parameter and press the PRINT button to confirm the selection. 5. Press the ON/OFF button to exit from the menu or select the return function and press the PRINT button. -
Page 17: Serial Output Setup
CONVERSION UNIT OF FACTOR SYMBOL MEASUREMENT 1 g = GRAMS CARATS OUNCES** 0.035273962 POUNDS** 0.0022046226 PENNYWEIGHTS** 0.643014931 TROY OUNCE** 0.032150747 GRAINS** 15.43235835 HONG KONG 0.02671725 TAEL** SYNGAPORE 0.02646063 TAEL** TAIWAN TAEL** 0.02666666 MOMME** 0.2667 **not available in verified balances 4. After having selected the desired weight unit, the screen relative to the menu of balance parameters will be displayed again. -
Page 18: Transmission Speed Selection
The different transmission modes are illustrated below: TRANSMISSION MODE FEATURES Continuous Transmits the weight data in a continuous way On demand Transmits the weight data only when the PRINT button is pressed Generic printer The weight data is printed only when the Busy command is active Tlp50 printer The weight data is printed only if the Tlp50 model printer is connected... -
Page 19: Autozero Function
parameter menu will be displayed again. It will now be possible to select another parameter or return to weighing mode by pressing the ON/OFF button. 9.4 Autozero function Autozero is a correction from a possible deviation from zero. Different autozero levels can be selected. 1. -
Page 20: Stability Function
The currently set filter type will be shown on the display: Filter Filter 2. Select the desired filter level. Pressing the MENU or CAL button it will be possible to scroll through the various levels forward or backward; then confirm your choice with the PRINT button. -
Page 21: Contrast Adjustment
2. Select the desired stability level. By pressing the MENU or CAL button you can scroll through the various levels forward or backward; then confirm your choice with the PRINT button. STABILITY MENU LEVEL OF STABILITY Stability 1 Use this level of stability when the environmental conditions are stable Stability 2 Use this level of stability when the environmental conditions are less... -
Page 22: Backlight Regulation
3. After having selected the desired contrast level, the screen relative to the balance parameters menu will be displayed again. It will now be possible to select another parameter or return to weighing mode by pressing the ON/OFF button. 9.8 Backlight regulation The balance’s display is equipped with a backlight to make the indication visible even in low light conditions. -
Page 23: Timer-Off Function
9.9 Timer-off function This function allows you to activate the automatic turn-off of the balance after a preset time of inactivity. 1. Select the Timer off parameter as described in paragraph 10. The currently set mode will be shown on the display: Timer off minutes 2. - Page 24 2. Select the desired format of the date. Pressing the MENU or CAL button it will be possible to modify the format dd-mm or mm-dd; then confirm the choice with the PRINT button. Date and time Format: dd-gg 06-10-10 12:03:10 3.
-
Page 25: Language Selection
9.11 Language selection This function allows you to set the desired usage language. 1. Select the language parameter as described in paragraph 10. The currently set language will be shown on the display: Language English 2. Select the desired language. By pressing the MENU or CAL button it will be possible to scroll the various levels forward or backward;... -
Page 26: Calibration Mode Setting
9.12 Calibration mode setting This function allows you to set the calibration mode. * This function is only available for the models equipped with internal calibration (not available for all models). To check if the instrument is equipped with internal calibration mode, refer to the table of technical features, chapter 18. -
Page 27: Internal Calibration (I-Cal) [Locked For Verified Balances]
01-06-10 13:15:24 Cal 25 A 25-seconds countdown will start during which you can decide if: • Stop the automatic-calibration procedure by pressing the “ON/OFF button that will be delayed of 5 minutes • Let the countdown finish so that the automatic calibration starts Note: during the countdown do NOT load anything on the weigh pan! In this mode, it is also possible to carry out the calibration with the internal reference mass by pressing the CAL button at any moment, first ensuring that no weight is loaded on the plate. -
Page 28: External Calibration (E-Cal) [Locked For Verified Balances]
user by pressing the CAL button. Before carrying out the internal calibration, ensure that no weight is loaded on the plate. 9.12.3 External calibration (E-CAL) [locked for verified balances] The balance will be calibrated by using the external reference mass. (Follow the procedures described in paragraph 8.1.2) 9.12.4 Technical calibration (TEC-CAL) [locked for verified balances] This function allows the internal reference mass to be calibrated whenever assistance-control-... -
Page 29: Calibration Data
5. Once the internal calibration has been stored, the balance will return to the normal weighing condition. 6. Now re-enter the calibration menu as described in paragraph 9.1.12 and set the desired internal, automatic, or external calibration modality. WARNING: this procedure must be carried out only using class E2 or equivalent reference masses. -
Page 30: Balance Programs Menu
Balance programs menu 1. Press the MENU button with the plate empty. 2. The following writing will be shown on the display: Main Menù - Piece counting - Density - Formulation - Limits - Percent weight. 3. Now use the CAL and MENU buttons to navigate forward or backward in the menu of parameters. - Page 31 1. Select the number of pieces to put on the plate as a sample, pressing in sequence the MENU button to increase and the CAL button to decrease. 2. Load an empty container, if used, then press the PRINT button to confirm. The choice of the number of pieces (10, 25, 50, 100, manual, see chapter 10.3) is a function of the weight of an individual piece.
-
Page 32: Manual Insertion Of The Average Unit Weight
If the number of pieces is still insufficient, the message indicated above will be displayed again. Double the quantity of pieces loaded again. Once a sufficient number of pieces has been reached, their number will be displayed and it will be possible to proceed with the counting, loading the pieces to be counted on the plate. - Page 33 4. Insert the piece’s unit weight in grams using the CAL and MENU buttons to increase and decrease the value, while pressing the TARE button to pass to the next value. To insert a decimal point, hold down the CAL button for a prolonged time. During the entering phase, the prolonged pressing of the TARE button allows you to delete the inserted value.
-
Page 34: Automatic Updating Of The Average Unit Weight
2. Press the INSER button to confirm. 3. If the piece entered is less than 100 times the resolution of the balance, an error message will be displayed. To exit without entering the weight, press ESCAPE (on the alphanumeric keyboard) or ON/OFF. - Page 35 3. The density value of the liquid to be used will be displayed. The default value is equal to 1.0000 (distilled water at 20°C). 01-06-10 13:15:24 Density 1.0000 g/cm3 Enter the density of the liquid 4. It is possible to insert a different value using the CAL and MENU buttons to increase and decrease the value, while pressing the TARE button to pass to the next value.
-
Page 36: Liquid Density Determination
01-06-10 13:15:24 Density 0.0000 g Weight in water 9. The result of the density calculation of the solid will now be displayed. If the balance is equipped with a printer, it will be possible to print the density value by pressing the PRINT button. - Page 37 01-06-10 13:15:24 Density Liquid Select the mode 3. The default value of the solid’s density will be displayed. The default value is equal to 3.0000 g/cm 01-06-10 13:15:24 Density 3.0000 g/cm3 Enter the density of the solid 4. A different value can be entered by using the CAL and MENU buttons to increase and decrease the value, while pressing the TARE button to pass to the next value.
- Page 38 8. The weighing of the dipstick immersed in the liquid will then be requested. Then immerse the solid in the liquid, wait for the stability indicator to appear, and then press the PRINT button. The word ‘wait…” will be displayed during the acquisition of the value. 01-06-10 13:15:24 Density...
-
Page 39: Formulation Function
10.3 Formulation function 10.3.1 Manual formulation 1. Select the formulation program as described in paragraph 10. The following screen will be shown on the display: 01-06-10 13:15:24 Formulation Formula:00 Manual 2. Then press the PRINT button to confirm the selection. Formulation 01-06-10 13:15:24... -
Page 40: Formula Saving
6. Then press the PRINT button to confirm. 7. Repeat the operation for a maximum number of 99 ingredients. Note: During the acquisition of the ingredient, the display of Err10 indicates a negative weight value. Check not to have made a mistake with the ingredient loading and zeroing procedure. 8. - Page 41 3. Enter the name of the formula (it can be a series of numbers or letters, max 20 characters) using the MENU or CAL buttons to scroll all of the available characters, and the TARE button to pass to the next character. To select the uppercase or lowercase character, press and hold the MENU button until the beeping stops.
-
Page 42: Formula Recall
10. Then press the PRINT button to confirm and save the value. 11. Repeat the operation described from point 5 to point 10 to enter all of the desired components up to a maximum of 20. 12. After having entered all of the desired components press the ON/OFF button to exit from the formula saving procedure. - Page 43 5. Press the PRINT button again to insert the constant multiplier. Formulation 01-06-10 13:15:24 Flour E premere ‘ Print’ Insert the const. multiplier 6. Insert now the multiplicative constant K to determine the desired amount of product. Use the MENU or CAL buttons to increase or decrease the value. Example: if the entered formula is for 100g of product, inserting K = 2 the values of all components will be recalculated to obtain a total amount of product equal to 200g.
- Page 44 11. Repeat the procedure until the last component, after which the weights of the single components measured and the total weight will be printed if the instrument is equipped with a printer. The display will show the following screen: Formulation 01-06-10 13:15:24 : 5.0000g...
-
Page 45: Max-Min Thresholds Function
10.4 Max-Min thresholds function. The thresholds function allows you to determine if the weight loaded on the plate is above or below two thresholds pre-set by the user. 1. Select the thresholds function as described in paragraph 10. The following screen will be shown on the display: Thresholds 01-06-10 13:15:24... -
Page 46: With Both The Limits Set
7. The following screen will then be displayed. Thresholds 01-06-10 13:15:24 Select the buzzer 8. Through the MENU key, select the activation or not of the acoustic signal when the weight is within the two set limits. Then confirm the selection by pressing the ENTER button. 9. -
Page 47: Percentage Weighing Function
10.5 Percentage weighing function This function allows you to read the weight as a percentage of a reference weight. The reference weight is assumed as the 100% value (factory setting). There are two modes for the acquisition of the reference weight – an automatic one (with reference weight), and a manual one (with the manual entry of the value of the reference weight). -
Page 48: Mode With Manual Insertion Of The Reference Weight
10.5.2 Mode with manual insertion of the reference weight. 1. Select the percentage weight function as described in paragraph 10. The following screen will be shown on the display: Percent. weight 01-06-10 13:15:24 Automatic Select the mode 2. Press the MENU button to select manual mode Percent. -
Page 49: Animal Weighing Function
10.6 Animal weighing function Thus function allows you to acquire an averaged weight of moving objects or animals for a settable period of time. 1. Select the animal weighing function as described in paragraph 10. The following screen will be shown on the display: Animal weighing 01-06-10 13:15:24... -
Page 50: Maximum Load Function
10.7 Maximum load function The “maximum load” function allows you to measure the maximum breakage load of a solid. 1. Select the maximum load function as described in paragraph 10. A tare will automatically be carried out and the following screen will be shown on the display with an indication of the maximum load function at the top left: Maximum load 01-06-10... - Page 51 2. Enter the balance ID (it can be a series of numbers or letters, max 18 characters) using the MENU and CAL buttons to scroll through all of the available characters. To select uppercase or lowercase characters, press and hold the MENU button until the beeping stops. Note: It is also possible to set the value by using the optional alphanumeric keypad.
- Page 52 6. Then confirm all of the data entered by pressing and holding the PRINT button until the beeping stops. 01-06-10 13:15:24 Project ID: Testing 2 Sec 7. The balance will automatically return to the weighing screen.
-
Page 53: Rs232 Interface Features
RS232 Interface features 11.1 General features The balance transmits the value visualized on the display following serial RS232C standard, allowing to print the value of weight to a PC monitor or to a serial printer. In the case of connection to a PC, it will be possible to select the transmission in continuous mode or transmission at user command through pressing of the PRINT button ( as described at par.9.2). - Page 54 Balance side side Connector Connector 25 Pins Balance side side Connector Connector 9 Pins There are three ways of transmission in which the Balance and the computer can be interfaced: • Continuous transmission of weight data (continuous mode must be set from the menu as explained in the paragraph 9.2).
-
Page 55: Continuous Transmission Mode
11.4.1 Continuous Transmission mode String transmitted is composed by the following 14 characters: ▪ First character: weight sign (blank or -) ▪ Second to ninth character: weight or other data ▪ Tenth to twelfth character: weight unit symbol ▪ thirteenth character: stability indicator ▪... - Page 56 FORMULATION: -------------------- 03-04-11 10:54:57 -------------------- Manual 31.05 g 100.02 g 26.89 g -------------------- NOTE: To transmit the print of total of weights, press and keep pressed the PRINT button 157.96 g THRESHOLDS: Value under threshold Value inside thresholds Value over threshold -------------------- -------------------- --------------------...
-
Page 57: Ondemand Transmission With G.l.p
11.4.3 On demand transmission with G.L.P. In the on demand transmission with G.L.P., the data transmitted to computer are the same as described as in the on demand transmission without G.L.P. mode but with the add of G.L.P. parameters before of each transmission, as described below: -------------------- 03-04-11 12:14:03 Balance ID:... -
Page 58: Print Formats
11.5.1 PRINT FORMATS Here are described the different types of print, depending on the print mode and on the function selected: Generic printing or TLP 50 printer Weighing mode: -------------------- 03-04-11 10:13:44 -------------------- Weight: 0.00 g Piece counting: -------------------- 03-04-11 10:49:28 -------------------- Pcs.: Weight:... -
Page 59: Generic Printer Or Tlp 50 Printer With G.l.p
Thresolds: Value under threshold Value inside thresolds Value over threshold -------------------- -------------------- -------------------- 03-04-11 11:02:19 03-04-11 11:01:50 03-04-11 11:01:50 -------------------- -------------------- -------------------- Lim.1 : 10.00 g Lim.1 : 10.00 g Lim.1 : 10.00 g Lim.2 : 100.00 g Lim.2 : 100.00 g Lim.2 : 100.00 g Weight: -0.01 g... - Page 60 TEST -------------------- Weight data Weight: 18.71 g Signature: G.L.P. parameters --------------------...
-
Page 61: Error Codes
12 Error codes ERROR MESSAGE MEANING POSSIBLE SOLUTIONS ON DISPLAY Protect the balance from air Weight not stable after operation ERR01 flows or from vibrations of tare from the table. Protect the balance from air impossible to start the calibration ERR02 flows or from vibrations due to instability of the balance... -
Page 62: Maintenance And Care
13 Maintenance and care Regular maintenance of your balance will ensure best performance and accurate measurements. ▪ Cleaning Before cleaning the balance unplug and disconnect the power supply from the balance. Do not use aggressive cleaning product (such as solvents or similar), use a damp towel with mild detergent. -
Page 63: Warranty
15 Warranty ▪ The duration of the manufacturer’s warranty is 24 months from the date of purchase shown on the invoice. ▪ The warranty covers all manufacturing defects. It does not cover mechanical or electronic parts damaged by incorrect installation, tampering, incorrect use, or damage due to usage. ▪...
Need help?
Do you have a question about the W3101A-120 and is the answer not in the manual?
Questions and answers