Table of Contents

Related Manuals for Miele H2265E


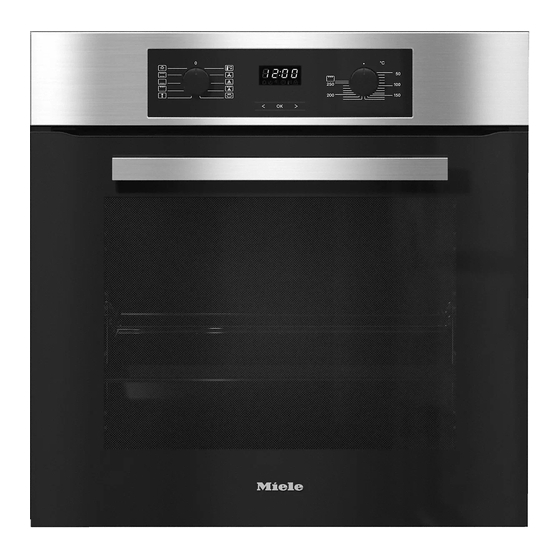
Summary of Contents for Miele H2265E
-
Page 1: Operating And Installation Instructions
Operating and installation instructions Cooker and oven To avoid the risk of accidents or damage to the appliance it is imperative that you read these instructions before installing the appliance and using it for the first time en-CA M.-Nr. 10 571 570... -
Page 2: Table Of Contents
Contents Warnings and safety instructions ................ 5 Caring for the environment ................ 16 Guide to the cooker..................... 17 Guide to the oven .................... 18 Oven controls....................... 19 Function selector ....................20 Temperature selector..................... 20 Temperature indicator light ................ 20 Clock/timer ......................21 Display...................... - Page 3 Contents Preheating the oven ....................37 Clock/timer ...................... 38 Display........................38 Symbols on the display .................. 38 Buttons ........................38 Setting the time ..................... 39 Time display ..................... 39 At the end of the duration................. 39 Using the minute minder ................... 40 Setting the minute minder ................
- Page 4 Contents Broiling chart ......................70 Further applications .................... 71 Defrost........................71 Heating dishes....................... 71 Gentle Bake......................72 Frozen food/Ready meals..................73 Drying/dehydrating....................74 Canning ......................... 75 Cleaning and care .................... 76 Unsuitable cleaning agents ................... 76 Tips........................77 Normal soiling......................77 Cleaning the seal....................
-
Page 5: Warnings And Safety Instructions
This prevents both personal injury and damage to the oven. Miele cannot be held liable for damage caused by non-compliance with these instructions. Keep these instructions in a safe place and pass them on to any... -
Page 6: Intended Use
Warnings and safety instructions Intended use This oven is intended for domestic use and use in other similar environments. The oven is not intended for outdoor use. The oven is intended for domestic use only to bake, roast, broil, cook, defrost, can and dry food. - Page 7 Warnings and safety instructions Safety with children Children should not be left alone or unattended in an area where an oven is in use. Never allow children to operate, sit or stand on any part of the oven. Caution: Do not store items of interest to children in cabinets above an oven.
- Page 8 This appliance must be installed and connected in compliance with the installation instructions. Installation, maintenance and repair work should only be performed by a Miele authorized service technician. Installation, maintenance and repair work by unqualified persons can cause considerable danger to users. ...
- Page 9 All other servicing should be referred to a qualified technician. Miele can only guarantee the safety of the appliance if genuine Miele spare parts are used. Defective components must only be replaced by genuine Miele spare parts.
-
Page 10: Proper Use
Warnings and safety instructions Proper use Danger of burning! The oven gets hot during operation. You could burn yourself on the heating elements, oven cavity, food or accessories. Wear oven gloves when placing food in the oven or removing it and when adjusting oven shelves etc. - Page 11 Warnings and safety instructions Pouring a cold liquid onto a hot surface creates steam which can cause severe scalding. The sudden temperature change can also cause damage to hot enamelled surfaces. Never pour cold liquids directly onto hot enamelled surfaces. ...
- Page 12 Warnings and safety instructions Broiling food for an excessively long time can cause it to dry out and may result in the food catching fire. Do not exceed recommended broiling times. Certain foods dry out quickly and may catch fire due to high broiling temperatures.
- Page 13 Warnings and safety instructions Do not slide pots or pans over the oven floor. This could scratch and damage the surface. The door can support a maximum load of 15 kg. Do not lean or sit on an open door, or place heavy items on it. Make sure that nothing gets trapped between the door and the oven cavity.
-
Page 14: Cleaning And Care
Warnings and safety instructions Cleaning and care The steam from a steam cleaning appliance could reach electrical components and cause a short circuit. Do not use a steam cleaner to clean this appliance. Only clean parts listed in these Operating and Installation Instructions. - Page 15 Do not place the Miele oven dishes on the upper support of shelf level 1 as they will not be secured by the non-tip safety notches. As a general rule, use shelf level 2.
-
Page 16: Caring For The Environment
Miele. By law, you are solely responsible for deleting any personal data from the appliance prior to disposal. Ensure that it presents no danger to children while being stored for disposal. -
Page 17: Guide To The Cooker
Guide to the cooker a Oven controls, cooking zone controls b Browning/broiling element c Catalytic enamelled back panel d Air inlet for the fan with ring heating element behind it e Side runners with 5 shelf levels f Oven floor with bottom heat element underneath it g Front frame with data plate h Door... -
Page 18: Guide To The Oven
Guide to the oven a Oven controls b Browning/broiling element c Catalytic enamelled back panel d Air inlet for the fan with ring heating element behind it e Side runners with 5 shelf levels f Oven floor with bottom heat element underneath it g Front frame with data plate h Door... -
Page 19: Oven Controls
Oven controls a Function selector For selecting oven functions b Clock/timer For displaying the time of day and settings c Temperature selector For setting the temperature d button For modifying times and settings e OK button For selecting functions and confirming settings f button For modifying times and settings... -
Page 20: Function Selector
Oven controls Function selector Temperature selector The function selector is used to select Use the temperature selector to select oven functions and to turn on the oven the temperature for the cooking lighting independently. processes. It can be turned clockwise or counter- It can be turned clockwise until a clockwise. -
Page 21: Clock/Timer
Oven controls Clock/timer The clock/timer is operated via the display and the , OK and sensor controls. Display The display shows the time of day or your settings. It goes slightly darker if settings are not being entered. Please refer to "Clock/timer" for more information. -
Page 22: Features
All accessories and cleaning and care apply to cookers and ovens. However, products in these instructions are both types of appliance are generally designed to be used with Miele ovens. referred to as "oven" throughout. They can be ordered from the Miele.ca Data plate website or Miele. -
Page 23: Side Runners
Features Side runners Always position the rack with the loading surface in the lower position. Side runners for accessories are fitted on either side of the oven cavity for These accessories have non-tip safety shelf levels . notches fitted in the middle of their short sides. -
Page 24: Flexiclip Runners Hfc 70-C
Features FlexiClip runners HFC 70-C FlexiClip runners can only be fitted on levels 1, 2 and 3. The FlexiClip runners can be drawn To prevent the risk of accessories right out of the oven to give a good sliding off the runners: overview of cooking in progress. - Page 25 Features If you are using the universal tray with a Because the FlexiClip runners sit on rack on top of it: the top rail of the side runners, the gap between the level the FlexiClip runners are on and the one above is smaller than if, for instance, racks were fitted on each level.
- Page 26 The FlexiClip runners are fitted on the upper rail of the two rails that make up a shelf level. The FlexiClip runner with the Miele logo is fitted on the right. When fitting the FlexiClip runners, do not extend them. If the FlexiClip...
- Page 27 Features Removing the FlexiClip runners Push the FlexiClip runner in all the way. Slide the FlexiClip runner at an angle along the top rail as far as it will go (3.). Push down on the tab at the front of the FlexiClip runner (1.).
- Page 28 Features Round baking tray HBF 27-1 Baking stone HBS 60 The round baking tray is suitable for The baking stone is ideal for items cooking pizzas, flat cakes made with which need a well baked base such as yeast or whisked mixtures, sweet and pizza, quiche, bread, bread rolls and savoury tarts, baked desserts, flat savoury snacks.
- Page 29 HUB Gourmet oven dishes Catalytic enamelled accessories HBD oven dish lids – Side walls Unlike other oven dishes, the Miele These are installed behind the side Gourmet oven dishes can be placed in runners and protect the interior walls the oven directly on the side runners.
-
Page 30: Oven Controls
Features Cooling fan Oven controls A cooling fan will come on The oven controls are used to operate automatically when a cooking program the various cooking functions for is started. The cooling fan mixes hot air baking, roasting and broiling. from the oven cavity with cool room air They are also used for: before venting it out into the kitchen... -
Page 31: Perfectclean Treated Surfaces
Features PerfectClean treated surfaces Cooktop controls PerfectClean surfaces have very good (features will vary depending on model) non-stick properties and are HxxxxE cookers also have cooking exceptionally easy to clean. zone controls for operating the cooking Food and soiling from baking and zones on the linked cooktop. -
Page 32: Initial Commissioning
Initial commissioning Before using for the first time Setting the time of day for the first time The oven must not be operated The time of day is shown in 24 hour until it has been correctly installed in clock format. -
Page 33: Heating Up The Oven For The First Time
Initial commissioning Clean the oven cavity with warm Heating up the oven for the water and liquid dish soap, applied first time with a clean sponge cloth or a clean, When the oven is heated up for the first damp microfibre cloth. -
Page 34: Overview Of Functions
Overview of functions The oven has a wide range of functions for preparing a variety of foods. Due to country-specific preferences for preparation of food, default temperatures and temperature ranges in °F and °C do not correspond. The temperature values have been defined as given in the chart. -
Page 35: Energy Saving Tips
Energy saving tips 30 % energy compared to cooking Cooking with a standard oven function as long Remove all accessories from the as the door is kept shut during oven that are not required for a cooking. cooking process. Convection Broil can be used for ... -
Page 36: Using The Oven
Using the oven Simple operation Cooling fan Place the food in the oven. The cooling fan will continue to run for a while after the oven has been switched Select the required oven function with off to prevent any humidity building up the function selector. -
Page 37: Preheating The Oven
Using the oven Rapid PreHeat Preheating the oven With Rapid PreHeat the heating-up It is only necessary to preheat the oven phase can be shortened. in a few instances. Most dishes can be placed in a cold Do not use Rapid PreHeat to oven. -
Page 38: Clock/Timer
Clock/timer The clock/timer offers the following You can only set or change a function if functions: the function selector is in the correct position. – Time of day display Buttons – Minute minder – Switching cooking processes on and Button Use off automatically ... -
Page 39: Setting The Time
Clock/timer Time display Setting the time The symbols and or will show Times are set in segments: if you have set times. – for the time of day and cooking If you are using the minute minder , durations, first the hours, then the cooking duration ... -
Page 40: Using The Minute Minder
Clock/timer Using the minute minder The minute minder can be used to time other activities in the kitchen, e.g. boiling eggs. The minute minder can also be used at the same time as a cooking program for ... -
Page 41: Changing The Minute Minder Duration
Clock/timer At the end of the minute minder Deleting the minute minder duration duration: Press continuously until flashes. – flashes. Confirm with OK. – The display will show the time The minutes will flash. counting upwards. Reduce the minutes down to –... -
Page 42: Switching Cooking Programs On And Off Automatically
Clock/timer Setting the cooking duration Switching cooking programs on and off automatically Example: a cake needs to bake for 1 hour and 5 minutes. Cooking programs can be switched on or off automatically. Place the food in the oven. To do this, set a duration or a duration ... -
Page 43: At The End Of The Cooking Duration
Clock/timer At the end of the cooking duration: – will appear. – flashes. – The oven heating will switch off automatically. Use or to set the hours. – The cooling fan continues to run. ... -
Page 44: Setting A Cooking Duration And End Of Cooking Duration
Clock/timer Setting a cooking duration and end of cooking duration To switch a cooking process on and off automatically you can set a cooking duration and an end of cooking duration. The symbol indicates the cooking Example: the current time of day is duration. -
Page 45: Changing The Cooking Duration
Clock/timer Changing the cooking duration Press continuously until flashes. The time remaining will appear in the display. Confirm with OK. Use or to set the minutes. The hours will flash. Confirm with OK. ... -
Page 46: Deleting A Cooking Duration
Clock/timer Deleting a cooking duration Deleting the end of cooking duration Press or continuously until Press or continuously until flashes. flashes. Confirm with OK. Confirm with OK. The hours will flash. The hours will flash. ... -
Page 47: Changing The Time Of Day
Clock/timer Changing the time of day The time of day can only be changed when the function selector is at Off. Turn the function selector to Off. Press continuously until flashes. Confirm with OK. The hours will flash. ... -
Page 48: Changing Settings
Clock/timer To change the status: Changing settings Press or continuously until the Default settings are set in the oven status you want is shown. controls at the factory (see "Settings overview"). Confirm with OK. You change a setting by changing its The selected status is now saved and status . - Page 49 Clock/timer Settings overview Setting Status The buzzer is switched off. Buzzer to The buzzer is switched on. volume * You can adjust the volume. When you select a status, you will hear the corresponding buzzer. ...
-
Page 50: Baking
Baking Baking paper, greasing the tin Handling food carefully will help protect your health. Miele accessories, e.g. the universal Cakes, pizzas and french fries should tray, are treated with PerfectClean be cooked until golden, not dark enamel (see "Features"). brown. -
Page 51: Notes On Using The Baking Charts
Baking Shelf level Notes on using the baking charts The shelf level on which you place your food depends on the function selected In the charts the data for the and the number of trays. recommended function is printed in bold. -
Page 52: Baking Charts
Baking Baking charts Creamed mixture Cakes/ biscuits [°F/°C] [min] Muffins (1 tray) 275–300/140–150 30–40 300–325/150–160 30–40 Muffins (2 trays) 275–300/140–150 2+4 35–45 Small cakes (1 tray) 300/150 25–40 20–30 325/160 Small cakes (2 trays) ... - Page 53 Baking Creamed mixture Cakes/ biscuits [°F/°C] [min] Foam cake (tray) 300–325/150–160 25–35 30–40 300–325/150–160 Marble, nut cake (tin) 300–325/150–160 55–75 300–325/150–160 55–75 Fresh fruit cake, with meringue 300–325/150–160 40–50 topping/glaze (tray) ...
-
Page 54: Rubbed-In Mixture
Baking Rubbed-in mixture Cakes/ biscuits [°F/°C] [min] Small cakes/biscuits (1 tray) 275–300/140–150 20–30 15–25 325–340/160–170 Small cakes/biscuits (2 trays) 275–300/140–150 1+3 20–30 Drop cookies (1 tray) 275/140 30–40 15–25 325/160 Drop cookies (2 trays) 275/140 35–45 Flan base... - Page 55 Baking Rubbed-in mixture Cakes/ biscuits [°F/°C] [min] Apple cake (baking tin 20 cm) 325/160 90–100 340/170 90–100 Apple pie 325–340/160–170 50–70 340–350/170–180 60–70 325–340/160–170 50–70 Fresh fruit cake, glazed (tin) 300–325/150–160 55–75 ...
-
Page 56: Yeast And Quark Doughs
Baking Yeast and quark doughs Cakes/ biscuits [°F/°C] [min] Gugelhupf 300–325/150–160 50–60 325–340/160–170 50–60 Stollen 300–325/150–160 45–65 325–340/160–170 45–60 Streusel cake 300–325/150–160 35–45 340–350/170–180 35–45 Fresh fruit cake (tray) 325–340/160–170 40–50 ... - Page 57 Baking Yeast and quark doughs Cakes/ biscuits [°F/°C] [min] White bread 350–375/180–190 35–45 375–400/190–200 30–40 Wholegrain bread 350–375/180–190 55–65 400–410/200–210 45–55 Pizza (tray) 340–350/170–180 35–45 2) 3) 375–400/190–200 30–45 2) 3) ...
-
Page 58: Sponge Mix
Baking Sponge mix Cakes/ biscuits [°F/°C] [min] Tart / flan base (2 eggs) 325–340/160–170 20–30 325–340/160–170 15–25 Sponge cake (4–6 eggs) 340–350/170–180 20–35 300–325/150–160 30–45 Whisked sponge 340/170 30–40 300–340/150–170 30–45 Swiss roll ... -
Page 59: Choux Pastry, Puff Pastry, Meringue
Baking Choux pastry, puff pastry, meringue Cakes/ biscuits [°F/°C] [min] Choux buns (1 tray) 325–340/160–170 30–45 25–35 350–375/180–190 Choux buns (2 trays) 325–340/160–170 1+3 30–45 Puff pastry (1 tray) 340–350/170–180 20–30 375–400/190–200 20–30 ... -
Page 60: Roasting
Roasting Tips Always follow USDA guidelines on food safety. – Browning: Browning only occurs towards the end of the roasting time. Operating modes Remove the lid about halfway through the roasting time if a more Depending on how the food is intensive browning result is desired. -
Page 61: Notes On Using The Roasting Charts
Roasting Preheating Notes on using the roasting charts Preheating is generally only required when roasting beef sirloin joints and In the charts the data for the fillet. recommended function is printed in bold. Roasting duration Unless otherwise stated, the durations The roasting time can be determined by given are for an oven which has not multiplying the thickness of the roast... -
Page 62: Roasting Charts
Roasting Roasting charts Beef, veal * [°F/°C] [min] Topside of beef, approx. 1 kg 340–350/170–180 100–130 375–400/190–200 110–140 Fillet of beef approx. 1 kg 300–325/150–160 20–50 350–375/180–190 20–50 Sirloin joint, approx. 1 kg 300–325/150–160 30–60 ... -
Page 63: Pork
Roasting Pork * [°F/°C] [min] Pork joint, approx. 1 kg 340–350/170–180 100–120 375–400/190–200 90–110 Pork joint with crackling, approx. 340–350/170–180 120–160 2 kg 375–400/190–200 130–150 Gammon joint, approx. 1 kg 300–325/150–160 60–80 340–350/170–180 80–100 Meat loaf, approx. -
Page 64: Lamb, Venison
Roasting Lamb, venison * [°F/°C] [min] Leg of lamb, approx. 1.5 kg 340–350/170–180 90–110 350–375/180–190 90–110 Saddle of lamb, approx. 1.5 kg 425–450/220–230 40–60 450–475/230–240 40–60 Venison, approx. 1 kg 400–410/200–210 80–100 400–410/200–210 80–100 Function / Temperature / Shelf level / Cooking duration Convection Bake / Surround... -
Page 65: Poultry, Fish
Roasting Poultry, fish * [°F/°C] [min] Poultry, 0.8–1 kg 350–375/180–190 60–70 375–400/190–200 60–70 Poultry, approx. 2 kg 350–375/180–190 90–110 375–400/190–200 110–120 Poultry, stuffed, approx. 2 kg 350–375/180–190 110–130 375–400/190–200 110–130 Poultry, approx. 4 kg ... -
Page 66: Slow Roasting
Slow Roasting This cooking method is ideal for Procedure cooking beef, pork, veal or lamb when a Use the universal tray with the rack tender result is desired. placed on top of it. First briefly sear the meat all over at a Do not use the Rapid PreHeat high temperature on the cooktop in function ... - Page 67 Slow Roasting After cooking Cooking durations/core temperatures Because the temperature during the cooking process was so low: Meat [min] [°F/°C] – Meat can be carved straight from the oven. It does not need to rest. Fillet of beef 80–100 138/59 Sirloin of beef...
-
Page 68: Broiling
Broiling Preparing food for broiling Danger of burning! If you broil with the door open the Trim the meat. Do not season the meat hot air will escape from the oven with salt before broiling, as this will before it has been cooled by the draw out the juices. -
Page 69: Notes On Using The Broiling Chart
Broiling Broiling duration Notes on using the broiling chart – Thinner cuts of meat/slices of fish require approx. 6–8 minutes per side. The data for the recommended function Thicker pieces require more time per is printed in bold. side. It is best to broil food of a Check the food after the shortest time similar thickness at the same time so quoted. -
Page 70: Broiling Chart
Broiling Broiling chart Preheat the browning/broiling element for approx. 5 minutes with the door closed. Food to be broiled Maxi Broil Convection Broil [°F/°C] [min] [°F/°C] [min] Thin cuts Burgers Maxi Broil 25–35 – – Kebabs Maxi Broil 10–15... -
Page 71: Further Applications
Further applications Defrost Heating dishes To gently defrost food use the Use Convection Bake for Defrost mode. preheating dishes. When this mode is selected, the fan Only preheat heat-resistant dishes. turns on and circulates the air around the oven cavity. ... -
Page 72: Gentle Bake
Further applications Examples of use: Gentle Bake Gentle Bake is suitable for small Food amounts, e.g. frozen pizzas, bake-off [°F/°C] [min] rolls, biscuits and for meat dishes and Biscuits 325/160 22–27 roasts. The optimal use of heat enables Ratatouille 350/180 40–60... -
Page 73: Frozen Food/Ready Meals
Further applications Frozen food/Ready meals Method Tips for pizza, French fries and Handling food carefully will help similar items protect your health. – For best results place frozen pizza on Cakes, pizzas and french fries should parchment paper on the wire rack. be cooked until golden, not dark brown. -
Page 74: Drying/Dehydrating
Further applications Drying/dehydrating Food [min] Fruit 120–480 Dehydrating is a traditional method of 180–480 Vegetables preserving fruit, certain vegetables and herbs. Herbs 50–60 It is important that fruit and vegetables Function / Drying time are ripe and not bruised before they are Convection Bake / Surround dehydrated. -
Page 75: Canning
Further applications Fruit/pickles Canning Turn the function selector to Oven Always follow the USDA canning lighting as soon as you can see guidelines. the bubbles forming in the jars. Leave the jars to stand for a further Canning containers 25–30 minutes in the warm oven cavity. -
Page 76: Cleaning And Care
Cleaning and care Unsuitable cleaning agents Danger of burning! Make sure the oven heating To avoid damaging the surfaces, do not elements are switched off. The oven use: must be cool. – cleaning agents containing soda, ammonia, acids or chlorides ... -
Page 77: Tips
Cleaning and care Normal soiling If soiling is left on for any length of time, it may become impossible to See "Cleaning catalytic enamelled remove. If items are used frequently panels" for instructions on how to without being cleaned, it may keep catalytic panels clean. -
Page 78: Stubborn Soiling (Excluding The Flexiclip Runners)
This will not affect the For very persistent soiling on performance in any way. PerfectClean coated enamel, apply the Miele oven spray to cold surfaces. Follow the instructions on the packaging. Non-Miele oven cleaner must only be used in a cold oven and for no longer than a maximum of 10 minutes. -
Page 79: Cleaning Catalytic Enamelled Panels
Cleaning and care Removing oil and grease Cleaning catalytic enamelled panels Remove any accessories from the oven, including the side runners. Soiling from oil and fat is burnt off catalytic enamel when very high Before starting the cleaning process, temperatures are used in the oven. -
Page 80: Removing The Door
Cleaning and care Removing the door Do not pull the door horizontally off its retainers, as they will spring back The door weighs approx. 9 kg. against the oven. Do not pull the door off the retainers by the handle, as the handle could break off. -
Page 81: Reinstalling The Door
Cleaning and care Open the door fully. Reinstalling the door If the locking clamps are not locked, the door could work loose resulting in damage. Ensure that the locking clamps are locked after refitting the door. To relock the locking clamps, turn them back up to the horizontal position as far as they will go. -
Page 82: Removing The Side Runners With Flexiclip Runners
Cleaning and care Removing the side runners Danger of burning! with FlexiClip runners Make sure the oven heating elements are switched off. The oven The side runners can be removed must be cool. together with the FlexiClip runners (if inserted). -
Page 83: Removing The Back Panel
Cleaning and care Removing the back panel Lowering the browning/broiling element Danger of injury! Do not use the oven without the Danger of burning! back panel in place. Make sure the oven heating elements are switched off. The oven The back panel can be removed for must be cool. -
Page 84: Frequently Asked Questions
The display is dark. There is no power to the oven. Check whether the mains fuse has tripped. If it has, contact a qualified electrician or Miele Service. The oven does not heat You have only selected an oven function or a temperature. - Page 85 Possible cause and remedy appears in the A fault has occurred that you cannot resolve. display. Contact Miele Service. A noise is heard after The cooling fan will continue to run for a while after the cooking process is the oven has been switched off to prevent any complete.
- Page 86 Lubricate the bearings with the special Miele lubricant. Only the special Miele lubricant is designed for the high temperatures in the oven cavity. Other lubricants may resinify when heated and will gum up the FlexiClip runners. You can obtain the special Miele lubricant from your Miele dealer or from Miele Service.
-
Page 87: Technical Service
– Miele Service The telephone number for Miele Service can be found at the back of this booklet. When contacting Miele, please have the model and serial number of your appliance ready. This information is given on the data plate, which is visible on the front frame of the oven when the door is fully open. -
Page 88: Electrical Connection
BE GROUNDED Installer: Please pass these Installation, repair and maintenance instructions on to the customer. work must be performed by a Miele authorized service technician. Work by unqualified persons could be dangerous and may void the warranty. Before connecting the appliance to... - Page 89 This power supply. data must correspond to prevent machine damage. Consult an Maximum connected load: 9,700 W, in electrician if in doubt. combination with Miele cooktop KM6002. H2265B Electrical connection 240 V Electrical connection 208 V The oven is equipped with a 6' 3"...
-
Page 90: Installation Diagrams
Installation diagrams Appliance and cut-out dimensions Miele ovens can be installed flush or proud. Discuss your installation requirements with your architect, designer and installer. Undercounter installation 21 5/8" 23 5/8" ( 550 mm) (600 mm) 7/8" 16" (22*/23** mm) (407 mm) 4"... -
Page 91: Installation Into A Tall Cabinet
Cut-out (4" x 22" / 100 mm x 560 mm) in the bottom of the cabinet for power cord and ventilation Power cord with plug Oven with glass front Oven with metal front Front design may vary depending on model. For the more current specifications please visit the Miele website. -
Page 92: Dimensions Of Oven Front
Installation diagrams Dimensions of oven front Dimensions are given in mm. 4 3/8" (111 mm) 23 7/16" (596 mm) 22 5/8" 23 5/16" (575 mm) (592 mm) 18 5/8" (473 mm) 3/16" (4 mm) - 1/16" (-2 mm) H22xx: 42 mm Ovens with glass front: 2.2 mm Ovens with metal front: 1.2 mm... -
Page 93: Cooker Installation
Cooker installation Lifting the cooker by the door handle The cooker must not be could cause damage to the door. operated until it has been correctly Use the handle cut-outs on the side installed. of the housing to lift the appliance. The cooker requires a sufficient It is a good idea to remove the door supply of cool air for efficient... -
Page 94: Installing The Oven
Installing the oven The oven must not be operated until it has been correctly installed in the cabinet carcase. The oven requires a sufficient supply of cool air for efficient operation. Make sure that the supply of cool air is not hindered in any way (e.g. - Page 95 Canada Importer Miele Limited Headquarters and Miele Centre 161 Four Valley Drive Vaughan, ON L4K 4V8 www.miele.ca Customer Care Centre Phone: 800-565-6435 customercare@miele.ca Germany Manufacturer Miele & Cie. KG Carl-Miele-Straße 29 33332 Gütersloh...
- Page 96 H2265E; H2265B en-CA M.-Nr. 10 571 570 / 00...
Need help?
Do you have a question about the H2265E and is the answer not in the manual?
Questions and answers