Miele H 2261 B Operating And Installation Instructions
Hide thumbs
Also See for H 2261 B:
- Installation instructions manual (12 pages) ,
- Operating and installation instructions (10 pages)

Related Manuals for Miele H 2261 B


Summary of Contents for Miele H 2261 B
-
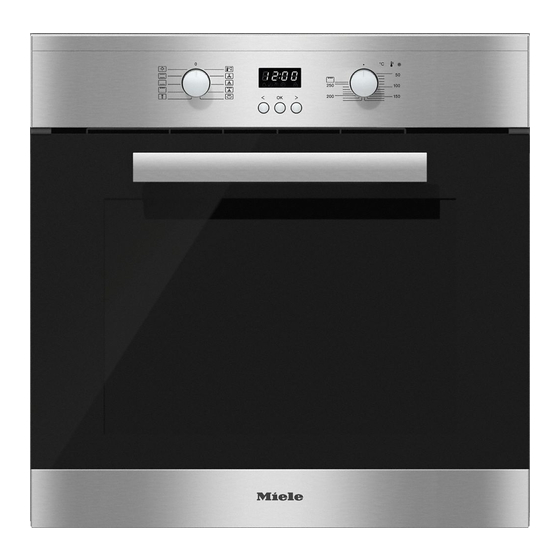
Page 1: Operating And Installation Instructions
Operating and Installation Instructions Oven H 2261 B To prevent accidents and machine damage, read these instructions before installation or use. en – CA M.-Nr. 09 786 730... -
Page 2: Table Of Contents
Contents IMPORTANT SAFETY INSTRUCTIONS..............5 Guide to the oven....................13 Oven controls....................... 14 Function selector ....................15 Clock / Timer ......................15 Display ......................15 Buttons ......................15 Temperature selector .................... 16 Temperature indicator ..................16 Features........................ 17 Model numbers ..................... 17 Data plate ...................... - Page 3 Contents Setting a time or a duration................... 34 Displaying the time / duration ................34 When the time/duration has elapsed ............... 34 Using the kitchen timer ..................35 Setting the timer....................35 Resetting the timer.................... 36 Canceling the timer................... 36 Turning a cooking program On / Off automatically ..........
- Page 4 Contents Installing the door....................65 Removing the shelf runners with FlexiClip telescopic runners......66 Removing the back panel..................66 Lowering the Browning / Broiling element............. 67 Frequently asked questions................68 Technical Service....................71 Caring for the environment................. 72 Electrical connection................... 73 Installation diagrams...................
-
Page 5: Important Safety Instructions
IMPORTANT SAFETY INSTRUCTIONS When using the appliance, follow basic safety precautions, including the following: Read all instructions before installation and use of the oven to prevent accidents and machine damage. This appliance complies with current safety requirements. Improper use of the appliance can lead to personal injury and material damage. - Page 6 Installation, repair and maintenance work should be performed by a Miele authorized service technician in accordance with national and local safety regulations and the provided installation instructions. Contact Miele’s Technical Service Department for examination, repair or adjustment. Repairs and other work by unauthorized persons could be dangerous and may void the warranty.
- Page 7 IMPORTANT SAFETY INSTRUCTIONS To guarantee the electrical safety of this appliance, continuity must exist between the appliance and an effective grounding system. This appliance must be grounded. Connect only to properly grounded outlet. See "Electrical connection - GROUNDING INSTRUCTIONS". It is imperative that this basic safety requirement be met.
- Page 8 IMPORTANT SAFETY INSTRUCTIONS Defective components should be replaced by Miele original spare parts only. Only with these parts can the manufacturer guarantee the safety of the appliance. In order for the oven to function correctly, it required an adequate supply of cool air.
- Page 9 IMPORTANT SAFETY INSTRUCTIONS Use only dry, heat-resistant potholders. Moist or damp potholders used on hot surfaces may result in steam burns. Do not let potholders come in contact with oil or grease. Do not substitute dish towels or other bulky items for potholders. Do not let potholders touch hot heating elements.
- Page 10 IMPORTANT SAFETY INSTRUCTIONS Broiling food for an excessively long time can cause it to dry out with the risk of catching fire. Do not exceed recommended broiling times. Some foods dry out very quickly and can be ignited by high broiling temperatures.
- Page 11 IMPORTANT SAFETY INSTRUCTIONS The door can support a maximum weight of 15 kg. Do not sit on or lean against an open door, and do not place heavy objects on it. Also make sure that nothing can get trapped between the door and the oven cavity.
- Page 12 Accessories Use only genuine original Miele spare parts. If spare parts or accessories from other manufacturers are used, the warranty may become void. SAVE THESE INSTRUCTIONS AND REVIEW THEM PERIODICALLY...
-
Page 13: Guide To The Oven
Guide to the oven a Oven controls b Browning / Broiling element c Catalytic enameled back panel d Convection fan with heating element e Runners with 4 shelf levels f Front frame with data plate g Door... -
Page 14: Oven Controls
Oven controls a Function selector To select oven functions b Clock / Timer Displays the time of day and settings c Temperature selector To set the temperature d Temperature indicator light Indicates that the oven is heating e Button To change times and settings f OK Sensor button To select and confirm a setting... -
Page 15: Function Selector
Oven controls Function selector Clock / Timer The function selector is used to select The clock/timer is operated via the oven functions and to turn on the oven Display with the , OK and buttons. lighting independently. Display It can be turned clockwise or counter- The display shows the time of day or clockwise. -
Page 16: Temperature Selector
Oven controls Temperature selector The temperature selector is used to select the temperatures for cooking programs. It can be turned clockwise until a resistance is felt and then turned back again. Temperatures are shown printed on the temperature selector and on the control panel. -
Page 17: Features
Printed on the data plate are the model products in these instructions are number, serial number and the designed to be used with Miele ovens. connection data (voltage/frequency/ They can be ordered from the maximum rated load) of the oven. -
Page 18: Shelf Runners
Features Shelf runners Non-tip safety notches are located on the shorter sides of these accessories. Side runners are located on the right These prevent the trays being pulled and left-hand sides of the oven with completely out of the side runners levels for inserting accessories. -
Page 19: Flexiclip Telescopic Runners
Features FlexiClip telescopic runners HFC50 The FlexiClip telescopic runners can be used on the three lower shelf levels. Each shelf level can also be removed from the oven individually. Push the runners into the oven before placing accessories on them. To ensure that accessories do not slide off the telescopic runners: –... - Page 20 Features If you are using a roasting pan with a Because the FlexiClip runners sit on wire rack on top of it: the top rail of the side runners the gap between the level the FlexiClip runners are on and the one above is smaller than if, for instance, the racks were fitted on each level.
- Page 21 (1.) and then hold it at an angle in Insert the FlexiClip runner with the towards the middle of the oven Miele logo on the right-hand side. compartment (2.). Do not extend the FlexiClip runners when inserting or removing them. If...
- Page 22 Features Removing the FlexiClip telescopic Splash insert HGBB51 runners Push the FlexiClip runner in all the way. The splash insert is placed in the roasting pan below the wire rack. The drippings from the meat or poultry are collected under the insert reducing spattering in the oven.
- Page 23 Features Gourmet Baking Stone HBS60 Gourmet Casserole Dishes HUB and Lids HBD The Miele casserole dishes, unlike other oven dishes, slide into the oven on the side runners. They have non-tip safety The baking stone is ideal for baking notches to prevent them being pulled dishes with a crisp bottom such as out too far.
- Page 24 Miele Microfiber Cloth Light soiling and fingerprints can be easily removed with the microfiber cloth. Miele Oven Cleaner Miele oven cleaner is suitable for removing stubborn soiling. It is not necessary to preheat the oven before use.
-
Page 25: Oven Controls
Features Oven controls Cooling fan The cooling fan comes on automatically The oven controls enable you to use when a cooking program is started. The the various cooking functions to bake, cooling fan mixes hot air from the oven roast and broil. cavity with cool room air before venting Ovens with a clock/timer also offer the it out into the kitchen through vents... -
Page 26: Perfectclean Treated Surfaces
Features PerfectClean treated surfaces Catalytic enameled surfaces The revolutionary PerfectClean enamel The back panel is coated with catalytic is a smooth, non-stick surface that enamel. Soiling from oil and fat is burnt cleans easily with a sponge. off this type of surface when very high temperatures are used in the oven. -
Page 27: Before Using For The First Time
Before using for the first time Before using for the first time Setting the time of day for the first time The oven must not be operated The time of day is shown in 12 hour until it has been properly installed clock format. -
Page 28: Heating The Oven
Before using for the first time Heating the oven Clean the oven interior with warm water and liquid dish soap, applied New ovens may have a slight odor with a soft sponge or microfiber during their first use. Heating up the cloth. -
Page 29: Guide To The Functions
Guide to the functions The oven has a range of functions for Rapid PreHeat preparing a variety of foods. (Browning / Broiling element + Surround Convection fan with heating element) Browning / Broiling element + Baking This function allows the oven to be element heated to the desired temperature quickly. -
Page 30: Convection Broil
Guide to the functions Convection Broil (Browning / Broiling element + Convection fan) This function distributes hot air from the Browning / Broiling element over the food using the fan. This allows for a lower temperature to be used then when using Maxi Broil . -
Page 31: Operation
Operation Energy saving tips Using the oven – Remove any accessories from the Place the food in the oven. oven that you do not require for Using the function selector select the cooking. required oven function. – Try not to open the door when The oven lighting and the fan will turn cooking. -
Page 32: Preheating The Oven
Operation Preheating the oven Rapid PreHeat With Rapid PreHeat the preheating The oven only needs to be preheated in phase can be shortened. a few cases. Most dishes can be placed in a cold Do not use Rapid PreHeat when oven. -
Page 33: Clock / Timer
Clock / Timer The clock/timer: Buttons – displays the time of day, Button Use – Highlight functions – can be used as a kitchen timer, – can turn the cooking programs on or – Reduce durations off, – Access settings –... -
Page 34: Setting A Time Or A Duration
Clock / Timer Setting a time or a duration Displaying the time / duration If you have set times the and or The hours and minutes are set symbols will appear. individually: If you are using the kitchen timer , –... -
Page 35: Using The Kitchen Timer
Clock / Timer Using the kitchen timer The timer can be used to time any activity in the kitchen, e.g. boiling eggs. The timer can also be used at the same time as a cooking program if a start and finish time have been set, e.g. -
Page 36: Resetting The Timer
Clock / Timer At the end of the timer Canceling the timer – flashes, Press and hold until starts flashing. – the time starts counting upwards, Confirm with OK. – the buzzer sounds for approx. 7 minutes, if selected (see "Clock/ The minutes will flash. -
Page 37: Turning A Cooking Program On / Off Automatically
Clock / Timer Turning a cooking program Setting the duration On / Off automatically Example: Baking a cake for 1 hour 5 minutes Cooking programs can be turned on or off automatically. Place the food in the oven. To do this, select an oven function and ... -
Page 38: At The End Of The Cooking Duration
Clock / Timer At the end of the cooking duration – appears in the display, – flashes, – the oven heating turns off automatically, Use or to set the hours. –... -
Page 39: Setting A Cooking Duration And Finish Time
Clock / Timer Setting a cooking duration and finish time A cooking duration and finish time can be set to turn a cooking program On/Off automatically. Example: The time is now 11:15; you The symbol indicates that a cooking want a dish with a cooking duration of duration has been set. -
Page 40: Changing The Cooking Duration
Clock / Timer Changing the cooking duration Press and hold until starts flashing. The cooking time remaining appears in the display. Confirm with OK. Use or to set the minutes. The hours will flash. -
Page 41: Deleting A Cooking Duration
Clock / Timer Deleting a cooking duration Deleting a finish time Press and hold or until Press and hold or until flashes. flashes. Confirm with OK. Confirm with OK. The hours will flash. The hours will flash. -
Page 42: Changing The Time Of Day
Clock / Timer Changing the time of day The time of day can only be changed when the function selector is at Off. Turn the function selector to Off. Press and hold until starts flashing. Confirm with OK. The hours will flash. -
Page 43: Changing Settings
Clock / Timer Changing settings To change the status: Press or until the required status The appliance is supplied with a appears in the display. number of default settings (see the "Settings overview" chart). Confirm with OK. A setting ... - Page 44 Clock / Timer Settings overview Setting Status The buzzer is Off. Buzzer to The buzzer is On. volume The volume can be changed. The corresponding buzzer * will be heard when a status is selected. ...
-
Page 45: Bake
Convection Bake , Intensive , or Surround Parchment paper / Greasing the pan . All Miele accessories (baking tray, roasting pan and pizza form) are treated Bakeware with PerfectClean enamel. The bakeware used depends on the... - Page 46 Bake Temperature As a general rule, select the lower temperature given in the chart. Choosing a baking temperature higher than those recommended may reduce the cooking time, but will lead to uneven browning, and unsatisfactory cooking results. Baking duration Check if the food is cooked at the end of the shortest duration quoted.
-
Page 47: Roast
Roast Oven functions Temperature Depending on how you would like the As a general rule, select the lower food prepared, you can use Convection temperature given in the chart. Bake or Surround . If higher temperatures are used, the meat will brown on the outside, but will Cookware not be properly cooked through. - Page 48 Roast Roasting duration The roasting time can be determined by multiplying the thickness of the roast (in cm) by the time listed below, depending on the type of meat: – Beef / Game: 15–18 min./cm – Pork / Veal / Lamb: 12–15 min./cm –...
-
Page 49: Slow Roasting
Slow Roasting This cooking method is ideal for Operation cooking beef, pork, veal or lamb when Use the roasting pan with the wire a tender result is desired. rack placed on top of it. First, using a cooktop sear the meat on Do not use the Rapid PreHeat ... - Page 50 Slow Roasting After the cooking process Cooking duration / Core temperatures Because the cooking and core temperatures are very low: Meat – the meat can be carved immediately, [min] [°F / °C] it does not need to rest. Sirloin –...
-
Page 51: Broil
Broil Cookware Danger of burns! Broil with the oven door closed. If you broil with the door open the hot air will escape from the oven before it has been cooled by the cooling fan. The controls will get hot. Oven functions Maxi Broil ... - Page 52 Broil Temperature Testing doneness As a general rule, select the lower Always follow USDA guidelines for temperature given in the chart. safe food temperatures. If higher temperatures are used, the meat will brown on the outside, but will To check how far a piece of meat has not be properly cooked through.
- Page 53 Broil Preparing food for broiling Broil Rinse the meat under cold water and Select the required oven function and pat dry. Do not season the meat with temperature. salt before broiling, this will draw out Preheat the Browning / Broiling the juices.
-
Page 54: Defrost
Defrost To gently defrost food use the Defrost Defrosting durations function. The duration needed for defrosting depends on the type and weight of the When this function is selected, the fan frozen food. turns on and circulates the air around the oven cavity. -
Page 55: Canning
Canning Fruit / Cucumbers Always follow the USDA canning guidelines. Turn the function selector to Light , as soon as bubbles are visible in Canning containers the jars. Let the jars stand in the oven for an additional 25-30 minutes. ... -
Page 56: Dehydrate
Dehydrate Dehydrating is a traditional method of Food Dehydrating time preserving fruit, certain vegetables and Fruit 2–8 hours herbs. Vegetables 3–8 hours It is important that fruit and vegetables Herbs* 50–60 minutes are ripe and not bruised before they are dehydrated. -
Page 57: Frozen Food
Frozen food Tips Preparation Cakes, pizza, baguettes Eating food which has been cooked correctly is important for good – Large frozen items such as cakes, health. pizzas or baguettes cover a large Only bake cakes, pizza, french fries, area of the baking tray or roasting etc. -
Page 58: Gentle Bake
Gentle Bake The Gentle Bake function is ideal for casseroles and gratins which require a crisp top. Food °F / °C [min] Lasagna 375 / 190 45–60 Potato Gratin 355 / 180 55–65 Vegetable Casserole 355 / 180 55–65 Pasta Bake 355 / 180... -
Page 59: Cleaning And Care
Cleaning and care Unsuitable cleaning agents Danger of burns! Make sure the heating elements are To better maintain your appliance avoid turned off and allowed to cool the following: completely. – cleaners containing soda, ammonia, thinners, or chlorides, Danger of injury! The steam from –... -
Page 60: Tips
Cleaning and care Normal soiling Soiling not removed immediately can become difficult to remove. See "Cleaning the catalytic enameled Continued use without cleaning will back panel" for cleaning instructions. make the oven much harder to clean. Remove any soiling immediately. ... -
Page 61: Stubborn Soiling (Excluding The Flexiclip Runners)
Cleaning and care Stubborn soiling (excluding the Stubborn soiling on PerfectClean surfaces can be cleaned using Miele FlexiClip runners) Oven Cleaner. It must only be applied to cold surfaces in accordance with Spilt fruit and roasting juices may the instructions on the packaging. -
Page 62: Stubborn Soiling On The Flexiclip Runners
Cleaning and care Stubborn soiling on the Cleaning the catalytic FlexiClip runners enameled back panel Soiling from oil and fat is burnt off Do not wash the FlexiClip telescopic catalytic enamel when very high runners in the dishwasher. This will temperatures are used in the oven. -
Page 63: Removing Oil And Grease
Cleaning and care Removing oil and grease Remove any accessories from the oven, including the shelf runners. Wipe any soiling form the oven interior and the inside of the door before starting the cleaning process. This will avoid them baking on. ... -
Page 64: Removing The Door
Cleaning and care Removing the door Do not attempt to take the door off the brackets when it is in the horizontal position, the brackets will spring back against the oven. Do not use the handle to pull the door off the brackets, the handle could break. -
Page 65: Installing The Door
Cleaning and care Installing the door Flip both locking clamps back up as far as they will go into a horizontal position. Hold both sides of the door securely and carefully fit it back into the brackets. Make sure that the door goes on straight. -
Page 66: Removing The Shelf Runners With Flexiclip Telescopic Runners
Cleaning and care Removing the shelf runners Removing the back panel with FlexiClip telescopic Danger of injury! runners Do not use the oven without the back panel in place. Danger of injury! Do not use the oven without the The back panel can be removed for shelf runners correctly inserted. -
Page 67: Lowering The Browning / Broiling Element
Cleaning and care Lowering the Browning / Broiling element Danger of burns! Make sure the heating elements are turned off and allowed to cool completely. Remove the shelf runners. Unscrew the wing nut. Use caution not to damage the Browning / Broiling element. -
Page 68: Frequently Asked Questions
Frequently asked questions The following faults can be corrected without contacting the Miele Service Department. If in doubt, please contact Miele. Danger of injury!Repairs should only be carried out by a qualified and trained professional in accordance with local and national safety regulations. - Page 69 The bearings in the FlexiClip telescopic runners are runners do not push in not sufficiently lubricated. or pull out smoothly. Lubricate the bearings with the special Miele lubricant. Only use this special lubricant as it is designed to withstand high temperatures in the oven. Other lubricants can harden and stick to the telescopic runners when they are heated.The Miele lubricant...
- Page 70 Frequently asked questions Problem Possible cause and remedy The oven lighting does The halogen bulb needs to be replaced. not turn on. Danger of burns! Make sure the heating elements are turned off and allowed to cool completely. Disconnect the appliance from the power supply. ...
-
Page 71: Technical Service
Technical Service After sales service In the event of a fault which you cannot easily correct yourself, please contact: – your Miele dealer, or – the Miele Technical Service Department. See back cover for contact details. Please quote the model and serial number of your appliance when contacting Miele. -
Page 72: Caring For The Environment
Caring for the environment Disposal of the packing Disposal of your old appliance material Do not dispose of this appliance with your household waste. The cardboard box and packing materials protect the appliance during Old appliances may contain materials shipping. They have been designed to that can be recycled. -
Page 73: Electrical Connection
Installation, repair and maintenance the data plate correspond with the work must be performed by a Miele household electrical supply. This authorized service technician. Work data must correspond to prevent by unqualified persons could be machine damage. -
Page 74: Installation Diagrams
Installation diagrams Appliance and cut-out dimensions Undercounter installation 21 5/8" 23 5/8" ( 550 mm) (600 mm) 7/8" (23 mm) 4" 21 9/16" (547 mm) (100 mm) 22 1/16" (560 mm) 23 7/16" (596 mm) 22 1/2" (572 mm) 23 7/16" 21 7/16"... - Page 75 Installation diagrams Installation into a tall cabinet 21 5/8" 590-595 mm ( 550 mm) (23 1/4"-23 7/16") 4" (100 mm) 7/8" (23 mm) 21 9/16" (547 mm) 22 1/16" (560 mm) 23 7/16" (596 mm) 22 1/2" (572 mm) 23 7/16" 21 7/16"...
-
Page 76: Installing The Oven
Installing the oven Open the door (if it was not removed The oven must not be operated previously). until it has been properly installed within cabinetry. In order for the oven to function correctly, it required an adequate supply of cool air. - Page 80 H2261B en – CA M.-Nr. 09 786 730 / 00...
Need help?
Do you have a question about the H 2261 B and is the answer not in the manual?
Questions and answers