Sign In
Upload
Download
Table of Contents
Contents
Add to my manuals
Delete from my manuals
Share
URL of this page:
HTML Link:
Bookmark this page
Add
Manual will be automatically added to "My Manuals"
Print this page
×
Bookmark added
×
Added to my manuals
Manuals
Brands
Advantech Manuals
Control Unit
ADAM-6217
User manual
Advantech ADAM-6217 User Manual
Adam-6200 series intelligent ethernet i/o module
Hide thumbs
1
2
3
4
5
6
7
8
9
10
11
12
13
14
15
16
17
18
19
20
21
22
23
24
25
26
27
28
29
30
31
32
33
34
35
36
37
38
39
40
41
42
43
44
45
46
47
48
49
50
51
52
53
54
55
56
57
58
59
60
61
62
63
64
65
66
67
68
69
70
71
72
73
74
75
76
77
78
79
80
81
82
83
84
85
86
87
88
89
90
91
92
93
94
95
96
97
98
99
100
101
102
103
104
105
106
107
108
109
110
111
112
113
114
115
116
117
118
119
120
121
122
123
124
125
126
127
128
129
130
131
132
133
134
135
136
137
138
139
140
141
142
143
144
145
146
147
148
149
150
151
152
153
154
155
156
157
158
159
160
161
162
163
164
165
166
167
168
169
170
171
172
173
174
175
176
177
178
179
180
181
182
183
184
185
186
187
188
189
190
191
192
Table Of Contents
193
page
of
193
Go
/
193
Contents
Table of Contents
Bookmarks
Table of Contents
Safety Instructions
Table of Contents
Chapter 1 Product Overview
Introduction
Feature Highlights
Easier Installation and Deployment
Auto-Bypass Protection
Group Configuration
Integrated Automation Application with IT Technologies
Excellent I/O Application
Effective Management
ADAM-6200 Series Family
Mechanical Design and Dimensions
Switch
LED Definition
Certification and Safety Standard
Product Label
Front Name Plate
Package Information
Chapter 2 Product Specifications
General Specification
Analog Input Module (ADAM-6217)
Application Wiring
Pin Assignment
Switch Setting
Analog Output Module (ADAM-6224)
Application Wiring
Digital Input/Output Modules (ADAM-6250/6251/6256)
Pin Assignment
Application Wiring
Isolated Digital Output
Adam-6256
Pin Assignment
Switch Setting
Relay Output Modules (ADAM-6260/6266)
Application Wiring
Dry Contact
Isolated Digital Input
Wet Contact
Isolated Relay Output
Pin Assignment
Switch Setting
Chapter 3 Hardware Installation
Interface Introduction
Panel Mounting
Bracket Dimension
Assembly with Bracket
DIN-Rail Mounting
Assembly with Din Rail Adapter
ADAM Module Mounted on a Rail
Wiring & Connections
Power Supply Wiring
I/O Units
Daisy Chain Connection
The Benefits of Daisy Chain Topology
Chapter 4 System Configuration
ADAM.NET Utility (Software)
Connection
Configure ADAM-6200 with ADAM.NET Utility
Operation Framework
Menu
File
Tools
Terminal for Command Testing
Monitor Stream/Event Data
Monitor Peer-To-Peer (Event Trigger)
Monitor GCL IO Data Message
Favorite Group
Refresh Serial and Ethernet
Toolbar
Module Tree Screen
Main Operation Screen
General Configuration
Information
ADAM Web Page
Network
Network Setting
Port Setting
Module Ethernet Protocol and Port
Stream
Host IP Address
Data Streaming
Administration
Password
Reset to Factory Default
Restart the Module
Firmware
File Import
JAR File
HTML File
Peer to Peer / Event
Access Control
User-Defined Modbus Address
I/O Configuration
I/O Channel Overview
Advanced Channel Setting
GCL Function Setting
Adam-6217
Analog Input Channel Overview
Locate
Hide Setting Panel
Input Range
Integration Time
Burnout
Calibration
Channel Information
Alarm Setting
Digital Input Channel Overview
Invert Signal
DI Status LED
Digital Filter
Analog Output Channel Overview
Trim Zero
Trim Span
Slew Rate
Safety Function
DI Configuration
Counter Mode
Low to High Latch Mode
High to Low Latch Mode
Frequency Mode
DO Configuration
DO Mode
Pulse Output Mode
Low to High Delay
High to Low Delay
Adam-6260
Peer to Peer
Basic Mode
Period Time Function
Period Time Function + C.O.S (Change of Status) Function
Basic Mode Configuration
Advanced Mode
Advanced Mode Configuration
Gcl
Overview
Configuration Environment
Logic Rule Configuration
Basic Logic Rule Programming
Input Condition Stage
Local Analog Input Channel (AI)
Local Frequency Input Channel (Di_Frequency)
Internal Timer (Timer)
Local Counter Input Channel (Di_Counter)
Local Digital Input Channel (DI)
Internal Flag (Auxflag)
Local Digital Output Channel (DO)
Internal Counter (Counter)
Logic Stage
Execution Stage
Execution Period (Execution_Period)
Send to Next Rule (Sendtonextrule)
Output Stage
Analog Output (AO)
Digital Output (DO)
Counter Channel Setting (Di_Counter)
Pulse Output (Do_Pulse)
Local Timer (Timer)
Local or Remote Internal Flag (Auxflag)
Remote Message Output (Remotemessage)
Local Internal Counter Setting (Counter)
Internal Flag for Logic Cascade and Feedback
Logic Cascade
Local Logic Cascade
Distributed Logic Cascade
Feedback
Export Logic File and Online Monitoring
GCL Rule Execution Sequence
GCL Execution and Data Transfer Performance
Typical Applications with GCL
Local Output
Remote Output
Sequential Control
Multiple DI to Control One DO
Flicker
Rising Edge
Falling Edge
DI Event Trigger
Remotely Monitoring and Control Via Web Server
Preset Conditions
Operating Steps: (Take Smart Phone as Example)
Appendix A I/O Modbus Mapping Table
Modbus Function Code Introduction
ADAM-6217 8-Ch Isolated Analog Input Module
I/O Modbus Mapping Table
ADAM-6224 4-Ch Isolated Analog Output Module
ADAM-6250 15-Ch Digital Input/Output Module
ADAM-6251 16-Ch Digital Input Module
ADAM-6256 16-Ch Digital Output Module
ADAM-6260 6-Ch Relay Output Module
ADAM-6266 4-Ch Relay Output Module with 4-Ch DI
Adam-6200 Ascii
Appendix B ADAM-6200 ASCII Commands
ASCII Commands for ADAM-6200 Modules
System Command Set
Analog Input Command Set
Analog Input Range Code
Analog Input Alarm Command Set
Set Alarm Connection
Read Alarm Connection
Set Alarm Limit
Read Alarm Limit
Read Alarm Status
Analog Output Command Set
Read AO Startup Value from One Channel
Set AO Startup Value to One Channel
Write AO Value to One Channel
Read Analog Output Range Code from Channel N
Analog Output Range Code
Digital Input/Output Command Set
Read Channel Status
Write All Digital Output Channels
Adam-6200
Write a Single Digital Output Channel
Read DI Channel Counter Value
REST for ADAM-6200
REST Resources for ADAM
Analog Input
Appendix C REST for ADAM-6200
Introduction
Analog Output
Digital Input
Digital Output
Advertisement
Quick Links
1
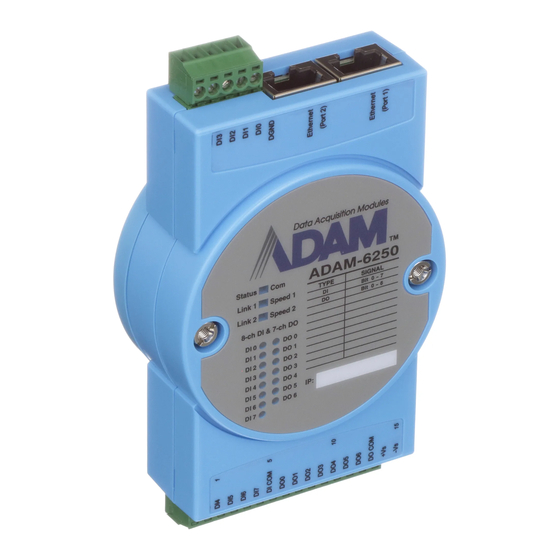
Digital Input/Output Modules (Adam-6250/6251/6256)
Download this manual
User Manual
Adam-6200
Series
Intelligent Ethernet I/O Module
Table of
Contents
Previous
Page
Next
Page
1
2
3
4
5
Advertisement
Table of Contents
Need help?
Do you have a question about the ADAM-6217 and is the answer not in the manual?
Ask a question
Questions and answers
Related Manuals for Advantech ADAM-6217
I/O Systems Advantech ADAM-6251 Startup Manual
16-ch digital input modbus tcp module (2 pages)
Control Unit Advantech ADAM-6224 User Manual
Adam-6200 series intelligent ethernet i/o module (193 pages)
Control Unit Advantech ADAM-6250 User Manual
Adam-6200 series intelligent ethernet i/o module (193 pages)
Control Unit Advantech ADAM-6260 User Manual
Adam-6200 series intelligent ethernet i/o module (193 pages)
Control Unit Advantech ADAM-6266 User Manual
Adam-6200 series intelligent ethernet i/o module (193 pages)
Control Unit Advantech ADAM-6051 Manual
16-channel digital i/o w/counter module (34 pages)
Control Unit Advantech ADAM-5000 Series User Manual
4-channel counter/frequency module (67 pages)
Control Unit Advantech ADAM-2000 Series User Manual
Wireless sensor network data acquisition modules (90 pages)
Control Unit Advantech ADAM-2510Z User Manual
Wireless sensor network data acquisition modules (74 pages)
Control Unit Advantech ADAM-3016 User Manual
Strain gauge input module (15 pages)
Control Unit Advantech ADAM 4000 Series User Manual
Data acquisition modules (398 pages)
Control Unit Advantech ADAM 4000 Series User Manual
Data acquisition modules (286 pages)
Control Unit Advantech ADAM-5240 User Manual
4-axis stepping/pulse-type servo motor control module (54 pages)
Control Unit Advantech ADAM 4015 User Manual
Data acquisition modules (286 pages)
Control Unit Advantech ADAM 4017 User Manual
Data acquisition modules (286 pages)
Control Unit Advantech ADAM 4060 User Manual
Data acquisition modules (286 pages)
This manual is also suitable for:
Adam-6224
Adam-6260
Adam-6250
Adam-6266
Adam-6251
Adam-6256
Table of Contents
Save PDF
Print
Rename the bookmark
Delete bookmark?
Delete from my manuals?
Login
Sign In
OR
Sign in with Facebook
Sign in with Google
Upload manual
Upload from disk
Upload from URL


Need help?
Do you have a question about the ADAM-6217 and is the answer not in the manual?
Questions and answers