Elcometer 224 Operating Instructions Manual
Model t
surface profile gauge
Hide thumbs
Also See for 224:
- User manual (84 pages) ,
- Operating instructions manual (41 pages) ,
- Operating instructions manual (25 pages)
Table of Contents
Advertisement
Quick Links
Download this manual
See also:
User Manual
Advertisement
Table of Contents

Related Manuals for Elcometer 224


Summary of Contents for Elcometer 224
- Page 1 Operating Instructions The New Elcometer 224 Surface Profile Gauge...
- Page 2 Elcometer 224 Model T: The Giteki mark, its ordinance number and the FCC ID can be accessed via: Menu/About/Legal/Regulatory NOTE: This equipment has been tested and found to comply with the limits for a Class B digital device, pursuant to Part 15 of the FCC Rules.
-
Page 3: Table Of Contents
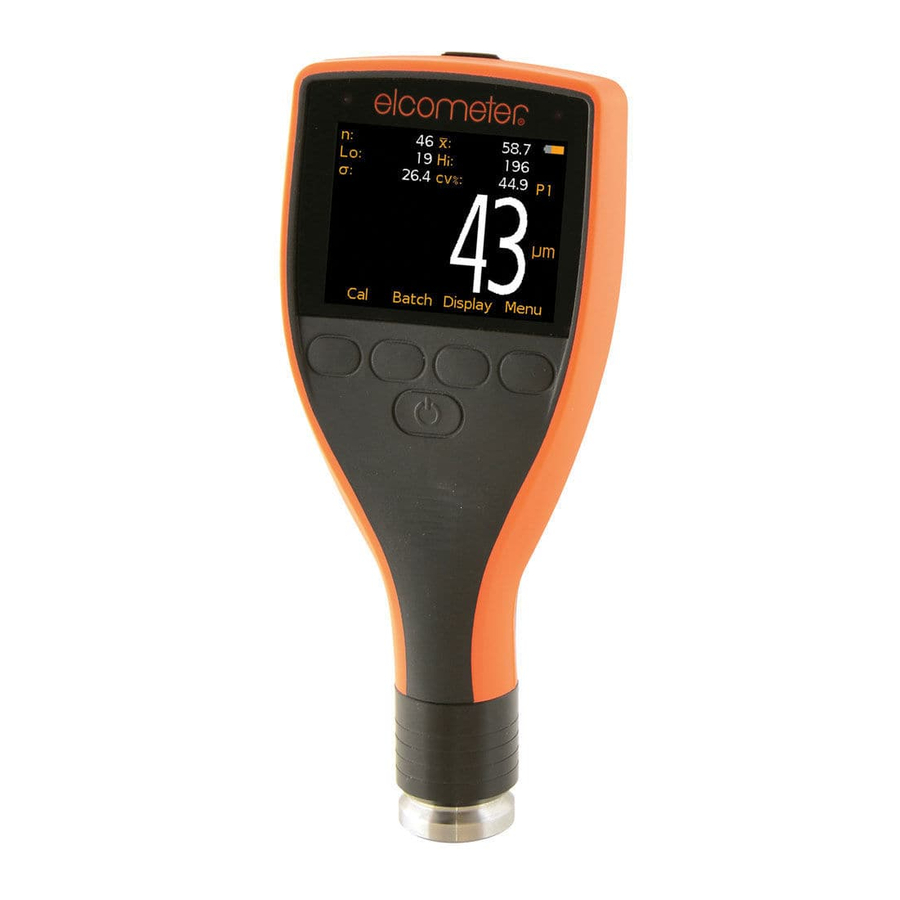
GETTING THE MOST OUR OF ELCOMASTER............CHANGING THE WELCOME SCREEN (BT)............GAUGE FIRMWARE UPDATES (BT)............... GAUGE ICONS & ERROR MESSAGES (BT)............GAUGE MENU STRUCTURES (BT)................ GAUGE TECHNICAL SPECIFICATIONS (BT)............PROBE TECHNICAL SPECIFICATIONS (BT)............GAUGE & PROBE ACCESSORIES (BT)..............ADDITIONAL REFERENCE INFORMATION............INDEX........................www.elcometer.com... - Page 4 Elcometer. For more information visit www.elcometer.com ABOUT YOUR GAUGE The Elcometer 224 Surface Profile Gauge is a handheld gauge for fast and accurate measurement of surface profile. The gauge is available in two models; Model B and T.
-
Page 5: Gauge Overview And Box Contents
Wrist Strap Connection Battery Compartment (¼ turn open/close) USB Data Output Socket (below cover) Box Contents Elcometer 224 Surface Profile Gauge Calibration Test Foils; Nominal Values 125 & 500µm and Glass Zero Tile (Integral gauges) Test Certificate Wrist Harness Protective Case ;... -
Page 6: Getting Started
Settings/Screen Brightness and the Bluetooth (Model T) is disabled (if you are not using it) via Menu/Bluetooth and uncheck the Enable Bluetooth radio button. Connecting the probe (separate gauges only) 1. Rotate the probe plug to align the pins 2. Screw in the collar - clockwise www.elcometer.com... - Page 7 The language can also be changed via Menu/Setup/Language Selecting units The Elcometer 224 can display readings in both metric and imperial measurement units (microns, millimetres, mils or inches). The a p p r o p r i a t e m e a s u r e m e n t u n i t c a n b e c h a n g e d v i a...
-
Page 8: Taking A Reading
• Firmly place the probe onto the • Bang the probe down hard onto surface the surface • Allow the metal base to make • Swing the probe by its cable contact with the surface - to improve accuracy www.elcometer.com... -
Page 9: Calibrating And Testing The Gauge Calibration
Calibrating the gauge is the process of zeroing the gauge on a smooth glass “zero” tile. Calibration foils can be used to check the accuracy of the gauge across its measurement range. The Elcometer 224 has on screen instructions to guide the user through the calibration method. -
Page 10: The Display
Cal softkey will continue to flash until the gauge is recalibrated. 5 THE DISPLAY The Elcometer 224 gauge has a colour display: • White characters: All measurement and statistical values. • Orange characters: All menu items, statistical parameters and symbols. - Page 11 Bar Graph (highest, lowest & average reading) q Lower Limit On Softkeys s Run Chart (last 20 readings) Upper and Lower Limits On T For a complete list of icons, see “Gauge Icons” on page 54 - 55 www.elcometer.com...
-
Page 12: The Gauge Features
Display/Readings Only radio button. 6 THE GAUGE FEATURES The Elcometer 224 Surface Profile Gauge has a number of easy to use features and functions to help the user be more efficient. These include: Fast reading rate (BT) The Elcometer 224 is capable of taking up to 60 accurate, repeatable and reproducible measurements every minute. - Page 13 Elcometer 224 to your PC via a USB cable. Two year gauge warranty (BT) The Elcometer 224 gauge is supplied with a 1 year warranty against manufacturing defects. To extend this warranty to 2 years, simply register your gauge via the elcometer.com website.
- Page 14 ® Bluetooth (T) and USB Data output (BT) Elcometer 224 gauges have the ability to transfer data via USB to a ® computer or wirelessly via Bluetooth technology to PC’s, PDA’s or ® mobile phones which are Bluetooth enabled using ElcoMaster™ 2.0 or ElcoMaster™...
- Page 15 User definable warning limits can be set. Once the reading exceeds the limit the gauge notifies the user by turning the reading and relevant limit icon red, flashing the red LED, and sounding the alarm beep. For more information see Limits on page 17. Nominal Value www.elcometer.com...
- Page 16 Users can choose to show Readings & Selected Stats (BT) - see On Screen Statistics on page 14, Readings & Run Chart (T) - see Run Chart on page 15-16, Readings & Bar Graph (BT) or Readings Only (BT). Readings & Run Chart is only available when in Batching. www.elcometer.com...
- Page 17 Time and date (T) Once the appropriate time and date has been set (Menu/Setup/Time and Date), the user can display the time and date at the top of the Elcometer 224 display via Menu/Setup/Time and Date/Display Time and Date. The time format can be set to either the 12 hour or 24 hour clock via...
- Page 18 Gauge Memory (T) The Elcometer 224 versions are supplied with a varying level of memory: Model B: The Model B gauge’s ‘rolling statistics’ provides accurate statistical values for all measurements taken since the statistics were last cleared (Display/Clear Statistics). The last 5 readings, however, can be displayed by pressing the Data softkey.
-
Page 19: Batching (T)
Individual limits can also be set up for each batch on Model T gauges. For more information see Batching on page 18. Gauge Welcome Screen (ST) Users can adjust the start up screen on their Elcometer 224 gauges via the ElcoMaster™ 2.0 software - see page 50 for more information. 7 BATCHING (T) - Page 20 When in batching the user can rename the batch to a more appropriate name. When a new batch is created, the gauge automatically names it ‘Batch n’ - where ‘n’ is the next unused batch number; e.g. Batch 1, Batch 2, Batch 3, etc. www.elcometer.com...
- Page 21 ! # ’ £ $ € % & * [ ] _ - + / \ < > : @ ; ” Pressing the Esc softkey at any time cancels the whole operation without making any changes to the original name. To store the re-named ‘name’ highlight OK and press the Select softkey. www.elcometer.com...
- Page 22 To copy a particular batch use the up and down arrow softkeys and select the appropriate batch. The Elcometer 224 will then copy all the batch settings - batch type, warning limits, and the batch name - and then ask the user whether they wish to rename the batch.
- Page 23 To review a particular batch use the up and down arrow softkeys and select the appropriate batch. The Elcometer 224 will then open up the Review Batch menu, allowing the user to: Review the statistics of the batch...
- Page 24 25 readings at a time. Pressing the Zoom- softkey returns to the original overview graph of all readings in the batch. To return the gauge to the Batch Review menu, press the Back softkey. www.elcometer.com...
- Page 25 Likewise the average of readings 4 - 6 are stored as the second measurement in the memory, etc. The individual readings within the counted average (1.2.3, 4.5.6, etc.) are not saved. Press Batch/New Batch/Batch Type and then select Counted Average. www.elcometer.com...
- Page 26 The Elcometer 224 then asks the user to set the counted average value. Using the up and down arrow softkeys, set the counted average from 2 - 99 and press the Ok softkey. This returns the user to the previous screen. Press the Back softkey to continue setting up the new batch as required before opening the new batch.
- Page 27 Note: Once a fixed batch size batch has been created and data has been stored into the memory, the user cannot rename the batch name within the gauge. The batch name can be amended using the ElcoMaster™ 2.0 software. www.elcometer.com...
-
Page 28: Downloading Data Using Elcomaster 2.0 (Bt)
8 DOWNLOADING DATA USING ELCOMASTER 2.0 (BT) Measurements from the Elcometer 224 Model T can be downloaded to a computer using the ElcoMaster™ 2.0 software (supplied with Model T gauges, downloadable from the Elcometer website for Model B gauges), or the older versions of ElcoMaster™. - Page 29 Click the ‘Browse...’ button to select an alternate file location. Click ‘Next >’ to continue Choose any additional tasks, by selecting the appropriate check box and press ‘Next >’ to continue www.elcometer.com...
- Page 30 ElcoMaster™ database files and ask if the user would like to upgrade the data to the new ElcoMaster™ 2.0 format. Upgrading can occur at any time by selecting Menu/Import/Import ElcoMaster 1.x Data and selecting the relevant database file. www.elcometer.com...
- Page 31 Action Tabs Expand Arrow Pressing the Menu button opens up a drop down list of options: Help : Provides Elcometer contact details and information about ElcoMaster™ 2.0. Update : Provides users with: the ability to update the ElcoMaster™ 2.0 software to the latest release - connection to the internet is required for this function.
- Page 32 Select an alternate location to store the database Enable or disable the auto update option (where access to the internet is prohibited). Download: Allows users to connect all their Elcometer gauges via USB, Bluetooth , or RS 232 where appropriate. ®...
- Page 33 Design custom reports View data in standard forms - predefined within the Design Report action tab or by Elcometer. Design a collection template to guide inspectors where, and in which order, readings should be taken - see page 46 for further details.
- Page 34 Connecting an Elcometer gauge to ElcoMaster™2.0 (BT) In order to download any gauge readings from the Elcometer 224 the user must first ‘Connect the gauge’ by clicking the ‘Connect Gauge’ button on the Download action tab. Clicking ‘Connect Gauge’ starts the ElcoMaster™...
- Page 35 S e l e c t t h e a p p r o p r i a t e connection method for the gauge Elcometer 224 Model B has USB data output, the Model T has both USB and Bluetooth data output.
- Page 36 By clicking on the Edit button, users can Delete the gauge from ElcoMaster™ 2.0, name the gauge by a more familiar identification (Enter a User ID) or set up the gauge power up display screen (Change the Welcome screen). See Changing the Welcome Screen on page 50. www.elcometer.com...
- Page 37 Downloading Data from the Elcometer 224 (T) Once the gauge has been connected to ElcoMaster™ 2.0 (see pages 33 - 35), switch on your gauge and click the ‘Download from Gauge’ button for the relevant gauge and connection method. The Download Wizard will now guide the user through the simple download readings process.
- Page 38 Select as required and press ‘Next >’ The selected batches will now download. Once the data download has been completed, the user can check the ‘View Files’ box and click ‘Finish’. Alternatively, click ‘Finish’ and select the ‘View Action Tab’ www.elcometer.com...
- Page 39 Viewing Data in ElcoMaster™ 2.0 ElcoMaster™ 2.0 not only allows users to view and analyse data from a wide range of Elcometer gauges, but also allows users to manually input data as required. This instruction book provides a brief summary of some of the features of ElcoMaster™...
- Page 40 Archive & Restore: Archive and restore inspection data Print, PDF, E-mail & Export: Print, generate a PDF, e-mail or export to Excel or a tab separated text file; the selected batch report www.elcometer.com...
- Page 41 Generates a PDF report of the selected items Email: Generates a PDF report of the selected items and attaches it to an email Export: Allows the user to export the selected items into Excel or as a text or CQATK XML file www.elcometer.com...
- Page 42 Relative Time (seconds) Reading Number Relative Time (minutes) Left clicking and dragging the mouse across the individuals chart allows users to zoom in on a specific area of the graph. The zoom can be reset by clicking on the icon. www.elcometer.com...
- Page 43 Shows any limits that were used whilst taking the readings or allows users to apply limits. When set, measurements outside the limits are highlighted within the measurement tab. Users can display the values on the graph by clicking the ) icon and selecting a colour. www.elcometer.com...
- Page 44 (for pasting in another program, or save the photograph to another file. Data, photographs, labels etc. added within the measurement window tabs is automatically included on any reports, exports, pdf and emails generated. www.elcometer.com...
- Page 45 Live Readings window. At any time the user can select a different batch to change where the next reading is taken. Click the button or switch of the gauge to disconnect www.elcometer.com...
- Page 46 Once complete click ‘Save’ and click the 'X' button in the top right to close the design window ‡ To use Design Collect, switch ElcoMaster™ 2.0 to Advanced Mode by clicking on the Expand Arrow, and selecting ‘Start Advanced Mode’. www.elcometer.com...
- Page 47 The gauge must be connected to ElcoMaster™ 2.0 before it will appear in the list, see pages 33 - 35 The ‘reading’ circle will be green if the measurement is within set limits and red, if outside limits. www.elcometer.com...
-
Page 48: Elcomaster Mobile (T)
Android 2.1 or above. Compatible with Bluetooth versions of the: - Elcometer 130 Salt Contamination Meter - Elcometer 224 Surface Profile Gauge - Elcometer 319 Dewpoint Meter - Elcometer 456 Coating Thickness Gauge Store live readings directly on the phone and save them into batches. - Page 49 Map readings on to a Google Map, photographs or diagrams. Installing ElcoMaster™ Mobile To install ElcoMaster™ Mobile simply scan the QR code or download via www.elcometer.com or Google Play, https://play.google.com/store/apps/details?id=com.elcometer.elcomaster, and follow the on screen instructions. www.elcometer.com...
-
Page 50: Cloud Computing With Elcomaster (T)
Bluetooth , USB, WiFI or 3G/4G. Using the ElcoMaster™ instant messaging feature, job instructions can be sent or stored in specific job files. Wherever you are in the world, ElcoMaster™ Mobile allows you to instantly upload to the cloud via 3G/4G or WiFi. www.elcometer.com... -
Page 51: Getting The Most Our Of Elcomaster
You can compare e-mail them back to the office for and combine inspection data from different storing, review and QA reporting. production lines or different locations, to produce specific Project Inspection Reports quickly and easily. www.elcometer.com... - Page 52 Have multi-site collaboration, real service providers and FTP servers time dialogue and decision making including: Google Drive, FTP Server, to improve efficiency and quality Dropbox. throughout the production process. www.elcometer.com...
-
Page 53: Changing The Welcome Screen (Bt)
12 CHANGING THE WELCOME SCREEN (BT) Each time the Elcometer 224 gauge is switched on, the Elcometer logo is displayed. Users can add their own logo, image or identification details as required via ElcoMaster™ 2.0. Once the gauge has been connected to ElcoMaster™... -
Page 54: Gauge Firmware Updates (Bt)
13 GAUGE FIRMWARE UPDATES (BT) Each time the Elcometer 224 gauge is connected to ElcoMaster™ 2.0 (see pages 33 - 35); if the computer has access to the internet, ElcoMaster™ 2.0 automatically checks to see if there are any gauge firmware updates for the connected gauge. -
Page 55: Gauge Icons & Error Messages (Bt)
Low Limit Set: Reading outside Low Limit Low & High Limit Set: Reading outside High Limit Low & High Limit Set: Reading outside Low Limit Calibration Lock Batch Type: Normal Batch Type: Counted Average USB Connected Bluetooth: On, Not Connected (Grey) Bluetooth: On; Connected (Orange) www.elcometer.com... -
Page 56: Error Messages
Unstable Reading External electromagnetic interference or gauge is faulty. Isolate from electromagnetic interference. If error persists, contact Elcometer. Value Too Large Calculated value is too large to be displayed. Contact Elcometer. Calibration Error Incorrect calibration calculation. Re-calibrate. If error persists, contact Elcometer. -
Page 57: Gauge Menu Structures (Bt)
15 GAUGE MENU STRUCTURES (BT) Please find below a simplified diagram of each Elcometer 224 model’s menu structures. Elcometer 224 Model T Setup Units Units ○ µm Language ○ Time and Date mils ○ Beep Volume inch ○ Screen Settings ○... - Page 58 15 GAUGE MENU STRUCTURES CONTINUED (BT) Elcometer 224 Model B Setup Menu Units Units Delete Last Reading ○ Language µm Setup Beep Volume ○ About Screen Settings mils ○ Reset ○ Gauge Auto Off inch ○ Emergency Light Display Screen Settings...
-
Page 59: Gauge Technical Specifications (Bt)
20,000 readings. Supplied with either a standard cable or armoured metal reinforced heavy duty cable, all probes are supplied with an Elcometer test certificate, glass zero tile and calibration test foils; nominal values 125µm (5mil) & 500µm (20mils). -
Page 60: Gauge & Probe Accessories (Bt)
- for PC’s without Bluetooth T99922341 Self Adhesive Screen Protectors (x10) T99922341 19 ADDITIONAL REFERENCE INFORMATION Standards The Elcometer 224 can be used in accordance with the following National and International Standards: ASTM D4417-B SANS 5772 US Navy NSI 009-32 US Navy PPI 63101-000... - Page 61 Elcometer supplier or directly to Elcometer. The warranty will be invalidated if the gauge has been opened. The Elcometer 224 gauge is supplied with a 1 year warranty against manufacturing defects. To extend this warranty to 2 years, register your gauge via the www.elcometer.com website.
-
Page 62: Index
12, 51 Beep Volume 7, 55 Icons Bluetooth Maintenance Data output Memory Downloading data Menu structures PIN Code Overview USB Adaptor Technical specifications Warranty 12, 60 Calibration Welcome screen 18, 50 Certificates Specification Lock 13, 54 Testing Validating Certification www.elcometer.com... - Page 63 Reading Rate Rotating Display Run Chart SANS 5772 Scale Ranges Setting Limits Software, ElcoMaster 2.0 Standards Statistics Switching On / Off Technical Specifications Test Certificates Time and Date Two Year Gauge Warranty 12, 60 Units, Selecting US Navy NSI 009-32 www.elcometer.com...
- Page 64 JAPAN ASIA & THE FAR EAST ENGLAND Elcometer Inc Elcometer (Asia) Pte Ltd Elcometer KK Elcometer Limited 1893 Rochester Industrial Drive 896 Dunearn Rd 7F Toranomon MT40 Bldg. 5-13-1 Edge Lane Rochester Hills Michigan 48309 Sime Darby Centre #03-09...
Need help?
Do you have a question about the 224 and is the answer not in the manual?
Questions and answers
Не включается