Table of Contents
Advertisement
Quick Links
Advertisement
Table of Contents

Subscribe to Our Youtube Channel
Related Manuals for OSEE XCM-250-OLED


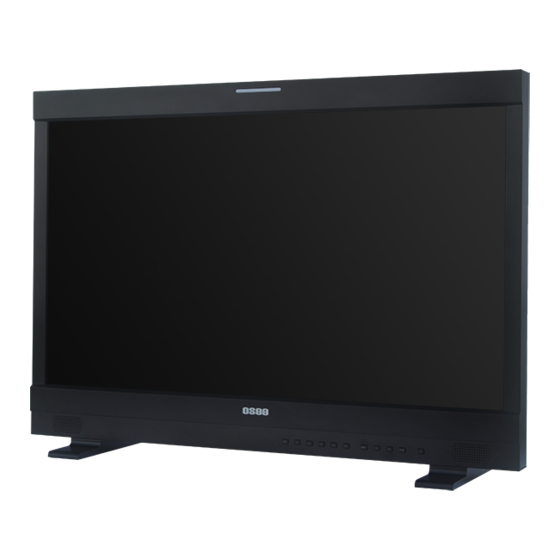
Summary of Contents for OSEE XCM-250-OLED
- Page 1 XCM-250-OLED Critical Evaluation and Grading Monitor User Manual...
-
Page 3: Product Information
Product Information Model: XCM-250 OLED Monitor Version: V010001 Release Date: February 5th, 2015 Company OSEE TECHNOLOGY CO., LTD. Contact Information OSEE TECHNOLOGY CO., LTD. Address: No.22 Building, No.68 zone, Beiqing Road, Haidian District, Beijing, China 100094 Post Code: Tel: (+86) 010-62434168... -
Page 4: Contents
About this manual Important The following symbols are used in this manual: Additional information for described subjects. Safety warnings or operations that user must pay attention to when using this product. Contents The user manual applies to the following device types: ... -
Page 5: Table Of Contents
Contents Contents ......................I Chapter 1 Overview ..................1 Chapter 2 Safety ..................... 3 Chapter 3 Unpack and Installation ............. 11 Chapter 4 XCM-250 Features ..............13 4.1 Front Panel Features ................ 15 4.1.1 Arrangement of Front Panel ............15 4.1.2 Operation of Front Panel .............. - Page 6 6.2.1 ADJUST Menu ................78 6.2.2 VIDEO DISPLAY Menu ..............79 6.2.3 SYSTEM Menu ................80 6.2.4 Other Menus ................... 81 6.3 Parameter Settings ................81 Chapter 7 Specifications ................85...
-
Page 7: Chapter 1 Overview
Overview Chapter 1 Overview The XCM-250 series OLED Monitor is a high performance broadcast monitor designed for the most demanding applications. Applications include, program production, high quality streaming, play out to air, studio image composition, color grading, post production, film and E-Cinema acquisition. Featuring the latest generation AMOLED panel at full resolution of 1920 x 1080 with 15 3D-LUT selections, the XCM-250 series OLED monitor is capable of reproducing a vivid color with phenomenal response time. - Page 8 Overview Features 3D-LUT color calibration technology plus 12bit image processing Having multi format input including 3G/SD/HD-SDI, 2K Adopting full HD, wide viewing angle AMOLED panel Proprietary algorithms provide advanced progressive/de-interlacing technology Various display mode: PBP, PIP, wipe and blending ...
-
Page 9: Chapter 2 Safety
Safety Chapter 2 Safety FCC Caution Any Changes or modifications not expressly approved by the party responsible for compliance could void the user's authority to operate the equipment. This device complies with part 15 of the FCC Rules. Operation is subject to the following two conditions: (1) This device may not cause harmful interference, and (2) this device must accept any interference received, including interference that may cause undesired operation. - Page 10 Safety Warnings: Read, keep and follow all of these instructions for your safety. Heed all warnings. Device Install in accordance with the manufacturer's instructions. If the brightness is adjusted to the minimum, then it might be hard to see the display screen.
- Page 11 Safety Position Do not block any ventilation openings. Do not use this unit near water. Do not expose the unit to rain or moisture, to reduce the risk of fire or electric shock. Do not use this unit near any heat sources such as radiators, heat registers, stoves, or other apparatus (including amplifiers) that product heat.
- Page 12 Safety Precaution: OLED PANEL The OLED panel fitted to this unit is manufactured with high precision technology, giving a functioning pixel ratio of at least 99.99%. Thus a very small proportion of pixels may be “stuck”, either always off (black), always on (red, green, or blue), or flashing.
- Page 13 Safety To reduce the risk of burn-in Turn off the character and marker displays: Press the MENU button to turn off the character displays. To turn off the character or marker displays of the connected equipment, operate the connected equipment accordingly. For details, refer to the operation manual of the connected equipment.
- Page 14 Safety Handling and Maintenance of the Screen The surface of the screen is specially coated to reduce image reflection. Make sure to observe the following points as improper maintenance procedures may impair the screen’s performance. In addition, the screen is vulnerable to damage. Do not scratch or knock against it using a hard object.
- Page 15 OSEE will not be liable for claims of any kind made by user of this unit or made by third parties. OSEE will not be liable for the termination or discontinuation of any ...
-
Page 17: Chapter 3 Unpack And Installation
When unpacking the components of XCM-250 monitor, please verify that none of the components listed in Table 3.1 are damaged or lack. If there is any missing, contact your distributors, Beijing OSEE Technology Co., Ltd., or OSEE Americas, Ltd. for it. - Page 18 Unpack and Installation Fasten the power protect accessory. As a final step, turn on the power switch on the rear panel to power on the device, and press POWER button located on the front panel to start up the screen. ...
-
Page 19: Chapter 4 Xcm-250 Features
XCM-250 Features Chapter 4 XCM-250 Features This chapter describes the features of XCM-250 monitor. The features of XCM-250monitor are as shown in Figure 4-1 after installed and powered on: Status Information SDI1 AFD CC 1080I59.94 Area Marker Safe Marker Audio Meter 1 2 3 4 5 6 7 8 Center Marker Wave Form... - Page 20 XCM-250 Features image. You can set whether to display it or not in MARKER menu. Audio Meter It is displayed for audio monitoring. You can set its groups, direction, position and mode in AUDIO menu. Timecode It is displayed at the bottom of the image, the format is HH:MM:SS:FF, if there is no timecode available, the monitor will display --:--:--:--.
-
Page 21: Front Panel Features
XCM-250 Features 4.1 Front Panel Features 4.1.1 Arrangement of Front Panel There are a series of buttons at the bottom of the screen, and these buttons are used to control the screen menu items. Figure 4.1-1 the Buttons in Front Panel As shown in Figure 4.1-1 the buttons are as follows: INPUT MENU... - Page 22 XCM-250 Features All of these buttons have indicators, the color of the indicator is different according to the button status, as shown in Table 4.1-1. Table 4.1-1 The Relationship of Buttons Status and Their Indicators Button Name Indicator Status Description Device is in standby status(The AUTO STANDBY function is OFF) POWER indicator will keep flashing for 60...
-
Page 23: Operation Of Front Panel
XCM-250 Features The monitor will be in Auto Standby mode under the following conditions: AUTO STANDBY mode is set to ON in CONFIG menu, and the POWER switch on the rear panel is turned on. Then, when the signal is disconnected or the monitor is detecting no input signal for more than 10 seconds, the monitor will enter into AUTO STANDBY mode. - Page 24 XCM-250 Features Figure 4.1-3 Correspondence between Source Menu and Interface User defined FUNCTION button. OPERATION: Press F1 to display the function menu list in the center of the screen, as shown in Figure 4.1-4. Toggle F1 button to change the value related to this function.
- Page 25 XCM-250 Features Use FUNCTION KEY menu to assign F1~F5 with the following commands: SCAN, NATIVE, ASPECT, BLUE ONLY, MONO, MARKER, H/V DELAY, AUDIO METER, FAST MODE, TC, IMD, MUTE, PBP, CC, FREEZE, WIN SELECT, FOCUS ASSIST, LUMA ZOOM CHECK, UNDEF. Refer to "5.1.9 FUNCTION KEY Menu"...
- Page 26 XCM-250 Features operations. It is UP button when working with MENU. Toggle this button to select the next item or increase the number. DOWN It is DOWN button when working with MENU. Toggle this button to select the next item or decrease the number. ENTER This button can achieve the following two situations: ...
-
Page 27: Rear Panel Features
XCM-250 Features Set these parameter values in the following position: BRIGHTNESS, CONTRAST, CHROMA. In Adjust Menu List on screen when pressing Enter key. In Adjust menu of network control page. After you have loaded the adjust menu list, it will be closed automatically if you do nothing operation with it in 10s. -
Page 28: Arrangement Of Rear Panel
XCM-250 Features 4.2.1 Arrangement of Rear Panel As shown in Figure 4.2-1, there are various input and output interfaces at the rear panel of XCM-250 monitor. Figure 4.2-1 The Rear Panel of XCM-250 Monitor The interfaces numbered from 1 to 8 in red dotted rectangle are described as follows: Power Switch Power Input... -
Page 29: Operations Of Rear Panel
XCM-250 Features Video Input: LINE1 IN Video Output: LINE1 OUT Video Input: LINE2(CVBS/Y) IN, feed the composited LINE2, and component Y signals. Video Output: LINE2(CVBS/Y) OUT, output the composited LINE2, and component Y signals. Video Input: LINE2(Pb/C) IN, feed the component Pb, and component C signals. - Page 30 XCM-250 Features Video Input Interface (BNC) It provides two SDI input interfaces, one is labeled as SDI1 IN, and the other is SDI2 IN. HDMI It provides one HDMI input interface, HDMI Type-A connector with a fastener compatible with DVI-D. Video Output Interface (BNC) It provides two SDI output interfaces.
- Page 31 XCM-250 Features Support for dynamic IMD and updating the new firmware. The Comparison of Pins and Input/output connectors for RS485 is shown as in Table 4.2-2: Table 4.2-2 The Comparison of Pins and Input/output connectors for RS485 PIN No. RS485 IN Terminal Signal RS485 OUT Terminal Signal Audio Input interface It provides four audio(2 pairs) input interfaces, 5dBu, impedance≥47K, RCA connector.
-
Page 32: Supported Signal Format
XCM-250 Features Signal Source Video Input Video Output LINE2(CVBS) LINE2(CVBS/Y) IN LINE2(CVBS/Y) OUT LINE2(CVBS/Y) IN LINE2(CVBS/Y) OUT LINE2(Y/C) LINE2(Pb/C) IN LINE2(Pb/C) OUT LINE2(CVBS/Y) IN LINE2(CVBS/Y) OUT LINE2(YPBPR) LINE2(Pb/C) IN LINE2(Pb/C) OUT LINE2(Pr) IN LINE2(Pr) OUT Figure 4.2-3 Video Input/Output Interfaces 4.3 Supported Signal Format The supported signal format for this device is as shown in Table 4.3-1: Table 4.3-1 Supported Signal Format... - Page 33 XCM-250 Features VIDEO HDMI YPBPR 480P60/59.94 576P50 720P24/23.97 720P25 720P30/29.97 720P50 720P60/59.94 1080SF24/23.97 1035I60/59.94 1080I50 ...
- Page 34 XCM-250 Features VIDEO HDMI YPBPR UXGA(1600X1200) UXGA+(1680X1050) WUXGA(1920X1080) WUXGA(1920X1200) ...
-
Page 35: Chapter 5 Functionality Of The Main Menu
Functionality of the Main Menu Chapter 5 Functionality of the Main Menu This chapter describes the structure and functionality of the main menu, and introduces how to modify and customize the menu settings. The main menu includes the following menu items, as shown in Figure5-1. Figure 5-1 Main Menu 5.1 Main Menu Press the MENU button at the bottom of the front panel, the main menu is... - Page 36 Functionality of the Main Menu The menu interface is divided into two panes: Main Menu List It contains the title of the Main menu and several sub-menu items. The title of this list is MAIN. Press UP or DOWN to access the corresponding menu item.
- Page 37 Functionality of the Main Menu MAIN INPUT SELECT SDI1 STATUS INPUT SELECT SDI2 MARKER LINE1 AUDIO LINE2 CVBS DISPALY HDMI CLOSED CAPTION NTSC SETUP CONFIG NTSC PHASE COLOR TEMP FOCUS ASSIST FUNCTION KEY FOCUS LEVEL FOCUS COLOR LUMA ZOOM CHECK KEY INHIBIT LUMA ZOOM LEVEL Figure 5.1-3 A Main Menu Item Is Selected...
-
Page 38: Status Menu
Functionality of the Main Menu The following will introduce the contents and functionality of these sub-menu items in sorts. 5.1.1 STATUS Menu The STATUS menu items are used to describe the current status information of the monitor, the menu items are as shown in Figure 5.1-6: MAIN STATUS INPUT... -
Page 39: Input Select Menu
Functionality of the Main Menu Items Default Value Domain Range Description UNDER Show fast FAST MODE OFF OFF/ON mode. Show MODEL XCM-250-3G production model. SERIAL Show serial XCM2502014090001 -- NUMBER number. Show IP ADDRESS 192.168.1.86 address. Show color COLOR 2015-1-5.4 version according to VERSION... - Page 40 Functionality of the Main Menu The relationship of Items, Default Value, Domain Range and Description of the sub-item is shown in Table 5.1-2: Table 5.1-2 The Description of INPUT SELECT Menu Items Default Items Domain Range Description Value SDI1 ON/OFF Enable/Disable SDI1 input.
- Page 41 Functionality of the Main Menu FOCUS ASSIST The FOCUS ASSIST function is used to display images on the screen with sharpened edges to help camera focus operation. The sharpened edges are the compared area whose luminance is beyond the reference level, and the edges are displayed in the pointed color.
-
Page 42: Marker Menu
Functionality of the Main Menu according to the line connection mode. When select a signal source format for LINE2, you can set the menu item INPUT SELECTLINE2 as CVBS, LINE2(Y/C) or LINE2(YPBPR), in addition, press INPUT button to pop up the source list for LINE2 selection. - Page 43 Functionality of the Main Menu Default Items Domain Range Description Value when the display aspect is 16:9, images show with the following scale: OFF: close area marker 15:9 14:9 Select the area marker AREA 13:9 aspect ratio according to MARKER ...
- Page 44 Functionality of the Main Menu Marker Illustration Description This marker enables easier checking the center CENTER CENTER portion’s focus. MARKER MARKER This marker displays two lines to identify an area AREA with a specified ratio. AREA MARKER MARKER This marker displays a rectangle to identify the SAFETY SAFETY...
-
Page 45: Audio Menu
Functionality of the Main Menu or BLENDING). The AREA MARKER, CENTER MARKER and SAFETY MARKER feature are available only when the MARKER item is set to ON. The safety marker area will change with the area marker. The cross hatch lines will display only in the single image or in PIP mode when CROSS HATCH is ON. - Page 46 Functionality of the Main Menu Default Items Domain Range Description Value AUDIO2: external HDMI/SDI1/SDI2, signal2 select only UNDEF: no signal UNDEF, AUDIO1 AUDIO2. When the audio source is Left speaker, select a SPEAK EBD CH1 EBD, the range of this item channel according to the OUT L is EDB CH1~ EDB CH16.
- Page 47 Functionality of the Main Menu Default Items Domain Range Description Value MODE1: simple audio meter MODE2: audio meter METER DIS Select displayed MODE1 with channel number MODE mode for audio meter. MODE3: audio meter with channel number and dB value Select reference...
- Page 48 Functionality of the Main Menu Figure 5.1-14 The Position of the Audio Meter On Screen The position of Meter is controlled by METER DIRECTION and METER POSITION, the position of the meter on the screen is as follows: BOT LEFT VERTICAL, BOT RIGHT VERTICAL, TOP LEFT VERTICAL, TOP RIGHT VERTICAL, BOTTOM HORIZONTAL and TOP HORIZONTAL.
-
Page 49: Display Menu
Functionality of the Main Menu The prerequisite for the available settings of the display mode and the position of audio meter is that the AUDIO METER is ON. 5.1.5 DISPLAY Menu The DISPLAY menu items are used to adjust the parameters displayed on the screen, the menu items are as shown in Figure 5.1-17: MAIN DISPLAY... - Page 50 Functionality of the Main Menu Default Items Domain Range Description Value Set whether to display AFD information. ON is an effective value to AFD OFF/ON DISPLAY DISPLAY item only if the value of STATUS DISPLAY is AUTO or MODE1 ...
-
Page 51: Close Caption Menu
Functionality of the Main Menu Input Signal Default Domain Range 720p 26~745 1080i50 1080i60/59.94 21~1123 1080sf23/23.97 1035i60 41~1120 1080p 42~1121 The comparison of a normal WFM/Vector and a Line WFM is as shown in Figure 5.1-18: LINE WFM Figure 5.1-18 The LINE WFM and the WFM ... - Page 52 Functionality of the Main Menu MAIN CLOSED CAPTION SDI CC LOG STATUS INPUT SELECT CLOSED CAPTION MARKER SDI CC TYPE AUTO1 AUDIO 608 CHANNEL SEL DISPALY CLOSED CAPTION CONFIG COLOR TEMP FUNCTION KEY KEY INHIBIT Figure 5.1-19 CLOSED CAPTION Menu The relationship of Items, Default Value, Domain Range and Description of the sub-item is shown in Table 5.1-7: Table 5.1-7 The Description of CLOSED CAPTION Menu Items...
-
Page 53: Config Menu
Functionality of the Main Menu Default Items Domain Range Description Value 608(VBI): Select to display the closed caption signal of the EIA/CEA-608 standards transmitted by using the line 21. Set the display mode for closed ... - Page 54 Functionality of the Main Menu Default Items Domain Range Description Value Set whether to display FAST MODE OFF OFF/ON in fast mode. FILM MODE Set whether to detect OFF/ON DETECT film mode. Set the display mode OFF/PBP/PIP of the multiple images TYPE /WIPE/BLENDING on screen.
- Page 55 Functionality of the Main Menu Default Items Domain Range Description Value Enable/disable SCREEN OFF/ON display in the screen SAVER saver. OFF/WHITE/RED/GREEN Set whether to display WIPE LINE /BLUE/YELLOW/CYAN wipe line, DISPLAY /MEGENTA/BLACK/ select a color for it. Display Multiple Images This monitor allows simultaneous display of two input signals on the monitor’s screen.
- Page 56 Functionality of the Main Menu The two pictures generated by two input signals separately are displayed one in another. One is displayed on full screen, called as the main picture, and the other is displayed in an inset window, called as the slave picture.
- Page 57 Functionality of the Main Menu picture is as shown Figure 5.1-24: Main Slave Picture Picture Figure 5.1-24 PBP Mode In PBP mode, it displays the WFM or Audio Meter only for the signal of the current picture. The current picture is labeled by a triangle, as shown in Figure 5.1-24, at the bottom center of the picture.
- Page 58 Functionality of the Main Menu Figure 5.1-26 Position Relationship of WFM and the Current Picture WIPE The area of the two pictures to be displayed is selected using a vertical WIPE pattern. This function is convenient when picture detail of the two images must be examined on a pixel basis, and it is normally used to review still images.
- Page 59 Functionality of the Main Menu (2) Set Display Mode The selection for picture & picture display mode contains the following items: OFF, PBP, PIP, WIPE and BLENDING, you can switch the selection as instructed below: Method 1: By menu item. Select the menu item Config SUB IN TYPE, use ENTER, UP or DOWN key to select a display mode.
- Page 60 Functionality of the Main Menu The input signal information of the main picture displays at the top left corner of the screen, and the one of the slave picture displays at the top right corner of the screen. Set the signal source for the main picture: press INPUT key on the front panel to display the SOURCE list, select an input signal source as the main source.
- Page 61 Functionality of the Main Menu The INTERLACE MODE function is not available in PIP, PBP, WIPE, FLIP, or BLENDING mode. The INTERLACE MODE function is available for SDI inputs. FLIP Mode The input signal has been inverted horizontally by a mirror type in FLIP Display mode.
- Page 62 Functionality of the Main Menu the front panel, meanwhile, the POWER indicator starts flashing rapidly for one minute (it flashes in turn with red, green, yellow, white color) before the screen saver is activated. After that, the flashing goes slowly in red when the screen saver is activated. ...
-
Page 63: Color Temp Menu
Functionality of the Main Menu the signal is disappeared for 10s. The length of LOCK NUMBER is up to 8 characters, you can use the combination of these characters: number (0 to 9) and letter (A to Z). Press ENTER to edit the LOCK NUMBER, than use UP or DOWN to select characters, than press ENTER to go to next character, press MENU to exit editor. - Page 64 Functionality of the Main Menu Items Default Value Domain Range Description USER2: Customized by user D55: 5500K D61: 6100K D65: 6500K D93: 9300K D-CINE RED GAIN 0~256 Adjust the Red Gain GREEN 0~256 Adjust the Green Gain GAIN BLUE GAIN 128 0~256...
-
Page 65: Function Key Menu
Functionality of the Main Menu The items about RED/GREEN/BLUE GAIN and BIAS are available only in USER1 and USER2 mode. If the COLOR TEMP is set to USER1 or USER2 with customized settings, you can select the menu item COLOR TEMP RESET command to restore product originals for Gains and Offsets, and press ENTER button to confirm the reset operation. - Page 66 Functionality of the Main Menu SCAN, NATIVE, ASPECT, BLUE ONLY, MONO, MARKER, H/V DELAY, AUDIO METER, FAST Set a function to SCAN MODE, TC, IMD, MUTE, PBP, F1 button CC, FREEZE, WIN SELECT, FOCUS ASSIST, LUMA ZOOM CHECK, UNDEF Set a function to NATIVE the same as F1 F2 button...
- Page 67 Functionality of the Main Menu Input Signal Default Value Range Input Signal Formats 2.39:1 720P25 1080I60/59.94 720P30/29.97 1080P24/23.97 720P50 1080P25 720P60/59.94 1080P30/29.97 1080SF24/23.97 1080P50 1035I60/59.94 1080P60/59.94 2048X1080PSF24/23.97 2048X1080P30/29.97 2048X1080PSF25 2048X1080P48/47.94 1.896:1 1.896:1 2048X1080PSF30/29.97 2048X1080P50 2.39:1 2048X1080P24/23.97 2048X1080P60/59.94 2048X1080P25 FREEZE Active this function to freeze the current frame displayed, press the...
- Page 68 Functionality of the Main Menu Value Items Special Value Value Range Description mode Enable disable display markers, MARKER ON/OFF function is as the same as the setting of the menu item “MARKER”” MARKER” H DELAY Enable disable H DELAY H/V DELAY V DELAY...
-
Page 69: Gpi Menu
Functionality of the Main Menu Value Items Special Value Value Range Description H FLIP Press F1~F5 button to activate the assigned function and adjust the parameter value. The SCAN mode or the ASPECT mode is not selectable when Native mode is set to ON. - Page 70 Functionality of the Main Menu The relationship of Items, Default Value, Domain Range and Description of the sub-item is shown in Table 5.1-15: Table 5.1-15 The Description of GPI Menu Items Items Default Value Domain Range Description UNDEF, AREA MARKER, CENTER MARKER, SAFETY MARKER, ASPECT, NATIVE, OVER SCAN, UNDER SCAN,...
-
Page 71: Imd Menu
Functionality of the Main Menu Items Function Trigger MARKER center marker. SAFETY Enable/Disable the display of Low: Enabled; High: Disabled MARKER safety marker. ASPECT Set the aspect ratio. Low: 16:9; High: 4:3 Switch between MONO Low: MONO; High: NORMAL monochrome and color. Switch scan mode between OVER SCAN Low: OVER;... - Page 72 Functionality of the Main Menu MAIN IMD DISPLAY STATUS INPUT SELECT IMD COLOR MARKER IMD CHARACTER XXXXXXXXXXXXXXXX AUDIO IMD PROTOCOL LOCAL DISPALY IMD ID CLOSED CAPTION IMD NAME XXXXXXXXXXXXXXXX CONFIG BAUD RATE 38400 COLOR TEMP LED TALLY FUNCTION KEY OSD TALLY MODE IMD TALLY MODE TALLY SOURCE STANDARD...
- Page 73 Functionality of the Main Menu Default Items Domain Range Description Value Set the ID number for IMD ID 0~255 each monitor Set an IMD name for IMD NAME XXXXXXXX each screen. 2400/4800/9600/19200 Select a baud rate for BAUD RATE 38400 /38400/57600/115200 communication.
- Page 74 Functionality of the Main Menu Green TALLY Illustration TALLY TALLY TALLY MODE If IMD DISPLAY item is ON, the IMD CHARACTER in the black bar will display on the center bottom of the screen. The length of IMD NAME and IMD CHARACTER is up to 16 characters, alphabets, numbers and special symbols are available.
-
Page 75: Key Inhibit Menu
Functionality of the Main Menu 5.1.12 KEY INHIBIT Menu The KEY INHIBIT menu item is used to lock the setting so that they can’t be changed by an unauthorized user, and the menu item is as shown in Figure 5.1-37: MAIN KEY INHIBIT KEY INHIBIT... -
Page 76: Menu Settings
Functionality of the Main Menu 5.2 Menu Settings When checking or modifying the value of the menu item, cooperating with the following buttons: MENU, UP, DOWN, ENTER. Operations to the Main menu Display the Main Menu Press MENU button to enter into the main menu, it displays at the top left corner of the screen. - Page 77 Functionality of the Main Menu Operations to sub-menu item Display the sub-menu item After display the Main menu, press UP or DOWN button to select a menu item, and the right part displays its sub-menu items according to the current selected menu item. ...
- Page 78 Functionality of the Main Menu The value in white color is modifiable, and the value in blue color is unmodifiable. Selecting the Menu Language You can select one of languages (English or Chinese) for displaying the menu. The default language for the menu is ENGLISH. The following will teach you how to switch to Chinese.
- Page 79 Functionality of the Main Menu Step 3 Confirm the modification of the value of sub-item Click DOWN button to select the sub-item LANGUAGE to Chinese, as shown in Figure 5.2-4, press ENTER button to confirm the modification. 主菜单 系统配置 快速模式 关闭...
-
Page 81: Chapter 6 Network Control
Network Control Chapter 6 Network Control XCM-250 supports network interface. Connect a computer with XCM-250 through this interface to achieve the network control to XCM-250. The network address of the computer which is connected with XCM-250 and the network address of XCM-250 must be in the same segment. This chapter will introduce how to set and check the parameters of XCM-250 in Internet Explorer. -
Page 82: Menu Control
Network Control 6.2 Menu Control Open the management interface as shown in Figure 6.2-1, the menu items listed in the left part are almost as the same as the main menu items. Figure 6.2-1 Management Interface As shown in Figure 6.2-1, the management interface is divided into the following parts: Input Source Selection Button It is used to selecting an input source as the input signal, such as: SDI1,... - Page 83 Network Control display are mostly as the same as the menu items listed in navigation menus except SYSTEM, ADJUST and VIDEO DISPLAY. Parameter list It shows the parameter names, values and operation buttons of the selected navigation menu, as shown in the red rectangle in Figure 6.2-2. The title in the yellow rectangle of the parameter list and the parameter list will change with the navigation menu when switched.
-
Page 84: Adjust Menu
Network Control 6.2.1 ADJUST Menu It will introduce ADJUST menu. Click ADJUST button at the left navigation menu list, it will display the adjust parameters, as shown in Figure 6.2-3: Figure 6.2-3 ADJUST Menu The relationship of Items, Default Value, Domain Range and Description of the sub-item is shown in Table 6.2-1: Table 6.2-1 The Description of ADJUST Menu Items Default... -
Page 85: Video Display Menu
Network Control Default Items Domain Range Description Value normal mode is actually the color mode Current Current Audio Level Enable/disable the audio MUTE Audio Level /MUTE monitor Enable/disable FREEZE OFF/ON current picture stopped or played. Set the picture displaying MAIN MAIN/SUB mode in full mode or in SOURCE... -
Page 86: System Menu
Network Control Table 6.2-2 The Description of VIDEO DISPLAY Menu Items Items Default Value Domain Range Description NORMAL SCAN NORMAL OVERSCAN Set the scan mode UNDERSCAN Whether to display NATIVE OFF/ON the picture dot by dot 6.2.3 SYSTEM Menu It will introduce SYSTEM menu. -
Page 87: Other Menus
Network Control Table 6.2-3 The Description of System Menu Items Domain Items Default Value Description Range 192.168.1.86 IP address MASK 255.255.255.0 Subnet mask Gateway 192.168.1.1 Gateway address LOCK NUMBER XXXXXX Set the Serial Number MPU Version Product information FPGA Version Product information NCU Version Product information... - Page 88 Network Control Figure 6.3-1 Parameter List for AUDIO MAIN AUDIO AUDIO SOURCE AUDIO1 STATUS INPUT SELECT SPEAK OUT L EBD CH1 MARKER SPEAK OUT R EBD CH1 AUDIO AUDIO METER DISPALY METER SELECT CH1-2 CLOSED CAPTION METER DIRECTION HORIZONTAL CONFIG METER POSITION COLOR TEMP METER DIS MODE...
- Page 89 Network Control Figure 6.3-3 Display the Drop Down Value List of Meter Select(S) Click button to confirm the selection and the page is refreshed. You can check the modification on the screen menu, the results are the same as shown in Figure 6.3-4 and Figure 6.3-5: Figure 6.3-4 Modify the Value of a Parameter...
- Page 90 Network Control The volume can be checked and modified in adjust menu on screen adjustment, or in Volume item of ADJUST menu in management interface. MAIN AUDIO AUDIO SOURCE AUDIO1 STATUS INPUT SELECT SPEAK OUT L EBD CH1 MARKER SPEAK OUT R EBD CH1 AUDIO...
-
Page 91: Chapter 7 Specifications
Specifications Chapter 7 Specifications Product detailed information Specification Values Picture performance Picture size (Diagonal) 24.5” Screen Dimension 580(H) x 404(V) x 57.7(D) Aspect Ratio 16:9 Display Area(mm) 543.36(H)×305.64(V) 178°(H)x178°(V) Viewing Angle Color Depth 1.073G colors (RGB 10-bits) Resolution 1920(H)×1080(V) 0.283(H)×0.283(V) Pixel Pitch(mm) Pixel Efficiency 99.99%... - Page 92 Specifications Specification Values SDI 75Ω(unbalanced) Input/Output Impedance LINE 75Ω(loop-through, with automatic termination) 3G –SDI: 70m (max.) SDI Transmission Distance HD –SDI: 100m (max.) SD-SDI: 200m (max.) Differential Phase <1.5° General Input: AC 100~240V/50/60Hz Power Adapter Output: DC 24V 6.67A Power Consumption Approx.120W (max.)/ Approx.65W(avg.) Operating Temperature 0°C~35°C...
-
Page 93: Specifications
Specifications NORMAL SCAN OVER SCAN UNDER SCAN NATIVE ASPECT Input Signal RATIO Input Output Input Output Input Output Input 16:9 1920X1080 1920X1080 1824X1026 720P30/29.97 1280X720 1216X684 1280X720 1280X720 2.39:1 1920X803 1920X803 1824X763 16:9 1920X1080 1920X1080 1824X1026 720P50 1280X720 1216X684 1280X720 1280X720 2.39:1 1920X803... - Page 94 Specifications NORMAL SCAN OVER SCAN UNDER SCAN NATIVE ASPECT Input Signal RATIO Input Output Input Output Input Output Input 0/29.97 2.39:1 1920X803 1920X803 1824X763 1.896:1 1920X1013 1920X1013 1824X962 2048X1080P4 2048X1080 1946X1026 2048X1080 2048X1080 8/47.94 2.39:1 1920X803 1920X803 1824X763 1.896:1 1920X1013 1920X1013 1824X962 2048X1080P5...
- Page 95 Specifications Figure 7-2 Rear Panel(Unit: mm) Figure 7-3 Top View(Unit: mm) Figure 7-4 Side View(Unit: mm)
- Page 96 Specifications Specifications are subject to change without notice. ------------------No Text Below------------------...
- Page 97 FOR MORE INFORMATION PLEASE VISIT: http://www.osee-dig.com/ OSEE TECHNOLOGY CO., LTD. No.22 Building, No.68 zone, Beiqing Road, Haidian District, Address: Beijing, China Tel: (+86) 010-62434168 (+86) 010-62434169 Fax: OSEE AMERICAS, LTD. 43218 Christy Street Fremont, CA 94368 Address: Toll Free: 866-625-6106...
Need help?
Do you have a question about the XCM-250-OLED and is the answer not in the manual?
Questions and answers