Table of Contents
Advertisement
Quick Links
Advertisement
Table of Contents

Subscribe to Our Youtube Channel
Related Manuals for OSEE LMD9014


Summary of Contents for OSEE LMD9014
- Page 1 LMD9014 USER MANUAL...
- Page 2 PRODUCT INFORMATION MODEL: LMD9014 LCD MONITOR Version: V020000 Release Date: 2010-4-23 COMPANY NAME OSEE Americas, Ltd. CONTACT INFORMATION 43218 CHRISTY STREET FREMONT, CA. 94538 Toll Free: 866-625-6106 Tel: 510-996-4499 Fax: 510-996-4492 Email: info@oseeamericas.com Web: www.oseeamericas.com...
- Page 3 The user manual applies to the following device types: l LMD9014-HSC l LMD9014-SC l LMD9014-V The images of LMD9014-HSC are adopted in the following descriptions. Any of the different specifications between the device types are elaborated. Before reading the manual, please confirm the device type.
-
Page 4: Table Of Contents
Safety Precaution for Use .................. 2 Chapter 3 Unpacking and Installation ................3 Chapter 4 Using the LMD9014 ................... 4 4.1 Status Display of the Screen ......................4 4.2 Front Panel Controls ........................5 4.3 Quick Button Descriptions ......................7 4.3.1... -
Page 5: Chapter 1 Product Overview
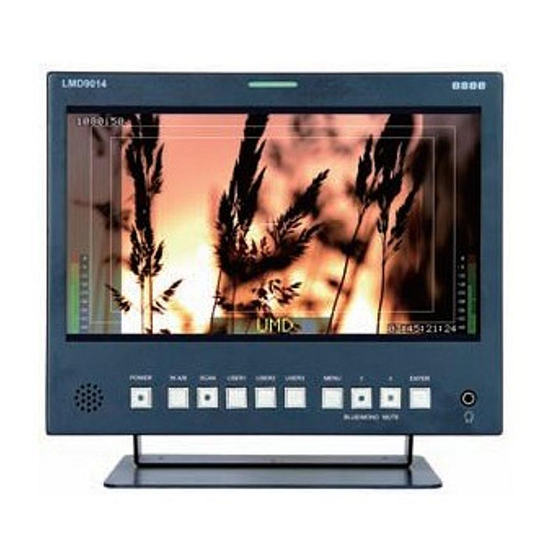
Chapter 1 Product Overview The LMD9014 is a 4U Standalone LCD monitor that offers video and audio monitoring with high resolution of 800x480. The unit is equipped with full digital processing technology, and its screen features anti-glare. The model accepts HD-SDI, SD-SDI and analog composite signal. A high display quality of all video signals can be ensured by full digital processing. -
Page 6: Chapter 2 Safety Precaution For Use
LMD9014 LCD MONITOR User Manual Chapter 2 Safety Precaution for Use Read and keep these instructions. Heed all warnings. Follow all instructions. About the Position Do not block any ventilation openings. Do not use this unit near water. Do not expose the unit to rain or moisture. -
Page 7: Chapter 3 Unpacking And Installation
Connect A.C. Mains power using the included power cord. Please ensure an Earth ground present to ensure proper operation of the unit. Fasten the power protect accessory. As a final step turn on each screen of the LMD9014 by depressing the power switch located on the front of the unit. -
Page 8: Using The Lmd9014
3. Safe Areas: Multiple safe areas are configurable in the MAIN Menu 4. Audio Meters: Levels for the audio. For LMD9014-SC and LMD9014-V, only two meters on the left side. 5. UMD: The MAIN Menu provides settings to customize the (In-Monitor Display) text area to show a line of characters, numbers, and/or some symbols. -
Page 9: Front Panel Controls
LMD9014 LCD MONITOR User Manual Ø Referring to the circumstance of no sync ( power on): Will indicate on the top left hand of screen: IN A: NO SYNC On the bottom of screen will UMD and METER be shown, but the display of UMD and METER is subject to the current main menu setting. - Page 10 LMD9014 LCD MONITOR User Manual 4/5/6: USER1~ USER3 “USER1~ USER3” serve as the quick-button; its function can be assigned in the main MENU. (For more information, please refer to “Chapter 4.3.2”) MENU Press to display the main menu. (For more information, please refer to “Chapter 4.3.3” and Chapter5)...
-
Page 11: Quick Button Descriptions
LMD9014 LCD MONITOR User Manual 4.3 Quick Button Descriptions 4.3.1 ENTER BUTTON When MENU is not used, you can press ENTER to regulate the following parameters: VOLUME, BRIGHTNESS, CONTRAST, SATURATION, SHARPNESS, and HUE. Press ENTER six times, parameters will cycle. You can get the exact value combined with buttons (down). -
Page 12: User Manual
LMD9014 LCD MONITOR User Manual The different apparatus model includes different user menu items. The options are as follows. (The underlined value means the DEFAULT value.) User Menu Items MODEL LMD9014-V LMD9014-SC LMD9014-HSC BUTTON ITEM USER 1 l SD ASPECT* l... -
Page 13: Menu Button
LMD9014 LCD MONITOR User Manual H/V DELAY, you’d better set “USER1” at H/V DELAY. 4.3.3 MENU BUTTON When you want to change the value of a parameter, you may use MENU, and you can follow four steps. Ø Step 1: Press MENU, and you can enter the main MENU. - Page 14 LMD9014 LCD MONITOR User Manual IN A TALLY IN HD-SDI/SDI/Analog Battery Holder DB-9 Male Composite Input IN B IN B IN A HD-SDI/SDI/Analog Composite Input VIDEO DC IN Four External Audio Connectors AUDIO 12V DC from Ø Tally IN connector (DB9 male) :...
-
Page 15: Main Menu Structure
LMD9014 LCD MONITOR User Manual Ø Note: For more information of Power Supply and Battery Holder, please refer to chapter 7. Chapter 5 Main Menu Structure The descriptions of main menu structure are as follows: (The operation of main menu refers to Chapter 4.3.3) The main menu includes seven sub-menu icons. -
Page 16: Audio Sub-Menu
“OFF” to “ON”,a reverse cannot be allowed. MON SOURCE MET 1…MET 4 Used to set the monitoring audio source from among audio meters. Note: For LMD9014-HSC, there are four audio meters (MET1~MET4). For LMD9014-SC/ LMD9014-V, there are only two audio meters (MET1~MET2). VOLUME 00dB…-30dB…MUTE Used to adjust the volume value. - Page 17 LMD9014 LCD MONITOR User Manual audio meter. Only used for LMD9014-HSC. TEST LEV -18dB…-20dB Used to set the test level of audio meter. AUDIO (2/5) IN A: MET 1 NONE…VU Used to set the audio meter types with the …PK…VU+PK input signal from INA connector.
-
Page 18: Marker Sub-Menu
“EBD1…EBD16” and “EXT1L…EXT2R”. Ø For LMD9014-V, only four options: “EXT1L…EXT2R” IN B: MET 1-R EBD2 For the input signal from INB connector, it is used to assign the audio channel for right audio... -
Page 19: Osd Sub-Menu
LMD9014 LCD MONITOR User Manual …1.85:1…15:9 marker. No function in h/v delay …14:9…13:9 mode and in 4:3 aspect ratio for …4:3 SD SDI input. Note: 1. SAFE MARKER Ÿ When SAFE MARKER is set to ON, the value of “CENTER”,“90%”,“80%”changes between ON, OFF. - Page 20 LMD9014 LCD MONITOR User Manual UMD NAME(S/N) S00000 16 Characters totally. UMD NAME is in compliance with IMAGE VIDEO Protocol UMD TLY MODE T1…T2…T1T2…T2T1 UMD TLY MODE is in …T1-…T2-…T1T2- compliance with IMAGE …T2T1-… VIDEO Protocol UMD BAUD RATE 2400…4800…9600…...
- Page 21 LMD9014 LCD MONITOR User Manual *4. COLOR Use this setting to choose the color of the UMD text. Available colors are red, green, yellow and white. This setting does not affect text color when using UMD text via the Image Video or TSL protocols (text color is set via the protocols).
-
Page 22: User Control Sub-Menu
LMD9014 LCD MONITOR User Manual *9. UMD TLY Mode Use this setting when using Image Video tally control. Choose one of the following settings, in conjunction with the Image Video controlling device. T1, T2, T1T2, T2T1, T1-, T2-, T1T2-, T2T1-. -
Page 23: User Config Sub-Menu
LMD9014 LCD MONITOR User Manual SD ASPECT: The screen Aspect Ratio. The screen Aspect Ratio value: 4:3 and 16:9. When the HD-SDI signal input, it will display in 16:9 by default. SD ASPECT function 16:9 Type/ input signal LMD9014-HSC HD-SDI input signal ü... -
Page 24: Technical Specifications
Operating Temperature 0° C to 70° C 2 Auto-sensing HD-SDI / SD-SDI/ Analog Composite inputs (BNC); Inputs 2 pairs External analog audio inputs Signal Format LMD9014 are compatible with the following Signal Formats: Product Number Signal Formats NTSC、PAL 480i-59.94、576i-50 1035i-59.94、1035i-60、1080i-50、1080i-59.94、1080i-60、1080p-23.97、... - Page 25 LMD9014 LCD MONITOR User Manual The relationships between the actual display form (on the top left of the screen)and input signal format are as follows: Signal Format Support Form Display Form 1080/60I 1080I60 1080/60I 1080/59.94I 1080I59.94 1080/50I 1080/50I 1080I50 1080/30P...
-
Page 26: Side View
LMD9014 LCD MONITOR User Manual Dimensions: Front View Unit: mm Side View Unit: LMD9014 POWER IN A/B SCAN USER1 USER2 USER3 MENU ENTER BLUE/MONO MUTE Rear View Unit: mm IN B IN A VIDEO DC IN AUDIO —22—... -
Page 27: Chapter 7 Supplying The Power
LMD9014 LCD MONITOR User Manual Chapter 7 Supplying the power An Anton/Bauer or V-mount type of battery pack (Optional units) or an external DC power supply can be used to power this monitor. u Using the Anton/Bauer type of battery pack Install the Anton/Bauer type of battery pack. -
Page 28: Chapter 8 Warranty For Lcd Monitor
This warranty is extended to the first consumer only, and proof of purchase is necessary to honor the warranty. If there is no proof of purchase provided with a warranty claim, osee reserves the right not to honor the warranty set forth above. Therefore, labor and parts may be charged to the consumer.
Need help?
Do you have a question about the LMD9014 and is the answer not in the manual?
Questions and answers