Table of Contents
Advertisement
Quick Links
Advertisement
Table of Contents

Subscribe to Our Youtube Channel
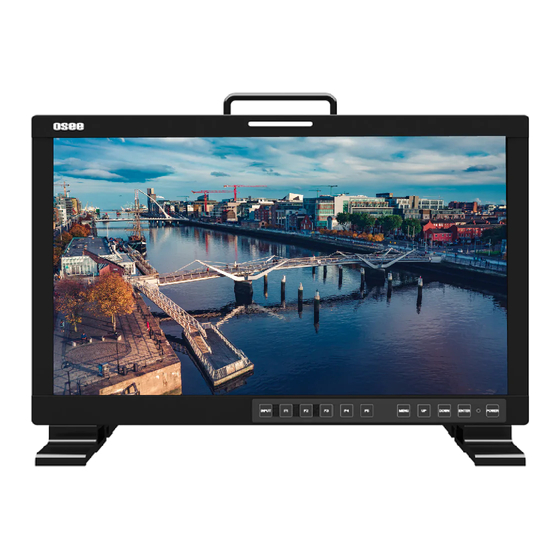
Related Manuals for OSEE LCM170-E Series


Summary of Contents for OSEE LCM170-E Series
- Page 1 LCM156-E/LCM170-E/ LCM215-E/LCM230-E/ LCM240-E Series LCD Monitor User Manual...
- Page 3 LCM156-E/LCM170-E/LCM215-E/ LCM230-E/LCM240-E Model: Series LCD Monitor V010101 Version: Release Date: January 11th, 2018 Company OSEE TECHNOLOGY LTD. Contact Information OSEE TECHNOLOGY CO., LTD. No.22 Building, No.68 zone, Beiqing Road, Haidian District, Address: Beijing, China 100094 Post Code: (+86) 010-62434168 Tel: Fax: (+86) 010-62434169 http://www.osee-...
-
Page 4: Contents
About this manual Important The following symbols are used in this manual: The further information or know-how for described subjects above which helps user to understand them better. The safety matters or operations that user must pay attention to when using this product. -
Page 5: Table Of Contents
Contents Contents ......................I Chapter 1 Safety ..................... 1 Chapter 2 Unpack and Installation ............... 5 Chapter 3 Locations and Function of Parts and Control ......9 3.1 Front Panel ..................9 3.1.1 Location of Control Buttons .............. 9 3.1.2 Function of Control Buttons .............. 9 3.2 Rear Panel .................. -
Page 7: Chapter 1 Safety
Safety Chapter 1 Safety FCC Caution Any Changes or modifications not expressly approved by the party responsible for compliance could void the user's authority to operate the equipment. This device complies with part 15 of the FCC Rules. Operation is subject to the following two conditions: (1) This device may not cause harmful interference, and (2) this device must accept any interference received, including interference that may cause undesired operation. - Page 8 Safety Warnings: Read, keep and follow all of these instructions for your safety. Heed all warnings. Device Install in accordance with the manufacturer's instructions. Do not beat with a hard object or scratch the LCD display. Do not make the freeze picture displaying on the screen time too long, otherwise, it will leave the afterimage on the screen.
- Page 9 Specifications are subject to change without notice. Do not use attachments or accessories not recommended by the manufacture. Use of inadequate attachments may result in serious accidents. Do not overload AC outlet or extension cord. Overloading can cause fire or serious electric shock.
-
Page 11: Chapter 2 Unpack And Installation
Unpack: When unpacking the LCM156-E monitor, please verify that none of the components listed in Table 3.1 are damaged or missing. If there are any components missing, please contact your distributors or OSEE for it. Table 3-1 Packing List Item... - Page 12 Unpack and Installation Figure 2-1 Assemble Pedestal of LCM156-E Figure 2-2 Assemble Pedestal of LCM170-E...
- Page 13 Unpack and Installation Figure 2-3 Assemble Pedestal of LCM230-E Connect required cables for signal input and output. For BNC connections use 75Ω rated connectors. Connect the power source using the included power supply or optional battery adapter and D-Tap to Power cable when not using Land Line power.
-
Page 15: Chapter 3 Locations And Function Of Parts And Control
Locations and Function of Parts and Control Chapter 3 Locations and Function of Parts and Control 3.1 Front Panel 3.1.1 Location of Control Buttons The control buttons are at the bottom of the screen, as shown in Figure 3.1-1. Figure 3.1-1 Buttons in Front Panel INPUT: Input selection button UP: Menu operation button F1: Function button... - Page 16 Locations and Function of Parts and Control SDI1: monitor the SDI input as the active signal through the SDI1 IN connector. SDI2: monitor the SDI input as the active signal through the SDI2 IN connector. LINE1(CVBS): monitor the Composite Analog Input as the active signal through the LINE1 IN connector.
- Page 17 Locations and Function of Parts and Control menu. OPERATION: for example, press F1 to display the FUNCTION menu at the left bottom corner of the screen, as shown in Figure 3.1-3. Toggle F1 button to change the value related to this function without the setting value display. FUNCTION FLASE COLOR NATIVE...
- Page 18 Locations and Function of Parts and Control UP Used to navigate on-screen menu. Toggle this button to select the previous item or increase the item value. DOWN Used to navigate on-screen menu. Toggle this button to select the next item or decrease the item value. ...
-
Page 19: Rear Panel
Locations and Function of Parts and Control push. Power Button and Indicator Used to turn the power to place the monitor into standby mode/off. When the device is off(Red), press the POWER button to turn it on. The power indicator lights in green. Flashing green indicates no signal is present (refer to section 3.1.1) When the device is on, press the POWER button to turn it off. - Page 20 Locations and Function of Parts and Control follows: Power Switch Press this part to switch on or switch off the power. Push the button to the “-” icon to switch on the power. Push the button to the “” icon to switch off the power. ON OFF Power Input Plug the power supply to this interface to provide power to the device.
- Page 21 Locations and Function of Parts and Control A component analog video input LINE1 IN interface. A composite analog video input Feed the component Pb, or interface. component C signal. LINE1 OUT LINE2(Pb/C) OUT A composite analog video output A component analog video output interface.
- Page 22 Locations and Function of Parts and Control Figure 3.2-2 Video Input/Output Interfaces The real panel of LCM170-E is as same as the LCM230-E’s, as shown below: Figure 3.2-3 The Rear Panel of LCM170-E Monitor Power Switch Press this part to switch on or switch off the power. Push the button to the “-”...
- Page 23 Locations and Function of Parts and Control ON OFF Power Input-AC IN Plug the power supply to this interface to provide power to the device. The specification is 100~240V 50/60Hz AC. Power Input- DC IN 14.5V One DC input interface from battery powered, 14.5V DC. Power Output-DC OUT 12V/BATT 1.5A One DC output interface, 1.5A DC.
-
Page 24: Supported Signal Format
Locations and Function of Parts and Control A 10/100M Ethernet interface. Provide connection to a computer for external control. Only use the adapter and the power cord specified by the manufacture for your safety! 3.3 Supported Signal Format The supported signal format for this device is as shown in Table 3.3-1: Table 3.3-1 Supported Signal Format VIDEO HDMI... - Page 25 Locations and Function of Parts and Control VIDEO HDMI YPBPR 2048X1080PSF25 2048X1080PSF30/29.97 2048X1080P24/23.98 2048X1080P25 2048X1080P30/29.97 2048X1080P48/47.94 2048X1080P50 2048X1080P60/59.94 VGA(640X480) SVGA(800X600) XGA(1024X768) SXGA(1280X1024) ...
-
Page 27: Chapter 4 Menu Operations
Menu Operations Chapter 4 Menu Operations This chapter describes the structure and functionality of the On-Screen Menu, and introduces how to modify and customize the menu settings. The Main Menu consists of the following sections: STATUS, INPUT SELECT, MARKER, AUDIO, DISPLAY, CLOSED CAPTION, CONFIG, LOOK PROFILE, FUNCTION KEY and KEY INHIBIT, as shown in Figure5-1. -
Page 28: Main Menu
Menu Operations AFD Information: Set by DISPLAY AFD Display item. CC Information: Set by CLOSED CAPTION menu. Marker Information: including Area Marker, Center Marker and Safety Maker, and set by Marker menu. Audio Meter: Set by Audio menu. Wave Form: Set by DISPLAY menu. Time Code: Set by DISPLAY menu. - Page 29 Menu Operations and press UP or DOWN button again to select your target sub-menu item which you want to modify its value. 4. Press Enter button to confirm the selection of your target sub-menu item, and press UP or DOWN button to adjust its value from its sub-menu item list. 5.
-
Page 30: Status Menu
Menu Operations If the KEY INHIBITKEY INHIBIT is set to be ON, all items will not be displayed except KEY INHIBIT item. To change any one of the items, you should turn the KEY INHIBITKEY INHIBIT to be OFF first. Refer to "4.1.10 KEY INHIBIT Menu"... -
Page 31: Input Select Menu
Menu Operations Items Default Value Description LOOK PROFILE D65 Rec709 Show the LOOK PROFILE Feature. ANAMORPHIC 16:9 Show the aspect ratio of the picture. FAST MODE Show the fast mode. MODEL LCM156-E Show the production model. SERIAL LCM1562016020200 Show the serial number. NUMBER IP ADDRESS 192.168.1.86... - Page 32 Menu Operations Default Items Domain Range Description Value LINE1 ON/OFF Enable/Disable LINE1 input. CVBS LINE2(Y/C) Enable/Disable LINE2 input, and LINE2 LINE2(YPBPR) select the input source format. HDMI ON/OFF Enable/Disable HDMI input. 0: the 0 setup level is used mainly in Japan.
- Page 33 Menu Operations Default Items Domain Range Description Value ZEBRA Set the reference level of detecting 0~100 LEVEL luminance. FOCUS ASSIST The FOCUS ASSIST function is used to display images on the screen with intensified edge to help camera focus operation. The intensified edges are those areas whose difference value exceeds the reference focus level (FOCUS LEVEL), and the intensified edge are displayed in the designated color set by FOCUS COLOR.
-
Page 34: Marker Menu
Menu Operations LINE2 Select input source format for LINE2 among LINE2(CVBS), LINE2(Y/C) and LINE2(YPBPR). For LINE2(CVBS) interface, LINE2(Y/C) interface and LINE2(YPbPr) interface share the same group of physical interfaces, select the signal source format for LINE2 according to the cable connection mode. To select a signal source format for LINE2, you can set the menu item INPUT SELECTLINE2 to be LINE2(CVBS), LINE2(Y/C) or LINE2(YPBPR), in addition, press INPUT button to pop up the SOURCE MENU for LINE2 selection. - Page 35 Menu Operations MAIN MARKER MARKER STATUS AREA MARKER INPUT SELECT CENTER MARKER MARKER SAFETY MARKER AUDIO MARKER LEVEL DISPLAY MARKER MAT CLOSED CAPTION CROSS HATCH CONFIG LOOK PROFILE FUNCTION KEY KEY INHIBIT Figure 4.1-9 MARKER Menu The relationship of Items, Default Value, Domain Range and Description of the sub-item is as shown in Table 4.1-3: Table 4.1-3 The Description of MARKER Menu Items Default...
- Page 36 Menu Operations Default Items Domain Range Description Value MARKER marker which represents the center of the image. Select to display and control the SAFETY size of the safety area, that is, MARKER the effective screen area. ...
- Page 37 Menu Operations Marker Illustration Description This marker displays multiple vertical and horizontal lines to CROSS help when users check the CROSS HATCH HATCH composition of a picture. MARKER MAT The Marker Mat darkens the outside area of the marker setting display area. When Marker Mat is set as OFF, the outside area of marker is transparent.
-
Page 38: Audio Menu
Menu Operations 4.1.4 AUDIO Menu The AUDIO menu items are used to set your audio source, audio level meter display preferences, the menu items are as shown in Figure 4.1-11: MAIN AUDIO STATUS AUDIO SOURCE INPUT SELECT SPEAK OUT L EBD CH1 MARKER SPEAK OUT R... - Page 39 Menu Operations Items Default Value Domain Range Description this item is EBD CH1~ speaker when SDI signal is EBD CH16. input. AUDIO Set whether to display the OFF/ON METER audio level meter. CH1-2 Used to select the audio ...
- Page 40 Menu Operations Items Default Value Domain Range Description -6dB -4dB -2dB AUDIO LEVEL METER The appearance of Audio Level Meter is as shown in Figure 4.1-12: Figure 4.1-12 Audio Level Meter METER SELECT item and METER DIS MODE item control the operational characteristics of Audio Metering, the former controls the amount of channels displayed in a meter.
- Page 41 Menu Operations Figure 4.1-13 The Position of the Audio Meter On Screen AUDIO LEVEL METER POSITION The position of AUDIO LEVEL Meter is controlled by METER DIRECTION and METER POSITION, the position of the audio meter on the screen could be as follows: TOP LEFT VERTICAL, TOP RIGHT VERTICAL, BOT LEFT VERTICAL, BOT RIGHT VERTICAL, BOTTOM HORIZONTAL and TOP HORIZONTAL.
-
Page 42: Display Menu
Menu Operations The prerequisite for the available settings of the display mode and the position of audio meter is that the AUDIO METER is ON. 4.1.5 DISPLAY Menu The DISPLAY menu items are used to set your status information, wave form, vector, line wave, AFD and time code preference displayed on the screen, the menu items are as shown in Figure 4.1-16: MAIN... - Page 43 Menu Operations Default Items Domain Range Description Value MODE1: WAVE Switch the display mode among FORM+ VECT75 mode1, mode2, vector100, MODE2: WAVE vector75 and wave form. WFM FORM FORM+ VECT100 When the wave form is selected, TYPE VECT100 it will display the wave form, and ...
- Page 44 Menu Operations Normal: the signal format is displayed as 1080i59.94, NTSC, or 1280X1024, etc. when the input is supported by the monitor. Particularly, When the monitor is set in PIP or PBP mode by setting the CONFIGSUB IN TYPE menu item, the Status Information for the main picture displays at the top left corner of the screen, and the Status Information for the slave picture displays at the top right corner of the screen.
- Page 45 Menu Operations Figure 4.1-18 WAVE FORM TYPE The WFM POSITION item is used to set the position of the wave form/vector display, and you can select from left bottom or right bottom. The WFM TRANS item is used to set the transparent of the wave form window and the vector window.
-
Page 46: Closed Caption Menu
Menu Operations TIME CODE The DISPLAYTIME CODE setting is used to display a time code and set a desired format for time code, only available for SDI input. The time code is displayed at the bottom center of the screen. The mode could be D-VITC, LTC or VITC, and the format is HH:MM:SS:FF. - Page 47 Menu Operations Default Items Domain Range Description Value Set whether to display the SDI CC logo when OFF/ON detecting closed caption in SDI input signal. Set whether to display closed caption CLOSED information. Only OFF/ON available when the SUB CAPTION IN TYPE item is set to be OFF.
-
Page 48: Config Menu
Menu Operations Figure 4.1-22 SDI CC LOGO Set CLOSED CAPTION CLOSED CAPTION to be ON to display the closed caption transmitted in the signal source, then, select a transmission standard accordant with signal input among AUTO1(608(VBI)& 608(708)), AUTO2(608(ANC)& 608(708)), 608(708), 608(ANC), 608(VBI). ... - Page 49 Menu Operations The relationship of Items, Default Value, Domain Range and Description of the sub-item is as shown in Table 4.1-7: Table 4.1-7 The Description of CONFIG Menu Items Default Items Domain Range Description Value FAST MODE OFF/ON Enable/Disable the fast mode. FILM MODE Set whether to detect 24PsF...
- Page 50 Menu Operations Particularly for LCM215-E, only when BACK LIGHT is less than or equal to 15, FAN CONTROL is adjustable, otherwise, when it is greater than 15, the fan will run automatically, that is to say, FAN CONTROL is ON and not adjustable! FAST MODE When displaying interlaced input signal, FAST mode is used to reduce the 3D de-interlacing processing time delay, set CONFIGFAST MODE to be ON to enable...
- Page 51 Menu Operations position relationship of the main picture and the slave picture is set by CONFIGPIP POSITION item, as shown in Figure 4.1-25: Figure 4.1-25 The Position Relationship in PIP Mode Adjust the display size by CONFIGPIP SIZE item, and there are two kinds of outlines for the slave picture, as shown in Figure 4.1-26: Figure 4.1-26 The Size for the Slave Picture In PIP mode, it displays the waveform/vector or Audio Meter only for the signal source...
- Page 52 Menu Operations Audio Meter Main Picture Slave Picture (BOT LEFT) Figure 4.1-27 The Illustrate for WFM and Audio Meter Display PBP(Picture by Picture) The two pictures generated by two input signals separately are displayed side by side, and this function helps with white balance adjustment, and determining shooting angles between two cameras etc.
- Page 53 Menu Operations Figure 4.1-29 Position of WFM and Audio Meter in PBP Mode Set Display Mode The display mode on the screen could be single(SUB IN TYPE is OFF), PBP, PIP, set as instructed below: OPERATION Method 1: Set By menu item Select the Config SUB IN TYPE item, use ENTER, UP or DOWN key to select a display mode among OFF, PBP and PIP.
- Page 54 Menu Operations Signal Source for Main Picture SDI1 SDI2 LINE1(CVBS) LINE2(CVBS) LINE2(Y/C) LINE2(YPSPR) HDMI \ Signal Source for Slave Picture LINE2(YPBPR) HDMI Position for signal source menu: The input signal information of the main picture displays at the top left corner of the screen, and the one of the slave picture displays at the top right corner of the screen.
-
Page 55: Look Profile Menu
Menu Operations when detecting no signal input or signal disappeared, the auto standby will be activated, and there will be a prompt during the process, as shown in Figure 4.1-32: Going into Standby Mode Figure 4.1-32 Entering the Auto Standby Mode When detecting no signal input or signal disappeared, the power indicator will be lit in flash green for 10 seconds, and showing the standby prompt, after that, the monitor screen will be turned off, and it will be in auto standby mode, the... - Page 56 Menu Operations Default Items Domain Range Description Value D65 Rec709 DCI P3 Rec BT.2020 ARRI_LOG_R709 BMD_CC_FILM_V BMD_PC_FILM_V2 Canon_CinCL1_WDR Canon_CinCL2_WDR LOOK Select a color look profile as Pana_VLog_V709 PROFILE your desired color space. ...
-
Page 57: Function Key Menu
(we support SpectralCal’s CalMAN currently), which could generate the customized calibration 3D LUTs, and OSEE Utility Tools (provided by OSEE) which could load the customized calibration 3D LUTs to specified monitor. LOOK PROFILE Reset Set LOOK PROFILE RESET item, it will reset the Gain and Offset values to default... - Page 58 Menu Operations Items Default Value Domain Range Description NATIVE, ANAMORPHIC, BLUE ONLY, MONO, MARKER, AUDIO FOCUS METER, FAST MODE, Set a function to F1 button ASSIST MUTE, PBP, FREEZE, FOCUS ASSIST, ZEBRA, H FLIP, FALSE COLOR, UNDEF NATIVE the same as F1 Set a function to F2 button ANAMORPHIC the same as F1 Set a function to F3 button...
- Page 59 Menu Operations INPUT SIGNAL INPUT OUTPUT 720X576 720X576 NTSC 720X483 720X483 720P24/23.98 1280X720 1280X720 720P25 1280X720 1280X720 720P30/29.97 1280X720 1280X720 720P50 1280X720 1280X720 720P60/59.94 1280X720 1280X720 1080SF24/23.98 1920X1080 1920X1080 1035I60/59.94 1920X1035 1920X1080 1080I50 1920X1080 1920X1080 1080I60/59.94 1920X1080 1920X1080 1080P24/23.98 1920X1080 1920X1080 1080P25 1920X1080...
- Page 60 Menu Operations INPUT SIGNAL ANAMORPHIC INPUT OUTPUT 16:9 720X576 1920X1080 720X483 1440X1080 NTSC 16:9 720X483 1920X1080 1280X720 1920X1080 720P24/23.98 720P25 X1.3 1280X720 1920x812 720P30/29.97 1280X720 1920x540 720P50 720P60/59.94 X2 MAG 860X720 1920x804 1920X1080 1920X1080 X1.3 1920X1080 1920X812 1080SF24/23.98 1920X1080 1920X540 X2 MAG 1290X1080 1920X804...
- Page 61 Menu Operations AUDIO METER Press the button to activate the audiometer. Set the audio meter in AUDIO menu, and refer to "4.1.4 AUDIO Menu" for details. FAST MODE Press the button to activate FAST mode which will reduce the 3D de-interlacing processing time delay.
-
Page 62: Key Inhibit Menu
Menu Operations highlighted in a designated color set by INPUT SELECTFOCUS COLOR item. Refer to “4.1.2 INPUT SELECT Menu” for the details. ZEBRA Press the button to activate the ZEBRA display. The image area whose luminance is higher than the reference ZEBRA LEVEL will be filled with a zebra pattern. Refer to “4.1.2 INPUT SELECT Menu”... - Page 63 Menu Operations by an unauthorized user, and the menu item is as shown in Figure 4.1-35: Figure 4.1-35 KEY INHIBIT Menu The relationship of Items, Default Value, Domain Range and Description of the sub-item is as shown in Table 4.1-12: Table 4.1-12 The Description of KEY INHIBIT Menu Items Items Default Value Domain Range Description...
-
Page 64: Menu Settings
Menu Operations Figure 4.1-36 KEY INHIBIT Prompt 4.2 Menu Settings When checking or modifying the value of the menu item, cooperating with the following buttons: MENU, UP, DOWN, ENTER. Take the following example to descript usage of these buttons. After you have loaded the Main Menu, it will be closed automatically if you do nothing operation with it in 60s. - Page 65 Menu Operations Figure 4.2-1 Select the Value of Language Step 3 Confirm the modification of the value of sub-item Click DOWN button to select the sub-item LANGUAGE to Chinese, as shown in Figure 4.2-2, press ENTER button to confirm the modification. Figure 4.2-2 Switching the Value of LANGUAGE Step 4 Exit the Main Menu Click MENU button to exit the Main Menu.
-
Page 67: Chapter 5 Specifications
Specifications Chapter 5 Specifications 5.1 Product detailed information Specification Values Model LCM156-E LCM170-E LCM215-E LCM230-E LCM240-E Dimension 15.6” 17.3” 21.5” 23” 24” Dimension 569.9 380.7x240x70.5 421.8x264.3x73.5 520.0x322.0x78.0 556.5x340.5x75.5 (WxHxDmm) x380.7x90.5 Pixel Pitch 0.179×0.179 0.199×0.199 0.24825×0. 24825 0.2652×0.2652 0.270×0.270 (WxHmm) Aspect Ratio 16:9 16:9 16:9... - Page 68 Specifications Specification Values Interface RJ45)X1 RS485(cascade RJ45) X2 Ethernet(10/100 adaptive Ethernet(10/100M adaptive RJ45) X1 RJ45) X1 CVBS: PAL, NTSC HD-SDI: 1080i50, 1080i 59.94, 1080i 60, HD-SDI: 1080i50, 1080i 59.94, 1080i 60, 720p50, 720p 59.94, 720p 60, 720p50, 720p Signal Formats 1035i59.94, 1035i 60 59.94, 720p 60, 1035i59.94,...
-
Page 69: Optional Accessories
LCM-Hanger LCM-E general hanger with inch thread OSEE Monitor Adapter LCM-CA OSEE Monitor Adapter C-stand C-Stand Battery Plate If you want to use a battery as your backup power supply, you can choose the battery plate listed in the optional accessories table above, and you can select two types of battery plate according to your needs: V-mount battery plate or AB-mount battery plates, as shown in Figure 5.2-1:... - Page 70 Specifications There are two kinds of methods for mounting the battery plate: in portrait or in landscape. For V-mount battery plate, as shown in Figure 5.2-2 and Figure 5.2-3, and for AB-mount Battery Plate, as shown in Figure 5.2-4 and Figure 5.2-5: Figure 5.2-2 AB-mount Battery Plate in Landscape Figure 5.2-3 AB-mount Battery Plate in Portrait...
- Page 71 Specifications Figure 5.2-4 V-mount Battery Plate in Landscape Figure 5.2-5 V-mount Battery Plate in Portrait Sunhood In case of diffusion light and direct illumination, we can use sunhood for the...
- Page 72 Specifications LCM-E series monitors for images supervision. Mount the sunhood as shown in Figure 5.2-6, Figure 5.2-7, Figure 5.2-8 and Figure 5.2-9: Figure 5.2-6 Mount a Sunhood for LCM156-E Figure 5.2-7 Mount a Sunhood for LCM170-E/LCM215-E...
- Page 73 Specifications Figure 5.2-8 Mount a Sunhood for LCM230-E Figure 5.2-9 Mount a Sunhood for LCM240-E Protective Screen Choose the protective screen to protect your monitor screen. Mount the protective screen as shown in Figure 5.2-10, Figure 5.2-11, Figure 5.2-12 and...
- Page 74 Specifications Figure 5.2-13: Figure 5.2-10 Mount a Protective Screen for LCM156-E...
- Page 75 Specifications Figure 5.2-11 Mount a Protective Screen for LCM170-E/ LCM215-E...
- Page 76 Specifications Figure 5.2-12 Mount a Protective Screen for LCM230-E...
- Page 77 Figure 5.2-13 Mount a Protective Screen for LCM240-E OSEE Monitor Adapter C-Stand Each monitor can be mounted to any stand with an OSEE Monitor adapter C-Stand, the connection method is as shown in Figure 5.2-14, and the usage is as shown in Figure 5.2-15:...
- Page 78 Specifications Figure 5.2-14 Adapter C-Stand to LCM-E Monitor Figure 5.2-15 Connecting to Light Stand Hanger It provides an inch screw thread hanger as an optional accessory. The hanger provides two sorts of screw thread: 3/8 inch screw thread, a total of 4; 1/4 inch screw thread, a total of 8, as shown in Figure 5.2-16:...
-
Page 79: Dimensions
Specifications Figure 5.2-16 Inch Screw Thread Hanger 5.3 Dimensions The description of the LCM***-E series dimensions are as shown in the following figures(Unit: mm):... - Page 80 Specifications LCM156-E Front Panel Side View Rear Panel Top View...
- Page 81 Specifications LCM170-E Front Panel Side View Rear Panel Top View...
- Page 82 Specifications LCM215-E Front Panel Side View Rear Panel Top View...
- Page 83 Specifications LCM230-E Front Panel Side View Rear Panel Top View...
- Page 84 Specifications LCM240-E Front Panel Side View Rear Panel Top View Specifications are subject to change without notice. ------------------No Text Below------------------...
- Page 85 FOR MORE INFORMATION PLEASE VISIT: http://www.osee-dig.com / OSEE TECHNOLOGY LTD. Address: No.22 Building, No.68 zone, Beiqing Road, Haidian District, Beijing, China (+86) 010-62434168 Tel: Fax: (+86) 010-62434169 FOR MORE INFORMATION PLEASE VISIT: http:/www.oseeamericas.com OSEE AMERICAS, LTD. Address: 43218 Christy Street Fremont, CA. 94538...
Need help?
Do you have a question about the LCM170-E Series and is the answer not in the manual?
Questions and answers