Vent-Axia 405215 Advance S Installation & Commissioning Manual
Sentinel kinetic advance mvhr
Hide thumbs
Also See for 405215 Advance S:
- Installation and user manual (64 pages) ,
- Installation and user manual (40 pages) ,
- Installation and user manual (64 pages)

Related Manuals for Vent-Axia 405215 Advance S


Summary of Contents for Vent-Axia 405215 Advance S
- Page 1 Sentinel Kinetic Advance MVHR Installation & Commissioning Stock Ref. N° 405215 Advance S 405216 Advance SX PLEASE RETAIN THESE INSTRUCTIONS WITH THE PRODUCT. Copyright © 2009 Vent-Axia Limited. All rights reserved. 408651...
-
Page 2: Warnings And Safety Information
Warnings and Safety Information Warnings and Safety Information PLEASE READ THESE INSTRUCTIONS CAREFULLY BEFORE COMMENCING INSTALLATION. 1. Do not install this product in areas where the following may be present or occur: • Excessive oil or a grease laden atmosphere. •... -
Page 3: Installation Guidance
Warnings and Safety Information Installation Guidance 1. The installer is responsible for the installation and electrical connection of the sentinel system on site. It is the responsibility of the installer to ensure that the equipment is safely and securely installed and left only when mechanically and electrically safe. 2. -
Page 4: Table Of Contents
About this Document About this document Contents Warnings and Safety Information Installation Guidance ..............3 About this document Contents ..................4 UK Building Regulations (Part F) Technical Data Declaration of Conformance Product Description ............... 5 The Sentinel Kinetic conforms to the 2010 Building ... -
Page 5: Technical Data
Technical Data Product Description The Vent-Axia Sentinel Kinetic Advance models S & SX Mechanical Ventilation/Heat Recovery (MVHR) is a heat recovery unit designed for the energy efficient ventilation of houses and similar dwellings, conforming to the latest requirements of the Building Regulations document F 2010. -
Page 6: Accessories
472697 Input Switch PCB Accessory. The optional Input Switch Accessory offers four volt free pairs of switch terminals for sensor inputs to allow boosting from a full range of Vent-Axia controllers e.g. humidistats, PIRs, and timers. 472699 LS2/3 PCB Accessory. -
Page 7: Technical Specification
Technical Data Technical Specification Performance Sentinel Kinetic Advance S Sentinel Kinetic Advance SX Airflow Maximum, FID, 115 l/s (414 m default 20% default 15 l/s (54 m Normal default 30% Normal default 25 l/s (90 m Boost default 50% Boost default 40 l/s (144 m Purge default 100%... -
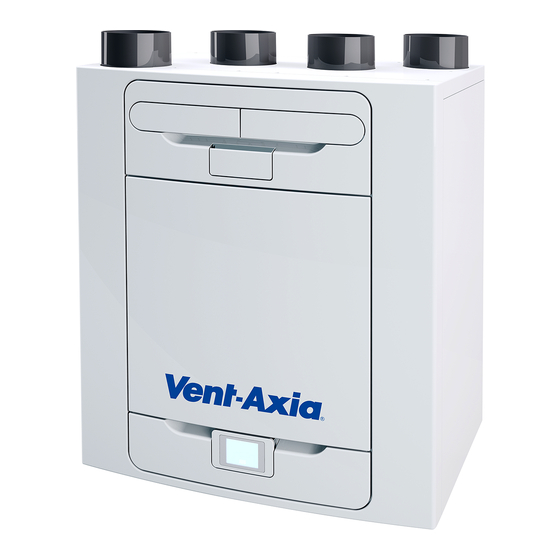
Page 8: Product Dimensions
Technical Data Product Dimensions Remove front cover (see page 17) to view Rating label. (Label is positioned to the right of the controller). Figure 2: Sentinel Kinetic Advance Dimensions Sentinel Kinetic Advance MVHR Installation & Commissioning Instructions PN 408651... -
Page 9: Sentinel Kinetic Advance Summer Bypass
Technical Data Sentinel Kinetic Advance Summer Bypass The Sentinel Kinetic Advance includes a unique Summer Bypass (SBP) feature to provide energy-free cooling when the house temperature and ambient temperature allows. Note that the volume of air provided by this ventilation system is a fraction of that required for space heating or space cooling and will not in itself be sufficient to cool a room. -
Page 10: Performance Data
Technical Data Performance Data Static Pressure (Pa) Fig 3 Sentinel Kinetic Advance Performance graph Sentinel Kinetic Advance MVHR Installation & Commissioning Instructions PN 408651... -
Page 11: Installation
Installation Installation Overview The following instructions are intended to help prevent potential hazards and installation should only be carried out by a qualified electrician and installer. This booklet covers both the Kinetic Advance S and SX models. The control systems are identical on both models but there are some differences during the commissioning that the installer needs to be aware of. -
Page 12: Wall Mounting The Unit
Installation Wall Mounting the Unit Step 1: Mark the wall bracket position using the dimensions shown. Note the position of the top of the unit in relation to the wall bracket. Ensure the bracket position is horizontal. Step 2: Attach the wall bracket to the wall using appropriate fixings. -
Page 13: Floor Mounting The Unit
The board may then be attached to joists, flooring, or equivalent. Vent-Axia recommend that where possible, the wall bracket is used in conjunction with any floor mount solution to prevent the unit from tipping. -
Page 14: Floor Mounting The Unit (Alternate Method)
Step 3: Adjust your chosen foot type to ensure the base of the unit is horizontal in both axis. Vent-Axia recommend that where possible, the wall bracket is used in conjunction with any floor mount solution to prevent the unit from tipping. -
Page 15: Vertical Discharge Condensate Installation
Installation Vertical Discharge Condensate Installation Note The kinetic advance condensate outlet is compatible with standard 22 mm plastic push-fit fittings and 32mm plastic waste pipe fittings. A water trap must be fitted between the unit and the rest of the waste system. Wastepipes must have a 3 degree minimum angle to allow the water to drain away from the unit naturally. -
Page 16: Attach The Ducting
Installation Attach the Ducting 1. Always use a short piece of insulated flexible duct 100-150 mm long, extended to its full length when connecting to ductwork. 2. Securely connect this ducting to the spigots using worm-drive clips or cable ties. 3. -
Page 17: Electrical Installation
Installation Electrical Installation Step 1: Remove the outer cover by pressing the tabs either side of the control module and lifting the cover outwards from the bottom edge. Step 2: Remove the control module by lifting it upwards and away from the unit. Step 3: Remove the two screws on either side of the access panel. -
Page 18: Connect Switches And Sensors
Connect any switches or sensors required to control the unit by connecting to the terminal connectors at the bottom of the control unit as shown on Page 19 and in Table 1. If necessary contact Vent-Axia regarding the wiring and fixing of accessories and sensors. - Page 19 Installation Other means of connecting the unit can be used if they meet the local wiring regulations. SEE NOTES ON PAGE 20 Terminal No. Name Description (Control Mode 01) REMOTE Remote Terminals for connecting a remote externally from the unit. Switch 1 Volt-free contact for sensor input between + and - terminals Red Light Emitting Diode...
-
Page 20: Connect The Power Supply
NS connection then a bridging wire must be used between NS and N NOTES Power supplied to the unit via a 3 pole isolating switch, such as Vent-Axia Part Number 563518, (or 4 pole isolating switch if using LS and NS,) must be supplied via the same circuit as the LS connection. -
Page 21: Commissioning
Commissioning Commissioning Powering up the Unit Switching On To switch the unit on: 1. Switch on the power at the mains supply isolator feeding the unit. 2. Following switch-on, the fan motors will start and the Control Unit will display a start-up screen, described on page 22. -
Page 22: Commissioning Menu
Commissioning Commissioning Menu When powering up the unit for the first time, the controller will automatically scroll through the commissioning menu ‘Modify settings’ screens (see page 24) allowing the installer to configure the settings. If the unit has been pre-installed by an electrician, and has been powered up prior to commissioning then the User Menu Home screen will appear, follow the steps below to access the commissioning ‘Modify Settings’... -
Page 23: Commissioning Screens Summary
Commissioning Commissioning Screens Summary When the unit is switched on (see Powering up the Unit on page 21, the following Control Unit screens are available for commissioning the unit. Sentinel Kinetic Advance MVHR Installation & Commissioning Instructions PN 408651... -
Page 24: Commissioning Modify Settings
Commissioning Commissioning Modify Settings The following pages show all available settings withing the commissioning menu. Please note that some settings may not apear, or may be in a different order, due to pre-configuration by your distributer. Country Select country – This will load any pre-determined national default parameters and the language settings for all subsequent screens. - Page 25 Commissioning Filter Check Select the time interval for checking the filters using the buttons on the screen, between 1 month and 18 months. Note: There is an automatic filter check after the first 3 months irrespective of set intervals. Mode Names Change the mode pre-set for each user mode as required, Select each mode to modify to the required speed.
- Page 26 Commissioning Port Allocation If the installation has switch sensors, is wired to the lighting, has Vent-wise sensors or Vent-Wise momentary switch, the mode parameters can be set for each port. The unit will automatically detect any available ports. Note: Number of available ports and port types may differ from image shown depending on unit specification.
- Page 27 Commissioning Summer Bypass Adjust the summer bypass settings. Select each setting to adjust Bypass mode, indoor and outdoor temperatures and go to modes. Select the required bypass mode. Details of each mode can be found on page 9. The indoor temperature setting is the maximum desired room temperature.
- Page 28 Commissioning Internal RH Trip The integral humidity sensor increases airflow speed in proportion to relative humidity levels. The sensor also reacts to small but rapid increases in humidity, even if the normal trigger threshold is not reached. The night time relative humidity setback feature suppresses nuisance tripping as humidity gradually increases with falling temperature.
- Page 29 Commissioning Frost Protection Frost Protection is required to prevent the heat exchanger freezing at low temperatures. The process is fully automatic. Airflow mode reduces the Intake flow and increases the Extract and Supply flow in varying proportions dependent on the incoming air temperature.
- Page 30 Commissioning Mode Scheduling Use a schedule to set a Mode (Airflow setting) for a fixed, repeated period. For example, set Boost Mode every morning between 7:00am and 8:00am while cooking breakfast. Select the Schedule to view the settings Scroll through the settings using the &...
- Page 31 Commissioning Service Phone The Service Phone screen enables the installer to enter the telephone number that should be called for service in the event of a unit fault or for routine maintenance. Enter the number using the buttons on the screen, Scroll through the number using the buttons.
-
Page 32: Operation And Monitoring
Operation and Monitoring Operation and Monitoring Control Unit Screens Summary The following Control Unit screens are available for daily operation and monitoring of the unit. Sentinel Kinetic Advance MVHR Installation & Commissioning Instructions PN 408651... - Page 33 Operation and Monitoring Control Unit Screens Summary The following Control Unit screens are available in the Settings / Performance section. Sentinel Kinetic Advance MVHR Installation & Commissioning Instructions PN 408651...
-
Page 34: User Controls
Operation and Monitoring User controls User Menu Home Screen The user menu home screen, consists of a User Mode (BOOST) button, a Machine status bar, and a Settings / Performance bar. The Machine status scrolls through Mode of operation, Summer bypass status and Frost protection status. -
Page 35: Settings And Performance
Operation and Monitoring Settings and Performance Settings Scroll through the settings using the & buttons and select using where applicable to access Language, Date, Time, Reset filter, Display settings, Summer Bypass, Mode Scheduling, Service phone, Commissioner Menu & Diagnostics. Days Run and Filter check are reported values and do not have editable parameters in this section. - Page 36 Operation and Monitoring Time Change the time using the buttons on the screen. Note: The clock is 24 hour Reset Filter After maintenance or replacement of the filters, the filter timer can be reset by pressing . Press to return to the Settings Menu. Display Settings Change the brightness of the touch screen using buttons.
- Page 37 Operation and Monitoring Summer Bypass Adjust the summer bypass settings. Select each setting to adjust Bypass mode, indoor and outdoor temperatures and go to modes. Select the required bypass mode. Details of each mode can be found on page 9. The indoor temperature setting is the maximum desired room temperature.
- Page 38 Operation and Monitoring Mode Scheduling Use a schedule to set a Mode (Airflow setting) for a fixed, repeated period. For example, set Boost Mode every morning between 7:00am and 8:00am while cooking breakfast. Select the Schedule to view the settings Scroll through the settings using the &...
- Page 39 Operation and Monitoring Service Phone The service phone number can be entered by the installer and should be used if the unit displays a fault code, or to arrange routine servicing for the unit. Commissioning Menu Enter the lock code using the buttons to access the Commissioner Menu.
-
Page 40: Default Settings
Operation and Monitoring Default settings Parameters Settings Commissioning Screens Country United Kingdom Language English. Date Automatic - Factory set Time Automatic GMT/BST - Factory set Unit configuration Right Hand Filter Check 12 months Summer Bypass Normal Mode Names Normal, Boost, Low, Purge User Mode Boost Supply/Extract 50 %... -
Page 41: Maintenance
Maintenance Maintenance Filter Maintenance Heat recovery units require regular maintenance. The Sentinel Kinetic has been designed to facilitate access to enable maintenance to be carried out easily. When the unit displays “Clean or replace filters”. This is a reminder to ensure that the filters are not so dirty that they are blocking the airflow or allowing dirt to pass through. -
Page 42: Periodic Maintenance
Maintenance Periodic Maintenance WARNING THE FAN AND ANCILLARY CONTROL EQUIPMENT MUST BE ISOLATED FROM THE POWER SUPPLY DURING MAINTENANCE. Fan Filters Check fan filters as described on the previous page. Heat Exchanger Cell Step 1: Remove the outer cover by pressing the tabs either side of the control module and lifting the cover outwards from the bottom edge. -
Page 43: Spares
Maintenance Spares The following spare parts may be ordered from Vent-Axia: Part No Description 472663 Main Power Board 472665 Control Module 472667 Filters G3, 2 per pack 472669 Filters M5, 1 per pack 472671 Filters F7, 1 per pack 472673... -
Page 44: Troubleshooting
Troubleshooting Troubleshooting Diagnosing a Problem In the event of a problem, always troubleshoot the unit according to: Fault code displayed on the Control Unit. Fault LED if connected. If no indications are displayed, then troubleshoot problem according to the fault symptom as described in the following tables. - Page 45 Notes This page is intentionally blank and can be used for making notes regarding the unit. Sentinel Kinetic Advance MVHR Installation & Commissioning Instructions PN 408651...
- Page 46 Notes This page is intentionally blank and can be used for making notes regarding the unit. Sentinel Kinetic Advance MVHR Installation & Commissioning Instructions PN 408651...
-
Page 47: Product Fiche
Product fiche Product fiche Product fiche Name: Vent‐Axia Model ID (Stock Ref.) : Kinetic Advance S ‐ 405215 SEC Class A+ SEC Value ('Average') ‐43.70 SEC Value ('Warm') ‐18.32 SEC Value ('Cold') ‐88.78 Label Required? (Yes/No=Out of scope) Yes Declared as: RVU or NRVU/UVU or BVU RVU/BVU Speed Drive Variable Speed Type HRS (Recuperative, Regenerative, None) Recuperative Thermal Eff: [ (%), NA(if none)] 91 Max. Flow Rate (m3/h) 410.4 Max. Power Input (W): (@Max.Flow Rate) 180 LWA: Sound Power Level (dB) 56.5 Ref. Flow Rate (m3/s) 0.07980 Ref. Pressure Diff. (Pa) 50 SPI [W/(m3/h)] 0.23 Control Factor & Control Typology: (CTRL/ Typology) ... -
Page 48: Sentinel Kinetic Advance Mvhr Installation & Commissioning Instructions Pn
Applicable only to products installed and used in the United Kingdom. For details of guarantee outside the United Kingdom contact your local supplier. Vent-Axia guarantees its products for two years from date of purchase against faulty material or workmanship. In the event of any part being found to be defective, the product will be repaired, or at the Company’s option replaced, without charge, provided that the product:-...
Need help?
Do you have a question about the 405215 Advance S and is the answer not in the manual?
Questions and answers