Furuno FAR-3320W Installation Manual
Hide thumbs
Also See for FAR-3320W:
- Operator's manual (556 pages) ,
- Installation manual (245 pages) ,
- Instruction manual (99 pages)
Table of Contents
Advertisement
FAR-3320W/3220W-BB/3330SW/3230SW-BB
Model
SAFETY INSTRUCTIONS ........................i
SYSTEM CONFIGURATION ..................iii
EQUIPMENT LIST .................................vii
1. INSTALLATION...............................1-1
1.1 Antenna Unit .......................................1-1
1.2 Transceiver Unit................................1-13
1.3 Monitor Unit.......................................1-13
Unit ....................................................1-14
1.5 Power Supply Unit ............................1-17
1.6 Processor Unit ..................................1-18
1.7 Sensor Adapters (option) ..................1-20
1.8 Intelligent Hub (option)......................1-21
1.9 Switching Hub (option)......................1-22
2. WIRING............................................2-1
2.1 Overview .............................................2-1
2.2 Antenna Unit .......................................2-5
2.3 Transceiver Unit................................2-18
2.4 Processor Unit ..................................2-26
2.5 Power Supply Unit ............................2-37
2.6 Monitor Unit.......................................2-41
2.7 Sensor Adapters (option) ..................2-42
2.8 Intelligent HUB (option).....................2-60
(option)..............................................2-61
Menu ...................................................3-1
3.2 How to Align the Heading ...................3-1
3.3 How to Adjust the Sweep Timing ........3-2
3.4 How to Suppress Main Bang ..............3-3
3.5 Dual Radar Display .............................3-3
3.6 Other Settings .....................................3-7
ECDIS and Radar .............................3-15
All brand and product names are trademarks, registered trademarks or service marks of their respective holders.
Installation Manual
CHART RADAR
Sensor Data Based on Integrity........3-17
3.11 How to display the [Echo] page ........3-17
3.12 Web Setting Menu ............................3-18
4. INPUT/OUTPUT DATA ...................4-1
4.1 Processor Unit ....................................4-1
4.2 IEC 61162 Sentences .........................4-2
APPENDIX 1 JIS CABLE GUIDE.....AP-1
APPENDIX 2 ROD TERMINALS ......AP-2
PACKING LISTS ................................. A-1
OUTLINE DRAWINGS ........................ D-1
INTERCONNECTION DIAGRAMS ..... S-1
www.furuno.com
(Product Name: Marine Radar)
Advertisement
Table of Contents

Subscribe to Our Youtube Channel
Related Manuals for Furuno FAR-3320W


Summary of Contents for Furuno FAR-3320W
-
Page 1: Table Of Contents
Installation Manual CHART RADAR FAR-3320W/3220W-BB/3330SW/3230SW-BB Model (Product Name: Marine Radar) SAFETY INSTRUCTIONS ......i Sensor Data Based on Integrity..3-17 3.11 How to display the [Echo] page ..3-17 SYSTEM CONFIGURATION ....iii 3.12 Web Setting Menu ......3-18 EQUIPMENT LIST .........vii 4. INPUT/OUTPUT DATA ....4-1 1. - Page 2 ・FURUNO Authorized Distributor/Dealer 9-52 Ashihara-cho, Nishinomiya, 662-8580, JAPAN A : SEP 2014 Printed in Japan All rights reserved. E : DEC . 12, 2016 Pub. No. IME-36240-E ( AKMU ) FAR-3320W 0 0 0 1 7 8 0 3 7 1 4...
-
Page 3: Safety Instructions
See the installation manual for how to manage blind sectors. Model Transceiver Antenna* 100 W/m 50 W/m 10 W/m FAR-3320W RTR-108 XN20CF 0.5 m 1.2 m 5.5 m 0.3 m 4.0 m... - Page 4 Only qualified personnel are compass compass SHOCK allowed to work inside the Antenna Unit HAZARD 1.90 m 1.20 m (FAR-3320W) equipment. Antenna Unit 1.55 m 0.95 m Construct a suitable service (FAR-3330SW) platform from which to install the Processor Unit 2.40 m...
-
Page 5: System Configuration
EPFS meeting the requirements of the IMO resolution MSC.112(73). Gyrocompass meeting the requirements of the IMO resolution A.424(XI). SDME meeting the requirements of IMO resolution MSC.96(72). The radar may be interconnected via HUB-3000 to other FURUNO processing units having approved LAN ports. FAR-3320W, FAR-3220W-BB Basic configuration shown with solid line. - Page 6 SYSTEM CONFIGURATION FAR-3330SW, FAR-3230SW-BB Basic configuration shown with solid line. ANTENNA UNIT (w/Performance Monitor PM-52A) SN36CF-RSB-131 TRANSCEIVER Sub monitor UNIT Coaxial cable RTR-109 Antenna cable 100-115/220-230 VAC 1ø, 50-60 Hz (for de-icer) PSU-014 or PSU-015 100-230 VAC POWER SUPPLY 1ø, 50-60 Hz UNIT PSU-014: 24 rpm antenna unit 440 VAC...
- Page 7 SYSTEM CONFIGURATION Category of units: Antenna unit: Exposed to weather Other units: Protected from the weather Notes 1) The gyrocompass must be type approved for compliance with IMO resolution A.424(XI) (and/ or resolution A.821(19) for installation on HSC). The gyrocompass must also have an update rate that is adequate for the ship’s rate of turn.
-
Page 8: Power Supply
SYSTEM CONFIGURATION Interswitch connection When multiple radars are used, connect, to the EC-3000, the HUB-3000 to the LAN1 port, and HUB-100 to the LAN2 port. This configuration lets each radar be a standalone radar in case of HUB malfunction. 100-115/220-230 VAC ANTENNA UNIT 1ø, 50-60 Hz (for de-icer) 100-115/220-230 VAC... -
Page 9: Equipment List
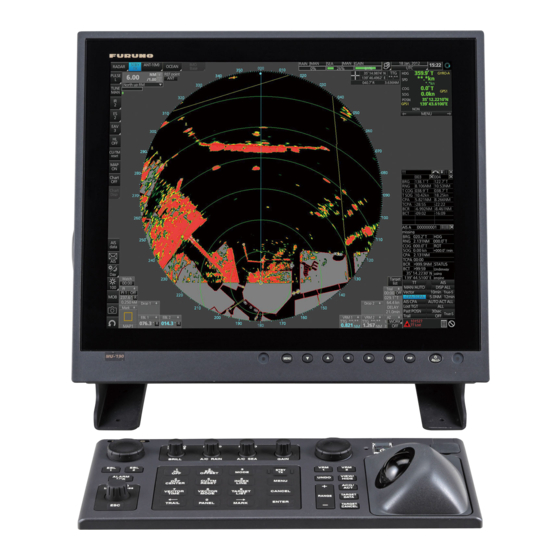
EQUIPMENT LIST Standard supply for FAR-3320W/FAR-3220W-BB Name Type Code No. Remarks Antenna Unit XN20CF-RSB-130 6.5 ft Select XN24CF-RSB-130 8 ft Transceiver Unit RTR-108 Processor Unit EC-3000 Monitor Unit MU-231 For FAR-3320W Select MU-270W Control Unit RCU-025 Standard type Select RCU-026... - Page 10 EQUIPMENT LIST Standard supply for FAR-3330SW/FAR-3230SW-BB Name Type Code No. Remarks Antenna Unit SN36CF-RSB-131 Transceiver Unit RTR-109 Processor Unit EC-3000 Monitor Unit MU-231 For FAR-3330SW Select MU-270W Control Unit RCU-025 Select RCU-026 Power Supply Unit PSU-014 24 rpm PSU-015 42 rpm Installation Materials CP03-35202 001-249-880...
- Page 11 Intelligent HUB HUB-3000 Control Unit RCU-024 ECDIS standard type RCU-026 Trackball type Monitor Unit MU-190 For FAR-3220W-BB, FAR- 3230SW-BB MU-231 For FAR-3320W, FAR-3330SW MU-270W Bracket Assembly OP26-5 000-016-270 For MU-190 OP26-15 001-116-730 For MU-231 OP26-30 001-439-060 For MU-270W Hood Assembly...
- Page 12 EQUIPMENT LIST Name Type Code No. Remarks Installation CP03-28900(10M) 000-082-658 LAN cable for sensor adapter Materials CP03-28910(20M) 000-082-659 CP03-28920(30M) 000-082-660 Installation CP24-02900(10M) 001-208-050 LAN cable for HUB-3000 Materials CP24-02910(20M) 001-208-060 LAN cable for HUB-3000 CP24-02920(30M) 001-208-070 LAN cable for HUB-3000 Thru-deck Cable CP03-00702 008-197-350...
- Page 13 For sub monitor, RW-00136, 40 m S03-92-50(8P) 001-259-920 For sub monitor, RW-00136, 50 m Junction Box RJB-001 Spare Parts SP24-00801 001-235-320 For HUB-3000 Waveguide Twist RWA-1050 C-109 001-304-660 For FAR-3320W Rectangular Guide OP03-148 008-477-540 Clamp FR-9Termination FR-9-00 001-102-740 Waveguide Drain 03-009-0360-0 300-903-600 H-type Wave- CP03-00600-W...
- Page 14 EQUIPMENT LIST This page is intentionally left blank.
-
Page 15: Installation
INSTALLATION NOTICE Do not apply paint, anti-corrosive sealant or contact spray to coating or plastic parts of the equipment. Those items contain organic solvents that can damage coating and plastic parts, especially plastic connectors. Antenna Unit 1.1.1 Installation considerations • The antenna unit is generally installed either on top of the wheelhouse or on the ra- dar mast, on a suitable platform. - Page 16 1. INSTALLATION • Install the antenna unit away from interfer- ing high-power energy sources and TX ra- dio antennas. more than 20° • Keep the lower edge of the antenna unit above the safety rail by at least 500 mm. •...
- Page 17 1. INSTALLATION 1.1.2 How to assemble, mount the antenna unit for FAR-3320W, FAR-3220W-BB How to assemble the antenna unit The antenna unit consists of the antenna radiator and the antenna unit chassis, and they are packed separately. Fasten the antenna radiator to the antenna unit chassis as follows: 1.
- Page 18 1. INSTALLATION The torque must 15.0 N•m. Then, Coat the screws fixed at step 4 with marine sealant (supplied) as shown in the figure below. Gasket Coat with Coat with marine sealant. marine Flat washer sealant. Flat washer Hex bolt How to fasten the antenna unit to the mounting platform The antenna unit may be assembled before hoisting it to the mounting platform.
- Page 19 1. INSTALLATION 1. Construct a suitable mounting platform referring to the outline drawing at the end of this manual. Note: The mounting platform must be flat, level and firmly secured. • The diameter of the mast for fixing the antenna unit platform must be over 180 •...
- Page 20 1. INSTALLATION Over 12 mm Mounting platform The reinforcement Be careful not to get ribs must be installed welding splatter on nuts, diagonally. bolts, etc. on the mounting Diameter: Over 180 mm Diameter: Over 180 mm platform. Thickness: Over 12 mm Thickness: Over 12 mm Bottom of platform 5.
- Page 21 1. INSTALLATION Seal washer Fasten ground wire then coat with marine sealant. Flat washer Spring washer Ground wire (Torque: 49 N•m) Antenna chassis Ground terminal Arrange grounding point as close as possible to antenna unit. Coat with marine sealant. Ground wire Ground wire Hex bolt Hex nut...
-
Page 22: Installation Location
1. INSTALLATION 1.1.3 How to assemble, mount the antenna unit for FAR-3330SW, FAR-3230SW-BB Installation location If an S-band antenna unit ins installed near the end of a platform to provide sufficient rotation clearance for the radiator, the antenna unit, because of its weight, swings up and down by ship’s vibration and rolling. - Page 23 1. INSTALLATION 3. Coat the threads of eight hex bolts (M1250, supplied) with marine sealant. Fas- ten the antenna radiator to the antenna support from the bottom of the bracket with the eight sets of hex bolts, spring washers and flat washers. The torque must be 49 N•m.
- Page 24 1. INSTALLATION How to hoist the antenna unit The antenna unit may be assembled before hoisting it to the mounting platform. Hoist the antenna referring to the illustration below and "FAR-3xx0 Series S-band Antenna Unit Installation Notice," issued separately. How to Hoist the S-band Antenna Unit Method 1 Belt sling Antenna...
- Page 25 1. INSTALLATION How to fasten the unit to the mounting platform 1. Construct a suitable mounting platform referring to the outline drawing at the end of this manual. Note: The mounting platform must be flat, level and firmly secured. • The diameter of the mast for fixing the antenna unit platform must be over 250 •...
- Page 26 1. INSTALLATION Coat with marine sealant. Seal washer Flat washer M12x70 Spring washer (eight places) Use two nuts. (Torque: 49 N•m) Coat with marine sealant. Note: The bolts can also be inserted from the underside of the platform. 5. Coat exposed hardware with marine sealant. 6.
-
Page 27: Transceiver Unit
1. INSTALLATION Transceiver Unit Installation considerations Keep in mind the following points when selecting a location. • Locate the unit away from heat sources because of heat that can build up inside the cabinet. • Locate the equipment away from places subject to water splash and rain. •... -
Page 28: Radar Control Unit, Trackball Control Unit
1. INSTALLATION Radar Control Unit, Trackball Control Unit The control units can be installed on a desktop or flush mounted in a console. For the desktop installation the unit can laid flat or tilted. Note: For configurations where the RCU-020 is installed in the connection stand (OP03-184 or OP26-20), you can exchange the RCU-020 with the RCU-025. - Page 29 1. INSTALLATION How to mount the unit flush with mounting surface Do this installation to install the control unit flat on the mounting surface. 1. Drill four mounting holes of 5 mm diameter referring to the outline drawing at the back of this manual.
- Page 30 1. INSTALLATION 1.4.2 Flush mounting Use the applicable optional flush mount kit to install the control unit in a console panel. Flush mount kit Control Unit Type Code RCU-025 OP24-24 001-171-790 RCU-026 OP24-27 001-171-820 1. Prepare a cutout in the location as shown in the figure as below. 170+2 170+2 110+2...
-
Page 31: Power Supply Unit
1. INSTALLATION Power Supply Unit 1.5.1 Installation considerations Keep in mind the following points when selecting a location. • Locate the unit away from heat sources because of heat that can build up inside the cabinet. • Select a location where the vibration is minimal. •... -
Page 32: Processor Unit
1. INSTALLATION 1.5.2 How to install the Power Supply Unit Use four bolts (M6, local supply) to fix the Power Supply Unit. : Bolt holes Notch Notch Note: For bulkhead mounting, fasten the unit so that the open notches on the unit are facing the deck. - Page 33 1. INSTALLATION • Install the processor unit on the floor, or on a bulkhead with the following direction (horizontal), because of the DVD drive unit. 1.6.2 How to install the processor unit Use six bolts (M6, local supply) to fasten the processor unit. 1.
-
Page 34: Sensor Adapters (Option)
1. INSTALLATION Sensor Adapters (option) Installation considerations When you select a mounting location, keep in mind the following points: • Locate the adapter away from heat sources because of heat that can build up inside the cabinet. • Select a location where the vibration is minimal. •... -
Page 35: Intelligent Hub (Option)
1. INSTALLATION Intelligent Hub (option) Use the optional Intelligent Hub HUB-3000 to connect gateway network equipment. Do not connect this network to the shipborne LAN network. Further, do not connect a PC to this network, other than for maintenance. Installation considerations Keep in mind the following considerations when selecting a location. -
Page 36: Switching Hub (Option)
1. INSTALLATION Switching Hub (option) Use the HUB-100 to connect sensor networks. This network cannot be connected to the shipborne LAN network. Further do not connect a commercial PC to this network, other than for the maintenance. For the installation procedures, see the operator’s manual for HUB-100 (Pub. No.OMC-35191). -
Page 37: Wiring
WIRING Overview Cabling considerations To lessen the chance of picking up electrical interference, avoid where possible rout- ing the antenna cable (power and LAN) near other onboard electrical equipment (ra- dars, TX radio antennas, etc.). Also avoid running the cable in parallel with power cables. - Page 38 2. WIRING About wiring • Use the optional USB cable (type: OP24-32) to connect to the USB port on the control unit. • The length of the USB cable must be within 5 m to prevent equipment trouble. • The length of LAN cables must be within 50 m. •...
- Page 39 2. WIRING FAR-3320W, FAR-3220W-BB wiring The maximum length of cabling is 130 m. Cabling between the transceiver unit and the antenna unit: 80 m Waveguide: 50 m Antenna Unit De-icer 100-115 / DPYCY-1.5 220-230 VAC TTYCYSLA-10 FR-9 Waveguide 15/30/40/50 m...
- Page 40 2. WIRING FAR-3330SW, FAR-3230SW-BB wiring The maximum length of cabling is 110 m. Cabling between the transceiver unit and the antenna unit: 80 m Microwave coaxial cable: 30 m Antenna Unit De-icer 100-115 / DPYCY-1.5 220-230 VAC TTYCYSLA-10 LHPX-20-ASSY 15/30/40/50 m 20/30 m Transceiver Unit Sub monitor...
-
Page 41: Antenna Unit
2. WIRING Antenna Unit 2.2.1 How to fabricate the cables Three cables are connected to the antenna unit: the serial cable from the transceiver unit, waveguide (FAR-3220W-BB/3320W) or microwave coaxial cable (FAR- 3230SW-BB/3330SW), and power cable for the de-icer (option). Serial cable (TTYCYSLA-10) Sheath Sheath... - Page 42 E-bend: 200 mm, H-bend: 400 mm Microwave coaxial cable for FAR-3230SW-BB/3330SW See the FURUNO Installation Handbook (publication no. TIE-00160) for how to treat this cable. 2.2.2 How to connect the serial cable, power cable for de-icer...
- Page 43 2. WIRING 2. Detach the performance monitor connector (J807) from the RF-TB board. J807 (performance monitor) 3. Unfasten four screws to open the cable entrance cover. Note: The orientation of the cable entrance assy. can be changed, in one of the three positions shown below.
- Page 44 2. WIRING 4. Unfasten the four screws fixing the cable clamp plates (2 pcs.). Cable entrance Cable clamp plate for de-icer Cable clamp plate for serial cable DUMMY PLUG Dummy plugs are provided to insert into the unused cable slots. Insert the plugs for waterproofing.
- Page 45 2. WIRING 6. DE-ICER INSTALLATION. See also “X-band De-icer Kit Installation Instructions”, issued separately, for the de-icer not fitted at the factory. If the de-icer is not pro- vided, go to step 7. DEICER Board [TEST] button [TEST] button (03P9573) DE-ICER Board (03P9573) TB901 TB901...
- Page 46 2. WIRING 5) Coat the gasket (all brims) of the intake with the supplied oil compound. Be sure to coat the gasket completely. Intake Intake Hatch: Oil compound Brim Brim 6) Set the front cover supplied with the kit. Take care not to hit the heater ele- ments on the chassis or radiator.
- Page 47 The torque for the fixing bolts is 10.0 N•m. 12. Connect the waveguide to the antenna with either an E-bend or H-bend wave- guide. See FURUNO Technical Information TIE00160 for further information. 1) Grease the O-ring and set it in its groove on the antenna unit.
- Page 48 2. WIRING FAR-3230SW-BB/3300SW Note: If there is a chance of inclement weather when the RF unit is removed, cover the intakes on the front and rear covers with packing tape for waterproofing. Be sure to remove the tape after completing the installation. Intake (Cover with packing tape) Intake (Cover with packing tape) ex) Front side...
- Page 49 2. WIRING 2. Disconnect the performance monitor connector (J807) from the RF-TB board J807 (performance monitor) 3. Unfasten the clamping gland for the serial cable and remove the gasket, flat wash- ers and protector. Remove Remove Gasket Gasket protector. protector. Flat washers Flat washers Gland for...
- Page 50 2. WIRING 5. Pass the serial cable through the locking wire saddle circled below. Attach the ca- ble to appropriate WAGO connectors, referring to the interconnection diagram, then connect them to the RF-TB Board. - TB802 (motor): 8 pin - TB803 (signal): 16 pin - Ground wire: Attach crimp-on lug (FV1.25-3(LF) RED) to wire.
- Page 51 2. WIRING 8. Fasten the coaxial connector to the waveguide flange with three sets of M620 hex bolts, M6 spring washers and M6 nuts. Hex bolt Spring washer 9. Tape the cable with two or more turns of 5 cm self-bonding tape then wrap with PVC tape.
- Page 52 2. WIRING 3) Unfasten two bolts to remove the RF-TB assembly, then pass the power cable for the de-icer through the cable entrance. Cable entrance Cable entrance TB assembly TB assembly 4) Set the supplied locking wire saddle at location (5) in the figure below. Pass the cable through locking wire saddles (1) to (5).
- Page 53 2. WIRING 6) Set the Voltage Selection switch according to the power source for the de-icer; 115 V or 230 V. The default setting is 230 V. 7) Turn on the power to the de-icer. Press the [TEST] button on the DE-ICER board about ten seconds to check if the heater gets hot.
-
Page 54: Transceiver Unit
2. WIRING 12)Attach the supplied earth label over the earth label currently attached near the ground terminal. Grounding terminal Ground terminal Earth label 12. Reconnect the performance monitor connector (J807) then close the stern cover. The torque for the fixing bolts is 21 N•m. Transceiver Unit 2.3.1 Fabrication of cables... - Page 55 2. WIRING Antenna cable (RW-00135) Fabricate the LAN cable as shown below. See "How to fabricate the LAN cable" on page 2-28 for how to attach the LAN cable connector. ANTENNA Power line Vinyl tape Armor Side LAN cable Sheath Sheath Braided Crimp-on lug (FV2-4 BLU)
- Page 56 2. WIRING 2.3.2 Transceiver unit for FAR-3320W Antenna cable, serial cable, sub monitor cable 1. Remove the cover of the unit. 2. Unfasten the bolts from the cable clamp. Lay the cables in respective cable slots so their armors rest in the slots.
- Page 57 2. WIRING POWER: TB801 on RF-TB Board (03P9570) PPL WHT ORG YEL GRN BLU Color How to connect wires to WAGO connector Press downward. <Procedure> Terminal 1. Twist the cores. opener 2. Press the terminal opener downward. 3. Insert the wire to hole. 4.
- Page 58 2. WIRING 4. Pass the LAN cable through two locking wire saddles and connect it to port J821. Attach a crimp-on lug to the shield of each cable, referring to the figure below for the type of crimp-on lug to use. Connect shields to the locations shown below. Bind all cables with the locking wire saddle and two cable ties (local supply).
- Page 59 2. WIRING • The transceiver unit output flange is a plain type and the antenna unit output flange is a choke type, and it is important to maintain this relationship throughout the wave- guide run. Thru-deck hole Weld here. Deck TRANSCEIVER UNIT Drain waveguide...
- Page 60 2. WIRING TB803 TB801 TB804 TB802 POWER: TB801 on RF-TB Board (03P9570) ORG YEL GRN BLU PPL WHT Color How to connect wires to WAGO connector Press downward. <Procedure> Terminal 1. Twist the cores. opener 2. Press the terminal opener downward. 3.
- Page 61 5. Check that armor of cables are lying in their respective cable slots then fasten the cable clamp. Microwave coaxial plug Attach the microwave coaxial plug to the coaxial cable. See the applicable FURUNO technical information for the procedure. Attach the coaxial cable assy. to the transceiv- er unit as follows: 1.
- Page 62 2. WIRING Processor Unit Note: The interface ports approved for interconnecting navigation equipment are shown in the figure below. For details, see section 2.4.3 "How to select the serial input/ output format". J3, J4 For IEC 61162-2 or IEC 61162-1 J5, J6, J7, J8, J9, J10 For IEC 61162-1 Top view of EC-3000...
- Page 63 2. WIRING DVI3 Cable clamp (DVI3: BNCX5-L2000) (See the next page.) COM2 DVI2 MU-231/270W (COM2: DSUB9P- LAN1 X2-L cable DVI2: DVI-D/D HUB-3000 S-LINK cable) (DTI-C5E350 VCV cable) Power cable (IEC60320-C13- L5M cable) Ground wire LAN2 USB1 (IV-2sq., HUB-100/MC-3000S RCU-025/026 local supply) (FR-FTPC-CY cable, (TS-20-071-1 cable) LAN3...
- Page 64 2. WIRING How to fabricate the LAN cable Fabricate the LAN cable (FR-FTPC-CY, DTI-C5E350 VCV), as shown below. (Wrap both edges of the armor with vinyl tape.) Make sure the shield of the cable contacts the shell of the modular plug. Note: For a locally supplied LAN cable, expose the armor and clamp the armor with the cable clamp.
-
Page 65: Processor Unit
2. WIRING IPX2 kit The optional IPX2 kit (Type: OP24-23, Code No.: 001-171-780) protects the connec- tors shown below to waterproofing standard IPX2. Contents of IPX2 kit Name Type Code No. Remarks Binding Screw #4-40UNCX3/16 000-176-619-10 Connector Gasket 1 24-014-0107 100-367-730-10 For D-sub connectors Connector Gasket 2... - Page 66 2. WIRING 2.4.2 How to connect cables inside the processor unit How to fabricate the cables Fabricate the JIS cables (see the Appendix for equivalent cables if not available local- ly) as shown below. Connect the cables to the WAGO connectors on the I/O Board (24P0124) inside the processor unit.
- Page 67 2. WIRING How to connect the cables 1. Unfasten four screws (M48) to remove the top cover from the processor unit. 2. Unfasten the three bolts circled below to remove the upper plate of the cable clamp. Clamp holes (upper) Unfasten this bolt to use Unfasten this bolt to use the lower clamp holes.
- Page 68 2. WIRING 4. Connect the WAGO connectors to the I/O Board, referring to the interconnection diagram. J12 (main control unit) For J13 and J14 (sub control units), see the figure at step 2 in this procedure. 5. Bind the cables to the fixing metal in the processor unit with the cable ties (sup- plied).
- Page 69 2. WIRING 2.4.3 How to select the serial input/output format How to set the termination resistors Use the jumper blocks JP1 and JP2 on the I/O Board (24P0124) to set the termination resistor J3 and J4 ON or OFF. The default setting is ON. •...
- Page 70 2. WIRING How to select the serial input/output format Use the connectors J3 and J4 to set the input/output format for serial CH1/CH2, from IEC-61162-1 or IEC-61162-2. For connectors J5 to J10, use the TTYCS-1Q or TTYCSLA-1Q cable. Connector J3 Pin# Signal In/Out...
- Page 71 2. WIRING Connector J6 Pin# Signal In/Out Description Remarks TD4-A Serial CH4, output IEC61162-1 Use TTYCS(LA)-1Q, IEC61162-1 only TD4-B Serial CH4, output IEC61162-1 RD4-H Serial CH4, input IEC61162-1 RD4-C Serial CH4, input IEC61162-1 Connector J7 Pin# Signal In/Out Description Remarks TD5-A Serial CH5, output IEC61162-1 Use TTYCS(LA)-1Q,...
- Page 72 2. WIRING How to set contact input/output The connector J11 can be used for the connection of contact input or voltage input. Refer to the figures shown below to make the wiring which complies with the input specification. Note: The input must not exceed the range of the input voltage, to prevent malfunc- tion.
-
Page 73: Power Supply Unit
2. WIRING Power Supply Unit Wire the unit as shown below. See the interconnection diagram for details. • PSU-014: For FAR-3220W • PSU-015: For FAR-3330SW PSU-015 PSU-014 Fuse holder Fuse holder (2 pcs.) 1. Connect the ground wire between the ground terminal on the chassis and the ship’s earth. - Page 74 2. WIRING 4. Pass the LAN cable of the antenna cable and serial cable through the cable clamp. 2. Pass the cable 2. Pass the cable to next lane. to next lane. Set the cable. Set the cable. 1. Insert the cable. 1.
- Page 75 2. WIRING 7. Fabricate the antenna cable as shown below. RW-00135 See "How to fabricate the LAN cable" on page 28 for how to attach the LAN cable connector. Power line Armor Vinyl tape LAN cable Sheath Sheath Braided Crimp-on lug (M4) shield Crimp-on lug (M3) Wrap the shield of LAN cable...
- Page 76 2. WIRING 11. Connect the shield wires of the antenna cable and serial cable for processor unit. Grounding point (for antenna cable) Grounding point (for antenna cable) Grounding point Grounding point (for serial cable for processor unit) (for serial cable for processor unit) 12.
-
Page 77: Monitor Unit
2. WIRING Monitor Unit For how to wire the monitor unit, see the operator’s manual supplied with the monitor unit. Also, for resolution and image data output settings, see the Instruction Manual (E32-01305-*). Mounting considerations Standard type • Connect the radar main monitor to the DVI1 and COM1 ports. •... -
Page 78: Sensor Adapters (Option)
2. WIRING How to open the [INSTALLATION SETTING] menu Turn off the monitor unit. While you hold the DISP key, press the BRILL key to turn on the monitor unit. Keep the DISP key pressed until the [INSTALLATION SETTING] menu appears. Note: When the [DVI PWR SYNC] slide switch is ON, turn on the connected external equipment while you press the DISP key to turn on the monitor unit. - Page 79 2. WIRING 2.7.1 MC-3000S Use the LAN cable FR-FTPC-CY cable to connect the MC-3000S and the processor unit. With HUB-100, a maximum of eight MC-3000S can be connected. Fabrications TTYCS-1Q cable LAN cable (FR-FTPC-CY) (J8) (J8) (J9) (J9) #1 to 4: 110 #1 to 4: 110 #1 to 4: 100 #1 to 4: 100...
- Page 80 2. WIRING TTYCSLA-1 cable TTYCS-1 cable Core: 6 Core: 6 Core: 6 Core: 6 Vinyl tape Vinyl tape Shield (fold back) Shield (fold back) Vinyl tape Vinyl tape (width: 10) (width: 10) (width: 10) (width: 10) See Note 1. See Note 1. TTYCS-4 cable TTYCSLA-4 cable J4/J6: 100...
- Page 81 2. WIRING Connections Unfasten four screws to remove the cover. Pass the cables through the clamps and attach the cables to respective connectors. The shield (or drain wire) must lie in (con- nected to) the clamp. For TTYCSLA cables, attach a shrinking tube (local supply), to drain wire, then use these crimp-on lugs and screws to connect the drain wire here.
- Page 82 2. WIRING How to set input specification (J4 to J9) For connectors J4 to J7, the connections are different depending on the input specifi- cations as shown below. Connector J4 Pin # Signal name In/Out Remarks IEC61162-2 IEC61162-1 Modbus* TD1-A Serial CH1, out- TTYCS(LA)-4 TTYCS(LA)-4...
- Page 83 2. WIRING Connector J6 Pin # Signal name In/Out Remarks IEC61162-2 IEC61162-1 TD3-A Serial CH3, output IEC61162-1/2 TTYCS(LA)-4 TTYCS(LA)-4 TD3-B Serial CH3, output IEC61162-1/2 RD3-A Serial CH3, input IEC61162-2 No connection RD3-B Serial CH3, input IEC61162-2 ISOGND3 Isolation, GND (CH3) RD3-H Serial CH3, input IEC61162-1 No connection TTYCS(LA)-4...
- Page 84 2. WIRING Case gasket OP24-28 The optional kit OP24-28 protects the connectors on the MC-3000C to waterproofing standard IPX2. Case gasket (type: OP24-28, code no.: 001-169-970) Name Type Code No. Remarks Case gasket (serial) 24-014-2051 100-367-880-10 For MC-3000S 1. Unfasten four binding screws to remove the cover from the adapter. Binding screw Cover 2.
- Page 85 2. WIRING 2.7.2 MC-3010A/3020D/3030D • MC-3010A: Inputs analog signal. To use MC-3010A as current input, connect short pins to each terminals. • MC-3020D: Inputs digital signal (8ch contact input). Contact or voltage input is se- lectable (contact input requires short pins). •...
- Page 86 2. WIRING Connection For TTYCSLA cables, pass the drain wire through shrink tubing, then attach these crimp- on lugs and screws to connect drain wires to chassis. IV-1.25sq. (Local supply) IV-1.25sq. (Local supply) TTYCS-1/ TTYCS-1/ TTYCSLA-1 TTYCSLA-1 MC1.5-W-L cable MC1.5-W-L cable IV-1.25sq.
- Page 87 2. WIRING • Power current: Pass the power current to the shunt resistor, 1k/parallel (combined resistance: 500) to input the amount of voltage change at the both ends of the re- sistor to the operational amplifier. AN +15V +15V +VS1 AN- IN Current +VS2...
- Page 88 2. WIRING How to set ACK input (MC-3020D) Use the connectors J3 to J6 on the to set the ACK input for ACK1 to ACK8 as shown below. • Input circuit for voltage input 470Ω/ 0.5W Resistor DC12V_OUT 2.2kΩ / 1W MC-DIN DIGI_IN1 DC voltage input...
- Page 89 2. WIRING Connector J4 ACK3 ACK3 ACK4 ACK4 Pin # Signal name In/Out Remarks contact voltage contact voltage DC12V_OUT ACK3 In Pin #1-#2: No connection short DIGI_IN3 MPYC-12 According to ACK3 input DIGI_RTN3 MPYC-12 GND (DC12V) No connection DC12V_OUT ACK4 In Pin #1- No con- #2: short...
- Page 90 2. WIRING Connector J6 ACK1 ACK2 ACK2 Pin # Signal name In/Out Remarks contact voltage contact voltage DC12V_OUT ACK1 In Pin #1-#2: No connec- short tion DIGI_IN7 MPYC-12 DIGI_RTN7 MPYC-12 GND (DC12V) No connec- tion DC12V_OUT ACK2 In Pin #1-#2: No connec- short tion...
- Page 91 2. WIRING Connector J5 Signal Alarm5 Alarm5 Alarm6 Alarm6 Remarks name NO Out NC Out NO Out NC Out Alarm5 MPYC-12 No connection COM5 MPYC-12 No connection Alarm5 MPYC-12 No connection COM6 MPYC-12 No connection Connector J6 Signal Alarm7 Alarm7 Alarm8 Alarm8 Remarks...
- Page 92 2. WIRING Case gasket OP24-29 The optional kit OP24-29 protects the connectors on the MC-3010A/3020D/3030D to waterproofing standard IPX2. Case gasket (type: OP24-29, code no.: 001-169-960) Name Type Code No. Remarks Case gasket (analog) 24-014-2052-1 100-367-961-10 MC-3010A/3020D/3030D 1. Unfasten four binding screws to remove the cover from the adapter. Cover Binding screw 2.
- Page 93 2. WIRING 2.7.3 How to set jumper blocks in the sensor adapters MC-3000S See the jumper blocks on the MC-CS Board (24P0114) referring to the tables that fol- low. J14 J22 J23 J15 J16 J17 J20 J21 MC-CS Board (24P0114) Rotary switch: Use the rotary switch (S2) to set the Modbus address when setting connectors J4/J5 to Modbus.
- Page 94 2. WIRING (Termination resistor ON) • When setting the starting/ending terminal for the multipoint, or the multipoint is not connected (CH1 to 4). • When setting the starting/ending terminal for Modbus (CH1, CH2) (Terminal resistor OFF) • When setting the terminal other than starting/ending for the multipoint (CH1 to 4). •...
- Page 95 2. WIRING MC-3010A/3020D/3030D This paragraph shows how to set the MC-ANLG Board (24P0115, for MC-3010A), MC-DIN Board (24P0116, for MC-3020D) and MC-DOUT Board (24P0117, for MC- 3030D). Rotary switch: Use the rotary switch (U18) to set the MODBUS address with a digit of number from “0”.
-
Page 96: Intelligent Hub (Option)
2. WIRING Intelligent HUB (option) Fix the LAN cables to the cable clamp with the cable ties (supplied). Power port Power Fail DPYC-1.5 cable DPYC-1.5 cable Ground wire (IV-1.25sq., supplied) LAN cable No use. LAN port To gateway network (ECDIS, radar, etc.) Attach the LAN cap (supplied) to the unused connector holes to meet waterproofing standard IPX2. -
Page 97: How To Extend The Control Unit Cable (Option)
2. WIRING How to Extend the Control Unit Cable (option) To extend the length of the cable between a control unit and the processor unit, use the optional cable assy 6TPSH-XH12X2-LxxSP1 (for RCU-024) or 6TPSH-XH12X2- LxxSP2 (for RCU-026). You can select the cable length among 10, 20 and 30 m. 2.9.1 Radar control unit 1. - Page 98 2. WIRING 9. Unfasten the three bolts circled in the figure below to remove the cable clamp (up- per). Clamp holes (upper) Unfasten this bolt to use Unfasten this bolt to use the lower clamp holes. the lower clamp holes. Clamp holes (lower) Unfasten these three bolts to remove the upper plate.
- Page 99 2. WIRING 2.9.2 Trackball control unit 1. Unfasten four binding screws (M38) from the bottom of the control unit, and a pan head screw (M38) and flat washer from the back of the control unit to remove the cover. Note: Remove the cover slowly to prevent damage to the cables connected to the circuit board in the control unit.
- Page 100 2. WIRING 5. Fasten the shield of the cable assy with the cable clamp (removed at step 2), then connect the connector at the end of the cable assy to the J1 on the circuit board. Note: The shield of the cable must not touch the circuit board. Cable assy Shield Cable clamp...
-
Page 101: Settings And Adjustments
SETTINGS AND ADJUSTMENTS Note: After completing the settings and adjustments, copy the setting data to a USB flash memory, referring to section 23.2 in the Operator's Manual. This will allow resto- ration of setting data after the SPU Board is replaced, etc. How to Access the Radar Installation Menu The [RADAR INSTALLATION] menu has... -
Page 102: How To Adjust The Sweep Timing
3. SETTINGS AND ADJUSTMENTS In practice, you will probably observe some small bearing error on the display because of the difficulty in achieving accurate initial positioning of the antenna unit. The follow- ing adjustment will compensate for this error. 1. Select a stationary target echo at a range between 0.125 and 0.25 NM, preferably near the heading line. -
Page 103: How To Suppress Main Bang
3. SETTINGS AND ADJUSTMENTS How to Suppress Main Bang Main bang is the clutter at the center of the screen that you typically see on the radar display, and it may mask close-in targets. If main bang appears at the screen center, suppress it as follows. - Page 104 3. SETTINGS AND ADJUSTMENTS 3.5.1 How to enable, disable the dual radar display 1. Open the [RADAR INSTALLATION] menu, then select [OTHERS menu]. 2. Select [5 COMBINE FUNC]. 3. Select [OFF] or [ON] as appropriate.
- Page 105 3. SETTINGS AND ADJUSTMENTS 3.5.2 How to set the width and length for the picture from the exter- nal radar If two FAR-3xx0 series radars are to be used for the dual radar display, set the same display area on each radar to ensure proper performance. 1.
- Page 106 3. SETTINGS AND ADJUSTMENTS 5. Use the scrollwheel to set [START] and [ANGLE], referring to the example below. Spin the scrollwheel to set and push it to confirm. A solid green line marks the dual radar display area. Width of sector START ANGLE (Example: 130°)
-
Page 107: Other Settings
3. SETTINGS AND ADJUSTMENTS 4. Press the MENU key to close the menu. Other Settings This section describes the menu items not previously described. 3.6.1 [ECHO ADJ] menu Open the main menu then select [9 RADAR IN- STALLATION] [1 ECHO ADJ] to open the [ECHO ADJ] menu. - Page 108 3. SETTINGS AND ADJUSTMENTS 3.6.2 [SCANNER] menu Open the main menu then select [9 RADAR IN- STALLATION] [2 SCANNER] to open the [SCANNER] menu. [1 BLIND SECTOR1], [2 BLIND SECTOR2] Set area(s) where to prevent transmission. Head- ing must be properly aligned (see section 3.2) be- fore setting any blind sector.
- Page 109 3. SETTINGS AND ADJUSTMENTS 3.6.3 [INSTALLATION] menu Open the main menu then select [9 RADAR INSTALLATION] [3 INSTALLATION] to open the [INSTALLATION] menu. IMO-/A-type radars B-type radar AUTO/MANUAL AUTO/MANUAL [1 RANGE UNIT] For the B-type radar, select the range unit, NM, SM, KM or kyd then push the left but- ton.
- Page 110 3. SETTINGS AND ADJUSTMENTS [6 PM GAIN ADJ] Adjust the performance monitor, Before setup Before setup After setup After setup automatically or manually, when- ever the magnetron is replaced. For automatic adjustment, no fur- ther operation is required; close 8.1 NM to 8.1 NM to the menu at the completion of the 10.1 NM...
- Page 111 3. SETTINGS AND ADJUSTMENTS 3.6.4 [TT PRESET] menu Open the main menu then select [9 RADAR INSTALLATION] [4 TT PRESET] to open the [TT PRESET] menu. Page 2 Page 1 [1 TT DATA OUTPUT] Show the [TT DATA OUTPUT] menu. Note: Confirm the data input configuration for the equipment which will receive the TT (target tracking) sentence BEFORE setting this menu.
- Page 112 3. SETTINGS AND ADJUSTMENTS [2 NUMBER OF TT] Set the number of targets that can be acquired, [100] or [MAX] (200). For FAR-2xx7 radar, select [100]. [3 MAX RANGE] Select the maximum target tracking range, 24 or 32 nm. [4 QV DISPLAY] [OFF]: Normal picture, [ON]: Quantized video.
- Page 113 3. SETTINGS AND ADJUSTMENTS [7 TRACK PRESET] • [GATE SIZE]: Set the gate size among [S], [M], [L] or [LL]. • [FILTER RESPONSE]: Set the filter response function. The setting range is 1 to 4. 1: Filter response is improved. 4: Filter stability is improved.
- Page 114 3. SETTINGS AND ADJUSTMENTS 3.6.5 [OTHERS] menu Open the main menu then select [9 RADAR IN- STALLATION] [5 OTHERS] to open the [OTH- ERS] menu. [1 DEMO ECHO] Select the type of demonstration echo to use. [EG] (Echo Generator), [TT-TEST] or [PC]. Select [OFF] to deactivate the demonstration echo feature.
-
Page 115: Network Transmission Setting Between Ecdis And Radar
3. SETTINGS AND ADJUSTMENTS Network Transmission Setting Between ECDIS and Radar Connect the ECDIS and FAR-3xx0 series radar with the LAN cable to show the radar echo and TT symbols on the ECDIS chart display, and show the ECDIS route and user chart symbols on the radar display. -
Page 116: Synchronization With Ship's Clock
3. SETTINGS AND ADJUSTMENTS 6. When [FWD DIST NM] is different between port and starboard sides, check the checkbox of [Use different values for Port and Starboard] and then enter each set- ting value. 7. Click the [Save] button to save the configuration. Synchronization With Ship’s Clock The time (UTC) received from the GPS is shown. -
Page 117: How To Change The Display Color For
3. SETTINGS AND ADJUSTMENTS 3.10 How to Change the Display Color for Sensor Data Based on Integrity The following procedure shows how to change the color of the data in the sensor in- formation box based on the results of the Integrity Check. For the Integrity Check, see the Operator’s Manual for the Chart Radar. -
Page 118: Web Setting Menu
3. SETTINGS AND ADJUSTMENTS 4. Click [Ship & Route Parameters], then click the [Function2] tab. 5. Check the checkbox of [Show Echo tab at Overlay/NAV Tools]. 6. Click the [Save] button to save the configuration. 3.12 Web Setting Menu Set up the radar from the [Common Installation Setting] menu on the web browser. For details on the [Common Installation Setting] menu, see the Instruction Manual (E32- 01305). -
Page 119: Input/Output Data
EPFS meeting the requirements of the IMO resolution MSC.112(73). Gyrocompass meeting the requirements of the IMO resolution A.424(XI). SDME meeting the requirements of IMO resolution MSC.96(72). The radar may be interconnected via HUB-3000 to other FURUNO processing units having approved LAN ports. Processor Unit Input and output data are shown in the table below. -
Page 120: Iec 61162 Sentences
4. INPUT/OUTPUT DATA IEC 61162 Sentences Input sentence and sentence priority Data Sentence priority Acknowledge alarm AIS base station addressed channel management com- mand AIS addressed and binary broadcast acknowledgement AIS voyage static data Datum Depth DPT>DBT Heartbeat supervision report Heading (true) THS>HDT NAVTEX received message... -
Page 121: Appendix 1 Jis Cable Guide
EX: TTYCYSLA - 4 MPYC - 4 TTYCSLA-4 # of cores Designation type Designation type # of twisted pairs The following reference table lists gives the measurements of JIS cables commonly used with Furuno products: Cable Core Cable Core Diameter Diameter... - Page 122 APPENDIX 2 ROD TERMINALS MC-3000S, MC-CS Board (24P0114) Connector # Pin # Signal name Rod terminal to use Connected cable 24V_VOUT AI 0.34-6 TQ (blue) 24V_GND MODBUS-A AI 0.14-8 GY (gray) MC1.5-W-Lxxx MODBUS-B Connector # Pin # Signal name Rod terminal to use Connected cable 24V_IN AI 1.5-6 BK (black)
-
Page 123: Appendix 2 Rod Terminals
APPENDIX 2 ROD TERMINALS Connector # Pin # Signal name Rod terminal to use Connected cable TD4-A TD4-B RD4-A TTYCS-4 RD4-B AI 0.75-6 GY (gray) TTYCSLA-4 ISOGND4 RD4-H RD4-C Connector # Pin # Signal name Rod terminal to use Connected cable TD5-A TD5-B TTYCS-1Q... - Page 124 APPENDIX 2 ROD TERMINALS MC-3010A MC-ANALG Board (24P0115) Connector # Pin # Signal name Rod terminal to use Connected cable 24V_IN AI 0.34-6 TQ (blue) 24V_GND MODBUS-A AI 0.14-8 GY (gray) MC1.5-W-Lxxx MODBUS-B Connector # Pin # Signal name Rod terminal to use Connected cable 24V_OUT AI 0.34-6 TQ (blue)
- Page 125 APPENDIX 2 ROD TERMINALS Connector # Pin # Signal name Rod terminal to use Connected cable DV12V_OUT1 DIGI_IN1 DIGI_RTN1 AI 1-6 RD (red) MPYC-12 DC12V_OUT2 DIGI_IN2 DIGI_RTN2 Connector # Pin # Signal name Rod terminal to use Connected cable DV12V_OUT3 DIGI_IN3 DIGI_RTN3 AI 1-6 RD (red)
- Page 126 APPENDIX 2 ROD TERMINALS MC-3030D, MC-DOUT Board (24P0117) Connector # Pin # Signal name Rod terminal to use Connected cable 24V_IN AI 0.34-6 TQ (blue) 24V_GND MODBUS-A AI 0.14-8 GY (gray) MC1.5-W-Lxxx MODBUS-B Connector # Pin # Signal name Rod terminal to use Connected cable 24V_OUT AI 0.34-6 TQ (blue)
-
Page 127: Appendix 3 Digital Interface
APPENDIX 3 DIGITAL INTERFACE Digital Interface Input sentence ABK, ACK, ACM, ACN, ALR, CUR, DBT, DPT, DTM, GGA, GLL, GNS, HBT, HDT, MTW, MWV, NRX, RMC, RRT, THS, VBW, VDM, VDO, VDR, VHW, VSD, VTG, ZDA Output sentences ABM, ACK, ALC, ALF, ALR, ARC, BBM, EVE, HBT, OSD, RSD, RRT, TLB, TTD, TTM, VSD Data reception Data is received in serial asynchronous form in accordance with the standard referenced in IEC 61162-2. - Page 128 APPENDIX 3 DIGITAL INTERFACE ACM, ACN - Alert command $**ACM,hhmmss.ss,aaa,x.x,x.x,ca,a*hh<CR><LF> $**ACN,hhmmss.ss,aaa,x.x,x.x,ca,a*hh<CR><LF> 1. Time (hh=00 to 23, mm=00 to 59, ss.ss=00.00 to 60.99, null) 2. Manufacturer mnemonic code (3 digit alphanumeric code, null) 3. Alert identifier (0 to 9999999) 4. Alert instance (1 to 999999, null) 5.
- Page 129 APPENDIX 3 DIGITAL INTERFACE DTM - Datum reference $**DTM,ccc,a,x.x,a,x.x,a,x.x,ccc,*hh<CR><LF> 1 2 3 4 5 6 7 1. Local datum (W84=WGS84 W72=WGS72 S85=SGS85, P90=PE90 2. Local datum subdivision code (one character, null) 3. Lat offset, min (0 - 59.99999) 4. N/S 5.
- Page 130 APPENDIX 3 DIGITAL INTERFACE HBT - Heartbeat supervision sentence $**HBT,x.x,A,x*hh<CR><LF> 1 2 3 1. Configured repeat interval (00.0 to 99.9(s)) 2. Equipment status (A=Normal V=System fail) 3. Sequential sequence identifier (0 to 9) HDT - Heading, true $**HDT, xxx.x,T*hh<CR><LF> 1. Heading, degrees (0.00 to 360.00) 2.
- Page 131 APPENDIX 3 DIGITAL INTERFACE RMC - Recommended minimum specific GPS/TRANSIT data $GPRMC,hhmmss.ss,A,llll.ll,a,yyyyy.yy,a,x.x,x.x,ddmmyy,x.x,a,a,a*hh<CR><LF> 2 3 4 6 7 8 10 11 1213 1. UTC of position fix (000000 - 235959) 2. Status (A=data valid, V=navigation receiver warning) 3. Latitude (0000.00000 - 9000.0000) 4.
- Page 132 APPENDIX 3 DIGITAL INTERFACE VDM - UAIS VHF data-link message !AIVDM,x,x,x,x,s--s,x,*hh<CR><LF> 1 2 3 4 5 6 1. Total number of sentences needed to transfer the message (1 to 9) 2. Message sentence number (1 to 9) 3. Sequential message identifier (0 to 9, null) 4.
- Page 133 APPENDIX 3 DIGITAL INTERFACE VTG - Course over ground and ground speed $**VTG,x.x,T,x.x,M,x.x,N,x.x,K,a,*hh <CR><LF> 1 2 3 4 5 6 7 8 9 1. Course over ground, degrees (0.00 - 360.00) 2. T=True (fixed) 3. Course over ground, degrees (No use) 4.
- Page 134 APPENDIX 3 DIGITAL INTERFACE ALF - Alert sentence $**ALF,x,x,x,hhmmss.ss,a,a,a,aaa,x.x,x.x,x.x,x,c--c,*hh<CR><LF> 1 2 3 5 6 7 8 9 10 11 12 13 1. Total number of ALF sentences this message (1, 2) 2. Sentence number (1, 2) 3. Sequential message identifier (0 to 9) 4.
- Page 135 APPENDIX 3 DIGITAL INTERFACE OSD - Own ship data $**OSD,53.21,A,57.89,R,12.52,R,45.67,6.78,N*hh<CR><LF> 1. Heading, degrees true (0.00 - 359.99, null) 2. Heading status (A=data valid, V=data invalid) 3. Vessel course, degrees true (0.00 - 359.99, null) 4. Course reference (B/M/W/R/P, null) B=Bottom tracking log M=Manually entered W=Water referenced R=Radar tracking (of fixed target)
- Page 136 APPENDIX 3 DIGITAL INTERFACE TTM - Tracked target message $RATTM,05,12.34,23.4,R,45.67,123.4,T,1.23,8.23,N,c--c,T,R,hhmmss.ss,M*hh<CR><LF> 9 10 11 12 13 1. Target number (00 to 999) 2. Target distance from own ship (0.000 - 99.999) 3. Bearing from own ship,degrees (0.0 - 359.9) 4. True or Relative (T) 5.
-
Page 137: Serial Interface
APPENDIX 3 DIGITAL INTERFACE Serial Interface TD-A TD-B LTC1535 ISOGND RD-A RD-B 110 ohm* * Set with jumper. 470 ohm Open/close switchable. RD-H PC-400 RD-C Processor Unit: IEC 61162-2/1 input/output Sensor Adapter: IEC 61162-2/1 input/output 470 ohm RD-H PC-400 RD-C Processor Unit: IEC 61162-1 input Sensor Adapter: IEC 61162-1 input 10 ohm... - Page 160 24/Mar/2014 H.MAKI...
- Page 161 24/Mar/2014 H.MAKI...
- Page 163 D-10...
- Page 164 D-11...
- Page 165 D-12...
- Page 166 D-13...
- Page 167 D-14...
- Page 168 D-15...
- Page 169 D-16...
- Page 170 D-17...
- Page 171 D-18...
- Page 172 D-19...
- Page 173 D-20...
- Page 174 D-21...
- Page 175 D-22...
- Page 176 D-23 Y.NISHIYAMA 13/Jan/2012...
- Page 177 D-24 Y.NISHIYAMA 13/Jan/2012...
- Page 178 D-25 Y.NISHIYAMA 13/Jan/2012...
- Page 179 D-26 Y.NISHIYAMA 13/Jan/2012...
- Page 180 D-27...
- Page 181 POWER_FAIL-B HUB-3000 (REFER TO C4473-C02 FOR DETAIL) IV-1.25sq. 操作部機種は任意選択 ANY MODEL OF CONTROL UNIT MAY BE SELECTED. IV-2sq. 注記 *1)造船所手配。 *2)オプション。 DRAWN TYPE FAR-3320W(/3220W-BB) T.YAMASAKI 8/Nov/2016 CHECKED 名 称 航海用レーダー NOTE H.MAKI 8/Nov/2016 APPROVED *1: SHIPYARD SUPPLY 相互結線図 9/Nov/2016 H.MAKI...
- Page 182 空中線部 パフォーマンスモニター ANTENNA UNIT PERFORMANCE MONITOR PM-52A RSB-131 LHPX-20-ASSY TTYCYSLA-10 20/30m RW-4747 IV-3.5sq. 送受信部 TRANSCEIVER UNIT TB803 RW-00136,15/30/40/50m,φ20 RTR-109 チャ 副指示器 アカ SUB MONITOR OP_HD ダイ キ OP_BP シロ WHT クロ BLK OP_TRIG TB804 COAX. CABLE J101 STP(CAT5e) CABLE IEC61162-1/2 IEC61162-1 MAX.30m 空中線電源部...
- Page 183 H.MAKI NOTE 2/Oct/2015 INCLUDES OPTIONAL UNIT. APPROVED 相互結線図 6/Oct/2015 H.MAKI *1: SHIPYARD SUPPLY FAR-3320W オプションおよびUPS取付板を含む。 SCALE MASS NAME *2: OPTION INCLUDES OPTIONAL UNIT AND UPS FIXTURE. STANDARD CONSOLE(MARINE RADAR) *3: A CONSOLE CAN INCLUDE THREE UNTS (MC-3000S INCLUDED) AMONG SENSOR ADAPTERS.
- Page 184 空中線部 パフォーマンスモニター ANTENNA UNIT PERFORMANCE MONITOR PM-52A RSB-131 TTYCYSLA-10 IV-3.5sq. 副指示器 RW-00136,15/30/40/50m,φ20 SUB MONITOR TB803 チャ アカ OP_HD 送受信部 ダイ TRANSCEIVER UNIT キ OP_BP RTR-109 シロ WHT OP_TRIG クロ BLK TB804 COAX. IEC61162-1/2 IEC61162-1 STP(CAT5e) CABLE 制御部 MAX.30m 24P0124 PROCESSOR UNIT EC-3000 TD-A MOD-Z072-005+...
-
Page 185: Interconnection Diagrams
選択 SELECT 制御部 センサーアダプター PROCESSOR SENSOR ADAPTER UNIT MC-3000S(SERIAL 8ch) EC-3000 パネルPC部 PANEL COMPUTER UNIT PCU-3000 または OR スイッチングハブ SWITCHING HUB HUB-100 IV-1.25sq. 3-4間ジャンパー設定 オープン:電圧入力、ショート:電流入力 JUMPER SETTING BETWEEN 3 AND 4; OPEN: VOLTAGE INPUT, CLOSE: CURRENT INPUT IV-1.25sq. IV-1.25sq. 注記 *1)造船所手配。...
Need help?
Do you have a question about the FAR-3320W and is the answer not in the manual?
Questions and answers