Lantronix SecureLinx Spider User Manual
Hide thumbs
Also See for SecureLinx Spider:
- Quick start manual (18 pages) ,
- Quick start manual (16 pages) ,
- Quick start manual (16 pages)
Table of Contents
Advertisement
Advertisement
Table of Contents

Related Manuals for Lantronix SecureLinx Spider


Summary of Contents for Lantronix SecureLinx Spider
- Page 1 SecureLinx Spider™ User Guide Part Number 900-495 Revision A March 2007...
- Page 2 Copyright & Trademark © 2007, Lantronix. All rights reserved. No part of the contents of this book may be transmitted or reproduced in any form or by any means without the written permission of Lantronix. Printed in the United States of America.
- Page 3 Changes or modifications to this device not explicitly approved by Lantronix will void the user's authority to operate this device. The information in this guide may change without notice. The manufacturer assumes no responsibility for any errors that may appear in this guide.
-
Page 4: Table Of Contents
Floppy Image ______________________________________________________ 29 CD-ROM Image ____________________________________________________ 30 Virtual Media Options________________________________________________ 31 7: User Administration Local vs. Remote Authentication _______________________________________ 32 Local User Management _____________________________________________ 32 User Permissions___________________________________________________ 34 8: KVM Settings User Console ______________________________________________________ 35 Keyboard/Mouse ___________________________________________________ 37 SecureLinx Spider User Guide... - Page 5 SNMP____________________________________________________________ 49 10: Maintenance Device Information __________________________________________________ 51 Event Log_________________________________________________________ 52 11: Firmware Updates and Resets Update Firmware ___________________________________________________ 53 Reset ____________________________________________________________ 54 A: Troubleshooting B: Supported Video Formats C: Technical Support D: Compliance E: Warranty SecureLinx Spider User Guide...
-
Page 6: 1: Preface
1: Preface Purpose and Audience This guide describes how to install, configure, use, and update the SecureLinx Spider device. It is for users remotely and securely monitoring and control of one target computer system by one or more remote users. -
Page 7: 2: Introduction
It provides an overview of the products, lists their key features, and describes the applications for which they are suited. The SecureLinx Spider is a distributed KVM-over-IP device designed to remotely and securely provide monitoring and control of one (target) computer system by one or more remote users. -
Page 8: Functionality
Selective disable of Telnet/SSH − Target Server Supports Multiple Operating Systems: Windows Requirements 98/2000/2003/XP/Vista, Unix, Linux, or MAC OSX 10 − Power/keyboard/mouse: 2 USB ports; or 1 USB and 1 PS/2 keyboard and 1 PS/2 mouse connector SecureLinx Spider User Guide... - Page 9 Dimensions (H x W x D) 13.2 x 5.8 x 3.1 cm (5.2 x 2.3 x 1.2 in) − Refer to Figure 1 for cable dimensions − Weight 185g (6.6oz) − Shipping Weight .5 kg (1.0 lbs) SecureLinx Spider User Guide...
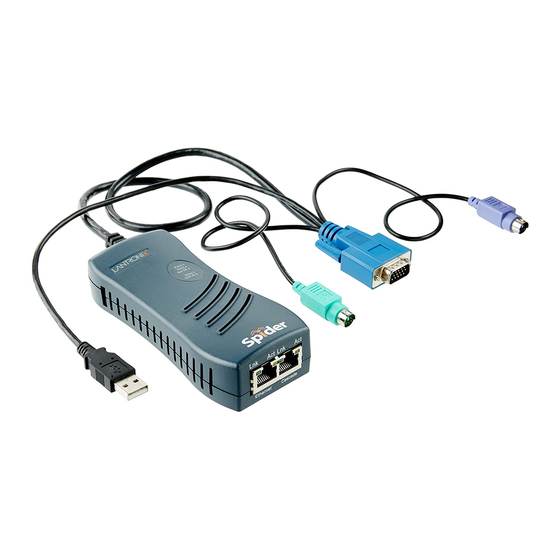
- Page 10 2: Introduction Figure 1 Spider Cable Dimensions SecureLinx Spider User Guide...
-
Page 11: 3: Installation
3: Installation This chapter describes how to install the SecureLinx Spider. Package Contents In addition to the Spider distributed KVM/IP module, the box contains the following items: Null modem DB9F to RJ45 serial cable Mounting kit Quick Start Guide CD-ROM containing documentation and utilities An optional external AC/DC power supply is available. -
Page 12: Batch Versus Individual Setup
The quickest and easiest source of power is the auxiliary DC input. DC supplies are available from Lantronix under order number 520-085-R. If using a third party charger with mini-USB connector, make sure it is 5V@1A regulated (“Efficiency level III” or “IV”... -
Page 13: Installation And Network Settings
The two blue power LEDs will illuminate and the green system OK LED flashes to indicate that it is booting up. Bootup is complete within approximately one minute. The system OK LED stops flashing and remains illuminated. SecureLinx Spider User Guide... -
Page 14: Target Computer Setup
On a Windows target system, select Control Panel Display Settings. Modify the screen resolution value as necessary. Select Control Panel Display Settings Advanced Monitor. Modify the screen refresh rate (consult the appropriate documentation when using an atypical video card or another operating system on the target computer). SecureLinx Spider User Guide... - Page 15 Spider’s equivalent settings. The Spider’s default serial settings are 115200 bps, 8 data bits, one stop bit, no parity, and no handshake. The pinout of the included cable matches a standard DB9 COM port. SecureLinx Spider User Guide...
-
Page 16: Client Setup
Spider may be changed at Device Settings Network. When idle, the Spider generates minimal network traffic but when images are rapidly changing on the host system and image quality is set to the maximum there can be SecureLinx Spider User Guide... -
Page 17: Power
The Spider can also derive power from an external DC supply. DC supplies are available from Lantronix under order number 520-085-R. The DC supply is most useful as a back- up, as the Spider will otherwise lose power if the attached computer does. -
Page 18: 4: Web Browser Access
4: Web Browser Access The SecureLinx Spider controls a target computer by redirecting its human interface peripherals of keyboard, mouse, and video screen to one or more other (client) computers. The Spider achieves this by serving up web pages and launching a Java applet across the network connection to the client using standard protocols (such as IP, TCP, and HTTP/HTTPS). - Page 19 You may then set the unit up for either local or remote authentication for other users, and define their permission level. As sysadmin, you may also make changes to the hardware settings, establish configuration parameters, and perform maintenance operations. SecureLinx Spider User Guide...
-
Page 20: 5: Remote System Control
1. From the Main Menu, select Remote Console KVM Console to launch the Lantronix Spider Remote Console. The Remote Console window may open in the foreground or in the background. If it launches in the background, click on the icon to bring the window to the front. - Page 21 The top toolbar has a number of buttons for one-click access to functions, and a pull- down menu where other options may be reached. The icons vary depending on which keyboard interface is active. Access Virtual Media SecureLinx Spider User Guide...
- Page 22 The far right icon shows whether this client may interact or simply view the target computer. Monitor Only is disabled; keyboard and mouse may interact with the target. Monitor Only is enabled; this client is view-only. SecureLinx Spider User Guide...
-
Page 23: Basic Remote Console Operation
There also is no local cursor; Alt+F12 is required to free the cursor to move the focus from the active viewport. Clicking when the local cursor SecureLinx Spider User Guide... -
Page 24: Optimizing Video
To return a particular setting or all settings to the original factory defaults, click Reset this Mode or Reset All Modes. Clock and Phase are low-level settings that the A/D converter uses in the digitization process. Adjustment should not be required unless advised by Lantronix Tech Support. SecureLinx Spider User Guide... -
Page 25: Scaling Target Video To Client Resolution
After the second click the button will appear as usual, showing that the keycode was sent. Click the Close button on the title bar to close the soft keyboard. SecureLinx Spider User Guide... -
Page 26: Other Remote Console Functions
Auto Adjust Video button is clicked. As the encoding settings and noise filter may sometimes result in visible compression artifacts, selecting Options Refresh Video can be used to redraw the entire viewport area. SecureLinx Spider User Guide... -
Page 27: Telnet/Ssh
6. Use the SSH or Telnet ability to send and receive serial data between the client and the serial port. The Spider does not echo this data back to the client. 7. When complete, enter Esc-Exit to return to the command line. 8. Enter logout or l to close the connection. SecureLinx Spider User Guide... -
Page 28: Telnet Console Use
Telnet Console window, it simply passes them through to the serial port. Characters coming in from the serial port are displayed in the window. 6. When through, enter Esc-Exit to return to the command line. 7. Enter logout or l to close the connection. SecureLinx Spider User Guide... -
Page 29: 6: Virtual Media
Other client systems logging into the Spider will also see the active image in all Virtual Media pages. To upload a floppy image file: 1. From the Main Menu, select Virtual Media Floppy Disk to open the Floppy Image Upload window. SecureLinx Spider User Guide... -
Page 30: Cd-Rom Image
4. Click Set to mount the image. (The file must be structured as a CD-ROM image.)The filename appears as the Active Image and the image is available to the target computer as a letter drive (e.g. F:). 5. Click Discard to terminate the connection to the share drive. SecureLinx Spider User Guide... -
Page 31: Virtual Media Options
Options to open the Virtual Media Options window. 2. Select or deselect Disable USB Mass Storage if no image is loaded. 3. Click Apply to save settings. Click Reset to Def to restore the system default. SecureLinx Spider User Guide... -
Page 32: 7: User Administration
Modifying Passwords To change current user password: 1. Select User Management User Passwords from the Main Menu. The Change Password screen displays. SecureLinx Spider User Guide... -
Page 33: User And Group Management
(Optional) Enter the user’s mobile phone number. Group Membership Select the user’s group from the pull-down menu. Enforce user to change Select checkbox to require the user to change their password password on next login upon initial login. SecureLinx Spider User Guide... -
Page 34: User Permissions
1. Select User Management Permissions from the Main Menu. The User/Group Permissions window displays. 2. From the pull-down menu, select a User or Group to configure. 3. Modify the displayed permissions as necessary for the selection. 4. Click Update to save the permission changes. SecureLinx Spider User Guide... -
Page 35: 8: Kvm Settings
LANs where bursts of up to 2 Mbytes/second are acceptable. To modify the user console: 1. Select KVM Settings User Console from the Main Menu. The Remote Console Settings for User window displays. 2. Configure the following settings: SecureLinx Spider User Guide... - Page 36 Remote Console Button Keys Key Definition Button Keys allow simulating keystrokes at the remote system that cannot be generated from the client keyboard. A flexible syntax allows for combinations of keys being clicked in combination or in SecureLinx Spider User Guide...
-
Page 37: Keyboard/Mouse
Spider and the attached computer does not support USB, you will have a view-only system. On the PS/2 model Spider, select PS/2 to force the PS/2 interface or USB to require USB. This selection has no effect on the USB model Spider SecureLinx Spider User Guide... -
Page 38: Video
To modify video settings: 1. Select KVM Settings Video from the Main Menu. The Miscellaneous Video Setting window displays. SecureLinx Spider User Guide... - Page 39 8: KVM Settings 2. Select the Noise Filter level from the drop-down menu. 3. Click Apply to save settings. Click Reset to Def to restore system defaults. SecureLinx Spider User Guide...
-
Page 40: 9: Device Settings
Preferred Host DHCP servers can register a name for this Spider to assist in Name (DHCP only) finding it. IP address If you are using a fixed IP address, enter it in the usual dot notation. SecureLinx Spider User Guide... -
Page 41: Security
General settings for security parameters such as encryption and access control may be found at Device Settings Security. Other areas with security implications include User Management/Permissions, Authentication, Network Settings, and the Event Log; see the appropriate sections for information on those areas. SecureLinx Spider User Guide... - Page 42 IP address has not had either an Accept or Drop decision made, this selection can allow it to be either Accepted or Dropped. In other words, this pull-down defines the default action for IP addresses with no rules defined. SecureLinx Spider User Guide...
-
Page 43: Certificate
Certificate Signing Request (CSR) that needs to be certified by a certification authority (CA). To create and install a SSL certificate: 1. Select Device Settings Certificate from the Main Menu. The Certificate Signing Request window displays. SecureLinx Spider User Guide... - Page 44 CSR to a CA for certification. 4. Click Upload to upload the certificate from the client computer to the Spider. The Spider now has its own certificate used for identifying itself to its clients. SecureLinx Spider User Guide...
-
Page 45: Serial Port
Spider’s serial port. Once the port is set up, it may be accessed through the web interface at the Telnet Console window, or using a Telnet/SSH client to connect directly. SecureLinx Spider User Guide... -
Page 46: Date/Time
Ensure NAT and firewalls are set up to allow the protocol to pass. Also, provide the Spider with DNS server names. 3. Click Apply to save settings. Click Reset to Def to restore system defaults. SecureLinx Spider User Guide... -
Page 47: Remote Authentication
Specify the Distinguished Name (DN) where the directory tree LDAP Server starts in the user LDAP server. Type of external LDAP Sets the type of the external LDAP server. Available selections Server are Generic LDAP, Novell Directory Service, and Microsoft SecureLinx Spider User Guide... -
Page 48: Event Log
NFS log file, SMTP email, or SNMP to distribute event information on the network. The Spider monitors five classes of events with the logging of each enabled or disabled. To configure event log settings: 1. Select Device Settings Event Log from the Main Menu. The Event Log window displays. SecureLinx Spider User Guide... -
Page 49: Snmp
3. Click Apply to save settings. Click Reset to Def to restore system defaults. SNMP The Spider has an internal SNMP agent which has various objects accessible in its MIB. It also can generate traps based on events. The Spider permits enabling or disabling the SecureLinx Spider User Guide... - Page 50 Enter the contact name for the system. Click here to view the Click the link to view the SNMP MIB. SNMP MIB 3. Click Apply to save settings. Click Reset to Def to restore system defaults. SecureLinx Spider User Guide...
-
Page 51: 10: Maintenance
LED which can be lit by remote control, making it easier to locate. By default the LED is off, but you can uncheck the box to turn on the LED on the Spider you are connected to. 4. Click Apply. SecureLinx Spider User Guide... -
Page 52: Event Log
10: Maintenance Event Log To view the current event log: 1. Select Maintenance Event Log from the Main Menu. The Event Log window displays. 2. Navigate between logs by clicking Prev and Next. SecureLinx Spider User Guide... -
Page 53: 11: Firmware Updates And Resets
Many of the functions and features of the Spider are implemented in firmware and capable of field upgrades. The latest firmware may be found at www.lantronix.com. The firmware file, when uncompressed, is approximately 4Mbytes in size and has a .bin suffix. -
Page 54: Reset
Resetting subsystems does not terminate connected users. 4. To perform a complete reset, click Reset for Reset Device. A prompt displays, requesting confirmation. A complete reset closes all user connections and performs a full reboot. SecureLinx Spider User Guide... -
Page 55: A: Troubleshooting
7. Every time I open a dialog box with some buttons the mouse pointers are not synchronous anymore. Disable the setting Automatically move mouse pointer to the default button of dialog boxes in the mouse settings of your operating system. SecureLinx Spider User Guide... - Page 56 Make sure that the encoding is set to “plain text” and the checkbox “use for outgoing” is set. As an alternative, you may also use a Mozilla based browser (Mozilla, FireFox). SecureLinx Spider User Guide...
-
Page 57: B: Supported Video Formats
640x340 70, 85 640x400 56, 85 640x480 60, 67, 72, 75, 85 720x400 70, 85 800x600 56, 60, 70, 72, 75, 85 832x624 1024x768 60, 70, 72, 75, 85 1152x864 1152x870 1152x900 66, 76 1280x960 1280x1024 SecureLinx Spider User Guide... -
Page 58: C: Technical Support
Description of the problem Target computer interface (PS/2 or USB) and video format Status of the unit when the problem occurred (please try to include information on user and network activity at the time of the problem) SecureLinx Spider User Guide... -
Page 59: D: Compliance
D: Compliance (according to ISO/IEC Guide 22 and EN 45014) Manufacturer’s Name & Address: Lantronix Inc., 15353 Barranca Parkway, Irvine, CA 92618 USA Declares that the following product: Product Name(s): SecureLinx Spider Conform to the following standards or other normative documents: UL/CUL (CSA-22.2 No. -
Page 60: E: Warranty
Lantronix, freight prepaid. Upon verification of warranty, Lantronix will -- at its option -- repair or replace the product and return it to the customer freight prepaid. If the product is not under warranty, the customer may have Lantronix repair the unit on a fee basis or return it.
Need help?
Do you have a question about the SecureLinx Spider and is the answer not in the manual?
Questions and answers