Lantronix SM12XPA Install Manual
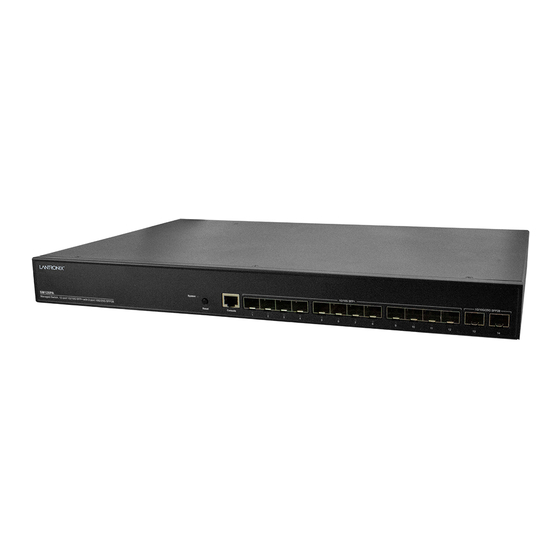
12-port multi-gig sfp+ with (2) 10g/25g sfp28 slots managed layer 3 fiber switch
Hide thumbs
Also See for SM12XPA:
- Quick start manual (2 pages) ,
- User manual (473 pages) ,
- Quick start manual (2 pages)

Related Manuals for Lantronix SM12XPA


Summary of Contents for Lantronix SM12XPA
- Page 1 SM12XPA 12-port Multi-Gig SFP+ with (2) 10G/25G SFP28 slots Managed Layer 3 Fiber Switch Install Guide Part Number 33847 Revision B October 2022...
- Page 2 SM12XPA Install Guide Intellectual Property © 2022 Lantronix, Inc. All rights reserved. No part of the contents of this publication may be transmitted or reproduced in any form or by any means without the written permission of Lantronix. Lantronix is a registered trademark of Lantronix, Inc. in the United States and other countries.
-
Page 3: Table Of Contents
Lantronix SM12XPA Install Guide Contents 1. Introduction ................................5 Product Description ..............................5 About This Manual ..............................5 Related Documentation ............................5 Ordering Information ...............................5 Features ..................................6 Software Features ..............................8 Specifications ............................... 12 Front Panel ................................13 LED Descriptions ..............................13 Reset Button ................................ 14 Back Panel ................................ - Page 4 Lantronix SM12XPA Install Guide Declaration of Conformity ..........................37 RoHS, WEEE, and Environmental Programs ....................38 Box Label and Device Label ..........................38 Record Device and System Information ......................39 33847 Rev. B https://www.lantronix.com/...
-
Page 5: Introduction
1. Introduction Product Description The SM12XPA Fiber Aggregation Switch is a managed Layer 3 (L3) Multi-Gigabit Ethernet fiber switch offering powerful Layer 2 and basic Layer 3 features for improved functionality. It also supports enhanced security features such as IP source guard and Access Control Lists to guard networks against unauthorized access. -
Page 6: Features
Lantronix SM12XPA Install Guide Features CFM, APS, Keychain, TSN, TAS • Jumbo frames up to 10K bytes • DHCP Relay, DHCP Option 82, DHCP Snooping, DHCP Server • DHCP Client, Relay, Option 66, Option 67, Option 82 • Full Layer 2 features •... - Page 7 Lantronix SM12XPA Install Guide Management DHCP Server • • RMON groups 1,2,3,9 Port Mirroring • • UPnP s-Flow • • LLDP (Link Layer Discovery Protocol) Web Management, SNMP V1/V2c/V3, HTTP/HTTPs, SSH, CLI • Firmware Update via TFTP and HTTP/HTTPs •...
-
Page 8: Software Features
Lantronix SM12XPA Install Guide Software Features Layer 2 Switching Management Web, SNMP v1/v2/v3c, SSH. CLI, RESTful API Spanning Tree Supports IEEE 802.1s MSTP, IEEE 802.1w RSTP, and IEEE 802.1d STP • Standard Spanning Tree 802.1d Spanning Tree • Rapid Spanning Tree (RSTP) 802.1w Protocol (STP) •... - Page 9 Lantronix SM12XPA Install Guide The Time-Sensitive Networking (TSN) Task Group (TG) is a part of the IEEE 802.1 Working Group (WG). The charter of the TSN TG is to provide deterministic services through IEEE 802 networks (i.e., guaranteed packet transport with bounded latency, low packet delay variation, and low packet loss).
- Page 10 Lantronix SM12XPA Install Guide Prevents traffic on a LAN from being disrupted by a broadcast, multicast, or unicast Storm Control storm on a port DHCP Snooping A feature that acts as a firewall between untrusted hosts and trusted DHCP servers Supports up to 256 entries.
- Page 11 Lantronix SM12XPA Install Guide SNMP version1, 2c and 3 with support for traps, and SNMP version 3 user-based SNMP security model (USM) • Web browser upgrade (HTTP/ HTTPs) and TFTP Firmware Upgrade Upgrade through console port as well • HTTP/HTTPs; SSH •...
-
Page 12: Specifications
Lantronix SM12XPA Install Guide Specifications IEEE 802.3 , IEEE 802.3z, IEEE 802.3ae, IEEE 802.3x, IEEE 802.3ad, IEEE 802.1D, IEEE 802.1w, IEE 802.1s, IEEE 802.1Q, IEEE 802.1p, IEEE 802.1AB, IEEE 1588v2, Standards IEEE 802.1d, EEE 802.1s, IEEE 802.1X, IEEE 802.1ab, IEEE 1588 v2, IEEE 802.1ad, ITU-T G.8031, ITU-T G.8032... -
Page 13: Front Panel
Lantronix SM12XPA Install Guide Front Panel The front panel provides the ports, LEDs and a Reset button as shown and described below. LED Descriptions The LEDs on the front panel allow switch status checking and monitoring as follows. System LED: Indicates if the switch is powered up correctly or indicates if there is a system alarm triggered for troubleshooting. -
Page 14: Reset Button
Lantronix SM12XPA Install Guide The port is enabled and has established a link to a connected device, and the connection speed is 25Gbps. Green The port is transmitting/receiving packets, and the connection speed Blinking is 25Gbps. The port is enabled and has established a link to a connected SFP28 device, and the connection speed is 1G/10G/25Gbps. -
Page 15: Back Panel
Lantronix SM12XPA Install Guide Back Panel The back panel provides for one or two hot-swappable power supplies for powering the switch and an airflow opening. The switch ships with one power supply standard; order the secondary power supply module for the maximum power. -
Page 16: Power Supply Led
Lantronix SM12XPA Install Guide Power Supply LED The PS-AC-250 power supply LED is shown and described below. PS-AC-250 LED: LED State Power Supply Condition Green Output On and OK No AC power to all power supplies 1Hz Blinking Green AC present / Only 12VSB On (PS off) or PS in Smart On state AC cord unplugged or AC power lost;... -
Page 17: Installation
Power Cord Included: To order the corresponding country-specific power cord, add the extension to the end of the SKU: SM12XPA-NA = North America, AL = North America locking right angle, LA = Latin America, EU = Europe, UK = United Kingdom, SA = South Africa, JP = Japan, OZ = Australia, BR = Brazil. - Page 18 Lantronix SM12XPA Install Guide Warnings 1. The switch is an indoor device. If you must use it to connect outdoor devices such as outdoor IP cameras or outdoor WiFi Aps with cable, you must install an arrester on the cable between outdoor device and the switch.
-
Page 19: Mounting The Switch In A 19-Inch Rack
Lantronix SM12XPA Install Guide Mounting the Switch in a 19-inch Rack 1. Attach the mounting brackets to both sides of the chassis. Insert screws and tighten them with a screwdriver to secure the brackets. Attaching Brackets to the Switch 2. Place the switch on a rack shelf in the rack. Push it in until the oval holes in the brackets align with the mounting holes in the rack posts. -
Page 20: Connecting To The Console Port
NIC to directly connect your PC to this switch. Otherwise, you need to have another management switch between your PC and the switch. Installing SFP+/SFP28 Modules Note: see the related SFP device manual for important Safety warnings. See the Lantronix SFP page for our full line of SFP transceivers. -
Page 21: Removing Sfp+/Sfp28 Modules
6. Place the module in an antistatic bag or other protective environment. Power Supply Information The SM12XPA ships with one AC power supply (100V-240V AC Input) in the box with the switch but not installed. An optional second power supply may be ordered separately. -
Page 22: Power Supply Specifications
Lantronix SM12XPA Install Guide Power Supply Specifications PS-AC-250 Output Power Output Voltage Output Current 0.1A ~ 20.8A Voltage Tolerance 11.40V ~ 12.60V Output Ripple and Noise 120mV Hold-up Time 16mS Rise Time 70mS Efficiency Bronze (20% / 50% / 100% Loading) -
Page 23: Connecting The Ac Power Cord
3: Check the SYS LED. If it is ON, the power connection is correct. Connecting AC Power Cord Adding a Second (Optional) Power Supply The SM12XPA ships with one 250W power supply installed. Use the procedure below to install a second power supply. Procedure: 1. -
Page 24: Power Supply Performance
Lantronix SM12XPA Install Guide Power Supply Performance The switch has one power supply by default. It offers a second supply as an option, as shown in the web UI: With both power supplies installed they operate in High Availability mode (one is in active mode and the other is in standby mode. -
Page 25: Initial Switch Configuration
You need a fiber NIC on your computer to connect to the switch. This can be a 1G/10G or 25G NIC card. b. You can use another switch in between your computer and the SM12XPA. Use a copper cable / SFP between your computer and a switch that has 1G or 10G SFP port and then connect the switch to the SM12XPA. -
Page 26: Connect And Log In To The Switch Using The Cli
4. Use Console port settings Baud rate: 115200bps, Data bit: 8, Parity: None, Stop bit: 1 Flow control: none. Telnet Port 23. SSH Port 22. 5. Perform initial switch configuration using the CLI (Command Line Interface). See the SM12XPA CLI Reference for details. -
Page 27: Related Information
Nuclear Facilities, Aircraft Navigation or Aircraft Communication Systems, Air Traffic Control, Life Support, or Weapons Systems ("High Risk Activities"). Lantronix and its supplier(s) specifically disclaim any expressed or implied warranty of fitness for such High Risk Activities. - Page 28 Lantronix SM12XPA Install Guide Network Safety This subclause sets forth a number of recommendations and guidelines related to safety concerns. The list is neither complete nor does it address all possible safety issues. The designer is urged to consult the relevant local, national, and international safety regulations to verify compliance with the appropriate requirements.
- Page 29 Lantronix SM12XPA Install Guide Electrical Safety Warnings Electrical Safety IMPORTANT: This equipment must be installed in accordance with safety precautions. Elektrische Sicherheit WICHTIG: Für die Installation dieses Gerätes ist die Einhaltung von Sicherheitsvorkehrungen erforderlich. Elektrisk sikkerhed VIGTIGT: Dette udstyr skal installeres i overensstemmelse med sikkerhedsadvarslerne.
-
Page 30: General Troubleshooting
Lantronix SM12XPA Install Guide General Troubleshooting Most problems are caused by the following situations. Check for these items first when starting troubleshooting: 1. Make sure your switch model supports the feature or function attempted; see Features on page 4. 2. Verify the install process; see chapter 2. -
Page 31: Led Troubleshooting
Lantronix SM12XPA Install Guide LED Troubleshooting The following table provides information to easily troubleshoot problems by taking actions based on the suggested solutions within. Table 5: LED Troubleshooting Table Symptoms Possible Causes Suggested Solutions 1. Check if correct power cord is connected firmly to the switch and to the AC outlet socket. -
Page 32: Power Consumption
Lantronix SM12XPA Install Guide Power Consumption AC Power Consumption (for one power supply) AC power consumption measured after 60 minutes under full loading with wire speed forwarding. AC 90V Input AC Current Device Operation AC Voltage Power Apparent Real Power... - Page 33 Lantronix SM12XPA Install Guide AC 220V Input AC Current Device Operation AC Voltage Power Apparent Real Power Device Status Consumption Interface Factor Power (VA) Non-loading None 0.160 0.606 35.20 21.33 Standby mode 10G SFP+ x 12 0.191 0.695 42.02 29.20...
-
Page 34: Ac Power Consumption (For Two Power Supplies)
Lantronix SM12XPA Install Guide AC Power Consumption (for two power supplies) AC power consumption measured after 60 minutes under full loading with wire speed forwarding. AC 90V Input AC Current Device Operation AC Voltage Power Apparent Real Power Device Status... - Page 35 Lantronix SM12XPA Install Guide AC 220V Input AC Current Device Operation AC Voltage Power Apparent Real Power Device Status Consumption Interface Factor Power (VA) Non-loading None 0.275 0.439 60.50 26.56 Standby mode 10G SFP+ x 12 0.295 0.530 64.90 34.40...
-
Page 36: Regulatory Agency Information
In accordance with European Union Directive 2002/96/EC of the European Parliament and of the Council of 27 January 2003, Lantronix will accept post usage returns of this product for proper disposal. The contact information for this activity can be found in the 'Contact Us' portion of this document. -
Page 37: Declaration Of Conformity
Declaration of Conformity Manufacture’s Name : Lantronix, Inc. Manufacture’s Address : 48 Discovery, Suite 250, Irvine, CA 92618, USA Declares that the product: SM12XPA Conforms to the following Product Regulations: 47 CFRFCC Part 15, Subpart B, Class A, ANSI C63.4:2014 UKCA and UL Standards: EN 62368-1, EN 55032:2015+A11:2020, Class A. -
Page 38: Rohs, Weee, And Environmental Programs
Lantronix SM12XPA Install Guide RoHS, WEEE, and Environmental Programs https://www.lantronix.com/legal/rohs/. Box Label and Device Label The labels provide information that can help the Tech Support Specialist. Box Label Device Label 33847 Rev. B https://www.lantronix.com/... -
Page 39: Record Device And System Information
Describe any action(s) already taken to resolve the problem (e.g., troubleshooting steps, etc.): ______________ _________________________________________________________________________________________ _________________________________________________________________________________________ _________________________________________________________________________________________ The model # and serial # of all other Lantronix products in the network: _______________________________ _________________________________________________________________________________________ _________________________________________________________________________________________ Describe your network environment (layout, cable type, cable distance, etc.): ____________________________... - Page 40 Phone: 949-453-3990 Fax: 949-453-3995 Technical Support Tel: +1 (800) 526-8766, Tel: +1 (949) 453-3990, or https://www.lantronix.com/technical-support/ Sales Offices For a current list of our domestic and international sales offices, go to the Lantronix web site at www.lantronix.com/about/contact. 33847 Rev. B https://www.lantronix.com/...
Need help?
Do you have a question about the SM12XPA and is the answer not in the manual?
Questions and answers