
Related Manuals for Psion Teklogix PX750


Summary of Contents for Psion Teklogix PX750
- Page 1 NEO Hand-Held Computer (Model No. PX750) May 16, 2010 Part No. 8100157.B ISO 9001 Certified Quality Management System...
- Page 2 2100 Meadowvale Boulevard, Mississauga, Ontario, Canada L5N 7J9 http:\\www.psionteklogix.com This document and the information it contains is the property of Psion Teklogix Inc., is issued in strict confidence, and is not to be reproduced or copied, in whole or in part, except for the sole purpose of promoting the sale of Psion Teklogix manufactured goods and ser- vices.
- Page 3 Return-To-Factory Warranty Psion Teklogix Inc. provides a return to factory warranty on this product for a period of twelve (12) months in accordance with the Statement of Limited Warranty and Limitation of Liability provided at www.psionteklogix.com/warranty. (If you are not already a member of Teknet and you attempt to view this warranty, you will be asked to register.
-
Page 5: Table Of Contents
Performing A Cold Reset............24 Psion Teklogix NEO Hand-Held Computer User Manual... - Page 6 3.11.2 Cleaning NEO ..............48 Psion Teklogix NEO Hand-Held Computer User Manual...
- Page 7 Volume and Sound Properties ..........91 Psion Teklogix NEO Hand-Held Computer User Manual...
- Page 8 5.10 TweakIT ................125 Psion Teklogix NEO Hand-Held Computer User Manual...
- Page 9 Charging Options ..............155 Psion Teklogix NEO Hand-Held Computer User Manual...
- Page 10 Software ..............170 Psion Teklogix NEO Hand-Held Computer User Manual...
- Page 11 Bar Code Symbologies – Descriptions ..........D-20 Psion Teklogix NEO Hand-Held Computer User Manual...
-
Page 13: Chapter 1: Introduction
1.2 Text Conventions ........4 1.3 NEO Hand-Held Computer Features......4 Psion Teklogix NEO Hand-Held Computer User Manual... -
Page 15: About This Manual
Windows Zero Config. Appendix C: Bar Code Settings describes symbologies available with the Teklogix Scanners applet. Appendix D: Teklogix Imagers Applet explains how to use the Teklogix Imagers applet. Psion Teklogix NEO Hand-Held Computer User Manual... -
Page 16: Text Conventions
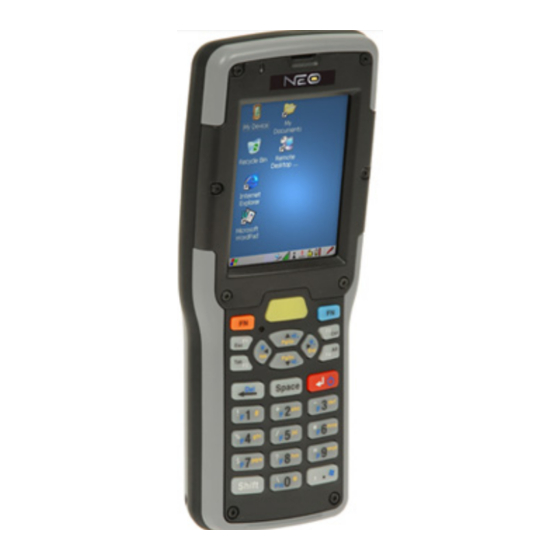
In addition, the tilted screen in conjunction with the protective rib at the base of the keyboard allows the unit to be placed facedown safely with no danger of an accidental key press. Note: For complete NEO hand-held computer specifications, refer to “Specifications” on page 167. Psion Teklogix NEO Hand-Held Computer User Manual... - Page 17 Figure 1.1 NEO Hand-Held Computer - Numeric & Alpha-Numeric Model Variants Connected NEO Standard Features: • 2.7 inch Colour Touchscreen • Windows® CE 5.0 Professional • microSD slot • 3300 mAh Battery • Discrete VoIP (Push-To-Talk) • WiFi and Bluetooth Radios Psion Teklogix NEO Hand-Held Computer User Manual...
- Page 18 ® ® • Microsoft Windows CE 5.0 Core ® ® • Microsoft Windows CE 5.0 Professional Programming Environment • HTML, XML • Mobile Devices SDK - HTML, XML - CE.NET SDK: - Java™ Psion Teklogix NEO Hand-Held Computer User Manual...
- Page 19 1D Standard Imager Option – EV15 • 2D Imager Option – HHP 5000 Internal Expansion Slots • One microSD slot Expansion Port • Battery Output Power • USB Signalling • Scanner Trigger Input Psion Teklogix NEO Hand-Held Computer User Manual...
-
Page 20: Power Management
Accessories • Desktop charger • Quad charger • Pistol grip • Holster • Hand Strap • Shoulder Strap • Additional miscellaneous adaptors and cables (a complete list of accessories is available at www.psionteklogix.com Psion Teklogix NEO Hand-Held Computer User Manual... - Page 21 2.7.1 Performing A Warm Reset ......24 2.7.2 Performing A Cold Reset......24 Psion Teklogix NEO Hand-Held Computer User Manual...
-
Page 23: Chapter 2: Basic Checkout
NEO is powered with a 3300 mAh lithium-ion battery, Model No. WA3006. Warning: Before charging the battery, it is critical that you review the safety guidelines in the ‘NEO Hand-Held Computer (Model No. PX750) Regulatory & Warranty Guide’, PN 8000175. -
Page 24: Switching The Unit Off (Suspend)
NEO for one or more wireless network profiles. A network profile contains set- tings for SSID (Service Set Identifier) and security options. Note: In most situations, the configuration of your 802.11 radio will require parameter set- ting and access keys from a network administrator. Psion Teklogix NEO Hand-Held Computer User Manual... -
Page 25: Status Tab
When there are no network profiles configured, this tab is not populated. Disable/Enable Radio: This button toggles between Disable Radio and Enable Radio de- pending on whether the radio is turned off or on. Psion Teklogix NEO Hand-Held Computer User Manual... -
Page 26: Wi-Fi Config Tab
If, for example, you are using a different type of secu- rity for your network, the fields you complete may not match those described here. Psion Teklogix NEO Hand-Held Computer User Manual... -
Page 27: Authentication Modes
Open Authentication Open authentication does not provide security. When this option is chosen, NEO will connect to wireless networks which do not use authentication or encryption. Psion Teklogix NEO Hand-Held Computer User Manual... -
Page 28: Eap
This menu allows you to choose the EAP (Extensible Authentication Protocol) type used for 802.1x authentication to an access point. The following EAP types are supported by Wi-Fi Config: • TLS: Provides strong security via the use of client certificates for user authentication. Psion Teklogix NEO Hand-Held Computer User Manual... -
Page 29: Encryption
Only the Encryption options that are compatible with the type of Auth. Mode you’ve chosen will be listed. In fact, in some cases, this menu will not be available at all. Psion Teklogix NEO Hand-Held Computer User Manual... -
Page 30: Connecting The Wireless Network
The Status tab is displayed. The Status field displays ASSOCIATING while the 802.11b/g radio attempts to connect to the network. Once the association is complete, the Status tab is populated with the appropriate information about your network. Psion Teklogix NEO Hand-Held Computer User Manual... -
Page 31: Configuring Tcp/Ip
Tap on Start>Settings>Network and Dial-up Connections. Tap on the radio icon for which you want to assign an IP address – in the sample screen below, the icon is labelled SDIO86861. The Wireless Statistics screen is displayed. Psion Teklogix NEO Hand-Held Computer User Manual... - Page 32 Tap the stylus on the radio button next to Specify an IP address to select it. • Type an IP, Subnet Mask and Default Gateway address in the appropriate fields. Press [ENTER] to save your information. Psion Teklogix NEO Hand-Held Computer User Manual...
-
Page 33: Name Server
• Tap on the Name Servers tab. The DNS and WINS fields in the Name Servers tab allow you to specify additional WINS and DNS resolvers. The format for these fields is ###.###.###.###. Psion Teklogix NEO Hand-Held Computer User Manual... -
Page 34: Advanced Tab
A dialog box is displayed letting you know that you will lose all unsaved data. Tap on Once the reset is complete, the Wireless Zero Config screen is displayed on NEO. Refer to Appendix B: “Wireless Zero Config” for details. Psion Teklogix NEO Hand-Held Computer User Manual... -
Page 35: Checking The Scanner
If you are using Windows XP or earlier, your data transfers require Active Sync. To install ActiveSync, follow the step-by-step instructions provided with the program’s setup wizard. Refer to the following website for details: http://www.microsoft.com/windowsmobile/activesync/activesync45.mspx Psion Teklogix NEO Hand-Held Computer User Manual... -
Page 36: Using Windows Mobile Device Center
To execute a cold reset and launch the Windows CE 5.0 operating system (bypassing the boot menu): • Press and hold down the [FN/BLUE] [FN/ORANGE] and [ENTER] keys simultane- ously for a minimum of six seconds. Psion Teklogix NEO Hand-Held Computer User Manual... - Page 37 3.9 Bluetooth Radio ........43 Psion Teklogix NEO Hand-Held Computer User Manual...
- Page 38 3.11.2 Cleaning NEO ....... . 48 Psion Teklogix NEO Hand-Held Computer User Manual...
-
Page 39: Features Of Neo
Features of NEO Figure 3.1 Front View Receiver (Light Emitting Diode) Microphone Protective Rib... -
Page 40: The Battery
Important: Before attempting to install, use or charge the battery pack, it is critical that you review and follow the important safety guidelines in NEO Hand-Held Computer Regulatory & Warranty Guide, PN 8000175. Psion Teklogix NEO Hand-Held Computer User Manual... -
Page 41: Removing The Battery Pack
These include: • AC Wall Adaptor (Model No. PX3012) – operates as an AC power source and when used in conjunction with PX3001 or PX3054, also charges the battery installed in the unit. Psion Teklogix NEO Hand-Held Computer User Manual... -
Page 42: Switching The Hand-Held On And Off
The startup screen is displayed. Note: If NEO is in suspend state, pressing [ENTER] ‘wakes’ the unit from this state. The screen in which you were working before the computer entered suspend state is displayed. Psion Teklogix NEO Hand-Held Computer User Manual... -
Page 43: The Keyboard
Keep in mind, however, that the ‘One Shot’ function allows you to determine how many key presses will lock a modifier key ‘on’ – one press or two. Refer to “Keyboard One Shot Modes” on page 83 for details. Psion Teklogix NEO Hand-Held Computer User Manual... -
Page 44: Locking Modifier Keys
The delete function ([FN/BLUE] [<—/DEL]) erases the character at the cursor position. The [CTRL] And [ALT] Key The [CTRL] and [ALT] keys modify the function of the next key pressed and are applica- tion-dependent. Psion Teklogix NEO Hand-Held Computer User Manual... -
Page 45: Function Keys And Macro Keys
The hand-held keyboard is equipped with a total of 10 function keys colour coded in blue print on the numeric keys; these keys are accessed by executing a key combination, [FN/BLUE] followed by the appropriate numeric key. Psion Teklogix NEO Hand-Held Computer User Manual... -
Page 46: The Macro Keys
Important: The letters you choose appear in the taskbar, providing a visual indicator of which letter will be displayed on the screen. To choose the letter a: • Press the [FN/ORANGE] key, and press the numeric key [2]. Psion Teklogix NEO Hand-Held Computer User Manual... -
Page 47: Creating Uppercase Letters
Remember that you can refer to the softkey bar for a visual indication of which alpha key will be displayed on the screen. Important: Once you have finished typing alpha characters, remember to turn off or unlock the [FN/ORANGE] key. Psion Teklogix NEO Hand-Held Computer User Manual... -
Page 48: The Keyboard Backlight
Stylus Properties dialog box in the Control Panel to recalibrate the screen. • In the Control Panel, choose the Stylus icon to display the Stylus Properties window. Psion Teklogix NEO Hand-Held Computer User Manual... -
Page 49: Neo Hand-Held Indicators
3.6.1 LED Indicator A tri-coloured LED – yellow, green or red – is located on the upper-left side of the unit, above the screen. Psion Teklogix NEO Hand-Held Computer User Manual... -
Page 50: Audio Indicators
To specify how you want NEO to respond under various condi- tions, refer to “Volume and Sound Properties” on page 91. Psion Teklogix NEO Hand-Held Computer User Manual... -
Page 51: Adjusting The Receiver Volume
The taskbar changes dynamically, and only those icons that are applicable are displayed. For example, if a radio is not installed in NEO, the radio signal icon is not displayed in the taskbar. Psion Teklogix NEO Hand-Held Computer User Manual... - Page 52 When the battery power is completely depleted, a final warning window indicates that NEO will be powered down. If NEO is using external AC power, an AC icon is displayed in the taskbar. Full Empty AC Connection Psion Teklogix NEO Hand-Held Computer User Manual...
-
Page 53: Monitoring The Battery And Maximizing Run Time
2 years of use (less than 60% of original capacity remaining). Keep in mind however that heavy usage or operating the unit at temperature ex- tremes will shorten the battery life. Psion Teklogix NEO Hand-Held Computer User Manual... -
Page 54: Storing Batteries
• A ‘never used’ lithium-ion battery that has been stored for 3 years may have limited or no useful life remaining once put into service. Think of batteries as perishable goods. Psion Teklogix NEO Hand-Held Computer User Manual... -
Page 55: Uploading Data In A Docking Station
Panel. Tap on the Power icon and then, the Built-in Devices tab. Add a checkmark next to Enable Bluetooth. To pair a device: • Follow the manufacturer’s instructions to place the remote device in pairing mode. Psion Teklogix NEO Hand-Held Computer User Manual... - Page 56 Note: If a remote device has authentication enabled and you’ve skipped the authentication process, a pop-up screen will ask if you want to allow the remote device to connect to NEO. Tap on Yes and type the PIN. When authentication is complete, tap on Done. Psion Teklogix NEO Hand-Held Computer User Manual...
- Page 57 This dialog box offers a number of additional options such as enabling Encryption and se- lecting three different modes: Serial, ActiveSync and Scanner • Serial is used for simple serial port communication. • ActiveSync is for ActiveSync-over-Bluetooth. Psion Teklogix NEO Hand-Held Computer User Manual...
-
Page 58: The Microsd Card
Slide the microSD card onto the guides on the SD door – position the card with the con- nector pads at the bottom so that when the door is closed, they make contact with the connectors in the unit. Connector Pads On microSD Card microSD Door (opened) Psion Teklogix NEO Hand-Held Computer User Manual... -
Page 59: General Maintenance
• benzyl alcohol, and • concentrated acids. Note: An optional protective cover (PN 1081366) is available to help protect the touch- screen. Follow the installation instructions shipped with the cover. Psion Teklogix NEO Hand-Held Computer User Manual... -
Page 60: Cleaning Neo
To clean ink marks from the keyboard and touchscreen, use isopropyl alcohol. • When using a dampened cloth to clean NEO, make certain that the battery cover is in place to protect the battery compartment from moisture. Psion Teklogix NEO Hand-Held Computer User Manual... - Page 61 4.5 Using a Dialog Box........66 Psion Teklogix NEO Hand-Held Computer User Manual...
-
Page 63: Chapter 4: Working With Windows Ce 5.0
Table 4.1 for a description of the navigation keys. Table 4.1 Keyboard Navigation Operation Key or Key Combination Switch between active [ALT] [TAB] applications Open task manager [ALT] [ESC] Psion Teklogix NEO Hand-Held Computer User Manual... -
Page 64: Working With Files, Folders And Programs
You must press one key followed by the next in sequence. Refer to Section 4.2: “Working with Files, Folders and Programs” for additional details about key- board navigation. Working with Files, Folders and Programs Figure 4.1 Working with Windows Icons Folder Program Icon File Psion Teklogix NEO Hand-Held Computer User Manual... -
Page 65: The Startup Desktop
Double-tap on the icon to open a window or, in the case of an application icon, launch an application. On the keyboard: • Use the arrow keys to highlight the icon, and press [ENTER] to launch the highlighted icon. Psion Teklogix NEO Hand-Held Computer User Manual... -
Page 66: The Desktop Icons
Microsoft WordPad is a basic word processor used to create, edit, view and print text documents. Remote Desktop Connection This option allows NEO to communicate with a remote desktop PC. “Remote Connect” on page 73 provides a website with step-by-step instructions. Psion Teklogix NEO Hand-Held Computer User Manual... -
Page 67: The Taskbar
Press [FN/BLUE] [.] (period) to display the Start Menu. • Press the [DOWN] arrow key to highlight Shortcuts in the Start Menu, and then press the [RIGHT] arrow key to display the sub-menu. Psion Teklogix NEO Hand-Held Computer User Manual... -
Page 68: Customizing The Taskbar
Tap the stylus on the items you want to activate or deactivate. The check mark indicates active items. If you’re using the keyboard: • Highlight the options you want to activate, and press the [SPACE] key to select them. The check mark indicates active items. Psion Teklogix NEO Hand-Held Computer User Manual... - Page 69 Menu hot key brings up the Security dialog box to allow authorized users to access the hand-held configuration. Keep in mind that this dialog box is also displayed if an invalid ap- plication is entered in the Application from Start Menu field. Psion Teklogix NEO Hand-Held Computer User Manual...
-
Page 70: The Start Menu
Note: If a ‘Start Menu’ item has an underlined character, you can type the underlined alpha character to display the associated dialog box– for example, displaying the ‘Start Menu’ and then typing the letter ‘s’ displays the ‘Security’ dialog box. Psion Teklogix NEO Hand-Held Computer User Manual... -
Page 71: The Desktop
By default, the security level is set to User, restricting access to only the most basic Start Menu items. To allow access to all the Start Menu and taskbar options: • In the Security Level dialog box, tap on the radio button next to Supervisor. Psion Teklogix NEO Hand-Held Computer User Manual... -
Page 72: Configuring Security
By default, a security icon is not displayed for user-level security. Note: It is recommended that you enable ‘Allow Teklogix Security Level’ so that autho- rized Psion Teklogix service personnel can access your unit should it require maintenance. -
Page 73: Programs
The X icon deletes the sound and the diskette icon allows you to save your sound. Command Prompt Command Prompt is used to access the DOS command prompt. At the prompt, you can type DOS commands such as dir to display all the directories in the drive. Psion Teklogix NEO Hand-Held Computer User Manual... -
Page 74: Shortcuts
The taskbar displays indicators such as a radio signal icon and the security level. These indicators are attached to dialog boxes that provide addi- tional information. • Choose Start>Shortcuts>System Tray. Psion Teklogix NEO Hand-Held Computer User Manual... - Page 75 Task Manager The Task Manager allows you to switch to another task or to end an active task. To display the task manager window: • Tap on Shortcuts>Task Manager, or Press [ALT] [ESC]. Psion Teklogix NEO Hand-Held Computer User Manual...
-
Page 76: Settings
Control Panel The Control Panel contains applets used to configure hardware, the operating system and the shell. If NEO is running with the Psion Teklogix TekTerm application or another appli- cation, additional configuration applets may appear in the Control Panel. -
Page 77: Run
Figure 4.7 Run Dialog Box 4.4.7 Shutdown The Shutdown menu includes these options: Suspend, Warm Reset and Cold Reset. Psion Teklogix NEO Hand-Held Computer User Manual... -
Page 78: Using A Dialog Box
You can move between dialog items by tapping on them with your stylus, or by pressing the arrow keys and the [TAB] key ([SHIFT] [TAB] moves the cursor backwards). Psion Teklogix NEO Hand-Held Computer User Manual... - Page 79 Figure 4.9 on page 67 you can choose to Obtain an IP address via DHCP or Specify an IP address. Press the [TAB] key to highlight a radio button option, and then select a radio button by pressing the arrow keys to highlight the appropriate option. Psion Teklogix NEO Hand-Held Computer User Manual...
- Page 80 Saving Your Choices: Once you’ve made all your changes, press the [ENTER] key to save your changes and exit the window. Note: A dialog box item that is displayed in grey text indicates that it is not currently available. Psion Teklogix NEO Hand-Held Computer User Manual...
- Page 81 5.5.6 Manage Triggers ....... 98 5.5.6.1 Trigger Mappings ......98 Psion Teklogix NEO Hand-Held Computer User Manual...
- Page 82 5.12 Dr. Debug ........131 Psion Teklogix NEO Hand-Held Computer User Manual...
- Page 83 5.14.3 Translations Tab.......140 5.14.3.1 Case Rules ......141 Psion Teklogix NEO Hand-Held Computer User Manual...
-
Page 85: Chapter 5: Configuration
TekTerm is a powerful emulation application ideally suited for real time data transaction ap- plications associated with mainframes and servers. NEO includes unique features that support TekTerm – a Psion Teklogix application that has the ability to maintain multiple si- multaneous sessions with a variety of host computers. For detailed information, please refer to the TekTerm Software User Manual, PN 8000073. -
Page 86: Control Panel Icons
The client checks that the certificate has been digitally signed by a certification authority that the client explicitly trusts. “Certificate Assignment” on page 102 directs you to the appropriate setup information. Psion Teklogix NEO Hand-Held Computer User Manual... - Page 87 Allows multiple-scanner trigger management, including the ability to configure each of the trigger buttons. You can configure the trigger ID for each trigger button for both single- and double-click, and the double-click time. Psion Teklogix NEO Hand-Held Computer User Manual...
- Page 88 Windows CE 5.0 Core. Region & Language Allows you to specify the local language that is to be displayed on the hand-held screen along with the format of numbers, currency, time and date for your region. Psion Teklogix NEO Hand-Held Computer User Manual...
- Page 89 System Settings (display font size), and provides the Registry Editor. Volume & Sounds Allows you to adjust the volume of the sound emitted to indicate events like warnings, key clicks and screen taps. Psion Teklogix NEO Hand-Held Computer User Manual...
-
Page 90: Basic Setup
In the Display Properties dialog box, open the Backlight tab. Note: Backlight changes take effect immediately. You do not need to reset the unit. To maximize battery run time, keep the display backlight brightness and active durations as low as possible. Psion Teklogix NEO Hand-Held Computer User Manual... -
Page 91: Display Appearance
(not battery power). If NEO is drawing power from its battery, this option is ignored and the other parameters defined in Display Properties dialog box are used. 5.5.1.2 Display Appearance • In the Display Properties dialog box, open the Appearance tab. Psion Teklogix NEO Hand-Held Computer User Manual... -
Page 92: Keyboard Properties
The value assigned for this parameter determines the delay between repeat characters. Sliding the Repeat Delay bar to the left increases the delay between key repeats, and sliding the bar to the right shortens the repeat delay time. Psion Teklogix NEO Hand-Held Computer User Manual... -
Page 93: Sequence
With the [ORANGE] key locked ‘on’, if you press [2] twice and then pause between key presses for 1 second, the letter ‘b’ will be selected automatically. Moving the Sequence slider to the right increases the pause time between alpha key presses. Psion Teklogix NEO Hand-Held Computer User Manual... -
Page 94: Keyboard Backlight
Note: Tapping in the checkbox next to ‘When using external power, keep the backlight always ON’ forces the keyboard backlight to remain on when the unit is operating with external power. Note: To maximize battery run time, keep the backlight intensity at the lowest possible setting. Psion Teklogix NEO Hand-Held Computer User Manual... -
Page 95: Keyboard One Shot Modes
If you choose Lock from the drop-down menu, pressing a modifier key once locks it ‘on’ until you press the modifier key a second time to unlock or turn it off. OneShot If you choose OneShot, the modifier key remains active only until the next key is pressed. Psion Teklogix NEO Hand-Held Computer User Manual... -
Page 96: Keyboard Macro Keys
In the Keyboard Properties dialog box, open the Macros tab. Recording And Saving A Macro • In the Macro: menu highlight a macro key number, for example macro 1. Tap on the Record button. Psion Teklogix NEO Hand-Held Computer User Manual... - Page 97 Scancode Mapping. Press the mapped macro key(s) to execute the macro. Deleting A Macro To delete a macro: • In the Macros tab, highlight the macro number you want to delete. • Tap on the Delete button. Psion Teklogix NEO Hand-Held Computer User Manual...
-
Page 98: Unicode Mapping
Unicode mapping is mapped to the default Unicode value. Adding and Changing Unicode Values Important: Changes to Unicode mappings are not saved until you exit the Keyboard Properties dialog box. • Choose the Add/Change button Psion Teklogix NEO Hand-Held Computer User Manual... -
Page 99: Scancode Remapping
There are three different tables of scancode mappings: the Normal table, the Blue table and the Orange table. The Normal table defines unmodified key presses; the Blue table defines Psion Teklogix NEO Hand-Held Computer User Manual... - Page 100 (e.g., Macro 2). Adding a Remap To add a new remapping: • Choose the Add button at the bottom of the dialog box. Psion Teklogix NEO Hand-Held Computer User Manual...
- Page 101 In the Scancode Remapping tab, tap the stylus on the remap you want to edit. • Tap on the Edit button, and make the appropriate changes. • Tap on OK to save your changes. Psion Teklogix NEO Hand-Held Computer User Manual...
-
Page 102: Lock Sequence
Note: It is useful to leave the ‘Show popup message’ enabled (default) so that anyone attempting to use the hand-held keyboard will see the key sequence they will need to enter to unlock the keyboard displayed on the screen. Psion Teklogix NEO Hand-Held Computer User Manual... -
Page 103: Volume And Sound Properties
A locked keyboard icon is displayed in the softkey bar when the keyboard is locked. Locked Keyboard Icon • Type the key sequence to unlock the keyboard. 5.5.3 Volume and Sound Properties • In the Control Panel, choose the Volume & Sounds icon. 5.5.3.1 Volume Adjustments Psion Teklogix NEO Hand-Held Computer User Manual... -
Page 104: Sound Adjustments
5.5.4 Power Properties This icon displays a Power Properties dialog box that indicates the battery capacity and allows you to manage battery use. • In the Control Panel, choose the Power icon. Psion Teklogix NEO Hand-Held Computer User Manual... -
Page 105: Battery Capacity
5.5.4.2 Power Saving Suspend • In the Power Properties dialog box, open the Suspend tab. Power Source This dialog box allows you to specify the suspend time for either AC Power or Battery Power. Psion Teklogix NEO Hand-Held Computer User Manual... -
Page 106: Suspend Threshold
Chapter 5: Configuration Power Properties Suspend Timeout Important: Psion Teklogix recommends setting the Suspend value to 10 minutes. To further reduce power consumption, carefully consider the duration of time that the display and the keyboard backlight are ‘on’ (see “Display Back- light”... -
Page 107: Advanced
NEO’s Windows CE 5.0 environment does not store any critical data in RAM (such as the registry or file system). If the user's application does not save data to RAM, Psion Teklogix recom- mends keeping the Suspend Threshold setting as low as possible to maximize battery run time. -
Page 108: Devices
Keep in mind that the content of this screen varies de- pending on the devices installed. Tapping on OK activates your selections. 5.5.5 Stylus Properties • In the Control Panel, choose the Stylus icon. Psion Teklogix NEO Hand-Held Computer User Manual... -
Page 109: Double-Tap
This tab allows you to disable the touchscreen. • Choose the Touch tab. Tap the checkbox next to Disable the touch panel. To enable a disabled touchscreen: • Press the following keys – [TAB] [SPACE] [ENTER]. Psion Teklogix NEO Hand-Held Computer User Manual... -
Page 110: Manage Triggers
(the module). Along with keyboard keys, trigger sources can also be grip trig- gers, external hardware triggers or software-based. When the specified key is pressed, the trigger consumer (for example, a decoded scanner) is sent a message. Psion Teklogix NEO Hand-Held Computer User Manual... - Page 111 The OK button in the top right of the Manage Triggers screen saves all changes made. If the cancel button X is tapped instead, or the [ESC] key is pressed, all changes will be discarded. Psion Teklogix NEO Hand-Held Computer User Manual...
-
Page 112: Add And Edit Trigger Mapping
Imager and Non-Decoded Scanner. If so, both devices/opera- tions will occur simultaneously. This is not recommended in most cases, especially with devices such as Imagers. It is also possible to map different sources to the same module (trigger consumer). Psion Teklogix NEO Hand-Held Computer User Manual... - Page 113 Module Trigger This identifies the driver or application receiving the trigger presses. Show All Modules By default, inactive owners are not shown. By checking this checkbox, all owners, both active and inactive, are displayed. Psion Teklogix NEO Hand-Held Computer User Manual...
-
Page 114: Certificate Assignment
Note: The Bluetooth radio uses an internal antenna. The Bluetooth radio is disabled by default. Before you begin the setup process: • Under Settings>Control Panel, tap on the Power icon. Psion Teklogix NEO Hand-Held Computer User Manual... -
Page 115: Paired Tab
To learn how to scan for devices that will appear in this tab, review “Device Tab” on page 105. Note: If a service is actively paired and connected, the device and its services are displayed in bold typeface in this list. Psion Teklogix NEO Hand-Held Computer User Manual... - Page 116 HSP/HFP (Headset Profile/Hands-Free Profile) Service Commands The HSP (Headset Profile) allows users to connect their device to Bluetooth enabled head- sets and other audio devices. HSP/HFP services provide the following unique menu options: Psion Teklogix NEO Hand-Held Computer User Manual...
-
Page 117: Device Tab
Clear removes all Bluetooth devices listed except those with currently paired and connected services. Note: To limit the scope of the scan to a particular type of device, refer to “Filtering By Class of Device (COD)” on page 106. Psion Teklogix NEO Hand-Held Computer User Manual... -
Page 118: Filtering By Class Of Device (Cod)
Pair begins the pairing process by inquiring the services and profiles of the discovered device. An authentication dialog box is displayed the first time a Bluetooth device is paired. Psion Teklogix NEO Hand-Held Computer User Manual... -
Page 119: Pairing A Device
Note: If a remote device has authentication enabled and you’ve skipped the authentication process, a pop-up screen will ask if you want to allow the remote device to connect to NEO. Tap on Yes and type the PIN. When authentication is complete, tap on Done. Psion Teklogix NEO Hand-Held Computer User Manual... - Page 120 This dialog box offers a number of additional options such as enabling Encryption and se- lecting three different modes: Serial, ActiveSync and Scanner. • Serial is used for simple serial port communication. • ActiveSync is for ActiveSync-over-Bluetooth. Psion Teklogix NEO Hand-Held Computer User Manual...
-
Page 121: Servers Tab
NEO after a change is made to this option. The OPP Server allows other Bluetooth devices to send files to this device. • Tap on the checkbox to activate the server – the associated port name is displayed beside the server name. Psion Teklogix NEO Hand-Held Computer User Manual... -
Page 122: Mode Tab
Local Address displays the MAC address (BD_Addr) of the Bluetooth chip. HCI Version & LMP Version display the version of the chip firmware. Component indicates the version of the Psion Teklogix Bluetooth Subsystem (the manager, drivers, etc). Psion Teklogix NEO Hand-Held Computer User Manual... -
Page 123: Bluetooth Gprs Wan Connection
Manager (for instructions on pairing devices, see “Pairing a Device” on page 107). 4. To set up the internet parameters on the NEO, choose the Network And Dial-up Connections icon from the Control Panel. 5. Choose the Make New Connection icon. Psion Teklogix NEO Hand-Held Computer User Manual... - Page 124 Configure button to display the Device Properties dialog box. NEO communicates via Bluetooth to your Bluetooth-equipped cellular telephone and re- trieves the parameters for the Device Properties dialog box. NEO then disconnects. Psion Teklogix NEO Hand-Held Computer User Manual...
- Page 125 9. Under the Call Options tab, turn off Cancel the call if not connected within, and press [ENTER] to save your changes. 10. In the Modem dialog box, choose the Next button to display the Phone Number dialog box. Psion Teklogix NEO Hand-Held Computer User Manual...
- Page 126 Once you’ve edited this dialog box to reflect your network carrier requirements, press [ENTER] to save your changes. 13. At this point, you’ll need to return to the Control Panel, and choose the Network and Dial-up Connections icon. Psion Teklogix NEO Hand-Held Computer User Manual...
-
Page 127: Total Recall
When you tap on your new connection, an onscreen message indicates the status of your connection: connected, disconnected, error messages, and so on. Total Recall Total Recall is a Psion Teklogix utility developed to maintain applications and settings during a cold boot. This utility is based on a backup and restore concept. •... -
Page 128: Creating A Backup Profile
To change the Profile Name (optional), tap on the [...] button to the right of the Profile Location field. • In the Name field, type a new name. (You may need to move the onscreen keyboard down to make the Name field visible.) Psion Teklogix NEO Hand-Held Computer User Manual... - Page 129 Defining the Type of Backup Default Backup Default Backup is selected so that all installed or copied files, database entries, and the Reg- istry are saved. Choose Advanced Backup if you want to tailor your backup. Psion Teklogix NEO Hand-Held Computer User Manual...
- Page 130 The options you chose to back up appear in your window as the backup progresses. When the backup is complete, the last item in the list indicates the location and name of the backup profile. Psion Teklogix NEO Hand-Held Computer User Manual...
-
Page 131: Restoring A Profile
(Next) button. [-->] • Click on Restore Profile to restore the files to your hand-held. 5.7.3 Viewing a Profile To view a profile: • In the Total Recall home screen, tap on View Profile. Psion Teklogix NEO Hand-Held Computer User Manual... -
Page 132: Deleting A Profile
In the next screen, locate your backup file, and tap on OK. A warning pop-up screen appears asking if you’re certain that you want to delete this file. • Tap on Yes to delete the file. Psion Teklogix NEO Hand-Held Computer User Manual... -
Page 133: The Storage Manager
4. Press the Dismount button to dismount the memory card. All partitions on the card will be dismounted. 5. Press the Format button to format the memory card. All partitions and information on the card will be erased during the formatting process. Psion Teklogix NEO Hand-Held Computer User Manual... -
Page 134: Creating Partitions
The new partition is automatically mounted. This is indicated by an asterisk (*) next to its name in the partition list. Any unallocated space on the card is indicated at the left, and addi- tional partitions can be created in it. Psion Teklogix NEO Hand-Held Computer User Manual... -
Page 135: Partition Management
1. Choose the desired partition. 2. Tap the Properties button. The Partition Properties dialog appears. 3. Tap the Dismount button. The partition is dismounted. The asterisk disappears next to its name in the partitions list. Psion Teklogix NEO Hand-Held Computer User Manual... - Page 136 Choose the desired partition. • Tap the Properties button. The Partition Properties dialog appears. • Tap the Mount button. The partition is mounted. The asterisk appears next to its name in the partitions list. Psion Teklogix NEO Hand-Held Computer User Manual...
-
Page 137: Ipv6 Support
Choose the checkbox next to Enable IPv6 Network Support to enable this internet protocol. 5.10 TweakIT This utility allows you to ‘tweak’ or adjust Advanced system settings (interface, network and servers), User settings (font size and docking port message), and provides a Registry Editor. Psion Teklogix NEO Hand-Held Computer User Manual... -
Page 138: Advanced
Temp folder – that is, data are always loaded from the FTP Server to the Temp folder and from the Temp folder to the FTP Server. If this option is disabled, a warm reset must be performed to accept the change. Psion Teklogix NEO Hand-Held Computer User Manual... -
Page 139: Interface And Network Settings
128-bit IP address (replacing version 4). Modem Logging When this option is enabled, NEO logs AT commands (e.g., dial-out information, password string, etc.) that the administrator can monitor for debugging purposes. Modem commands are stored in: \MdmLog.txt. Psion Teklogix NEO Hand-Held Computer User Manual... -
Page 140: Services Settings
Access Point (AP): High, Medium or Low. If, for example, this option is set to High, the radio will begin searching for a new Access Point while still at a fairly strong Psion Teklogix NEO Hand-Held Computer User Manual... -
Page 141: User
When Directional Tabbing is enabled, arrow keys can be used to navigate to various links, text boxes and so on around the page rather than limiting you to the [TAB] key. Fit-to- Screen reformats the web page on the NEO screen into a single column, eliminating the Psion Teklogix NEO Hand-Held Computer User Manual... -
Page 142: User Display Settings
This option allows you to adjust the size of the font used the NEO display: Large, Normal or Small. 5.10.2.3 User System Settings Docking Port Message Checking this box blocks the message that normally pops up on the display when NEO is docked. Psion Teklogix NEO Hand-Held Computer User Manual... -
Page 143: Registry Editor
Tap on Start>Settings>Control Panel. Tap on the Error Reporting icon. 5.12 Dr. Debug Dr. Debug is an error diagnostic tool. • Tap on Start>Settings. Tap on Control Panel followed by the Dr. Debug icon. Psion Teklogix NEO Hand-Held Computer User Manual... -
Page 144: Status
• Choose an Error Level from the drop down menu. • To change the location where debug information will be stored, tap on the button to the right of the Log Folder option. Psion Teklogix NEO Hand-Held Computer User Manual... -
Page 145: Utilities
Utilities 5.12.3 Utilities The Utilities tab is used to log network traffic. When you tap on the Start button, debug data is collected so that, if necessary, it can be forwarded to a Psion Teklogix technician for evaluation. 5.13 Teklogix Imagers Settings The Teklogix Imagers applet is used to create, modify, delete and activate imager settings. -
Page 146: Imager Demo Applet
5.13.1 Imager Demo Applet An Imager demo applet is also provided to illustrate how the imager works. • To launch the demo applet, tap on Start>Programs, and then tap on the Imager icon. Psion Teklogix NEO Hand-Held Computer User Manual... -
Page 147: Teklogix Scanner Settings
(ISCP). If an HHP 5000 imager is installed in your unit, refer to Appendix D: “Teklogix Imagers Applet” for details about setting up your imager. The symbologies listed change to reflect the scanner you choose and the bar codes it supports. Psion Teklogix NEO Hand-Held Computer User Manual... -
Page 148: Restoring Default Settings
Choose Default subtree to reset only the parameters in the symbology you selected, or choose Default all settings to reset all scanner parameters to default settings. To reset a single parameter to its default setting: Psion Teklogix NEO Hand-Held Computer User Manual... -
Page 149: Options Tab
Click Time (msec) This parameter controls the maximum gap time (in milliseconds) for a double-click. If the time between the first and second clicks of the scanner trigger is within this time, it is con- Psion Teklogix NEO Hand-Held Computer User Manual... -
Page 150: Display Parameters
These parameters determine whether or not the NEO emits an audible scanner ‘beep’ when a good (successful) scan or a bad (unsuccessful) scan is performed. Set these parameters to either on to enable the beeper or off to disable it. Psion Teklogix NEO Hand-Held Computer User Manual... -
Page 151: Data Handling
ASCII of that OS and display it accurately, in this example, using double- byte characters. If you choose ISO-8859-1 Latin 1, data will be displayed according to the character mapping of this Latin 1 code page, ignoring the local OS code page. Psion Teklogix NEO Hand-Held Computer User Manual... -
Page 152: Translations Tab
– if a rule within a case fails, the entire case fails. • In the Translation tab, tap on the Case # to create rules. Psion Teklogix NEO Hand-Held Computer User Manual... -
Page 153: Case Rules
Match and replace at index – matches the match string at a specified index and replaces/changes it. • Replace at index – replaces/changes unspecified data in a given range. • Add barcode prefix/suffix – adds a global prefix or suffix. Psion Teklogix NEO Hand-Held Computer User Manual... - Page 154 Translation information about the status of each case/rule is displayed in the scan log file (see “Scan Log File” on page 139) when enabled. This is useful if a case fails, and you are trying to determine why a rule is failing. Psion Teklogix NEO Hand-Held Computer User Manual...
- Page 155 6.7 Cigarette Lighter Adaptor — Model PX3056 .....161 6.8 Quad Docking Station – PX3004 PC & PX3004 NPC ....162 Psion Teklogix NEO Hand-Held Computer User Manual...
- Page 156 6.10 Bluetooth Peripherals ....... . 166 Psion Teklogix NEO Hand-Held Computer User Manual...
-
Page 157: Chapter 6: Peripheral Devices & Accessories
Belt Kit including Belt Clip, Adaptor Plate and screws PX3025 Pistol Grip PX3030 Important: Carrying accessory screws have adhesive pre-applied to them. Do not add adhesives to secure screws on carrying accessories; these chemicals may damage the plastic casing. Psion Teklogix NEO Hand-Held Computer User Manual... -
Page 158: Attaching The Hand Strap
– the eyelets on the either side of the base of the unit. You may find Figure 6.2 useful as a reference. Figure 6.2 Attaching the Quick Release Buckle • Guide the quick release buckle through the lanyard loop to secure it to the unit. Psion Teklogix NEO Hand-Held Computer User Manual... - Page 159 M2x6 screw included with the hand strap. Figure 6.3 Attaching the Hand Strap • Snap the hand-strap buckle into the lanyard quick release buckle. Psion Teklogix NEO Hand-Held Computer User Manual...
-
Page 160: Belt Clip Installation
NEO Unit Folded End • Position the belt clip adaptor plate so that the thicker, folded end aligns with the angled scanner section on the back of NEO as illustrated in Figure 6.5. Psion Teklogix NEO Hand-Held Computer User Manual... - Page 161 Figure 6.6 Attaching The Adaptor Plate Attach Belt Clip here Metal Insert Metal Insert • With the adaptor plate attached to NEO, join the plastic belt clip (included in your kit) to the adaptor plate. Psion Teklogix NEO Hand-Held Computer User Manual...
-
Page 162: The Expansion Port
– you’ll see an indent in the shape of the port cover in the pistol plastic. • Position the pistol grip over the slots moulded into the back of NEO, and snap it into place – no screws required. Psion Teklogix NEO Hand-Held Computer User Manual... -
Page 163: The Battery
Important: Carefully review the “NEO Hand-Held Computer Regulatory & Warranty Guide”, PN 8000175, before handling a battery. NEO operates on a 3300 mAh lithium-ion battery pack, Model No. WA3006. Note: Review Chapter 7: “Specifications” for detailed information. Psion Teklogix NEO Hand-Held Computer User Manual... -
Page 164: Adaptor/Cable Options
• A slot on the side of the adaptor is provided to accommodate the carrying strap. Thread the carrying strap through the slot on the adaptor. (Refer to Figure 6.8 on page 153.) Psion Teklogix NEO Hand-Held Computer User Manual... - Page 165 Chapter 6: Peripheral Devices & Accessories RS-232 Adaptor – Model No. PX3050 Figure 6.8 Threading Wrist Strap Through Adaptor Slot to accommodate Thread Carrying Strap Carrying Strap through slot in Adaptor Psion Teklogix NEO Hand-Held Computer User Manual...
-
Page 166: Micro-Usb Adaptor - Model No. Px3054
NEO, the adaptor allows you to connect an AC wall adaptor (Model No. PX3012) or an automotive power adaptor (Model No. PX3056) to the hand-held. The micro-USB port allows you to utilize the micro-USB to Ethernet cable (Model No. PX3052) and the micro- Psion Teklogix NEO Hand-Held Computer User Manual... -
Page 167: Charging Options
Align the docking port on the base of NEO with the adaptor, and gently snap the adaptor into place. Charging Options Psion Teklogix offers a variety of charging options for NEO. These include: • AC Adaptor – Model No. PX3012 with PX3054 •... -
Page 168: Installation - Docking Stations
Quad docking station–can consume up to 3A @ 120VAC or 1.5A @ 240VAC. 6.4.3 Operator Controls NEO docking stations have no operator controls or power switches. Desktop Docking Station – PX3001 Figure 6.9 Desktop Docking Station Spare Battery Charge Well Connector Pins Tri-coloured Psion Teklogix NEO Hand-Held Computer User Manual... -
Page 169: Desktop Docking Station Setup
It is equipped with a micro-USB port. Figure 6.10 Back of Desktop Docking Station Micro-USB Port DC IN Socket Important: This docking station can only be used to charge Psion Teklogix approved lithium-ion batteries. 6.5.1 Desktop Docking Station Setup Refer to instruction sheet PN 1081333 for a checklist of startup steps. -
Page 170: Charging A Spare Battery
Additional peripherals and other power consumption features will also alter the specified charge time. The desktop docking station stops applying power to the battery when it is fully charged– there is no risk of overcharge if the battery remains in the charge well. Psion Teklogix NEO Hand-Held Computer User Manual... -
Page 171: Docking Station Charger Led Indicators
• Ensure NEO is fully seated in the dock. • Verify that there is power from the mains outlet. • Remove the power cable from the docking station, and check it for damage. Psion Teklogix NEO Hand-Held Computer User Manual... -
Page 172: Indicator Does Not Light When Battery Installed
The hand-held unit automatically detects insertion into the desktop dock and loads the ap- propriate drivers to communicate with the micro-USB Ethernet converters. Network Addressing The host application uses standard TCP/IP protocol to name, locate and communicate with a specific NEO on the network. Psion Teklogix NEO Hand-Held Computer User Manual... -
Page 173: Troubleshooting Usb Operations
The cigarette lighter adaptor allows you to power your hand-held and recharge your battery using power drawn from your vehicle’s automotive power outlet when used in conjunction with the DC/USB Adaptor, Model No. PX3054. Psion Teklogix NEO Hand-Held Computer User Manual... -
Page 174: Quad Docking Station - Px3004 Pc & Px3004 Npc
Quad Docking Station – PX3004 PC & PX3004 NPC Note: The quad docking station is shipped with a user manual. It is critical that this man- ual be reviewed for additional information and updates. Psion Teklogix NEO Hand-Held Computer User Manual... -
Page 175: Quad Docking Station Setup
Although the USB converters have fixed Ethernet MAC addresses, there is generally no cor- relation between these addresses and a specific hand-held. The host application uses standard TCP/IP protocol to name, locate and communicate with a specific NEO on the network. Psion Teklogix NEO Hand-Held Computer User Manual... -
Page 176: Battery Charging - Led Behaviour
Make certain that the battery installed in NEO is not defective. Scanners and Imagers NEO supports 1D laser scanner (SE955), 2D imager (HHP 5000) and 1D imager (EV15) options to address a variety of user application requirements. The scanner installed in your Psion Teklogix NEO Hand-Held Computer User Manual... -
Page 177: Basic Scanner Operations
When the scan is successful, the bar code data is displayed on the screen until the scan button (or pistol trigger) is released, but only if Scan Result is turned on in the Options tab of the Scanner Settings menu in the Control Panel. Psion Teklogix NEO Hand-Held Computer User Manual... -
Page 178: Troubleshooting
NEOs equipped with Bluetooth radios make it possible to communicate with a variety of Bluetooth peripherals, including GSM/GPRS handsets, scanners, printers, and so on. The range of the Bluetooth radio is limited to approximately 10 meters. Psion Teklogix provides built-in support for the Bluetooth peripherals listed below. • GSM/GPRS universal handset. - Page 179 7.3.3 HHP 5000 Imager Performance ..... . .174 7.3.3.1 HHP 5000 Decode Zone ..... .175 Psion Teklogix NEO Hand-Held Computer User Manual...
-
Page 181: Chapter 7: Specifications
Built-in microphone and receiver on all Connected hand-helds • 85db internal beeper • Bluetooth (on equipped models) Internal Expansion Slot • One microSD memory card slot – user accessible. Expansion Port • Battery Power Psion Teklogix NEO Hand-Held Computer User Manual... -
Page 182: Software
® ® • Microsoft Windows CE 5.0 Professional (connected variant) ® ® • Microsoft Windows CE 5.0 Core (batch variant) Programming Environment • HTML, XML. • Mobile Devices SDK: - CE .NET SDK Psion Teklogix NEO Hand-Held Computer User Manual... -
Page 183: Wireless Communication
NEO Radio Specifications 7.2.1 802.11b/g Radio Direct Sequence Spread Spectrum (DSSS) and Orthogonal Frequency Division Multiplexing (OFDM) • Form factor: Embedded surface mount module, 8.2 x 8.4 mm • Antenna port: U.FL jack Psion Teklogix NEO Hand-Held Computer User Manual... -
Page 184: Bluetooth Radio
RX Sensitivity (BER<0.1%): -80 dBm max • Data Rate: V1.2 = 732.2 kbps and 57.6 kbps asymmetric, 433.9 kbps symmetric V2.0 = 2 & 3Mbps • 802.11 Co-existence: 2-line hardware handshake with 802.11 radio Psion Teklogix NEO Hand-Held Computer User Manual... -
Page 185: Scanner/Imager Specifications
1.75 in. – 35.5 in. / 4.45 cm – 90.17 cm 40 mil * - 40 in. / * - 101.6 cm 55 mil * - 55 in. / * - 139.7 cm * dependent on width of bar code Psion Teklogix NEO Hand-Held Computer User Manual... -
Page 186: Ev15 Imager Specifications
0 Lux to 100,000 Lux Minimum Range Maximum Range Mil Size Inches Inches 14.5 35.5 High quality symbols in normal room light. 7.3.3 HHP 5000 Imager Performance Specification HHP 5000 Image Sensor 752H x 480 CMOS sensor Psion Teklogix NEO Hand-Held Computer User Manual... -
Page 187: Hhp 5000 Decode Zone
95% RH, non-condensing at 122° F (50°C) Shock 18 shocks of 3,500 G for 0.5 msec at 23°C (73° F) 7.3.3.1 HHP 5000 Decode Zone Performance Focal Point 7 inches (17.8 cm) from lens plate Psion Teklogix NEO Hand-Held Computer User Manual... - Page 188 (8.9 cm) (7.9 cm) (5.3cm) (5.8 cm) (7.9 cm) (5.1 cm) 7.6 in. 9 in. 13.2 in. 10.2 in. 8.8 in. 13.0 in. (19.3cm) (22.9 cm) (33.5 cm) (25.9 cm) (22.4 cm) (33 cm) Psion Teklogix NEO Hand-Held Computer User Manual...
-
Page 189: Docking Connector Pinouts
USB Vbus (5 V @ 500 mA) DOCK_ID Dock Identifier USB_DOCK_D- USB Data Negative USB_DOCK_D+ USB Data Positive USB_DOCK_ID USB Identifier DGND Ground RS-232 Transmit Console Data RS-232 Receive Console Data DGND Ground Psion Teklogix NEO Hand-Held Computer User Manual... -
Page 190: Battery Connector
USB Device port negative data USB+ USB Device port positive data EXP-~TRIG Pistol Grip Trigger signal EXP_~DETECT Detection of installed device 8, 9, 10, 11, 12 SW_VSYS_PWR Power Output (2.7-4.2VDC, 1A peak, 500mAh nominal) switched Psion Teklogix NEO Hand-Held Computer User Manual... -
Page 191: Wireless Information
• Tap on Start>Settings>Network and Dial-up Connections. • Choose the radio icon representing the radio you want to set up – in the sample screen in Figure B.1, this is labelled as SDIO86861 Psion Teklogix NEO Hand-Held Computer User Manual... - Page 192 Figure B.2 Wireless Statistics • Wireless Information Tab: This tab displays existing networks to which you can con- nect, and it allows you to add a new network or modify the settings for an existing network. Psion Teklogix NEO Hand-Held Computer User Manual...
- Page 193 Wireless Properties Tab: Type the appropriate SSID (Service Set Identifier) in the Network name (SSID): dialog box. The Network name field can contain a maximum of 32 characters. The name assigned here is listed as a preferred network. Psion Teklogix NEO Hand-Held Computer User Manual...
- Page 194 The receiving station then sends back a frame that indicates whether it recognizes the identity of the sending station. Psion Teklogix NEO Hand-Held Computer User Manual...
- Page 195 MD5 encapsulated in an EAP is used in conjunction with the 802.1X standard to authenticate users at the MAC layer. Available EAPs are listed in the dropdown menu next to the EAP option. To activate 802.1X, highlight 802.1x authentication, and check the checkbox. Psion Teklogix NEO Hand-Held Computer User Manual...
-
Page 196: Assigning An Ip Address
B.2.2 Advanced Features To display the Advanced Wireless Settings dialog box: • Tap on the Advanced button in the Wireless Information tab. (Refer to Figure B.3.) This window lists the available preferred networks. Psion Teklogix NEO Hand-Held Computer User Manual... - Page 197 • Highlight the network that you want to modify. • Tap on the Properties button. • Make any necessary changes in the Wireless Properties dialog box, and press [ENTER] to save the changes. Psion Teklogix NEO Hand-Held Computer User Manual...
-
Page 199: Decoded (Internal) Scanners
Double-tapping on this parameter dis- plays a dialog box in which you can enter a value between 5 and 99, measured in tenths of seconds. Psion Teklogix NEO Hand-Held Computer User Manual... - Page 200 When you double-tap on this parameter, a dialog box is displayed in which you can choose a value of 30 sec., 1 min., 2 min., or 3 min. Psion Teklogix NEO Hand-Held Computer User Manual...
- Page 201 Scanning these is an alternative way to reprogram some of the scanner features. Important: Psion Teklogix strongly recommends that this parameter only be enabled by personnel with a very strong understanding the scanner and how it operates.
- Page 202 ID character is inserted between the prefix and the decoded symbol. When you double-tap on this parameter, a dialog box is displayed in which you can choose a transmit code: None, AIM, or Symbol. Psion Teklogix NEO Hand-Held Computer User Manual...
- Page 203 Note: “Trioptic Code 39” and “Full ASCII” should not be enabled simultaneously. The scanner does not automatically discriminate between these two symbologies. Trioptic Code 39 symbols always contain six characters. Setting this parameter to on allows this type of symbology to be recognized. Psion Teklogix NEO Hand-Held Computer User Manual...
- Page 204 When this parameter is enabled, the integrity of a Code 39 symbol is checked to ensure that it complies with specified algorithms. Note: Only those “Code 39” symbols that include a Mod 43 check digit are decoded when this parameter is enabled. Psion Teklogix NEO Hand-Held Computer User Manual...
- Page 205 When a value is assigned for this parameter, only bar codes that match the field size exactly can be transmitted. If a value is assigned to this parameter, a Minimum Size and Maximum Size value is not required. Psion Teklogix NEO Hand-Held Computer User Manual...
- Page 206 Enable GS1-128/GS1 US Previously named UPC/EAN and UCC, these types of bar codes include group separators and start codes. Enable ISBT 128 To successfully scan this variation, Enable ISBT 128 must be set to on. Psion Teklogix NEO Hand-Held Computer User Manual...
- Page 207 When this parameter is enabled, five leading zeros are added to decoded EAN-8 symbols, making them compatible in format to EAN-13 symbols. Disabling this parameter returns EAN-8 symbols to their normal format. Add/Remove Data Refer to “Add/Remove Data” on page C-8 for details. Psion Teklogix NEO Hand-Held Computer User Manual...
- Page 208 When you double-tap on one of these parameters, a dialog box is displayed where you can choose one of three options for lead-in characters for UPC-E and UPC-E1 symbols trans- mitted to the host device: System Char – system character transmitted with the data, C-10 Psion Teklogix NEO Hand-Held Computer User Manual...
- Page 209 When you double-tap on this parameter, a dialog is displayed in which you can enter a value between 2 and 20. A value of 5 or above is recommended when Autodiscriminate is selected and you are decoding a mix of UPC/EAN symbols with and without supplementals. Psion Teklogix NEO Hand-Held Computer User Manual C-11...
- Page 210 Length within a range allows you to decode a code type within a speci- fied range from 4 to 55. Length Restriction Refer to “Length Restriction” on page C-7 for details. Add/Remove Data Refer to “Add/Remove Data” on page C-8 for details. C-12 Psion Teklogix NEO Hand-Held Computer User Manual...
- Page 211 Refer to “Length Restriction” on page C-7 for details. Add/Remove Data Refer to “Add/Remove Data” on page C-8 for details. C.1.14 MSI Plessey Enabled Set this parameter to on to enable MSI Plessey. Psion Teklogix NEO Hand-Held Computer User Manual C-13...
- Page 212 MOD 10/MOD 11 or MOD 10/MOD 10. Length Restriction Refer to “Length Restriction” on page C-7 for details. Add/Remove Data Refer to “Add/Remove Data” on page C-8 for details. C-14 Psion Teklogix NEO Hand-Held Computer User Manual...
- Page 213 All GS1 DataBar bar codes encode a GTIN-12 or GTIN-13 in a 14-digit data structure. In order to make the GTIN-12 or GTIN-13 a 14-digit data structure, a leading zero or zeros is filled to the left of the GTIN. Psion Teklogix NEO Hand-Held Computer User Manual C-15...
- Page 214 Length within a range allows you to decode a code type within a speci- fied range from 1 to 12. Length Restriction Refer to “Length Restriction” on page C-7 for details. Add/Remove Data Refer to “Add/Remove Data” on page C-8 for details. C-16 Psion Teklogix NEO Hand-Held Computer User Manual...
- Page 215 Setting this parameter to ‘on’ enables Micro PDF-417 bar code scanning. Micro PDF-417 is a multi-row symbology that is useful for applications requiring greater area efficiency but lower data capacity than PDF-417. Psion Teklogix NEO Hand-Held Computer User Manual C-17...
-
Page 216: Decoded (Iscp
Refer to “Length Restriction” on page C-7 for details. Add/Remove Data Refer to “Add/Remove Data” on page C-8 for details. Decoded (ISCP) • Tap on the Scanner drop-down menu, and choose Decoded (ISCP). C-18 Psion Teklogix NEO Hand-Held Computer User Manual... - Page 217 Same Read Validate The data is only transmitted after repeated reads give the same result. The value assigned at this parameter determines the number of reads required, from 0 to 10 times. Psion Teklogix NEO Hand-Held Computer User Manual C-19...
- Page 218 Setting this parameter to on enables the transmission of start and stop characters, which are usually not transmitted. Code 39 can start and end with either a * or a $ character (see also the next parameter). C-20 Psion Teklogix NEO Hand-Held Computer User Manual...
- Page 219 Refer to “Add/Remove Data” on page C-8 for details. C.2.4 Code 128 Enable Setting this parameter to on enables Code 128. GS1-128 GS1-128 is the GS1 implementation of the Code 128 barcode specification. The former correct name was UCC/EAN-128. Psion Teklogix NEO Hand-Held Computer User Manual C-21...
- Page 220 Labeling of Whole Blood and Blood Components” (June 2000, Version 1.2.1). Reading Range Determines the reading distance from which a bar code can be successfully scanned. The default setting, Extended, allows for increased reading distance. C-22 Psion Teklogix NEO Hand-Held Computer User Manual...
- Page 221 If the check digit is to be transmitted with the data, this parameter must be enabled. Add/Remove Data Refer to “Add/Remove Data” on page C-8 for details. C.2.6 EAN 8 Enabled Set this parameter to on to enable EAN 8. Psion Teklogix NEO Hand-Held Computer User Manual C-23...
- Page 222 Set this parameter to on to allow UPC-E1 (zero suppressed) bar code scans. Transmit Check Digit If the check digit is to be transmitted with the data, this parameter must be enabled. C-24 Psion Teklogix NEO Hand-Held Computer User Manual...
- Page 223 EAN/UCC GTIN. To use GTIN processing, you must activate the EAN 128 symbology. Important: When EAN 128 and GTIN processing are both activated, it is not possible to read normal EAN 128 Codes. Psion Teklogix NEO Hand-Held Computer User Manual C-25...
- Page 224 Not Transmitted strips the start and stop characters from this bar code. CLSI Library System When enabled, spaces are inserted after characters 1, 5, 10 in the 14-character label (used in the USA by libraries using the CLSI system). C-26 Psion Teklogix NEO Hand-Held Computer User Manual...
- Page 225 This parameter uses the specified algorithm of the option you've chosen to ensure the integ- rity of the symbol data before transmitting. If the data does not contain that algorithm, the data is not transmitted. Psion Teklogix NEO Hand-Held Computer User Manual C-27...
- Page 226 Minimum Length Minimum lengths for the bar code can be set from 0 to 255. The length of a code refers to the number of characters (i.e., human readable characters), including check digit(s). C-28 Psion Teklogix NEO Hand-Held Computer User Manual...
- Page 227 Length Mode You can chose to set L1 as Minimum Length or L1, L2, L3 as Fixed Length. Length Restriction Refer to “Length Restriction” on page C-7 for details. Psion Teklogix NEO Hand-Held Computer User Manual C-29...
- Page 228 Set Length L1, Set Length L2, and Set Length L3 Lengths for Discrete 2 of 5 can be set from 0 to 255. The length of a code refers to the number of characters (i.e., human readable characters), including check digit(s). C-30 Psion Teklogix NEO Hand-Held Computer User Manual...
- Page 229 Enable GS1 DataBar Omni, Expanded & Limited GS1 DataBar Omni and GS1 DataBar Expanded have omnidirectional scanning capability. GS1 DataBar Limited can only be scanned by a linear hand-held scanning device. They Psion Teklogix NEO Hand-Held Computer User Manual C-31...
- Page 230 UPC-EAN Composite Message This option allows you to choose how UPC-EAN shared bar codes are transmitted: Always Linked, Never Linked or Auto-discriminate. C.2.20 TLC-39 Enable Setting this parameter to on enables TLC-39 scanning capability. C-32 Psion Teklogix NEO Hand-Held Computer User Manual...
- Page 231 If Code 128 Emulation is enabled, the following Micro PDF-417 symbols are transmitted with one of the following prefixes: ]C1 if the first codeword is 903-907, 912, 914, 915 ]C2 if the first codeword is 908 or 909 Psion Teklogix NEO Hand-Held Computer User Manual C-33...
- Page 232 62 characters (max 2725) are encoded. Set this parameter to on enable this option. Length Restriction Refer to “Length Restriction” on page C-7 for details. Add/Remove Data Refer to “Add/Remove Data” on page C-8 for details. C-34 Psion Teklogix NEO Hand-Held Computer User Manual...
-
Page 233: Required Applets
Every preset belongs to a preset type. The following preset types are available: Psion Teklogix NEO Hand-Held Computer User Manual... - Page 234 Symbology Settings menu, refer to “Bar Coding Tab – Configuring Symbologies” on page D-15. This preset enables the decoding of all bar codes that the imager can decode. Linear This preset enables the decoding of all the 1D symbologies that the imager can decode. Psion Teklogix NEO Hand-Held Computer User Manual...
- Page 235 D.2.4 Image Capture Predefined Presets The following presets enable successful image capture in almost all conditions. Note: It is recommended that the default preset be used whenever possible. Psion Teklogix NEO Hand-Held Computer User Manual...
-
Page 236: Using The Teklogix Imagers Applet
To configure the image capture presets, open the dialog box as follows: • Tap on Start>Settings>Control Panel. • Tap on the Teklogix Imagers icon, and if it’s not already selected, tap on the Imaging tab. Figure D.1 Imaging Tab Psion Teklogix NEO Hand-Held Computer User Manual... - Page 237 Highlight a preset, and tap on the View button. The associated preset window is displayed. • Tap on the + sign to expand the lists so that you can view the parameter settings. Psion Teklogix NEO Hand-Held Computer User Manual...
- Page 238 To ensure that it will work reliably, it should be as close as possible to the original predefined preset. To change a parameter value: • Highlight the custom preset, and tap on the Edit button. Psion Teklogix NEO Hand-Held Computer User Manual...
- Page 239 - Highlight the parameter and then press the [SPACE] key, or double-click on the parameter. Either method toggles between the two available values. • When you’ve completed your edits, tap on OK. Psion Teklogix NEO Hand-Held Computer User Manual...
-
Page 240: Configuring The Bar Code Decoding Camera Presets
This window lists all the presets, both predefined and the custom. Presets are identified as follows: • Predefined presets are marked as read-only. For a description, review “Predefined Pre- sets” on page D-2. • Predefined presets are marked as ‘R’ read-only. Psion Teklogix NEO Hand-Held Computer User Manual... - Page 241 Highlight the preset, and tap on the Activate button. D.4.3 Viewing a Preset To view the parameter settings in a preset: • Highlight a preset, and tap on the View button. The associated preset window is displayed. Psion Teklogix NEO Hand-Held Computer User Manual...
- Page 242 To ensure that it will work reliably, it should be as close as possible to the original predefined preset. To change a parameter value: • Highlight the custom preset, and tap on the Edit button. D-10 Psion Teklogix NEO Hand-Held Computer User Manual...
- Page 243 Either method toggles between the two available values. • When you’ve completed your edits, tap on OK. The parameter list is displayed; the new value for the changed parameter is shown. Psion Teklogix NEO Hand-Held Computer User Manual D-11...
- Page 244 Configuring the Bar Code Decoding Symbologies To configure the bar code decoding camera presets: • Tap on Start>Settings>Control Panel>Teklogix Imagers. • Tap on the Barcoding tab. Figure D.3 Viewing Bar Code Decoding Symbologies D-12 Psion Teklogix NEO Hand-Held Computer User Manual...
- Page 245 A new custom preset is created by modifying a preset – either a predefined preset or an ex- isting custom preset. To create a custom preset: • Highlight a preset, and tap on the Add button. A screen like the sample following is displayed. Psion Teklogix NEO Hand-Held Computer User Manual D-13...
- Page 246 Tap on the + symbols to expand the lists and view the parameter settings. • Scroll through the parameter list until you reach the parameter that you want to change. • For a parameter that can take a range of values: D-14 Psion Teklogix NEO Hand-Held Computer User Manual...
- Page 247 My Default. Once the preset is activated, you can enable or disable the bar codes the imager will read. • Highlight My Default in the Barcoding tab. • Double-tap on the Edit button. Psion Teklogix NEO Hand-Held Computer User Manual D-15...
- Page 248 Scroll through the parameter list until you reach the parameter that you want to change. • For a parameter that can take a range of values: - Highlight the parameter, and then press the [SPACE] key or double-click the parameter. D-16 Psion Teklogix NEO Hand-Held Computer User Manual...
- Page 249 Panel program are synchronized with changes made here. Changes made in either place affect both translation tables. • Tap on Start>Settings>Control Panel. • Tap on the Teklogix Imagers icon, and then tap on the Translations tab. Psion Teklogix NEO Hand-Held Computer User Manual D-17...
- Page 250 To configure the location for saved images, open the dialog box as follows: • Tap on Start>Settings>Control Panel. • Tap on the Teklogix Imagers icon, and then tap on the Advanced tab. D-18 Psion Teklogix NEO Hand-Held Computer User Manual...
- Page 251 Type the file Name, choose the Folder and file Type. • Choose the Location in which your files will be saved. • When you have completed all the changes, tap on the Save button. Psion Teklogix NEO Hand-Held Computer User Manual D-19...
-
Page 252: Bar Code Symbologies - Descriptions
Highlight the preset you want to edit, and tap on the Activate button – an A is added at the far right of the preset. With the activated preset highlighted, double-tap on the Edit button. D-20 Psion Teklogix NEO Hand-Held Computer User Manual... - Page 253 If this parameter is enabled, the characters +, %, and / are used as escape characters. The combination of an escape character and the next character is converted to an equivalent ASCII character. Psion Teklogix NEO Hand-Held Computer User Manual D-21...
- Page 254 Note: “Trioptic Code” and “Full ASCII” should not be enabled simultaneously. The scan- ner does not automatically discriminate between these two symbologies. Enable Trioptic Code symbols always contain six characters. Setting this parameter to on allows this type of symbology to be recognized. D-22 Psion Teklogix NEO Hand-Held Computer User Manual...
- Page 255 A Supplements Separator is a space that is added between the EAN 13 bar code and the Supplement code/Addenda. ISBN Translate When this parameter (International Standard Book Number) is enabled, the first 3 characters (‘978’) are ignored and the checksum (0.9, ‘X’) is calculated on the remaining characters. Psion Teklogix NEO Hand-Held Computer User Manual D-23...
- Page 256 Supplements 2 and Supplements 5 Supplements are additions to EAN/UPC codes. These addendums can be 2 or 5 characters in length. Usually, data from an addendum is a suffix to the main symbol output data. D-24 Psion Teklogix NEO Hand-Held Computer User Manual...
- Page 257 When this parameter is set to on, the imager does not accept the main bar code without a supplement. Supplements Separator Supplements Separator is a space that is added between the UPC-E bar code and the Supple- ment code/Addenda. Psion Teklogix NEO Hand-Held Computer User Manual D-25...
- Page 258 Keep in mind the parity character may not be part of your output setup; in this case, this parameter should be turned off. D-26 Psion Teklogix NEO Hand-Held Computer User Manual...
- Page 259 (i.e., human readable characters), including check digit(s). Double-tapping on these parameters displays a screen in which you can set the minimum and maximum allow- able code lengths – 4 to 48. Psion Teklogix NEO Hand-Held Computer User Manual D-27...
- Page 260 Double-tapping on these parameters displays a screen in which you can set the minimum and maximum allowable code lengths – 2 to 80. D.5.15 Matrix 2 of 5 Enabled Set this parameter to on to enable “Matrix 2 of 5”. D-28 Psion Teklogix NEO Hand-Held Computer User Manual...
- Page 261 ASCII (start/stop pattern 1). If you set this parameter to off, the imager reads symbols with start/stop pattern 1 and decodes them as compressed numeric with optional full ASCII (start/stop pattern 2). Psion Teklogix NEO Hand-Held Computer User Manual D-29...
- Page 262 Double-tapping on these parameters displays a screen in which you can set the minimum and maximum allowable code lengths – 2 to 80. D.5.21 Composite Enabled Set this parameter to on to enable “Composite” bar codes. D-30 Psion Teklogix NEO Hand-Held Computer User Manual...
- Page 263 ASCII characters or 154 numeric characters can be encoded into 2 to 16 rows. Each row is divided by a separator bar. The top and bottom of the symbol also have separator bars that extend to the ends of the minimum quiet zones. Psion Teklogix NEO Hand-Held Computer User Manual D-31...
- Page 264 Double-tapping on these parameters displays a screen in which you can set the minimum and maximum allowable code lengths – 1 to 2048. D.5.28 2D Data Matrix Enable Set this parameter to on to enable “2D Data Matrix”. D-32 Psion Teklogix NEO Hand-Held Computer User Manual...
- Page 265 The length of a code refers to the number of characters (i.e., human readable characters), in- cluding check digit(s). Double-tapping on these parameters displays a screen in which you can set the minimum and maximum allowable code lengths – 1 to 3750. Psion Teklogix NEO Hand-Held Computer User Manual D-33...
- Page 266 Set this parameter to on to enable “Postal: Canadian”. D.5.36 Postal: China Enabled Set this parameter to on to enable “Postal: China”. D.5.37 Postal: Japanese Enabled Set this parameter to on to enable “Postal: Japanese”. D-34 Psion Teklogix NEO Hand-Held Computer User Manual...
- Page 267 Set this parameter to on to enable “Postal: Korean”. D.5.40 Postal: Royal Enabled Set this parameter to on to enable “Postal: Royal”. D.5.41 VeriCode® Enabled VeriCode is a 2D omni-directional symbol. To read this symbol, set this parameter to on. Psion Teklogix NEO Hand-Held Computer User Manual D-35...
- Page 269 151 beep conditions 38 backup 11 volume adjustment 39 charging 11 pinouts A-2 battery backlight capacity dialog box 93 display 78 charging 29 intensity 36 gauge 40 Psion Teklogix NEO Hand-Held Computer User Manual...
- Page 270 47 Convert To UPC -A 25 (scanner double-click) Click Data CTRL Key 32 (scanner double-click) Click Time Custom preset D-1 CLSI Editing 13 cycle tasks 63 CLSI Library System 26 Codabar 26, B-26 Psion Teklogix NEO Hand-Held Computer User Manual...
- Page 271 Double-Click, Manage Triggers menu 99 IATA 2 of 5 B-29 Double-Tap (stylus settings) 97 Identifier, Default preset group (imaging Dr. Debug 131 software) D-2 IEEE radio, configuring 12 Imager EAN 13 9, 23 Psion Teklogix NEO Hand-Held Computer User Manual...
- Page 272 84 Predefined preset D-3 modifiers 31 Matrix 2 of 5 30, B-28 navigating using the keyboard 51 Maximum Length B-22, B-23 one shot mode 83 memory card SCAN 33 creating partitions 122 Psion Teklogix NEO Hand-Held Computer User Manual...
- Page 273 122 Preset (imaging software) deleting 123 Custom D-1 dismounting 123 Group D-1 formatting 123 Predefined D-1 management 123 Preset Group, Default identifier (imaging mounting 124 PC, connecting NEO to 160 software) D-2 Psion Teklogix NEO Hand-Held Computer User Manual...
- Page 274 Good Scan Beep 138 Scan Mode 2 laser duration 1 scanner Laser On Time 1, 19 decoded (internal) 1 Linear Decode 12 decoded (ISCP) 18 Linear Security Level 3 module (SE955) specifications 173 Psion Teklogix NEO Hand-Held Computer User Manual...
- Page 275 1D internal 165 Shutdown 65 2D UPC Half Block Stitching 12 system tray 62 (2D) Scanning Mode task manager 63 Scan Result 138 Strip Leading 8 Scan Result Time 138 Strip Trailing 8 screen Psion Teklogix NEO Hand-Held Computer User Manual...
- Page 276 Windows CE, navigating in 51 recalibration 36, 97 Windows Explorer 61 stylus, using 51 Windows Mobile Device Center, setting up touch pen, using 51 touchscreen, disabling and enabling 97 Translations parameters (bar codes) 140 VIII Psion Teklogix NEO Hand-Held Computer User Manual...
- Page 277 2D QR Code B-33 2D Raster Expand Rate C-4 2D UPC Half Block Stitching 12 36-key keyboard alpha keys, accessing 34 uppercase letters, creating 35 802.11b/g radio specifications 171 802.11 radio, configuring 12 Psion Teklogix NEO Hand-Held Computer User Manual...
Need help?
Do you have a question about the PX750 and is the answer not in the manual?
Questions and answers