
Related Manuals for Psion Teklogix PX750


Summary of Contents for Psion Teklogix PX750
- Page 1 NEO Hand-Held Computer (Model No. PX750) February 23, 2009 Part No. 8100157.A ISO 9001 Certified Quality Management System...
- Page 2 2100 Meadowvale Boulevard, Mississauga, Ontario, Canada L5N 7J9 http:\\www.psionteklogix.com This document and the information it contains is the property of Psion Teklogix Inc., is issued in strict confidence, and is not to be reproduced or copied, in whole or in part, except for the sole purpose of promoting the sale of Psion Teklogix manufactured goods and ser- vices.
- Page 3 Return-To-Factory Warranty Psion Teklogix Inc. provides a return to factory warranty on this product for a period of twelve (12) months in accordance with the Statement of Limited Warranty and Limitation of Liability provided at www.psionteklogix.com/warranty. (If you are not already a member of Teknet and you attempt to view this warranty, you will be asked to register.
-
Page 5: Table Of Contents
Performing A Cold Reset............24 Psion Teklogix NEO Hand-Held Computer User Manual... - Page 6 3.11.2 Cleaning NEO ..............45 Psion Teklogix NEO Hand-Held Computer User Manual...
- Page 7 Volume And Sound Properties ..........90 Psion Teklogix NEO Hand-Held Computer User Manual...
- Page 8 5.10.4 User Display Settings............130 Psion Teklogix NEO Hand-Held Computer User Manual...
- Page 9 5.13.3.13 Code 11 ............161 Psion Teklogix NEO Hand-Held Computer User Manual...
- Page 10 Indicator Solid Red..........191 Psion Teklogix NEO Hand-Held Computer User Manual...
- Page 11 EV15 Imager Decode Zone .........207 Psion Teklogix NEO Hand-Held Computer User Manual...
- Page 12 Assigning An IP Address ............. .B-6 viii Psion Teklogix NEO Hand-Held Computer User Manual...
-
Page 13: Chapter 1: Introduction
1.2 Text Conventions ........3 1.3 NEO Hand-Held Computer Features......4 Psion Teklogix NEO Hand-Held Computer User Manual... -
Page 15: About This Manual
Appendix A: Pinouts describes NEO pinouts. Appendix B: Wireless Zero Config outlines the steps used to configure your radio using Windows Zero Config. Text Conventions Note: Notes highlight additional helpful information. Psion Teklogix NEO Hand-Held Computer User Manual... -
Page 16: Neo Hand-Held Computer Features
In addition, the tilted screen in conjunction with the protective rib at the base of the keyboard allows the unit to be placed facedown safely with no danger of an accidental key press. Note: For complete NEO hand-held computer specifications, refer to “Specifications” on page 199. Psion Teklogix NEO Hand-Held Computer User Manual... -
Page 17: Model Variants
Connected NEO Standard Features: • 2.7 inch Colour Touchscreen • Windows® CE 5.0 Professional • 128 MB Flash/128 MB RAM • microSD slot • 3000 mAh Battery • Discrete VoIP (Push-To-Talk) • WiFi and Bluetooth Radios Psion Teklogix NEO Hand-Held Computer User Manual... - Page 18 CE 5.0 Programming Environment • HTML, XML • Mobile Devices SDK - HTML, XML - CE.NET SDK: - Java™ ® - Visual Studio 2008 ® - Standard protocol APIs – Windows sockets (WinCE) Psion Teklogix NEO Hand-Held Computer User Manual...
-
Page 19: Application Software
1D Standard Imager Option – EV15 Internal Expansion Slots • One microSD slot Expansion Port • Battery Output Power • USB Signalling • Scanner Trigger Input Docking Port • RS232 • • DC Input Psion Teklogix NEO Hand-Held Computer User Manual... -
Page 20: Power Management
Accessories • Desktop charger • Quad charger • Pistol grip • Holster • Hand Strap • Shoulder Strap • Additional miscellaneous adaptors and cables (a complete list of accessories is available at www.psionteklogix.com Psion Teklogix NEO Hand-Held Computer User Manual... - Page 21 2.7.1 Performing A Warm Reset ......24 2.7.2 Performing A Cold Reset......24 Psion Teklogix NEO Hand-Held Computer User Manual...
-
Page 23: Chapter 2: Basic Checkout
NEO is powered with a 3000 mAh Lithium-ion Battery, Model No. WA3020, and is com- patible with battery Model No. WA3006. Warning: Before charging the battery, it is critical that you review the safety guidelines in the ‘NEO Hand-Held Computer (Model No. PX750) Regulatory & Warranty Guide’, PN 8000175. 2.1.1.1 Charging The Main Battery Battery packs shipped from the factory are charged to approximately 40% and must be fully charged prior to use. -
Page 24: Switching The Unit Off (Suspend)
NEO for one or more wireless network profiles. A network profile contains set- tings for SSID (Service Set Identifier) and security options. Note: In most situations, the configuration of your 802.11 radio will require parameter set- ting and access keys from a network administrator. Psion Teklogix NEO Hand-Held Computer User Manual... -
Page 25: Status Tab
When there are no network profiles configured, this tab is not populated. Disable/Enable Radio: This button toggles between Disable Radio and Enable Radio de- pending on whether the radio is turned off or on. Psion Teklogix NEO Hand-Held Computer User Manual... -
Page 26: Wi-Fi Config Tab
If, for example, you are using a different type of secu- rity for your network, the fields you complete may not match those described here. Psion Teklogix NEO Hand-Held Computer User Manual... -
Page 27: Authentication Modes
Open Authentication Open authentication does not provide security. When this option is chosen, NEO will connect to wireless networks which do not use authentication or encryption. Psion Teklogix NEO Hand-Held Computer User Manual... -
Page 28: Eap
This menu allows you to choose the EAP (Extensible Authentication Protocol) type used for 802.1x authentication to an access point. The following EAP types are supported by Wi-Fi Config: • TLS: Provides strong security via the use of client certificates for user authentication. Psion Teklogix NEO Hand-Held Computer User Manual... -
Page 29: Encryption
Only the Encryption options that are compatible with the type of Auth. Mode you’ve chosen will be listed. In fact, in some cases, this menu will not be available at all. Psion Teklogix NEO Hand-Held Computer User Manual... -
Page 30: Connecting The Wireless Network
The Status tab is displayed. The Status field displays ASSOCIATING while the 802.11b/g radio attempts to connect to the network. Once the association is complete, the Status tab is populated with the appropriate information about your network. Psion Teklogix NEO Hand-Held Computer User Manual... -
Page 31: Configuring Tcp/Ip
Tap on Start>Settings>Network and Dial-up Connections. Tap on the radio icon for which you want to assign an IP address – in the sample screen below, the icon is labelled SDIO86861. The Wireless Statistics screen is displayed. Psion Teklogix NEO Hand-Held Computer User Manual... - Page 32 Tap the stylus on the radio button next to Specify an IP address to select it. • Type an IP, Subnet Mask and Default Gateway address in the appropriate fields. Press [ENTER] to save your information. Psion Teklogix NEO Hand-Held Computer User Manual...
-
Page 33: Name Server
• Tap on the Name Servers tab. The DNS and WINS fields in the Name Servers tab allow you to specify additional WINS and DNS resolvers. The format for these fields is ###.###.###.###. Psion Teklogix NEO Hand-Held Computer User Manual... -
Page 34: Advanced Tab
A dialog box is displayed letting you know that you will lose all unsaved data. Tap on Once the reset is complete, the Wireless Zero Config screen is displayed on your NEO. Refer to Appendix B: “Wireless Zero Config” for details. Psion Teklogix NEO Hand-Held Computer User Manual... -
Page 35: Checking The Scanner
Back up NEO files to the PC, then restore them from the PC to the hand-held again, if needed, and so on. 2.6.1 Using Microsoft ActiveSync To install ActiveSync, follow the step-by-step instructions provided with the program’s setup wizard. Refer to the following website for details: http://www.microsoft.com/windowsmobile/activesync/activesync45.mspx Psion Teklogix NEO Hand-Held Computer User Manual... -
Page 36: Using Microsoft Vista
To execute a cold reset and launch the Windows CE 5.0 operating system (bypassing the boot menu): • Press and hold down the [FN/BLUE] [FN/ORANGE] and [ENTER] keys simultane- ously for a minimum of six seconds. Psion Teklogix NEO Hand-Held Computer User Manual... - Page 37 3.9 Bluetooth Radio ........42 Psion Teklogix NEO Hand-Held Computer User Manual...
- Page 38 3.11.2 Cleaning NEO ....... . 45 Psion Teklogix NEO Hand-Held Computer User Manual...
-
Page 39: Features Of Neo
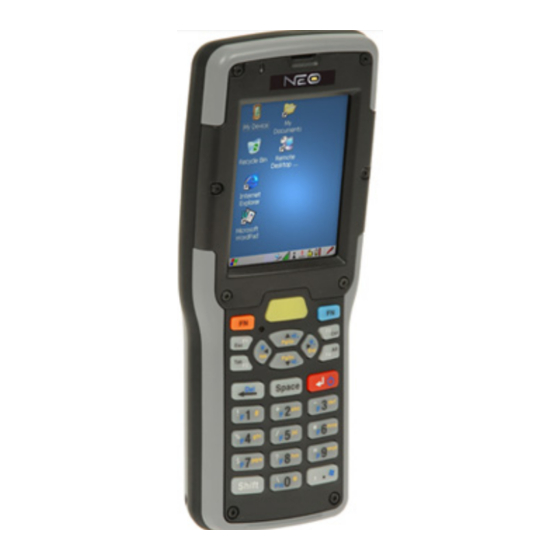
Features Of NEO Figure 3.1 Front View Receiver (Light Emitting Diode) Microphone Protective Rib... -
Page 40: The Battery
Important: Before attempting to install, use or charge the battery pack, it is critical that you review and follow the important safety guidelines in NEO Hand-Held Computer Regulatory & Warranty Guide, PN 8000175. Psion Teklogix NEO Hand-Held Computer User Manual... -
Page 41: Removing The Battery Pack
These include: • AC Wall Adaptor (Model No. PX3010)—operates as an AC power source and when used in conjunction with PX3001 or PX3054, also charges the battery installed in the unit. Psion Teklogix NEO Hand-Held Computer User Manual... -
Page 42: Switching The Hand-Held On And Off
Important: Keep in mind that turning off NEO does not result in a complete reboot; rather, the unit enters a power-saving, “suspend” state. When the unit is turned on from suspend state, operation resumes within a few seconds. Psion Teklogix NEO Hand-Held Computer User Manual... -
Page 43: The Keyboard
For example, pressing the [CTRL] key twice locks it on – it is displayed as CTRL KEY in the taskbar at the bottom of the computer screen. Psion Teklogix NEO Hand-Held Computer User Manual... -
Page 44: The Keys
Typically, the [TAB] key moves the cursor to the next field to the right or downward. The [ESC] Key Generally, this key is used as a keyboard shortcut to close the current menu, dialog box or activity and return to the previous one. Psion Teklogix NEO Hand-Held Computer User Manual... -
Page 45: Function Keys And Macro Keys
An indicator in the left corner of the taskbar dis- plays the currently selected character. To access an alpha character, first press the [FN/ORANGE] key and then press the numeric key above which the alpha character you want to type is printed. Psion Teklogix NEO Hand-Held Computer User Manual... - Page 46 Note: If you want to use uppercase characters at all times, press [FN/BLUE] [SHIFT]. An icon of an uppercase ‘A’ is displayed in the taskbar indicating that all letters will be displayed as uppercase characters. Psion Teklogix NEO Hand-Held Computer User Manual...
-
Page 47: The Keyboard Backlight
Stylus Properties dialog box in the Control Panel to recalibrate the screen. • In the Control Panel, choose the Stylus icon to display the Stylus Properties window. Psion Teklogix NEO Hand-Held Computer User Manual... -
Page 48: Neo Hand-Held Indicators
3.6.1 LED Indicator A tri-coloured LED – yellow, green or red – is located on the upper-left side of the unit, above the screen. Psion Teklogix NEO Hand-Held Computer User Manual... -
Page 49: Audio Indicators
To specify how you want your NEO to respond under various con- ditions, refer to “Volume And Sound Properties” on page 90. Psion Teklogix NEO Hand-Held Computer User Manual... -
Page 50: Adjusting The Receiver Volume
The taskbar changes dynamically, and only those icons that are applicable are displayed. For example, if a radio is not installed in your NEO, the radio signal icon is not displayed in the taskbar. Psion Teklogix NEO Hand-Held Computer User Manual... -
Page 51: Battery Gauge
When the battery power is completely depleted, a final warning window indicates that NEO will be powered down. If NEO is using external AC power, an AC icon is displayed in the taskbar. Full Empty AC Connection Psion Teklogix NEO Hand-Held Computer User Manual... -
Page 52: Monitoring The Battery And Maximizing Run Time
2 years of use (less than 60% of original capacity remaining). Keep in mind however that heavy usage or operating the unit at temperature ex- tremes will shorten the battery life. Psion Teklogix NEO Hand-Held Computer User Manual... -
Page 53: Storing Batteries
• A ‘never used’ lithium-ion battery that has been stored for 3 years may have limited or no useful life remaining once put into service. Think of batteries as perishable goods. Psion Teklogix NEO Hand-Held Computer User Manual... -
Page 54: Uploading Data In A Docking Station
Bluetooth-enabled cellular phone as a data modem, ex- changing information with other Bluetooth devices and providing network access. You can also pair your hand-set with a Bluetooth headset. Refer to “Bluetooth Setup” on page 102 for setup details. Psion Teklogix NEO Hand-Held Computer User Manual... -
Page 55: Pairing A Bluetooth Headset Or Other Bluetooth Device
3.10.1 Inserting The Card • Switch off NEO. • Remove the battery cover and the battery. • Gently slide the SD door down and then flip it forward. Psion Teklogix NEO Hand-Held Computer User Manual... - Page 56 Connector Pads On microSD Card microSD Door (opened) • Carefully flip the SD door down, and slide it upward to lock it in place. Do not force it. Psion Teklogix NEO Hand-Held Computer User Manual...
-
Page 57: General Maintenance
To clean ink marks from the keyboard and touchscreen, use isopropyl alcohol. • When using a dampened cloth to clean NEO, make certain that the battery cover is in place to protect the battery compartment from moisture. Psion Teklogix NEO Hand-Held Computer User Manual... - Page 59 4.5 Using A Dialog Box ........64 Psion Teklogix NEO Hand-Held Computer User Manual...
-
Page 61: Chapter 4: Working With Windows Ce 5.0
Table 4.1 for a description of the navigation keys. Table 4.1 Keyboard Navigation Operation Key or Key Combination Switch between active [ALT] [TAB] applications Open task manager [ALT] [ESC] Psion Teklogix NEO Hand-Held Computer User Manual... -
Page 62: Working With Files, Folders And Programs
You must press one key followed by the next in sequence. Refer to Section 4.2: “Working With Files, Folders And Programs” for additional details about keyboard navigation. Working With Files, Folders And Programs Figure 4.1 Working With Windows Icons Folder Program Icon File Psion Teklogix NEO Hand-Held Computer User Manual... -
Page 63: The Startup Desktop
Double-tap on the icon to open a window or, in the case of an application icon, launch an application. On the keyboard: • Use the arrow keys to highlight the icon, and press [ENTER] to launch the highlighted icon. Psion Teklogix NEO Hand-Held Computer User Manual... -
Page 64: The Desktop Icons
Microsoft WordPad is a basic word processor used to create, edit, view and print text documents. Remote Desktop Connection This option allows your NEO to communicate with a remote desktop PC. “Remote Con- nect” on page 71 provides a website with step-by-step instructions. Psion Teklogix NEO Hand-Held Computer User Manual... -
Page 65: The Taskbar
Press [FN/BLUE] [.] (period) to display the Start Menu. • Press the [DOWN] arrow key to highlight Shortcuts in the Start Menu, and then press the [RIGHT] arrow key to display the sub-menu. Psion Teklogix NEO Hand-Held Computer User Manual... -
Page 66: Customizing The Taskbar
Tap the stylus on the items you want to activate or deactivate. The check mark indicates active items. If you’re using the keyboard: • Highlight the options you want to activate, and press the [SPACE] key to select them. The check mark indicates active items. Psion Teklogix NEO Hand-Held Computer User Manual... - Page 67 Menu hot key brings up the Security dialog box to allow authorized users to access the hand-held configuration. Keep in mind that this dialog box is also displayed if an invalid ap- plication is entered in the Application from Start Menu field. Psion Teklogix NEO Hand-Held Computer User Manual...
-
Page 68: The Start Menu
Note: If a ‘Start Menu’ item has an underlined character, you can type the underlined alpha character to display the associated dialog box– for example, displaying the ‘Start Menu’ and then typing the letter ‘s’ displays the ‘Security’ dialog box. Psion Teklogix NEO Hand-Held Computer User Manual... -
Page 69: The Desktop
By default, the security level is set to User, restricting access to only the most basic Start Menu items. To allow access to all the Start Menu and taskbar options: • In the Security Level dialog box, tap on the radio button next to Supervisor. Psion Teklogix NEO Hand-Held Computer User Manual... -
Page 70: Configuring Security
By default, a security icon is not displayed for user-level security. Note: It is recommended that you enable ‘Allow Teklogix Security Level’ so that autho- rized Psion Teklogix service personnel can access your unit should it require maintenance. -
Page 71: Programs
The X icon deletes the sound and the diskette icon allows you to save your sound. Command Prompt Command Prompt is used to access the DOS command prompt. At the prompt, you can type DOS commands such as dir to display all the directories in the drive. Psion Teklogix NEO Hand-Held Computer User Manual... -
Page 72: Shortcuts
The taskbar displays indicators such as a radio signal icon and the security level. These indicators are attached to dialog boxes that provide addi- tional information. • Choose Start>Shortcuts>System Tray. Psion Teklogix NEO Hand-Held Computer User Manual... -
Page 73: Task Manager
Task Manager The Task Manager allows you to switch to another task or to end an active task. To display the task manager window: • Tap on Shortcuts>Task Manager, or Press [ALT] [ESC]. Psion Teklogix NEO Hand-Held Computer User Manual... -
Page 74: Settings
Control Panel The Control Panel contains applets used to configure hardware, the operating system and the shell. If your NEO is running with the Psion Teklogix TekTerm application or another application, additional configuration applets may appear in the Control Panel. -
Page 75: Run
Choosing the Run option from the Start Menu displays a dialog box in which you can enter the name of the program, folder or document you want to open or launch. Figure 4.7 Run Dialog Box 4.4.7 Shutdown The Shutdown menu includes these options: Suspend and Warm Reset. Psion Teklogix NEO Hand-Held Computer User Manual... -
Page 76: Using A Dialog Box
You can move between dialog items by tapping on them with your stylus, or by pressing the arrow keys and the [TAB] key ([SHIFT] [TAB] moves the cursor backwards). Psion Teklogix NEO Hand-Held Computer User Manual... - Page 77 Figure 4.9 on page 65 you can choose to Obtain an IP address via DHCP or Specify an IP address. Press the [TAB] key to highlight a radio button option, and then select a radio button by pressing the arrow keys to highlight the appropriate option. Psion Teklogix NEO Hand-Held Computer User Manual...
- Page 78 Saving Your Choices: Once you’ve made all your changes, press the [ENTER] key to save your changes and exit the window. Note: A dialog box item that is displayed in grey text indicates that it is not currently available. Psion Teklogix NEO Hand-Held Computer User Manual...
- Page 79 5.5.6.1 Trigger Mappings ......98 5.5.6.2 Add And Edit Trigger Mapping....100 Psion Teklogix NEO Hand-Held Computer User Manual...
- Page 80 5.13.1.2 Restoring Default Settings ....135 5.13.2 Decoded (Internal) Scanners ......136 Psion Teklogix NEO Hand-Held Computer User Manual...
- Page 81 5.13.4 Options Tab ....... . .168 Psion Teklogix NEO Hand-Held Computer User Manual...
- Page 82 5.13.5 Translations Tab ......171 5.13.5.1 Case Rules ......172 Psion Teklogix NEO Hand-Held Computer User Manual...
-
Page 83: Chapter 5: Configuration
Internet using NEO (Windows CE device). Refer to the following website for step-by-step information about setting up this connection: http://www.microsoft.com/windowsxp/using/mobility/getstarted/remoteintro.mspx or contact Psion Teklogix support services. (Refer to the NEO Regulatory & Warranty Guide, PN 8000175, or locate the office closest to you at www.psionteklogix.com). The TekTerm Application TekTerm is a powerful emulation application ideally suited for real time data transaction ap- plications associated with mainframes and servers. -
Page 84: Control Panel Icons
The client checks that the certificate has been digitally signed by a certification authority that the client explicitly trusts. “Certificate Assignment” on page 101 directs you to the appropriate setup information. Psion Teklogix NEO Hand-Held Computer User Manual... -
Page 85: Error Reporting
Allows multiple-scanner trigger management, including the ability to configure each of the trigger buttons. You can configure the trigger ID for each trigger button for both single- and double-click, and the double-click time. Psion Teklogix NEO Hand-Held Computer User Manual... - Page 86 Windows CE 5.0 Core. Region & Language Allows you to specify the local language that is to be displayed on the hand-held screen along with the format of numbers, currency, time and date for your region. Psion Teklogix NEO Hand-Held Computer User Manual...
- Page 87 System Settings (display font size), and provides the Registry Editor. Volume & Sounds Allows you to adjust the volume of the sound emitted to indicate events like warnings, key clicks and screen taps. Psion Teklogix NEO Hand-Held Computer User Manual...
-
Page 88: Basic Setup
Control Panel allows you to specify the intensity of the backlight along with how long the display will maintain the specified intensity. Note: Keep in mind that this option may be restricted to supervisory use only. Psion Teklogix NEO Hand-Held Computer User Manual... - Page 89 Bright For delay and as long as no user action takes place (such as a keypress or scan trig- ger). At the expiration of the Dim For duration, the display backlight shuts off. Psion Teklogix NEO Hand-Held Computer User Manual...
-
Page 90: Display Appearance
[FN/BLUE] and [FN/ORANGE] modifier keys. This dialog box also allows you to define macro keys and Unicode characters. • In the Start Menu, choose Settings>Control Panel>Keyboard icon. Psion Teklogix NEO Hand-Held Computer User Manual... -
Page 91: Key Repeat
The value assigned for this parameter determines the delay between repeat characters. Sliding the Repeat Delay bar to the left increases the delay between key repeats, and sliding the bar to the right shortens the repeat delay time. Psion Teklogix NEO Hand-Held Computer User Manual... -
Page 92: Sequence
With the [ORANGE] key locked ‘on’, if you press [2] twice and then pause between key presses for 1 second, the letter ‘b’ will be selected automatically. Moving the Sequence slider to the right increases the pause time between alpha key presses. Psion Teklogix NEO Hand-Held Computer User Manual... -
Page 93: Keyboard Backlight
Note: Tapping in the checkbox next to ‘When using external power, keep the backlight always ON’ forces the keyboard backlight to remain on when the unit is operating with external power. Note: To maximize battery run time, keep the backlight intensity at the lowest possible setting. Psion Teklogix NEO Hand-Held Computer User Manual... -
Page 94: Keyboard One Shot Modes
If you choose Lock from the drop-down menu, pressing a modifier key once locks it ‘on’ until you press the modifier key a second time to unlock or turn it off. OneShot If you choose OneShot, the modifier key remains active only until the next key is pressed. Psion Teklogix NEO Hand-Held Computer User Manual... -
Page 95: Keyboard Macro Keys
On the 26-key NEO, you can program a maximum of 15 macro keys. • In the Macro menu highlight a macro key number, for example macro 1, to assign a macro to macro key [M1]. Choose the Record button. Psion Teklogix NEO Hand-Held Computer User Manual... - Page 96 Press the macro key to which you’ve assigned the macro. Deleting A Macro To delete a macro: • In the Macros tab, highlight the macro number you want to delete. • Choose the Delete button. Psion Teklogix NEO Hand-Held Computer User Manual...
-
Page 97: Unicode Mapping
Unicode mapping is mapped to the default Unicode value. Adding And Changing Unicode Values Important: Changes to Unicode mappings are not saved until you exit the Keyboard Properties dialog box. • Choose the Add/Change button Psion Teklogix NEO Hand-Held Computer User Manual... -
Page 98: Scancode Remapping
There are three different tables of scancode mappings: the Normal table, the Blue table and the Orange table. The Normal table defines unmodified key presses; the Blue table defines Psion Teklogix NEO Hand-Held Computer User Manual... - Page 99 (e.g., Macro 2). Adding A Remap To add a new remapping: • Choose the Add button at the bottom of the dialog box. Psion Teklogix NEO Hand-Held Computer User Manual...
- Page 100 In the Scancode Remapping tab, tap the stylus on the remap you want to edit. • Tap on the Edit button, and make the appropriate changes. • Tap on OK to save your changes. Psion Teklogix NEO Hand-Held Computer User Manual...
-
Page 101: Lock Sequence
Note: It is useful to leave the ‘Show popup message’ enabled (default) so that anyone attempting to use the hand-held keyboard will see the key sequence they will need to enter to unlock the keyboard displayed on the screen. Psion Teklogix NEO Hand-Held Computer User Manual... -
Page 102: Volume And Sound Properties
A locked keyboard icon is displayed in the softkey bar when the keyboard is locked. Locked Keyboard Icon • Type the key sequence to unlock the keyboard. 5.5.3 Volume And Sound Properties • In the Control Panel, choose the Volume & Sounds icon. Figure 5.5 Volume Icon Psion Teklogix NEO Hand-Held Computer User Manual... -
Page 103: Volume Adjustments
Keep in mind that adjusting this slider modifies the beeper and the receiver volume. Note: You can also adjust volume directly from the keyboard. Refer to “Audio Indicators” on page 37 for details. 5.5.3.2 Sound Adjustments Psion Teklogix NEO Hand-Held Computer User Manual... -
Page 104: Power Properties
• In the Control Panel, choose the Power icon. Figure 5.6 Power Icon 5.5.4.1 Battery Capacity • In the Power Properties dialog box, open the Battery tab to view battery details. Psion Teklogix NEO Hand-Held Computer User Manual... -
Page 105: Power Saving Suspend
This dialog box allows you to specify the suspend time for either AC Power or Battery Power. Suspend Timeout Important: Psion Teklogix recommends setting the Suspend value to 10 minutes. To further reduce power consumption, carefully consider the duration of time that the display and the keyboard backlight are ‘on’ (see “Display Back- light”... -
Page 106: Suspend Threshold
The NEO Windows CE 5.0 environment does not store any critical data in RAM (such as the registry or file system). If the user's application does not save data to RAM, Psion Teklogix recom- mends keeping the Suspend Threshold setting as low as possible to maximize battery run time. -
Page 107: Advanced
0% to 20%. 5.5.4.5 Devices This tab controls power to individual SDIO slot, and built-in devices. Enable or disable the checkboxes as needed, then tap on OK to save your changes. Psion Teklogix NEO Hand-Held Computer User Manual... -
Page 108: Stylus Properties
Touchscreens rarely require recalibration. However, if your touchscreen has never been cal- ibrated or if you find that the stylus pointer is not accurate when you tap on an item, follow the directions below. Psion Teklogix NEO Hand-Held Computer User Manual... -
Page 109: Touch
This option allows you to configure how bar code scanners and other devices are triggered. You can configure the trigger ID for each trigger button for both single- and double-click, and the double-click time. • In the Control Panel, choose the Manage Triggers icon. Psion Teklogix NEO Hand-Held Computer User Manual... -
Page 110: Trigger Mappings
(the module). Along with keyboard keys, trigger sources can also be grip trig- gers, external hardware triggers or software-based. When the specified key is pressed, the trigger consumer (for example, a decoded scanner) is sent a message. Psion Teklogix NEO Hand-Held Computer User Manual... - Page 111 The OK button in the top right of the Manage Triggers screen saves all changes made. If the cancel button X is tapped instead, or the [ESC] key is pressed, all changes will be discarded. Psion Teklogix NEO Hand-Held Computer User Manual...
-
Page 112: Add And Edit Trigger Mapping
Imager and Non-Decoded Scanner. If so, both devices/opera- tions will occur simultaneously. This is not recommended in most cases, especially with devices such as Imagers. It is also possible to map different sources to the same module (trigger consumer). Psion Teklogix NEO Hand-Held Computer User Manual... -
Page 113: Certificate Assignment
Show All Modules By default, inactive owners are not shown. By checking this checkbox, all owners, both active and inactive, are displayed. 5.5.7 Certificate Assignment • In the Control Panel, choose the Certificate icon. Psion Teklogix NEO Hand-Held Computer User Manual... -
Page 114: Bluetooth Setup
Bluetooth is a global standard for wireless connectivity for digital devices and is intended for Personal Area Networks (PAN). The technology is based on a short-range radio link that operates in the ISM band at 2.4 GHz. When two Bluetooth-equipped devices come within a Psion Teklogix NEO Hand-Held Computer User Manual... - Page 115 When the radio is enabled, a Bluetooth icon appears the taskbar at the bottom of the screen. It is ready for setup. • Tap on Settings>Control Panel>Bluetooth icon. Figure 5.10 Bluetooth Icon The Bluetooth Manager dialog box displays the other Bluetooth devices with which you can communicate. Psion Teklogix NEO Hand-Held Computer User Manual...
-
Page 116: The Devices Tab
• In the drop-down list of options available, choose Active to pair the device. A COM/BSP port name will appear next to the service for this device. Your device is now paired. Psion Teklogix NEO Hand-Held Computer User Manual... - Page 117 (LANAccessUsingPPP service). ASync (ActiveSync) is another available profile. • To start the service scan, highlight a device in the Devices tab list, and then click on the Services button or double-click on the device entry. Psion Teklogix NEO Hand-Held Computer User Manual...
- Page 118 Important: The remote device must have authentication enabled, otherwise the PIN authentication will fail. • Highlight a device, click on the Set Pin button, and type the PIN. Psion Teklogix NEO Hand-Held Computer User Manual...
-
Page 119: Headset
Enter the PIN, and tap on OK to connect the devices. 5.6.2 Headset The Headset connection is initiated from this menu, and the headset speaker and micro- phone volumes can be adjusted here. Psion Teklogix NEO Hand-Held Computer User Manual... -
Page 120: The Servers Tab
Once you activate a server profile, it is recommended that NEO be rebooted before you try to bond from a server. Note: You do not need to reboot if you are deactivating a server. Psion Teklogix NEO Hand-Held Computer User Manual... -
Page 121: Outgoing Tab
Note: To add a service to the Outgoing port, an active service must first be deactivated. Then you can choose the ‘Outgoing’ option from the Activation menu (highlight a service, right-click or press the [SPACE] bar to display the Activation menu). Psion Teklogix NEO Hand-Held Computer User Manual... -
Page 122: Active Conn. Tab
Although the name will have changed in the Properties menu in Bluetooth Controls, the radio only reads it on boot-up. For the changes to take effect, you must reset NEO (for reset instructions, see “Resetting NEO” on page 20). Psion Teklogix NEO Hand-Held Computer User Manual... -
Page 123: Properties Tab
Bluetooth devices if the first attempt fails. (When NEO scans for other devices, it sometimes fails to scan names.) Note: Keep in mind that setting this parameter to a higher value will lengthen the scan time. Psion Teklogix NEO Hand-Held Computer User Manual... -
Page 124: Search For Tab
2. Make the phone discoverable. 3. Pair the phone service with the NEO Dial-Up Networking service using the Blue- tooth Manager (for instructions on pairing devices, see “The Devices Tab” on page 104). Psion Teklogix NEO Hand-Held Computer User Manual... - Page 125 Chapter 5: Configuration Bluetooth GPRS WAN Connection 4. To set up the internet parameters on the NEO, choose the Network And Dial-up Connections icon from the Control Panel. 5. Choose the Make New Connection icon. Psion Teklogix NEO Hand-Held Computer User Manual...
- Page 126 Configure button to display the Device Properties dialog box. NEO communicates via Bluetooth to your Bluetooth-equipped cellular telephone and re- trieves the parameters for the Device Properties dialog box. NEO then disconnects. Psion Teklogix NEO Hand-Held Computer User Manual...
- Page 127 9. Under the Call Options tab, turn off Cancel the call if not connected within, and press [ENTER] to save your changes. 10. In the Modem dialog box, choose the Next button to display the Phone Number dialog box. Psion Teklogix NEO Hand-Held Computer User Manual...
- Page 128 Once you’ve edited this dialog box to reflect your network carrier requirements, press [ENTER] to save your changes. 13. At this point, you’ll need to return to the Control Panel, and choose the Network and Dial-up Connections icon. Psion Teklogix NEO Hand-Held Computer User Manual...
-
Page 129: Total Recall
When you tap on your new connection, an onscreen message indicates the status of your connection: connected, disconnected, error messages, and so on. Total Recall Total Recall is a Psion Teklogix utility developed to maintain applications and settings during a cold boot. This utility is based on a backup and restore concept. •... -
Page 130: Creating A Backup Profile
1. To begin, type a name for the profile in the field labelled Profile Name. 2. Choose the Profile Type you want to create: For this device only – creates a backup that is manually restored by the operator. Psion Teklogix NEO Hand-Held Computer User Manual... - Page 131 The Select Files option allows you to select predefined file types. • Remove the check mark next to All Files. You’ll notice the checkbox next to Select Files changes , indicating that additional options are available. Psion Teklogix NEO Hand-Held Computer User Manual...
- Page 132 Choose Remove Files – a dialog box is displayed listing the files that will be backed up. • Highlight the item you want to remove from the list, and tap on the Remove button. Psion Teklogix NEO Hand-Held Computer User Manual...
- Page 133 View Selections Depending on what you have selected for inclusion in your profile, you can view a list of the selected files, databases and/or registry. • Choose the Next button to perform the operation. Psion Teklogix NEO Hand-Held Computer User Manual...
-
Page 134: Restoring A Profile
Memory-card devices are normally ‘mounted’ (made available to the system) automatically when they are inserted. They must be dismounted before they can be formatted. To format an entire memory card: 1. Choose Start> Settings>Control Panel. Psion Teklogix NEO Hand-Held Computer User Manual... -
Page 135: Creating Partitions
Each partition appears as a separate folder in Windows Explorer. To create new partitions: 1. Tap the New button next to the Partitions list box. The Create New Partition dialog box appears: Psion Teklogix NEO Hand-Held Computer User Manual... -
Page 136: Partition Management
Tap the Properties button. The Partition Properties dialog appears. • Tap the Dismount button. The partition is dismounted. The asterisk disappears next to its name in the partitions list. To delete a partition: • Select the desired partition. Psion Teklogix NEO Hand-Held Computer User Manual... - Page 137 There are also two checkboxes, which govern: • Whether to use the transaction-safe FAT file system (TFAT). This file system keeps multiple copies of the file-allocation table, changing one while maintaining another as a backup. Psion Teklogix NEO Hand-Held Computer User Manual...
-
Page 138: Ipv6 Support
The IPv6 Support icon in the Control Panel allows you to activate IPv6 network support on your unit if your network setup requires this. This internet protocol specification (version 6) supports 128-bit IP addresses, replacing version 4. Figure 5.12 IPv6 Support Icon Psion Teklogix NEO Hand-Held Computer User Manual... -
Page 139: Tweakit
Choose the checkbox next to Enable IPv6 Network Support to enable this internet protocol. 5.10 TweakIT This utility allows you to ‘tweak’ or adjust Advanced system settings (interface, network and servers), User settings (font size and docking port message), and provides a Registry Editor. Psion Teklogix NEO Hand-Held Computer User Manual... -
Page 140: Advanced Interface And Network
When this option is enabled, NEO logs AT commands (e.g., dial-out information, password string, etc.) that the administrator can monitor for debugging purposes. Modem commands are stored in: \MdmLog.txt. 5.10.2 Advanced Services Settings Psion Teklogix NEO Hand-Held Computer User Manual... -
Page 141: Internet Explorer Settings
Screen reformats the web page on the NEO screen into a single column, eliminating the need for horizontal scrolling. Enabling Focus Rectangle adds a yellow rectangle around the cursor to make it clearly visible on the screen. Psion Teklogix NEO Hand-Held Computer User Manual... -
Page 142: User Display Settings
This option allows you to adjust the size of the font used on the NEO display: Large, Normal or Small. 5.10.5 User System Settings Docking Port Message Checking this box blocks the message that normally pops up on the display when NEO is docked. Psion Teklogix NEO Hand-Held Computer User Manual... -
Page 143: Registry Editor
Careless registry editing can cause irreversible damage to NEO. 5.11 Error Reporting Error Reporting allows you to enable or disable Microsoft error reporting prompts. • Tap on Start>Settings>Control Panel. Tap on the Error Reporting icon. Psion Teklogix NEO Hand-Held Computer User Manual... -
Page 144: Teklogix Error Handling Service
Service icon. Teklogix Error Handling Service is an error diagnostic tool. Tapping in the checkbox next to Enable error reporting enables this service. 5.12.1 ErrorLogInfo • To log errors, tap on the ErrorLogInfo tab. Psion Teklogix NEO Hand-Held Computer User Manual... -
Page 145: Netlog
Enable NetLog Debug Capturing, debug data is collected so that, if necessary, it can be for- warded to a Psion Teklogix technician for evaluation. You can also define where you want the data stored and the maximum size of the file. -
Page 146: Scanner Settings
Not all options apply to all scanners. Figure 5.13 Teklogix Scanners Icon For a listing of available scanners and their specifications, please refer to Chapter 7: “Specifications”. 5.13.1 Bar Codes Psion Teklogix NEO Hand-Held Computer User Manual... -
Page 147: Scanner
Choose Default subtree to reset only the parameters in the symbology you selected, or choose Default all settings to reset all scanner parameters to default settings. To reset a single parameter to its default setting: Psion Teklogix NEO Hand-Held Computer User Manual... -
Page 148: Decoded (Internal) Scanners
Tap on the Scanner drop-down menu, and choose Decoded (internal). 5.13.2.1 Options Note: Some options are available only for specific scanners. Refer to the option names in this section for scanner model identification. Psion Teklogix NEO Hand-Held Computer User Manual... -
Page 149: Decoded (Internal) - Advanced Options
Setting this parameter to on allows the scanner to respond to programming bar codes that can be found in the scanner manual. Scanning these is an alternative way to reprogram some of the scanner features Psion Teklogix NEO Hand-Held Computer User Manual... -
Page 150: Linear Security Level
Chapter 5: Configuration Decoded (Internal) Scanners Important: Psion Teklogix strongly recommends that this parameter only be enabled by personnel with a very strong understanding the scanner and how it operates. Scanning the wrong parameter code can result in an inoperable unit; if this occurs, the unit will need to be shipped to a depot for repair. -
Page 151: Decoded (Internal) Data Options
Delete Char Set ECIs Setting this parameter to on enables the scanner to delete any escape sequences representing Character Set ECIs—Extended Channel Interpretations (also known as GLIs) – from its buffer before transmission. Psion Teklogix NEO Hand-Held Computer User Manual... -
Page 152: Code 39
Code 32 Prefix Note: “Convert to Code 32” must be enabled in order for this parameter to function. When this parameter is enabled, the prefix character “A” is added to all “Code 32” bar codes. Psion Teklogix NEO Hand-Held Computer User Manual... - Page 153 ASCII character. Decode Performance If this parameter is enabled, one of three decode levels can be chosen in the Decode Perfor- mance Level parameter. Psion Teklogix NEO Hand-Held Computer User Manual...
- Page 154 This character, if non-zero, is added after a successfully decoded bar code. Press the key you want to insert in the dialog box attached to this parameter. The ASCII/Unicode key value of the keypress is displayed. Psion Teklogix NEO Hand-Held Computer User Manual...
-
Page 155: Code 128
When you double-tap on this parameter, a dialog box is displayed in which you can enter a decode performance level of between 1 and 3. Length Restriction Refer to “Length Restriction” on page 142 for details. Psion Teklogix NEO Hand-Held Computer User Manual... -
Page 156: Ean 13
Country Code and System Char—both the country code (“0” for USA) and system character are transmitted with the data, or None—no preamble is transmitted. The lead-in characters are considered part of the symbol. Psion Teklogix NEO Hand-Held Computer User Manual... -
Page 157: Upc E
This parameter converts UPC-E1 (zero suppressed) decoded data to UPC-A format before transmission. After conversion, data follows UPC-A format and is affected by UPC-A pro- gramming selections (e.g., Preamble, Check Digit). Add/Remove Data Refer to “Add/Remove Data” on page 142 for details. Psion Teklogix NEO Hand-Held Computer User Manual... -
Page 158: Upc/Ean Shared Settings
This option should be enabled when bar codes are in proximity to each other. 2D UPC Half Block Stitching Setting this parameter to on enables “UPC Half Block Stitching” for the omnidirectional scanner engine only. Psion Teklogix NEO Hand-Held Computer User Manual... -
Page 159: Code 93
Choosing Two discrete lengths allows you to decode only those codes containing two selected lengths. Length within a range allows you to decode a code type within a specified range from 5 to 55. Psion Teklogix NEO Hand-Held Computer User Manual... -
Page 160: Msi Plessey
If this parameter is set to One, it is assumed that the last digit is a check digit. If “Check Digits” is set to Two, it is assumed that the last two digits are check digits. Psion Teklogix NEO Hand-Held Computer User Manual... -
Page 161: Interleaved 2 Of 5
Check Digit Verification When enabled, this parameter checks the integrity of an I 2 of 5 symbol to ensure it complies with a specified algorithm—either USS (Uniform Symbology Specification) or OPCC (Optical Product Code Council). Psion Teklogix NEO Hand-Held Computer User Manual... -
Page 162: Discrete 2 Of 5
Length within a range allows you to decode a code type within a specified range from 1 to 12. Length Restriction Refer to “Length Restriction” on page 142 for details. Add/Remove Data Refer to “Add/Remove Data” on page 142 for details. Psion Teklogix NEO Hand-Held Computer User Manual... -
Page 163: Composite
This option allows you to choose how UPC-EAN shared bar codes are transmitted: Always Linked, Never Linked or Auto-discriminate. Enable TLC-39 This composite component integrates MicroPDF417 with the linear code. Setting this pa- rameter to on enables this parameter. Psion Teklogix NEO Hand-Held Computer User Manual... -
Page 164: Decoded (Iscp)
This gives the scanner a minimum amount of time to complete its current decode before the scan is cancelled when the user quickly triggers on/off. Psion Teklogix NEO Hand-Held Computer User Manual... -
Page 165: Code 39
ASCII character. Reading Range Determines the reading distance from which a bar code can be successfully scanned. The default setting, Extended, allows for increased reading distance. Psion Teklogix NEO Hand-Held Computer User Manual... -
Page 166: Code 128
Length Restriction Refer to “Length Restriction” on page 142 for details. Add/Remove Data Refer to “Add/Remove Data” on page 142 for details. 5.13.3.4 Code 128 Enable Setting this parameter to on enables “Code 128”. Psion Teklogix NEO Hand-Held Computer User Manual... - Page 167 Enabling this parameter causes all code pairs that can be, to be concatenated even if they do not comply with Section 4.1 of the “ISBT 128 Bar Code Symbology and Application Speci- fication for Labeling of Whole Blood and Blood Components” (June 2000, Version 1.2.1). Psion Teklogix NEO Hand-Held Computer User Manual...
-
Page 168: Ean 13 Settings
(‘978’) are ignored and the checksum (0.9, ‘X’) is calculated on the remaining characters. Transmit Check Digit If the check digit is to be transmitted with the data, this parameter must be enabled. Add/Remove Data Refer to “Add/Remove Data” on page 142 for details. Psion Teklogix NEO Hand-Held Computer User Manual... -
Page 169: Ean 8
Refer to “Add/Remove Data” on page 142 for details. 5.13.3.8 UPC E Enabled Set this parameter to on to enable “UPC E”. Enable UPC-E1 Set this parameter to on to allow “UPC-E1” (zero suppressed) bar code scans. Psion Teklogix NEO Hand-Held Computer User Manual... -
Page 170: Upc/Ean Shared Settings
Enabling these parameters sets the length of the addendum bar code to either 2 or 5 characters. GTIN Compliant GTIN (global trade item number) processing transmits EAN 128 as the 14-character EAN/UCC GTIN. To use GTIN processing, you must activate the EAN 128 symbology. Psion Teklogix NEO Hand-Held Computer User Manual... -
Page 171: Code 93
Thus, when a set is chosen, the first and last digits of a Codabar message must be one of those characters and the body of the message should not contain these characters. Setting this parameter to Not Transmitted strips the start and stop characters from this bar code. Psion Teklogix NEO Hand-Held Computer User Manual... -
Page 172: Msi Plessey
Check Digit Verification The available options for this parameter are MOD 10 Check and Double MOD 10 Check. This parameter uses the specified algorithm of the option you've chosen to ensure the integ- Psion Teklogix NEO Hand-Held Computer User Manual... -
Page 173: Code 11
If the data does not contain that algorithm, the data is not transmitted. Transmit Check Digit If the check digit is to be transmitted with the data, this parameter must be enabled. Psion Teklogix NEO Hand-Held Computer User Manual... -
Page 174: Interleaved 2 Of 5
Double-tapping on these parameters displays dialog boxes where you can define the code length that will be recognized by your scanner. Length Mode You can chose to set L1 as Minimum Length or L1,L2,L3 as Fixed Length. Psion Teklogix NEO Hand-Held Computer User Manual... -
Page 175: Matrix 2 Of 5
If the data does not contain that algorithm, the data is not transmitted. Transmit Check Digit If the check digit is to be transmitted with the data, this parameter must be enabled. Psion Teklogix NEO Hand-Held Computer User Manual... -
Page 176: Telepen
Refer to “Length Restriction” on page 142 for details. Add/Remove Data Refer to “Add/Remove Data” on page 142 for details. 5.13.3.18RSS Code (Reduced Space Symbology) Enable Setting this parameter to on enables “RSS Code” scanning capability. Psion Teklogix NEO Hand-Held Computer User Manual... -
Page 177: Composite
Enable CC-C And Enable CC-AB To activate these components, set these parameters to on. Linear Transmission Only When ‘Linear Transmission Only’ is enabled, only the linear code portion of the composite bar code is transmitted when scanned. Psion Teklogix NEO Hand-Held Computer User Manual... -
Page 178: 166
Length Restriction Refer to “Length Restriction” on page 142 for details. Add/Remove Data Refer to “Add/Remove Data” on page 142 for details. 5.13.3.22Micro PDF-417 Enabled Set this parameter to on to enable “Micro PDF-417”. Psion Teklogix NEO Hand-Held Computer User Manual... -
Page 179: Codablock
Enable Codablock F Set this parameter to on to enable “Codablock type F”. Length Restriction Refer to “Length Restriction” on page 142 for details. Add/Remove Data Refer to “Add/Remove Data” on page 142 for details. Psion Teklogix NEO Hand-Held Computer User Manual... -
Page 180: Options Tab
This parameter determines which character is sent to the application installed in your NEO following a double-click. A dialog box appears, asking that you press the key you want to insert. The ASCII/Unicode key value of the keypress is displayed. Psion Teklogix NEO Hand-Held Computer User Manual... -
Page 181: Display Parameters
\Flash Disk\ScanLog.txt. Keep in mind that if the “Scan Log File” is enabled, there is a slight performance effect when performing multiple scans since the log file is written to persistent storage. Psion Teklogix NEO Hand-Held Computer User Manual... -
Page 182: Data Handling
ASCII of that OS and display it accurately, in this example, using double- byte characters. If you choose ISO-8859-1 Latin 1, data will be displayed according to the character mapping of this Latin 1 code page, ignoring the local OS code page. Psion Teklogix NEO Hand-Held Computer User Manual... -
Page 183: Translations Tab
Only one case will be applied to a bar code and a case will only be applied if all rules specified in the case are successful—if a rule within a case fails, the entire case fails. • In the Translation tab, tap on the Case # to create rules. Psion Teklogix NEO Hand-Held Computer User Manual... -
Page 184: Case Rules
Match and replace at index—matches the match string at a specified index and replaces/changes it. • Replace at index—replaces/changes unspecified data in a given range. • Add barcode prefix/suffix—adds a global prefix or suffix. Psion Teklogix NEO Hand-Held Computer User Manual... - Page 185 Translation information about the status of each case/rule is displayed in the scan log file (see “Scan Log File” on page 169) when enabled. This is useful if a case fails, and you are trying to determine why a rule is failing. Psion Teklogix NEO Hand-Held Computer User Manual...
- Page 187 6.7 Cigarette Lighter Adaptor — Model PX3056 .....193 6.8 Quad Docking Station – PX3004 PC & PX3004 NPC ....194 Psion Teklogix NEO Hand-Held Computer User Manual...
- Page 188 6.10 Bluetooth Peripherals ....... . 198 Psion Teklogix NEO Hand-Held Computer User Manual...
-
Page 189: Chapter 6: Peripheral Devices & Accessories
Belt Kit including Belt Clip, Adaptor Plate and screws PX3025 Pistol Grip PX3030 Important: Carrying accessory screws have adhesive pre-applied to them. Do not add adhesives to secure screws on carrying accessories; these chemicals may damage the plastic casing. Psion Teklogix NEO Hand-Held Computer User Manual... -
Page 190: Attaching The Hand Strap
– the eyelets on the either side of the base of the unit. You may find Figure 6.2 useful as a reference. Figure 6.2 Attaching The Quick Release Buckle • Guide the quick release buckle through the lanyard loop to secure it to the unit. Psion Teklogix NEO Hand-Held Computer User Manual... - Page 191 M2x6 screw included with the hand strap. Figure 6.3 Attaching The Hand Strap • Snap the hand-strap buckle into the lanyard quick release buckle. Psion Teklogix NEO Hand-Held Computer User Manual...
-
Page 192: Belt Clip Installation
On NEO Unit Folded End • Position the belt clip adaptor plate so that the thicker, folded end aligns with the angled scanner section on the back of NEO as illustrated in Figure 6.5. Psion Teklogix NEO Hand-Held Computer User Manual... - Page 193 Figure 6.6 Attaching The Adaptor Plate Attach Belt Clip here Metal Insert Metal Insert • With the adaptor plate attached to NEO, join the plastic belt clip (included in your kit) to the adaptor plate. Psion Teklogix NEO Hand-Held Computer User Manual...
-
Page 194: The Expansion Port
– you’ll see an indent in the shape of the port cover in the pistol plastic. • Position the pistol grip over the slots moulded into the back of NEO, and snap it into place – no screws required. Psion Teklogix NEO Hand-Held Computer User Manual... -
Page 195: The Battery
Guide”, PN 8000175, before handling a battery. NEO operates on a 3000 mAh Lithium-Ion battery pack – Model WA3020. (The hand-held is also compatible with battery Model No. WA3006.) Note: Review Chapter 7: “Specifications” for detailed information. Psion Teklogix NEO Hand-Held Computer User Manual... -
Page 196: Adaptor/Cable Options
• A slot on the side of the adaptor is provided to accommodate the carrying strap. Thread the carrying strap through the slot on the adaptor. (Refer to Figure 6.8 on page 185.) Psion Teklogix NEO Hand-Held Computer User Manual... - Page 197 Chapter 6: Peripheral Devices & Accessories RS232 Adaptor – Model No. PX3050 Figure 6.8 Threading Wrist Strap Through Adaptor Slot to accommodate Thread Carrying Strap Carrying Strap through slot in Adaptor Psion Teklogix NEO Hand-Held Computer User Manual...
-
Page 198: Micro-Usb Adaptor - Model No. Px3054
NEO, the adaptor allows you to connect an AC wall adaptor (Model No. PX3010) or an automotive power adaptor (Model No. PX3056) to the hand-held. The micro-USB port allows you to utilize the micro-USB to Ethernet cable (Model No. PX3052) and the micro- Psion Teklogix NEO Hand-Held Computer User Manual... -
Page 199: Charging Options
Align the docking port on the base of NEO with the adaptor, and gently snap the adaptor into place. Charging Options Psion Teklogix offers a variety of charging options for NEO. These include: • AC Adaptor – Model No. PX3010 with PX3054 •... -
Page 200: Power Consumption Considerations
Figure 6.9 Desktop Docking Station Spare Battery Charge Well Connector Pins Tri-coloured Note: The desktop docking station is shipped with its own user manual. It is critical that it be reviewed for additional information and updates. Psion Teklogix NEO Hand-Held Computer User Manual... -
Page 201: Desktop Docking Station Setup
It is equipped with a micro-USB port. Figure 6.10 Back Of Desktop Docking Station Micro-USB Port DC IN Socket Important: This docking station can only be used to charge Psion Teklogix approved lithium-ion batteries. 6.5.1 Desktop Docking Station Setup Refer to instruction sheet PN 1081333 for a checklist of startup steps. -
Page 202: Charging A Spare Battery
The desktop docking station is equipped with a single tri-coloured LED indicator in the lower-right corner of the front panel that indicates various charge states of the spare battery installed in the docking station. Psion Teklogix NEO Hand-Held Computer User Manual... -
Page 203: Troubleshooting The Charging Operation Of The Dock
Remove the power cable from the docking station, and check it for damage. • Reconnect the power cable to the outlet. 6.5.6.3 Indicator Does Not Light When Battery Installed • Reinstall the battery, and check that it is fully seated in the charge well. Psion Teklogix NEO Hand-Held Computer User Manual... -
Page 204: Linking A Neo To A Pc
If a link is established between a NEO and a host, the application on the host and on the hand-held must have a recovery mechanism in the event that NEO is removed from the dock, interrupting the link. Psion Teklogix NEO Hand-Held Computer User Manual... -
Page 205: Troubleshooting Usb Operations
The cigarette lighter adaptor allows you to power your hand-held and recharge your battery using power drawn from your vehicle’s automotive power outlet when used in conjunction with the DC/USB Adaptor, Model No. PX3054. Psion Teklogix NEO Hand-Held Computer User Manual... -
Page 206: Quad Docking Station - Px3004 Pc & Px3004 Npc
Quad Docking Station – PX3004 PC & PX3004 NPC Note: The quad docking station is shipped with a user manual. It is critical that this man- ual be reviewed for additional information and updates. Psion Teklogix NEO Hand-Held Computer User Manual... -
Page 207: Quad Docking Station Setup
Although the USB converters have fixed Ethernet MAC addresses, there is generally no cor- relation between these addresses and a specific hand-held. The host application uses standard TCP/IP protocol to name, locate and communicate with a specific NEO on the network. Psion Teklogix NEO Hand-Held Computer User Manual... -
Page 208: Battery Charging - Led Behaviour
Make certain that the battery installed in NEO is not defective. Scanners And Imagers NEO supports 1D laser scanner (SE955) and 1D imager (EV15) options to address a variety of user application requirements. The scanner/imager installed in your unit can be config- Psion Teklogix NEO Hand-Held Computer User Manual... -
Page 209: Basic Scanner Operations
If the scanner is not working, investigate the following: • Check that the bar code symbology being scanned is enabled for the hand-held you are using. Check any other parameters that affect the scanning procedure or the bar code. Psion Teklogix NEO Hand-Held Computer User Manual... -
Page 210: Bluetooth Peripherals
NEOs equipped with Bluetooth radios make it is possible to communicate with a variety of Bluetooth peripherals, including GSM/GPRS handsets, scanners, printers, and so on. The range of the Bluetooth radio is limited to approximately 10 meters. Psion Teklogix provides built-in support for the Bluetooth peripherals listed below. • GSM/GPRS universal handset. - Page 211 7.3.2 EV15 Imager Specifications ......206 7.3.2.1 EV15 Imager Decode Zone .....207 Psion Teklogix NEO Hand-Held Computer User Manual...
-
Page 213: Chapter 7: Specifications
Tri-coloured LED indicates battery charge and scan status Audio: Built-in microphone and receiver on all Connected hand-helds 85db internal beeper Bluetooth (on equipped models) Internal Expansion Slot • One microSD memory card slot – user accessible. Psion Teklogix NEO Hand-Held Computer User Manual... -
Page 214: Software
- On-board RAM: 128 MB SDRAM - On-board ROM: 128 MB Flash Operating System ® ® • Microsoft Windows CE 5.0 Professional (connected variant) ® ® • Microsoft Windows CE 5.0 Core (batch variant) Psion Teklogix NEO Hand-Held Computer User Manual... -
Page 215: Wireless Communication
Wireless Communication • On-board IEEE 802.11b/g (CCX Certified) • On-board Bluetooth radio 7.1.4 Bar Code Applications Note: All are user-upgradeable. • Optional 1D EV15 imager module. • Optional 1D SE955 laser scanner module. Psion Teklogix NEO Hand-Held Computer User Manual... -
Page 216: Neo Radio Specifications
NEO Radio Specifications 7.2.1 802.11b/g Radio Direct Sequence Spread Spectrum (DSSS) and Orthogonal Frequency Division Multiplexing (OFDM) Form factor Embedded surface mount module, 8.2 x 8.4 mm Antenna port U.FL jack Antenna Type PCB slot antenna Antenna Gain 2dBi peak Transmit Power 802.11b/g: 50 mW typical (+17 dBm) Frequency Range... -
Page 217: Scanner/Imager Specifications
1.21 cm H x 2.16 cm W x 1.55 cm (max) 0.47 in. H x 0.85 in. W x 0.61 in. D (max) Symbologies UPC/EAN, Code 128, Code 39, Code 93, I 2 of 5, Discrete 2 of 5, Codabar, MSI Plessey Psion Teklogix NEO Hand-Held Computer User Manual... -
Page 218: Se 955Hp Decode Zone
Codabar, Code 93/93i, Code 11, MSI, Plessey, Telepen, PDF417, Micro PDF417 Ambient Light Works in any lighting conditions, from 0 to 100,000 lux Shock 2000G, 0.7ms, half sinus, 3 axes Vibration 50G r.m.s Psion Teklogix NEO Hand-Held Computer User Manual... -
Page 219: Ev15 Imager Decode Zone
Chapter 7: Specifications EV15 Imager Specifications 7.3.2.1 EV15 Imager Decode Zone 0 Lux to 100,000 Lux Minimum Range Maximum Range Mil Size Inches Inches 14.5 35.5 High quality symbols in normal room light. Psion Teklogix NEO Hand-Held Computer User Manual... -
Page 221: Docking Connector Pinouts
USB Vbus (5 V @ 500 mA) DOCK_ID Dock Identifier USB_DOCK_D- USB Data Negative USB_DOCK_D+ USB Data Positive USB_DOCK_ID USB Identifier DGND Ground RS232 Transmit Console Data RS232 Receive Console Data DGND Ground Psion Teklogix NEO Hand-Held Computer User Manual... -
Page 222: Battery Connector
USB Device port negative data USB+ USB Device port positive data EXP-~TRIG Pistol Grip Trigger signal EXP_~DETECT Detection of installed device 8, 9, 10, 11, 12 SW_VSYS_PWR Power Output (2.7-4.2VDC, 1A peak, 500mAh nominal) switched Psion Teklogix NEO Hand-Held Computer User Manual... -
Page 223: Wireless Information
• Tap on Start>Settings>Network and Dial-up Connections. • Choose the radio icon representing the radio you want to set up – in the sample screen in Figure B.1, this is labelled as SDIO86861 Psion Teklogix NEO Hand-Held Computer User Manual... - Page 224 Figure B.2 Wireless Statistics • Wireless Information Tab: This tab displays existing networks to which you can con- nect, and it allows you to add a new network or modify the settings for an existing network. Psion Teklogix NEO Hand-Held Computer User Manual...
- Page 225 Wireless Properties Tab: Type the appropriate SSID (Service Set Identifier) in the Network name (SSID): dialog box. The Network name field can contain a maximum of 32 characters. The name assigned here is listed as a preferred network. Psion Teklogix NEO Hand-Held Computer User Manual...
- Page 226 The receiving station then sends back a frame that indicates whether it recognizes the identity of the sending station. Psion Teklogix NEO Hand-Held Computer User Manual...
- Page 227 MD5 encapsulated in an EAP is used in conjunction with the 802.1X standard to authenticate users at the MAC layer. Available EAPs are listed in the dropdown menu next to the EAP option. To activate 802.1X, highlight 802.1x authentication, and check the checkbox. Psion Teklogix NEO Hand-Held Computer User Manual...
-
Page 228: Assigning An Ip Address
B.2.2 Advanced Features To display the Advanced Wireless Settings dialog box: • Tap on the Advanced button in the Wireless Information tab. (Refer to Figure B.3.) This window lists the available preferred networks. Psion Teklogix NEO Hand-Held Computer User Manual... - Page 229 • Highlight the network that you want to modify. • Tap on the Properties button. • Make any necessary changes in the Wireless Properties dialog box, and press [ENTER] to save the changes. Psion Teklogix NEO Hand-Held Computer User Manual...
- Page 231 37 battery volume adjustment 38 Authentication, Bluetooth Controls 106 capacity dialog box 92 charging 29 gauge 39 backlight installing 11, 28 power saving suspend dialog box 93 display 76 intensity 35 removing 28 Psion Teklogix NEO Hand-Held Computer User Manual...
- Page 232 61 Check Digit Verification (I 2 of 5) 149 cleaning hand-held 45 (scanner double-click) Click Data Data Handling (code page) 170 (scanner double-click) Click Time data transfer, PC to NEO 23 Psion Teklogix NEO Hand-Held Computer User Manual...
- Page 233 EAN 8 144, 157 docking devices 40 EAN-8 Zero Extend 144 LED functions 36 modifier keys 39 ECI Decoder 140 onscreen 38 Enable Bookland (UPC-EAN) 146 scanner message 197 Enable CC-AB 151, 165 Psion Teklogix NEO Hand-Held Computer User Manual...
- Page 234 Key Repeat tab 79 unlocking 31 keys mounting partitions 126 alpha keys, 36-key keyboard 34 MSI Plessey 148, 160 LANAccessUsingPPP service, Bluetooth NOTIS Editing 148 NQuerty Retry, Bluetooth Controls 111 Laser On Time 137, 152 Psion Teklogix NEO Hand-Held Computer User Manual...
- Page 235 Check Digit Verification 141 Key) 32 Check Digit Verification (I 2 of 5) 149 Click Data (appending data) 168 Click Time 168 quad dock (WA4204-G2) 194 CLSI Editing 148 Codabar 147 Code 128 143, 154 radio Psion Teklogix NEO Hand-Held Computer User Manual...
- Page 236 SE955 scanner specifications 205 Set Length L1 141 SHIFT Key 32 Set Length L2 141 Shutdown Suffix 139 Cold Reset 64 Supp. Redundancy 146 Suspend 64 Supplementals 146 Warm Reset 64 symbologies 134 Psion Teklogix NEO Hand-Held Computer User Manual...
- Page 237 40 warnings 169 802.11 radio signal quality 40 Wi-Fi Configuration 13 using 53 Windows® Start Menu See Start Menu 56 task manager 61 Windows CE Teklogix Error Handling Service 132 dialog box 64 Psion Teklogix NEO Hand-Held Computer User Manual...
- Page 238 Windows CE, navigating in 49 Windows Explorer 59 1D internal scanner 197 2D UPC Half Block Stitching 146 36-key keyboard alpha keys, accessing 34 uppercase letters, creating 34 802.11b/g radio specifications 204 802.11 radio, configuring 12 VIII Psion Teklogix NEO Hand-Held Computer User Manual...
Need help?
Do you have a question about the PX750 and is the answer not in the manual?
Questions and answers