Table of Contents
Advertisement
Quick Links
Download this manual
See also:
User Manual
Advertisement
Table of Contents

Related Manuals for Psion Teklogix 7530 G2


Summary of Contents for Psion Teklogix 7530 G2
- Page 1 7530 G2 Hand-Held Computer Quick Reference Guide June 8, 2006 PN 8000090.A ISO 9001 Certified Quality Management System...
- Page 2 © Copyright 2006 by Psion Teklogix Inc., Mississauga, Ontario, Canada This document and the information it contains is the property of Psion Teklogix Inc., is issued in strict confidence, and is not to be reproduced or copied, in whole or in part, except for the sole purpose of promoting the sale of Psion Teklogix manufactured goods and services.
- Page 3 Psion Teklogix products at no charge to you.) In some regions, this warranty may exceed this period. Please contact your local Psion Teklogix office for details. For a list of offices, refer to “Support Services & Worldwide Offices” on page 53.
- Page 4 This Product, and its accessories, comply with the requirements of the Waste Electrical and Electronic Equipment (WEEE) Directive 2002/96/EC. If your end-of-life Psion Teklogix product or accessory carries a label as shown here, please contact your local country representative for details on how to arrange recycling.
- Page 5 RoHS-compliant as per the EU directive. Other than as noted below, a Psion Teklogix product that does not have an accompany- ing RoHS logo signifies that it was placed on the EU market prior to July 1, 2006, and is thereby exempt from the directive.
-
Page 7: Table Of Contents
2. Getting To Know Your 7530 G2 ..... . 22 2.1 7530 G2 Features ......22 2.2 The Battery . - Page 8 5.1 Caring For The Touchscreen ....52 5.2 Cleaning The 7530 G2 ......52 6.
-
Page 9: Safety Summary
Ο εξοπλισμός αυτός πληροί τις βασικές απαιτήσεις της κοινοτικής οδηγίας EU R&TTE 1999/5/EΚ. (Η δήλωση συμμόρφωσης διατίθεται στη διεύθυνση: www.psionteklogix.com) Deze apparatuur voldoet aan de noodzakelijke vereisten van EU- richtlijn betreffende radioapparatuur en telecommunicatie-eindappa- ratuur 199/5/EG. (verklaring beschikbaar: www.psionteklogix.com). Psion Teklogix 7530 G2 Hand-Held Computer Quick Reference Guide... - Page 10 Toto zariadenie je možné prevádzkovať v Slovenskej republike na základe Všeobecného povolenia č. VPR-01/2001. Use of the 802.11 7530 G2 in France: Owing to French Gov- ernment restrictions, the 802.11 7530 G2 is limited to indoor use. It may be used outdoors, on private property, only with prior authoriza- tion from the French Ministry of Defence.
-
Page 11: Important Note
IMPORTANT NOTE: FCC Radiation Exposure Statement: This equipment complies with FCC radiation exposure limits set forth for an uncontrolled environment under 47 CFR 2.1093 para- Psion Teklogix 7530 G2 Hand-Held Computer Quick Reference Guide... - Page 12 Note: To maintain compliance with the FCC RF exposure guide- lines, if you wear the 7530 G2 on your body, use the Psion Teklogix approved carrying case. Use of non-approved accessories may violate FCC RF exposure guidelines.
- Page 13 CLASS II LASER PRODUCT (CDRH) 610-680nm LASER (LED)DIODE Max.Output:1.4mW (SCAN ) <1mW(AIM) IEC 60825-1:1993+A1:1997+A2:2001 1080259E Caution! Using controls or adjustments, or performing procedures other than those specified herein may result in hazardous radiation exposure. Psion Teklogix 7530 G2 Hand-Held Computer Quick Reference Guide...
- Page 14 Do not operate the equipment without the covers and enclosures properly installed. Caution! Danger of explosion if a 7530 G2 battery is incorrectly handled, charged, disposed of or replaced. Replace only with the same or equivalent type recommended by the manufacturer. Dispose of used batteries according to the instructions described in “The Bat-...
- Page 15 • Do not directly solder the battery. • Do not connect the battery to an electrical outlet, vehicle cigarette lighter, etc. • Do not put battery into a microwave oven or pressurized container. Psion Teklogix 7530 G2 Hand-Held Computer Quick Reference Guide...
-
Page 16: Program License Agreements
Microsoft's End User License Agreement You have acquired a device (“DEVICE”) that includes software licensed by Psion Teklogix Inc. from Microsoft Licensing Inc. or its affiliates (“MS”). Those installed software products of MS origin, as well as associated media, printed materials, and “online” or electronic documentation (“SOFTWARE”) are protected by international intellectual property laws and treaties. - Page 17 • No Liability for Certain Damages. EXCEPT AS PROHIBITED BY LAW, MS SHALL HAVE NO LIABILITY FOR ANY INDI- RECT, SPECIAL, CONSEQUENTIAL OR INCIDENTAL DAMAGES ARISING FROM OR IN CONNECTION WITH Psion Teklogix 7530 G2 Hand-Held Computer Quick Reference Guide...
- Page 18 Software, and you may not install or use the Soft- ware or any accompanying documentation. The Software is the property of Psion Teklogix Inc. or its licensors and is pro- tected by copyright laws and international copyright treaties, as well as other intellectual property laws and treaties.
- Page 19 Software, or use the Software for any other purpose as which may be harmful to a third party. Psion Teklogix 7530 G2 Hand-Held Computer Quick Reference Guide...
-
Page 20: Disclaimer Of Warranty
DEVICES INTRODUCED, OR OTHERWISE. YOU EXPRESSLY ACKNOWLEDGE AND AGREE THAT USE OF THE SOFTWARE IS AT YOUR SOLE RISK AND YOU ARE RESPONSIBLE FOR INSTALLA- TION OF THE SOFTWARE ON YOUR COMPUTER. Psion Teklogix 7530 G2 Hand-Held Computer Quick Reference Guide... -
Page 21: Limitation Of Liability
6. COPYRIGHTS, OWNERSHIP AND PROPRIETARY RIGHTS All title and copyrights in and to the Software, and any copies thereof, are owned by Psion Teklogix Inc. or its suppliers. The Software also contains copyrighted material licensed from our suppliers or obtained from open source and all rights to such copyrighted material rests with such suppliers. - Page 22 You acknowledge that you have read this Agreement, understand it, and that it is the complete agreement between you and Psion Teklogix with respect to the subject matter hereof and supersedes all prior agreements, oral or written.
-
Page 23: Basic Preparation
Typically, 7530 G2 hand-helds are configured at the factory and arrive ready for use. Although the 7530 G2 is equipped with an internal Compact Flash and SD I/O slot, these slots are not intended for user modification. If a device needs to be changed or added in these slots, contact qualified Psion Teklogix personnel. -
Page 24: Attaching The Handstrap
1.3 Attaching A Pistol Grip The pistol grip is attached to the back of the 7530 G2 using the four threaded inserts in the upper part of the 7530 G2 casing. Four black #4-40 Phillips head screws are provided with this accessory. - Page 25 • Position the pistol grip so that it fits snugly over the back of the unit and the inserts on the back of the 7530 G2 align with the holes in the pistol grip. • Use a Phillips screwdriver to securely fasten the pistol grip to the back of the 7530 G2.
-
Page 26: Installing The Battery
A splash screen displaying the Psion Teklogix logo and the Micro- soft Windows CE logo appears followed by the startup desktop. Note: If the 7530 G2 is in suspend state, pressing [ENTER] ‘wakes’ the unit from this state. The screen in which you were working before the unit entered suspend state is displayed. -
Page 27: Switching The 7530 G2 Off
[BLUE] key is locked on. 1.7 Connecting To A Wireless Network In most cases, the 7530 G2 must be configured before it can connect to an 802.11 or Narrow Band wireless network. Chapter 2, “Config- uring An IEEE 802.11 Radio” and “Configuring A Narrow Band Radio”... -
Page 28: Getting To Know Your 7530 G2
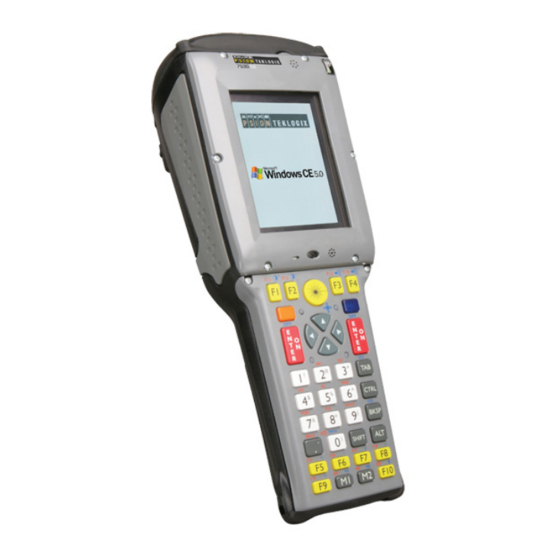
2. Getting To Know Your 7530 G2 2.1 7530 G2 Features Sound Port Stylus (pointing tool) 7530 G2 Screen Ambient Light Sensor Microphone Beeper Port Psion Teklogix 7530 G2 Hand-Held Computer Quick Reference Guide... -
Page 29: The Battery
While the battery is being replaced, the 7530 G2 will save its current data for at least 15minutes. A new, fully charged 7530 G2 battery is expected to last for greater than 10 hours under room temperature and normal operating modes. -
Page 30: The Keyboard
When a modifier key is pressed once, it is displayed in lowercase let- ters in the taskbar at the bottom of the 7530 G2 screen. For example, if the [CTRL] key is pressed, ctrl key is displayed at the bottom of the unit screen. -
Page 31: The Keys
Inserts a blank space between characters. In a Windows dialog box, the [SPACE] key enables or disables a checkbox. The [SCAN] Key Activates the scanner beam while pressed. For units without inter- nal scanners, this key is inoperable. Psion Teklogix 7530 G2 Hand-Held Computer Quick Reference Guide... -
Page 32: The 63-Key Keyboard
• Press the [ORANGE] key again to unlock or turn it off. To choose the letter ‘c’: • Press the [ORANGE], and press [2] three times. • Press the [ORANGE] key again to unlock or turn it off. Psion Teklogix 7530 G2 Hand-Held Computer Quick Reference Guide... - Page 33 • If you do not want to choose any additional alpha characters, press [ORANGE] again to unlock or turn ‘off’ the key and end alpha selection. Psion Teklogix 7530 G2 Hand-Held Computer Quick Reference Guide...
-
Page 34: Adjusting The Keypad Backlight
To adjust the intensity of the keypad backlight and the conditions under which this backlight is activated • In the Control Panel, tap on the Keyboard icon. Note: Access may be restricted to supervisory use. Psion Teklogix 7530 G2 Hand-Held Computer Quick Reference Guide... -
Page 35: The Display
2.4.1 Adjusting The Display Backlight • In the Control Panel, tap on the Display icon and then, tap the Backlight tab. Psion Teklogix 7530 G2 Hand-Held Computer Quick Reference Guide... -
Page 36: Adjusting The Contrast
2.4.3 Calibrating The Touchscreen Note: This function may be restricted to supervisory use. If your 7530 G2 touchscreen has never been calibrated or if you find that the stylus pointer is not accurate when you tap on an item: • In the Control Panel, tap the Stylus icon and then, tap on the Calibration tab. -
Page 37: 7530 G2 Indicators
7530 G2s use LEDs (Light Emitting Diodes), onscreen messages and audio tones as indicators. 2.5.1 LEDs The 7530 G2 is equipped with four tri-coloured LEDs. This section outlines what these LEDs indicate. Important: If an LED is illuminated in red, the operator should be cautious as this generally indicates an abnormal operating condition or active laser emission. - Page 38 Application Scanner Charge Charge LED The lower-right LED is reserved for internal charger/power status. and is active even when the 7530 G2 is inserted in a docking station (and in suspend mode). Function Charge LED Behaviour External power not available.
-
Page 39: Onscreen Indicators
Radio Traffic LED The upper-left LED on your 7530 G2 flashes either yellow (trans- mit) or green (receive). Note: Keep in mind that while the standard 802.11 radio supports the transmit/receive LED, not all radios support this function. Scan LED Successful scans are indicated in two ways –... - Page 40 The taskbar changes dynamically, and only those icons that are applicable are displayed. For example, if a radio is not installed in your 7530 G2, the radio signal icon is not displayed in the taskbar. Note: Refer to “The Taskbar” on page 42 for additional details.
- Page 41 – a warning window pops up. When the battery power is completely depleted, a final warning window indicates that the 7530 G2 will be powered down. If the 7530 G2 is using external AC power, an AC icon is displayed. Full Empty...
- Page 42 Scanner USB Device RFID Serial Device Docking Device When a 7530 G2 is inserted in a docking station, charger or cradle, an associated icon appears in the taskbar. Portable Docking Combo Charger & Quad Docking Station Power Cradle...
-
Page 43: Audio Indicators
This icon represents the Bluetooth radio installed in your 7530 G2. 2.5.3 Audio Indicators The 7530 G2 beeper provides a variety of sounds and can be config- ured to emit a sound under a variety of conditions. Refer to ‘Volume Adjustment’... -
Page 44: Checking The Scanner
2.7 Checking The Scanner If your 7530 G2 is equipped with an internal scanner, you can test it to ensure that it is operating properly. Point the scanner window at a bar code that your scanner was designed to decode – for example, a 1D UPC bar code or 2D bar code. -
Page 45: Scan Led Indicators
Refer to “Calibrating The Touchscreen” on page 30. The 7530 G2 is equipped with a stylus – a pointing tool that looks like a pen – stored in a slot at the top of the unit. The stylus is used to select objects on the touchscreen. -
Page 46: Navigating Using The Keyboard
You can also choose icons and navigate dialog boxes, display the desktop, and so on using the keyboard (rather than the touchscreen). Keep in mind that unlike a desktop computer, the 7530 G2 does not support key chording (pressing two keys at the same time). You must press one key followed by the next in sequence. -
Page 47: The Startup Desktop
3.3 The Startup Desktop When the 7530 G2 boots up, the startup desktop is displayed. Any applications stored in the Startup folder will start up immediately. The Startup folder is located in \Windows\Startup and \Flash Disk\Startup. 3.3.1 Accessing Desktop Icons •... -
Page 48: The Taskbar
3.3.2 The Taskbar The 7530 G2 is equipped with a taskbar at the bottom of the screen. It displays icons through which you can view the security level, bat- tery capacity and radio signal quality of your unit. A 7530 G2 attached to a charger, cradle, docking station or PDM displays the associated icon. -
Page 49: The Start Menu
• Tap on the Start button in the taskbar. Tap on the item in the menu with which you want to work. If you’re using the keyboard: • Press [BLUE] [0] (zero) to display the Start Menu. Psion Teklogix 7530 G2 Hand-Held Computer Quick Reference Guide... - Page 50 The Desktop Choosing Desktop from the Start Menu displays the 7530 G2 desktop. Security Settings To assign a security level: • Choose Security from the Start Menu. • Choose a security level from the dialog box. To allow access to all the Start Menu and taskbar options, choose the Supervi- sor security level.
- Page 51 Programs Program displays a sub-menu of options with which you can work access applications. Shortcuts Choosing Shortcuts provides access to the System Tray, Cycle Tasks and the Task Manager. Psion Teklogix 7530 G2 Hand-Held Computer Quick Reference Guide...
- Page 52 The Task Manager option allows you to switch to another task or to end an active task. To display the task manager window: • Press [BLUE] [0] (zero) [T] [T], or Psion Teklogix 7530 G2 Hand-Held Computer Quick Reference Guide...
- Page 53 • Press [ALT][ESC]. Settings The Settings menu provides access to the Control Panel applets, lets you configure your radio (Network and Dial-up Connections) and customize the Taskbar and Start Menu. Psion Teklogix 7530 G2 Hand-Held Computer Quick Reference Guide...
- Page 54 Resets the 7530 G2, leaving all saved files and (registry) settings intact. Unsaved data is lost. Resets the 7530 G2. Files stored outside of permanent memory are lost. Psion Teklogix 7530 G2 Hand-Held Computer Quick Reference Guide...
-
Page 55: Using A Dialog Box
Textbox: A textbox requires that you type information. Tap on the textbox you want to work with to highlight it, and then type the appropriate information. Psion Teklogix 7530 G2 Hand-Held Computer Quick Reference Guide... -
Page 56: Scanner Specifications
Laser Class 2 Visible laser diode Visible laser diode Visible laser diode Light Source 650 nm 650 nm 650 nm Output Power 0.83 mW 1.33 mW 1.35 mW Scan Patterns Linear Linear Linear Psion Teklogix 7530 G2 Hand-Held Computer Quick Reference Guide... -
Page 57: Se 1224Hp, Se 2223 Pdf & Se 1524Er
Scan Patterns Linear Image capture field Scan Angle/ 40º 26cm x 21cm @ 15cm Field of View Symbologies Most linear codes, PDF417 Most linear codes & most Supported & MicroPDF417 2D codes Psion Teklogix 7530 G2 Hand-Held Computer Quick Reference Guide... -
Page 58: General Maintenance
• Avoid abrasive cleaners, solvents or strong chemicals for cleaning. The 7530 G2 has a plastic case that is susceptible to harsh chemicals. The plastic is partially soluble in oils, min- eral spirits and gasoline. The plastic slowly decomposes in strong alkaline solutions. -
Page 59: Support Services & Worldwide Offices
6. Support Services & Worldwide Offices Psion Teklogix provides a complete range of product support serv- ices to its customers worldwide. These services include technical support and product repairs. 6.1 Technical Support For technical support in North America: Call Toll free:... -
Page 60: Product Repairs
Canada L5N 7J9 Tel: +1 800 387 8898 Option 2 - or - Direct: + 1 905 813 9900 Ext. 1999 Option 2 Fax: + 1 905 812 6304 Web: www.psionteklogix.com Psion Teklogix 7530 G2 Hand-Held Computer Quick Reference Guide... - Page 61 Psion Teklogix S.A. La Duranne 135 Rue Rene Descartes BP 421000 13591 Aix-En-Provence Cedex 3; France Tel: +33 4 42 90 88 09 Fax: +33 4 42 90 88 88 E-mail: tekeuro@psion.com Psion Teklogix 7530 G2 Hand-Held Computer Quick Reference Guide...
Need help?
Do you have a question about the 7530 G2 and is the answer not in the manual?
Questions and answers