Sign In
Upload
Manuals
Brands
Lexmark Manuals
Printer
MX410 Series
Lexmark MX410 Series Manuals
Manuals and User Guides for Lexmark MX410 Series. We have
9
Lexmark MX410 Series manuals available for free PDF download: Service Manual, User Manual, Manual, Administrator's Manual
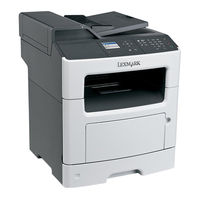
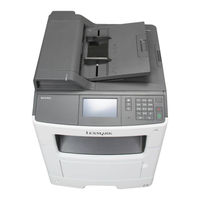
Lexmark MX410 Series Service Manual (510 pages)
Brand:
Lexmark
| Category:
All in One Printer
| Size: 38.79 MB
Table of Contents
Product Information
2
Edition Notice
2
October
2
Table of Contents
3
Notices, Conventions, and Safety Information
15
Laser Notice
15
Conventions
18
Safety Information
18
General Caution Statements
24
Change History
25
General Information
33
Media Guidelines
33
Paper Guidelines
33
Using Recycled Paper and Other Office Papers
36
Using Specialty Media
36
Supported Paper Sizes, Types, and Weights
38
Data Security Notice
41
Tools Required for Service
41
Diagnostics and Troubleshooting
43
Troubleshooting Overview
43
Performing the Initial Troubleshooting Check
43
Power-On Reset (POR) Sequence
44
Using Safe Mode
44
Fixing Print Quality Issues
45
Initial Print Quality Check
46
Gray Background or Toner Fog Check
46
Blank Pages Check
49
Print Is too Dark Check
55
Print Is too Light Check
57
Paper Curl Check
59
Folded or Wrinkled Paper Check
61
Solid Black Pages Check
62
Repeating Defects Check
65
Skewed Print Check
66
Streaked Vertical Lines Appear on Prints Check
68
Horizontal Light Bands Check
69
Vertical Light Bands Check
71
Vertical Dark Bands Check
72
Vertical Dark Streaks with Print Missing Check
73
White Streaks and Voided Areas Check
75
Fine Lines Are Not Printed Correctly (Specifically Chinese Characters) Check
78
Clipped Pages or Images Check
79
Compressed Images Appear on Prints Check
81
Incorrect Margins on Prints Check
82
Toner Rubs off Check
83
Toner Specks Appear on Prints Check
84
Paper Jams
86
Avoiding Jams
86
Understanding Jam Messages and Locations
87
[X]-Page Jam, Open Front Door. [20Y.XX]
88
[X]-Page Jam, Clear Standard Bin. [20Y.XX]
91
[X]-Page Jam, Open Rear Door. [20Y.XX]
91
[X]-Page Jam, Remove Tray 1 to Clear Duplex. [23Y.XX]
93
[X]-Page Jam, Open Tray [X]. [24Y.XX]
94
[X]-Page Jam, Open Tray [X]. [24Y.XX]
95
[X]-Page Jam, Clear Manual Feeder. [25Y.XX]
96
[X]-Page Jam, Open Automatic Feeder Top Cover. [28Y.XX]
97
200 Paper Jams
98
201 Paper Jams
103
Paper Jams
104
23Y Paper Jams
106
241 Paper Jams
107
242-244 Paper Jams
112
25Y Paper Jams
119
28Y Paper Jams
120
29Y Paper Jams
123
Understanding Printer Messages
125
Cartridge Low [88.Xy]
125
Cartridge Nearly Low [88.Xy]
125
Cartridge very Low, [X] Estimated Pages Remain [88.Xy]
125
Change [Paper Source] to [Custom String] Load [Paper Orientation]
125
Change [Paper Source] to [Custom Type Name] Load [Orientation]
126
Change [Paper Source] to [Paper Size] Load [Orientation]
126
Change [Paper Source] to [Paper Type] [Paper Size] Load [Orientation]
126
Close Flatbed Cover and Load Originals if Restarting Job [2Yy.XX]
126
Close Door
126
Configuration Change, some Held Jobs Were Not Restored [57]
127
Complex Page, some Data May Not Have Printed [39]
127
Defective Flash Detected [51]
127
Disk Must be Formatted for Use in this Device
127
Error Reading USB Drive. Remove USB
127
Error Reading USB Hub. Remove Hub
127
Fax Partition Inoperative. Contact System Administrator
128
Fax Server 'To Format' Not Set Up. Contact System Administrator
128
Fax Station Name Not Set Up. Contact System Administrator
128
Fax Station Number Not Set Up. Contact System Administrator
128
Imaging Unit Low [84.Xy]
128
Imaging Unit Nearly Low [84.Xy]
128
Imaging Unit very Low, [X] Estimated Pages Remain [84.Xy]
129
Incorrect Paper Size, Open [Paper Source] [34]
129
Insufficient Memory, some Held Jobs Were Deleted [37]
129
Insufficient Memory, some Held Jobs will Not be Restored [37]
129
Insufficient Memory for Flash Memory Defragment Operation [37]
129
Insufficient Memory to Collate Job [37]
130
Insufficient Memory to Support Resource Save Feature [35]
130
Load Manual Feeder with [Custom String] [Paper Orientation]
130
Load Manual Feeder with [Custom Type Name] [Paper Orientation]
130
Load Manual Feeder with [Paper Size] [Paper Orientation]
130
Load Manual Feeder with [Paper Type] [Paper Size] [Paper Orientation]
131
Load [Paper Source] with [Custom String] [Paper Orientation]
131
Load [Paper Source] with [Custom Type Name] [Paper Orientation]
131
Load [Paper Source] with [Paper Size] [Paper Orientation]
132
Load [Paper Source] with [Paper Type] [Paper Size] [Paper Orientation]
132
Maintenance Kit Low [80.Xy]
132
Maintenance Kit Nearly Low [80.Xy]
132
Maintenance Kit very Low, [X] Estimated Pages Remain [80.Xy]
132
Memory Full [38]
133
Memory Full, Cannot Print Faxes
133
Memory Full, Cannot Send Faxes
133
Network [X] Software Error [54]
133
No Analog Phone Line Connected to Modem, Fax Is Disabled
133
Non-Lexmark [Supply Type], See User's Guide [33.Xy]
133
Not Enough Free Space in Flash Memory for Resources [52]
134
Printer Had to Restart. Last Job May be Incomplete
134
Reinstall Defective or Unresponsive Cartridge [31.Xy]
134
Reinstall Missing or Unresponsive Cartridge [31.Xy]
135
Remove Paper from Standard Output bin
135
Replace All Originals if Restarting Job
135
Replace Cartridge, 0 Estimated Pages Remain [88.Xy]
135
Replace Cartridge, Printer Region Mismatch [42.Xy]
135
Replace Defective Imaging Unit [31.Xy]
136
Replace Jammed Originals if Restarting Job
136
Replace Imaging Unit, 0 Estimated Pages Remain [84.Xy]
136
Replace Maintenance Kit, 0 Estimated Pages Remain [80.Xy]
137
Reinstall Missing or Unresponsive Imaging Unit [31.Xy]
137
Replace Unsupported Cartridge [32.Xy]
137
Replace Unsupported Imaging Unit [32.Xy]
137
Restore Held Jobs
137
Scanner Automatic Feeder Cover Open
137
Scanner Disabled by Admin [840.01]
138
Scanner Disabled. Contact System Administrator if Problem Persists. [840.02]
138
Scanner Jam, Remove All Originals from the Scanner [2Yy.XX]
138
Scanner Jam, Remove Jammed Originals from the Scanner [2Yy.XX]
138
Serial Option [X] Error [54]
138
SMTP Server Not Set Up. Contact System Administrator
138
Some Held Jobs Were Not Restored
138
Standard Network Software Error [54]
139
Standard USB Port Disabled [56]
139
Supply Needed to Complete Job
139
Too Many Flash Options Installed [58]
139
Too Many Trays Attached [58]
139
Unformatted Flash Detected [53]
140
Weblink Server Not Set Up. Contact System Administrator
140
User Attendance Messages
140
User Attendance Messages (0-99.99)
140
Unresponsive Toner Cartridge Service Check
143
Unsupported Toner Cartridge Service Check
143
Printer/Cartridge Mismatch Service Check
144
Unsupported Imaging Unit Service Check
144
Imaging Unit Smart Chip Contact Service Check
145
Toner Smart Chip Compatibility Service Check
145
Imaging Chip Compatibility Service Check
146
Media Size Mismatch Service Check
146
Supplies Mismatch Service Check
147
Flash Full Service Check
148
Maintenance Kit Service Check
148
Insufficient Memory Service Check
148
Imaging Unit Low Service Check
149
Toner Cartridge Low Service Check
149
Printer Hardware Errors
150
111 Errors
150
121 Errors
154
126 Errors
156
132 Errors
157
133 Errors
158
140 Errors
159
146 Errors
160
Errors
162
Procedure before Starting the 9Yy Service Checks
163
900 Errors
165
912 Errors
170
94Y Errors
170
959 Errors
173
96Y Errors
174
97Y Errors
175
98Y Errors
176
99Y Errors
177
Adf/Scanner Hardware Errors
178
8Yy Error Messages
178
Scanner Disabled Error Service Check
179
Scanner Carriage Failure Service Check
180
ADF Service Check
181
Scanner Configuration Error Service Check
182
Scan/Fax/Copy Symptoms
182
Black or Blank Page Copy Service Check
183
CCD Service Check
184
Flatbed Motor Service Check
184
Flatbed Home Position Service Check
185
ADF Rattling Noise Service Check
186
Flatbed Legal Scan Service Check
186
ADF Streak Service Check
187
ADF Feed Errors Service Check
187
ADF Duplex Failure Service Check
188
Modem/Fax Card Service Check
189
Blank Spaces on Incoming Fax Service Check
190
Stretched Words on Incoming Fax Service Check
190
Fax Reception Service Check
191
Fax Transmission Service Check
192
Fax Error Log Codes
195
Escalating a Fax Issue to Second-Level Support
198
Input Option Hardware Errors
200
321-344 Errors
200
Other Symptoms
204
Base Printer Symptoms
204
Dead Machine Service Check
205
Controller Board Service Check
206
Control Panel Service Check
207
Control Panel Button Service Check
208
USB Print Service Check
209
Front Door Not Closed Service Check
210
Network Service Check
211
Advertisement
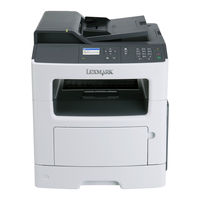
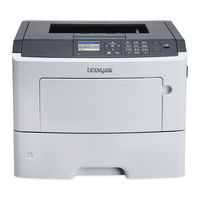
Lexmark MX410 Series Service Manual (421 pages)
Lexmark Machine Type 7015-270, -470, -6xx Printers Service Manual
Brand:
Lexmark
| Category:
Printer
| Size: 30.69 MB
Table of Contents
Table of Contents
3
Service Manual
1
Product Information
2
Edition Notice
2
November
2
Table of Contents
3
Notices and Safety Information
15
Laser Notices
15
Safety
18
Preface
23
Service Manual Conventions
23
General Information
25
Media Guidelines
25
Paper Guidelines
25
Moisture Content
26
Unacceptable Paper
26
Selecting Paper
27
Selecting Preprinted Forms and Letterhead
27
Storing Paper
27
Using Recycled Paper and Other Office Papers
28
Using Specialty Media
28
Supported Paper Sizes, Types, and Weights
30
Supported Paper Types and Weights
32
Data Security Notice
33
Tools Required for Service
34
Diagnostic Information
35
Troubleshooting Overview
35
Performing the Initial Troubleshooting Check
35
Power-On Reset (POR) Sequence
36
Using Safe Mode
36
Fixing Print Quality Issues
37
Initial Print Quality Check
37
Gray Background or Toner Fog on Prints
38
Printer Is Printing Blank Pages
39
Repeating Defects
39
Printer Is Printing Solid Black Pages
40
Shadow Images Appear on Prints
40
Skewed Print
41
Streaked Horizontal or Vertical Lines Appear on Prints
43
Toner Rubs off
44
Toner Specks Appear on Prints
45
Paper Jams
45
Avoiding Jams
46
Understanding Jam Messages and Locations
47
200 Paper Jams
48
Main Drive Motor Control Jam Service Check
55
202 Paper Jams
56
X]‑Page Jam, Clear Standard Bin. [20Y.XX
57
23Y Paper Jams
60
24Y Paper Jams
62
X]‑Page Jam, Open Tray [X]. [24Y.XX
62
25Y Paper Jams
71
X]‑Page Jam, Clear Manual Feeder. [25Y.XX
71
Mpf Service Check
73
28Y Paper Jams
74
29Y.XX Paper Jams
75
Understanding Printer Messages
76
Cartridge Low [88.Xy]
76
Cartridge Nearly Low [88.Xy]
76
Cartridge very Low, [X] Estimated Pages Remain [88.Xy]
76
Change [Paper Source] to [Custom String] Load [Paper Orientation]
76
Change [Paper Source] to [Custom Type Name] Load [Orientation]
76
Change [Paper Source] to [Paper Size] Load [Orientation]
77
Change [Paper Source] to [Paper Type] [Paper Size] Load [Orientation]
77
Close Door
77
Close Flatbed Cover and Load Originals if Restarting Job [2Yy.XX]
77
Configuration Change, some Held Jobs Were Not Restored [57]
77
Complex Page, some Data May Not Have Printed [39]
78
Defective Flash Detected [51]
78
Disk Must be Formatted for Use in this Device
78
Error Reading USB Drive. Remove USB
78
Error Reading USB Hub. Remove Hub
78
Fax Partition Inoperative. Contact System Administrator
78
Fax Server 'To Format' Not Set Up. Contact System Administrator
79
Fax Station Name Not Set Up. Contact System Administrator
79
Fax Station Number Not Set Up. Contact System Administrator
79
Imaging Unit Low [84.Xy]
79
Imaging Unit Nearly Low [84.Xy]
79
Imaging Unit very Low, [X] Estimated Pages Remain [84.Xy]
79
Incorrect Paper Size, Open [Paper Source] [34]
80
Insufficient Memory for Flash Memory Defragment Operation [37]
80
Insufficient Memory to Collate Job [37]
80
Insufficient Memory, some Held Jobs Were Deleted [37]
80
Insufficient Memory, some Held Jobs will Not be Restored [37]
80
Insufficient Memory to Support Resource Save Feature [35]
81
Load Manual Feeder with [Custom String] [Paper Orientation]
81
Load Manual Feeder with [Custom Type Name] [Paper Orientation]
81
Load Manual Feeder with [Paper Size] [Paper Orientation]
81
Load Manual Feeder with [Paper Type] [Paper Size] [Paper Orientation]
82
Load [Paper Source] with [Custom String] [Paper Orientation]
82
Load [Paper Source] with [Custom Type Name] [Paper Orientation]
82
Load [Paper Source] with [Paper Size] [Paper Orientation]
82
Load [Paper Source] with [Paper Type] [Paper Size] [Paper Orientation]
83
Maintenance Kit Low [80.Xy]
83
Maintenance Kit Nearly Low [80.Xy]
83
Maintenance Kit very Low, [X] Estimated Pages Remain [80.Xy]
83
Memory Full [38]
83
Memory Full, Cannot Print Faxes
83
Memory Full, Cannot Send Faxes
84
Network [X] Software Error [54]
84
No Analog Phone Line Connected to Modem, Fax Is Disabled
84
Non-Lexmark [Supply Type], See User's Guide [33.Xy]
84
Not Enough Free Space in Flash Memory for Resources [52]
85
Printer Had to Restart. Last Job May be Incomplete
85
Reinstall Defective or Unresponsive Cartridge [31.Xy]
85
Reinstall Missing or Unresponsive Cartridge [31.Xy]
85
Remove Paper from Standard Output bin
85
Replace All Originals if Restarting Job
85
Replace Cartridge, 0 Estimated Pages Remain [88.Xy]
86
Replace Cartridge, Printer Region Mismatch [42.Xy]
86
Replace Defective Imaging Unit [31.Xy]
86
Reinstall Missing or Unresponsive Imaging Unit [31.Xy]
87
Replace Imaging Unit, 0 Estimated Pages Remain [84.Xy]
87
Replace Jammed Originals if Restarting Job
87
Replace Maintenance Kit, 0 Estimated Pages Remain [80.Xy]
87
Replace Unsupported Cartridge [32.Xy]
87
Replace Unsupported Imaging Unit [32.Xy]
88
Restore Held Jobs
88
Scanner Automatic Feeder Cover Open
88
Scanner Disabled by Admin [840.01]
88
Scanner Disabled. Contact System Administrator if Problem Persists. [840.02]
88
Scanner Jam, Remove All Originals from the Scanner [2Yy.XX]
88
Scanner Jam, Remove Jammed Originals from the Scanner [2Yy.XX]
88
Serial Option [X] Error [54]
89
SMTP Server Not Set Up. Contact System Administrator
89
Some Held Jobs Were Not Restored
89
Standard Network Software Error [54]
89
Standard USB Port Disabled [56]
89
Supply Needed to Complete Job
90
Too Many Flash Options Installed [58]
90
Too Many Trays Attached [58]
90
Unformatted Flash Detected [53]
90
Weblink Server Not Set Up. Contact System Administrator
90
User Attendance Messages (0-99.99)
91
Imaging Unit Smart Chip Contact Service Check
93
Toner Cartridge Smart Chip Contact Service Check
93
Media Size Mismatch Service Check
94
Insufficient Memory Service Check
95
Printer/Cartridge Mismatch Service Check
95
Printer Hardware Errors
95
Printer Hardware Errors
96
1Xx Error Messages
97
111.XX LSU Service Check
100
Fuser Service Check
100
LVPS Service Check
101
Toner Density Sensor Service Check
101
CTLS Service Check
102
Main Drive Gearbox Service Check
102
ACM Service Check
103
Cartridge Gearbox Service Check
103
171.XX Cooling Fan Service Check
104
Tray 1 Pick/Lift Motor Gearbox Service Check
104
9Xx Error Messages
105
System Software Error Service Check
105
System Software Error Service Check
108
NVRAM Mismatch Failure Service Check
112
Base Printer Symptoms
114
Control Panel Service Check
114
Dead Machine Service Check
114
Controller Board Service Check
115
Control Panel Service Check
116
Control Panel Button Service Check
117
USB Print Service Check
118
Front Door Not Closed Service Check
119
Network Service Check
120
Input Option Hardware Errors
122
3Xx Error Messages
122
Option Tray Pick/Lift Motor Service Check
122
Option Tray Separator/Passthrough Motor Service Check
122
Option Tray ACM Motor Service
123
Option Tray Pick/Lift Motor Service Check
124
Option Tray Separator/Passthrough Motor Service Check
124
Option Tray ACM Motor Service Check
125
Option Tray Controller Card Service Check
125
Adf/Scanner Hardware Errors
126
8Xx Service Error Messages
126
Scanner Disabled Error Service Check
127
ADF Service Check
128
Scan/Fax/Copy Symptoms
129
Black or Blank Page Copy Service Check
130
CCD Service Check
131
Flatbed Motor Service Check
131
Flatbed Home Position Service Check
132
Flatbed Legal Scan Service Check
132
ADF Cover Open Service Check
133
ADF Paper Jam Service Check
134
ADF Streak Service Check
134
ADF Feed Errors Service Check
136
ADF Duplex Service Check
137
Modem/Fax Card Service Check
138
Fax Reception Service Check
139
Fax Transmission Service Check
141
Fax Error Log Codes
143
Escalating a Fax Issue to Second-Level Support
147
Service Menus
149
Understanding the Control Panel and Menus (Mx310Dn)
149
Using the Printer Control Panel
149
Understanding the Colors of the Indicator and Sleep Button Lights
150
Understanding the Control Panel and Menus (MX410, MX510, and MX511)
150
Using the Printer Control Panel
150
Understanding the Colors of the Indicator and Sleep Button Lights
151
Understanding the Home Screen
151
Using the Touch-Screen Buttons
153
Menus List
154
Diagnostics Menu
155
Entering the Diagnostics Menu
155
Registration
155
Scanner Calibration
155
Print Quality Pages
156
Print Tests
156
Registration
156
Scanner Calibration
156
Hardware Tests
157
Panel Test
157
Button Test
157
Dram Test
157
Serial Wrap Test
158
Duplex Tests
159
Quick Test
159
Duplex Tests
160
Top Margin
160
Left Margin
160
Input Tray Tests
161
Output bin Tests
162
Base Sensor Test
163
Device Tests
163
Printer Setup
164
Disk Test/Clean
164
Flash Test
164
Printed Page Count
165
Permanent Page Count
165
Ep Setup
166
Ep Defaults
166
Transfer Adjust
166
Print Contrast
166
Ep Setup
167
Gap Adjust
167
Event Log
168
Reports
168
Asic Test
169
Event Log
169
Scanner Tests
169
Feed Test
170
Scanner Tests
170
Sensor Tests
170
Scanner Tests
171
Exit Diags
173
Scanner Tests
173
Configuration Menu
174
Entering the Configuration Menu
174
Maintenance Counter Value
174
Reset ADF Maintenance Kit Counter
174
Reset Maintenance Counter
174
Panel Menus
175
Print Quality Pages
175
Reports
175
Download Emuls
176
Energy Conserve
176
Factory Defaults
176
PPDS Emulation
176
Safe Mode
176
Fax Low Power Support
177
Format Fax Storage
177
Min Copy Memory
177
Num Pad Job Assist
177
ADF Edge Erase
178
Flatbed Edge Erase
178
Scanner Manual Registration
178
Disable Scanner
179
Action for Prompts
180
Envelope Prompts
180
Paper Prompts
180
Disk Encryption
181
Jobs on Disk
181
Erase All Information on Disk
182
Font Density
182
Font Sharpening
182
Reduced Curl
182
Require Standby
182
Wipe All Settings
182
A5 Loading
183
LES Applications
183
UI Automation
183
Clear Custom Status
184
Clear Supply Usage History
184
Key Repeat Initial Delay
184
Key Repeat Rate
184
Automatically Display Error Screens
185
USB Pnp
185
USB Speed
185
Entering Invalid Engine Mode
185
Entering Recovery Mode
186
Accessing the Network SE Menu
186
Service Engineer Menu
186
Accessing the Service Engineer (SE) Menu
186
Service Engineer (SE) Menu
186
Fax Service Engineer (SE) Menu
187
Repair Information
189
Removal Precautions
189
Data Security Notice
189
Controller Board/Control Panel Replacement
190
Handling ESD-Sensitive Parts
190
Esf Solutions Backup
191
Ribbon Cable Connectors
192
Zero Insertion Force (ZIF) Connectors
192
Horizontal Top Contact Connector
193
Horizontal Bottom Contact Connector
196
Vertical Mount Contact Connector
199
Horizontal Sliding Contact Connector
202
Low Insertion Force (LIF) Connector
205
Printhead Assembly Adjustments
206
Removal Procedures
209
Left Side Removals
209
Left Cover Removal
209
Main Drive Gearbox Removal
211
MPF Solenoid Removal
213
MPF Gearbox Removal
215
Reverse Solenoid Removal
218
ACM Clutch Removal (MX310, MX410)
219
Cartridge Gearbox Removal
224
Duplex Gear Assembly Removal
224
Right Side Removals
226
Right Cover Removal
226
Memory Access Door Removal
229
Tray Present Sensor Removal
229
Cooling Fan Removal
230
Controller Board Removal
231
Controller Board Shield Removal
234
Toner Cartridge Smart Chip Contact Removal
236
Upper Shield Removal
236
Modem Removal
238
Front Removals
240
Left Front Mount Removal
240
Right Front Mount Removal
241
Transfer Roll Removal
243
Cartridge Plunger Removal
244
Name Plate Cover Removal
246
Front bin Cover Removal
248
Control Panel Assembly Removal
249
UICC (MX310) Removal
252
UICC Removal
252
UICC Shield Removal
253
Speaker Removal
254
USB Cable Bracket Removal
254
Control Panel Cover Removal
255
Display Removal (MX410, Mx51X)
256
Display (MX310) Removal
258
Light Tube Removal
258
Keypad Assembly Removal
260
MPF Tray Removal
260
MPF Pick Roller Cover Removal
263
MPF Pick Roller Removal
263
Bail Removal
264
Jam Access Cover Removal
264
Front Access Cover Removal
265
Front Door Sensor Removal
267
Front Input Guide Removal
267
Separator Pad Removal
269
Bottom Removals
272
Power Supply Removal
272
Power Supply Shield Removal
273
Duplex Removal
274
Duplex Sensor and Input Sensor Removal
275
Duplex Sensor and Input Sensor (MX310, MX410) Removal
278
Index Sensor Removal
279
Media Present Sensor Removal
280
Toner Density Sensor Removal
282
Trailing Edge Sensor Removal
282
Trailing Edge Sensor (MX310, MX410) Removal
283
ACM Assembly Removal
288
ACM Assembly (MX310, MX410) Removal
294
Pick/Lift Motor Gearbox Removal
297
Tray Guide Removal
298
Rear Side Removals
300
Dust Cover Removal
300
Rear Exit Door Removal
301
Narrow Media/Bin Full Sensor Removal
302
Rear Cover Removal
302
Redrive Assembly Removal
304
Fuser Removal
305
Top Side Removals
307
Top Cover Assembly Removal
307
Bin Extender Removal
308
Laser Scanning Unit (LSU) Removal
309
Removal Procedure
310
Adf/Scanner Removals
311
ADF Separator Pad Removal
311
ADF Separator Roll Removal
312
Flatbed Cushion Removal
314
Scanner Front Cover Removal
315
Scanner Rear Cover Removal
315
ADF Input Tray Removal
316
ADF Unit Removal
316
Scanner Assembly Removal
319
ADF Top Cover Assembly
323
ADF Cable Removal
325
ADF Unit Removal
325
USB Cable Removal
325
Scanner Front Cover Removal
326
USB Wireless Cable Removal
326
ADF Hinge Removal
328
Control Panel Ribbon Cable Removal
328
Flatbed Assembly Removal
328
Speaker Cable Removal
329
Cave Light Cable Removal
331
Restraint Pad Removal
332
250/550-Sheet Option Tray Removals
333
Pick Roller Removal
333
Separator Roll Assembly Removal
333
ACM Assembly Removal
335
Component Locations
339
Exterior Locations
339
Front View
339
Rear View
340
Connectors
341
Controller Board
341
Power Supply
347
Maintenance
349
Inspection Guide
349
Scheduled Maintenance
350
Maintenance Kits
350
Resetting the Maintenance Counter
351
Lubrication Specification
351
Cleaning the Printer
351
Cleaning the Scanner Glass
352
Parts Catalog
354
Legend
354
Assembly 1: Covers
355
Assembly 2: Imaging
357
Assembly 3: Control Panel (Mx41X, Mx51X)
361
Assembly 4: Control Panel (Mx31X)
363
Assembly 5: Electronics 1
365
Assembly 5: Electronics
366
Assembly 6: Electronics 2
367
Assembly 7: Frame
369
Assembly 8: Option Trays
371
Assembly 9: Maintenance Kits
373
Assembly 10: Power Cords
375
Assembly 11: Miscellaneous
377
Appendix A: Printer Specifications
379
Electrical Specifications
379
Operating Clearances
379
Acoustics
379
Operating Environment
380
Scanner Specifications
381
Fax Specifications
382
Appendix B: Options and Features
383
Available Internal Options
383
Media Handling Options
383
Appendix C: Theory of Operation
385
POR Sequence
385
Printer Control
385
Paper Path Information
385
Input Tray
385
Multipurpose Feeder (MPF)
386
Simplex Printing
386
Duplex Printing
387
Media Handling Components
387
Main Drive Gearbox
387
Autocompensator Mechanism (ACM)
388
Key Components
388
Media Present Sensor
388
Sensors
388
Trailing Edge Sensor
388
Other Key Components
389
Tray Present Sensor
389
Toner Density Sensor
389
Electrophotographic Process (EP Process)
390
ADF Theory
394
ADF Theory of Operation
394
Appendix D: Acronyms
397
Acronyms
397
Index
399
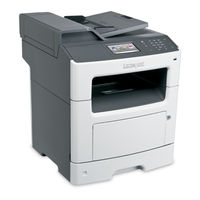
Lexmark MX410 Series User Manual (331 pages)
XM1100 Series
Brand:
Lexmark
| Category:
All in One Printer
| Size: 10.62 MB
Table of Contents
Table of Contents
2
Safety Information
7
Learning about the Printer
9
Finding Information about the Printer
9
Selecting a Location for the Printer
10
Printer Configurations
11
Understanding the Basic Functions of the Scanner
12
Using the ADF and Scanner Glass
13
Understanding the Printer Control Panel
14
Using the Printer Control Panel
14
Understanding the Colors of the Sleep Button and Indicator Lights
14
Understanding the Home Screen
15
Using the Touch-Screen Buttons
16
Setting up and Using the Home Screen Applications
18
Finding the IP Address of the Computer
18
Finding the IP Address of the Printer
19
Accessing the Embedded Web Server
19
Customizing the Home Screen
19
Understanding the Different Applications
20
Activating the Home Screen Applications
20
Finding Information about the Home Screen Applications
20
Setting up Forms and Favorites
20
Setting up Card Copy
21
Using Myshortcut
22
Setting up Multi Send
22
Setting up Scan to Network
23
Setting up Remote Operator Panel
24
Exporting and Importing a Configuration
24
Additional Printer Setup
26
Installing Internal Options
26
Accessing the Controller Board
27
Installing a Memory Card
28
Installing an Optional Card
30
Installing an Internal Solutions Port
32
Installing a Printer Hard Disk
38
Removing a Printer Hard Disk
41
Installing Hardware Options
42
Setting up the Printer Software
45
Attaching Cables
46
Networking
48
Preparing to Set up the Printer on a Wireless Network
50
Connecting the Printer Using the Wireless Setup Wizard
51
Connecting the Printer to a Wireless Network Using the Embedded Web Server
52
Changing Port Settings after Installing a New Network Internal Solutions Port
53
Setting up Serial Printing
54
Verifying Printer Setup
56
Loading Paper and Specialty Media
57
Setting the Paper Size and Type
57
Configuring Universal Paper Settings
57
Loading Trays
57
Loading the Multipurpose Feeder
62
Linking and Unlinking Trays
66
Creating a Custom Name for a Paper Type
67
Assigning a Custom Paper Type
67
Configuring a Custom Name
68
Paper and Specialty Media Guide
69
Using Specialty Media
69
Tips on Using Labels
70
Tips on Using Card Stock
70
Paper Guidelines
71
Fiber Content
72
Selecting Paper
72
Selecting Preprinted Forms and Letterhead
72
Using Recycled Paper and Other Office Papers
72
Supported Paper Sizes, Types, and Weights
74
Supported Paper Types and Weights
76
Printing
77
Printing Forms and a Document
77
Printing from a Mobile Device
78
Printing from a Flash Drive
79
Supported Flash Drives and File Types
80
Printing Confidential and Other Held Jobs
81
Modifying Confidential Print Settings
82
Printing Information Pages
83
Canceling a Print Job
83
For Macintosh Users
84
Copying
85
Making Copies
85
Copying Photos
86
Copying on Specialty Media
86
Customizing Copy Settings
87
Copying Different Paper Sizes
88
Reducing or Enlarging Copies
89
Adjusting Copy Quality
89
Collating Copies
90
Placing Separator Sheets between Copies
91
Copying Multiple Pages Onto a Single Sheet
91
Placing Information on Copies
92
Canceling a Copy Job
93
Understanding the Copy Options
93
Save as Shortcut
95
Margin Shift
95
Edge Erase
95
Separator Sheets
95
Advanced Imaging
96
E-Mailing
97
Setting up the Printer to E-Mail
97
Creating an E-Mail Shortcut
97
E-Mailing a Document
98
Customizing E-Mail Settings
100
Canceling an E-Mail
101
Understanding the E-Mail Options
101
Page Setup
103
Scan Preview
103
Faxing
104
Setting up the Printer to Fax
104
Initial Fax Setup
105
Choosing a Fax Connection
106
Connecting to a Distinctive Ring Service
117
Setting the Outgoing Fax Name and Number
117
Sending a Fax
118
Sending a Fax Using the Computer
119
Sending a Fax Using the Address Book
120
Sending a Fax at a Scheduled Time
120
Creating Shortcuts
121
Customizing Fax Settings
122
Canceling an Outgoing Fax
123
Holding and Forwarding Faxes
124
Understanding the Fax Options
125
Delayed Send
126
Advertisement
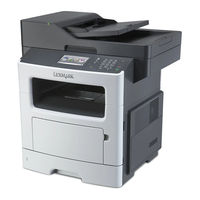
Lexmark MX410 Series User Manual (329 pages)
MX410 Series, MX510 Series
Brand:
Lexmark
| Category:
All in One Printer
| Size: 10.68 MB
Table of Contents
Table of Contents
2
Safety Information
7
Learning about the Printer
9
Finding Information about the Printer
9
Selecting a Location for the Printer
10
Printer Configurations
11
Understanding the Basic Functions of the Scanner
12
Using the ADF and Scanner Glass
13
Understanding the Printer Control Panel
14
Using the Printer Control Panel
14
Understanding the Colors of the Sleep Button and Indicator Lights
14
Understanding the Home Screen
15
Using the Touch-Screen Buttons
16
Setting up and Using the Home Screen Applications
18
Finding the IP Address of the Computer
18
Finding the IP Address of the Printer
19
Accessing the Embedded Web Server
19
Customizing the Home Screen
19
Understanding the Different Applications
20
Activating the Home Screen Applications
20
Finding Information about the Home Screen Applications
20
Setting up Forms and Favorites
20
Setting up Card Copy
21
Using Myshortcut
22
Setting up Multi Send
22
Setting up Scan to Network
23
Setting up Remote Operator Panel
24
Exporting and Importing a Configuration
24
Additional Printer Setup
26
Installing Internal Options
26
Accessing the Controller Board
27
Installing a Memory Card
28
Installing an Optional Card
30
Installing an Internal Solutions Port
32
Installing a Printer Hard Disk
38
Removing a Printer Hard Disk
41
Installing Hardware Options
42
Attaching Cables
45
Setting up the Printer Software
46
For Windows Users
47
Networking
48
Preparing to Set up the Printer on a Wireless Network
50
Connecting the Printer Using the Wireless Setup Wizard
51
Connecting the Printer to a Wireless Network Using the Embedded Web Server
52
Changing Port Settings after Installing a New Network Internal Solutions Port
53
Setting up Serial Printing
54
Verifying Printer Setup
56
Loading Paper and Specialty Media
57
Setting the Paper Size and Type
57
Configuring Universal Paper Settings
57
Loading Trays
57
Loading the Multipurpose Feeder
62
Linking and Unlinking Trays
66
Creating a Custom Name for a Paper Type
67
Assigning a Custom Paper Type
67
Configuring a Custom Name
68
Paper and Specialty Media Guide
69
Using Specialty Media
69
Tips on Using Labels
70
Tips on Using Card Stock
70
Paper Guidelines
71
Fiber Content
72
Selecting Paper
72
Selecting Preprinted Forms and Letterhead
72
Using Recycled Paper and Other Office Papers
72
Supported Paper Sizes, Types, and Weights
74
Supported Paper Types and Weights
76
Printing
77
Printing Forms and a Document
77
Printing from a Flash Drive
78
Supported Flash Drives and File Types
79
Printing Confidential and Other Held Jobs
80
Modifying Confidential Print Settings
81
Printing Information Pages
82
Canceling a Print Job
82
For Macintosh Users
83
Copying
84
Making Copies
84
Copying Photos
85
Copying on Specialty Media
85
Customizing Copy Settings
86
Copying Different Paper Sizes
87
Reducing or Enlarging Copies
88
Adjusting Copy Quality
88
Collating Copies
89
Placing Separator Sheets between Copies
90
Copying Multiple Pages Onto a Single Sheet
90
Placing Information on Copies
91
Canceling a Copy Job
92
Understanding the Copy Options
92
Save as Shortcut
94
Margin Shift
94
Edge Erase
94
Separator Sheets
94
Advanced Imaging
95
E-Mailing
96
Setting up the Printer to E-Mail
96
Creating an E-Mail Shortcut
96
E-Mailing a Document
97
Customizing E-Mail Settings
99
Canceling an E-Mail
100
Understanding the E-Mail Options
100
Page Setup
102
Scan Preview
102
Faxing
103
Setting up the Printer to Fax
103
Initial Fax Setup
104
Choosing a Fax Connection
105
Connecting to a Distinctive Ring Service
116
Setting the Outgoing Fax Name and Number
116
Sending a Fax
117
Sending a Fax Using the Computer
118
Sending a Fax Using the Address Book
119
Sending a Fax at a Scheduled Time
119
Creating Shortcuts
120
Customizing Fax Settings
121
Canceling an Outgoing Fax
122
Holding and Forwarding Faxes
123
Understanding the Fax Options
124
Delayed Send
125
Lexmark MX410 Series User Manual (325 pages)
Brand:
Lexmark
| Category:
Printer
| Size: 10.3 MB
Table of Contents
Table of Contents
2
Contents
6
Safety Information
7
Learning about the Printer
9
Finding Information about the Printer
9
Selecting a Location for the Printer
10
Printer Configurations
11
Understanding the Basic Functions of the Scanner
12
Using the ADF and Scanner Glass
13
Understanding the Printer Control Panel
14
Using the Printer Control Panel
14
Understanding the Colors of the Sleep Button and Indicator Lights
14
Understanding the Home Screen
15
Using the Touch-Screen Buttons
16
Setting up and Using the Home Screen Applications
18
Finding the IP Address of the Computer
18
Finding the IP Address of the Printer
18
Accessing the Embedded Web Server
18
Customizing the Home Screen
19
Understanding the Different Applications
19
Activating the Home Screen Applications
20
Setting up Card Copy
21
Using Myshortcut
21
Setting up Multi Send
22
Setting up Scan to Network
22
Setting up Remote Operator Panel
23
Exporting and Importing a Configuration
24
Additional Printer Setup
25
Installing Internal Options
25
Accessing the Controller Board
26
Installing a Memory Card
27
Installing an Optional Card
29
Installing an Internal Solutions Port
30
Installing a Printer Hard Disk
37
Removing a Printer Hard Disk
40
Installing Hardware Options
41
Attaching Cables
44
Setting up the Printer Software
45
Networking
46
Connecting the Printer Using the Wireless Setup Wizard
47
Connecting the Printer to a Wireless Network Using the Embedded Web Server
49
Verifying Printer Setup
50
Loading Paper and Specialty Media
51
Setting the Paper Size and Type
51
Configuring Universal Paper Settings
51
Loading Trays
51
Loading the Multipurpose Feeder
56
Linking and Unlinking Trays
60
Creating a Custom Name for a Paper Type
61
Assigning a Custom Paper Type
61
Configuring a Custom Name
62
Paper and Specialty Media Guide
63
Using Specialty Media
63
Tips on Using Labels
64
Tips on Using Card Stock
64
Paper Guidelines
65
Fiber Content
66
Selecting Paper
66
Selecting Preprinted Forms and Letterhead
66
Using Recycled Paper and Other Office Papers
66
Supported Paper Sizes, Types, and Weights
68
Supported Paper Types and Weights
70
Printing
72
Printing Forms and a Document
72
Printing from a Flash Drive or Mobile Device
73
Supported Flash Drives and File Types
74
Printing Confidential and Other Held Jobs
75
Printing Information Pages
77
Canceling a Print Job
78
Copying
79
Making Copies
79
Copying Photos
80
Copying on Specialty Media
80
Customizing Copy Settings
81
Copying Different Paper Sizes
82
Reducing or Enlarging Copies
83
Adjusting Copy Quality
83
Collating Copies
84
Placing Separator Sheets between Copies
85
Copying Multiple Pages Onto a Single Sheet
85
Placing Information on Copies
86
Canceling a Copy Job
87
Understanding the Copy Options
87
Save as Shortcut
89
Margin Shift
89
Edge Erase
89
Separator Sheets
89
Advanced Imaging
90
E-Mailing
91
Setting up the E-Mail Function
91
Creating an E-Mail Shortcut
91
E-Mailing a Document
92
Customizing E-Mail Settings
94
Canceling an E-Mail
94
Understanding the E-Mail Options
95
Page Setup
96
Scan Preview
96
Faxing
98
Setting up the Printer to Fax
98
Initial Fax Setup
99
Choosing a Fax Connection
100
Connecting to a Distinctive Ring Service
111
Setting the Outgoing Fax Name and Number
111
Sending a Fax
112
Sending a Fax Using the Computer
113
Sending a Fax Using the Address Book
114
Sending a Fax at a Scheduled Time
114
Creating Shortcuts
115
Customizing Fax Settings
115
Making a Fax Lighter or Darker
116
Viewing a Fax Log
116
Blocking Junk Faxes
116
Canceling an Outgoing Fax
117
Holding and Forwarding Faxes
117
Understanding the Fax Options
118
Delayed Send
120
Lexmark MX410 Series User Manual (321 pages)
Brand:
Lexmark
| Category:
All in One Printer
| Size: 9.78 MB
Table of Contents
Table of Contents
2
Safety Information
7
Conventions
7
Learning about the Printer
10
Finding Information about the Printer
10
Selecting a Location for the Printer
11
Printer Configurations
12
Understanding the Basic Functions of the Scanner
13
Using the ADF and Scanner Glass
14
Understanding the Printer Control Panel
15
Using the Printer Control Panel
15
Understanding the Colors of the Sleep Button and Indicator Lights
15
Understanding the Home Screen
16
Using the Touch-Screen Buttons
17
Setting up and Using the Home Screen Applications
19
Finding the IP Address of the Computer
19
Finding the IP Address of the Printer
19
Accessing the Embedded Web Server
19
Customizing the Home Screen
20
Understanding the Different Applications
20
Activating the Home Screen Applications
21
Setting up Remote Operator Panel
24
Exporting and Importing a Configuration
25
Additional Printer Setup
26
Installing Internal Options
26
Installing Hardware Options
42
Attaching Cables
45
Setting up the Printer Software
46
Networking
47
Verifying Printer Setup
51
Loading Paper and Specialty Media
53
Setting the Paper Size and Type
53
Configuring Universal Paper Settings
53
Loading Trays
53
Loading the Multipurpose Feeder
58
Linking and Unlinking Trays
62
Paper and Specialty Media Guide
65
Using Specialty Media
65
Paper Guidelines
67
Supported Paper Sizes, Types, and Weights
70
Printing
74
Printing a Document
74
Printing from a Mobile Device
75
Printing from a Flash Drive
76
Printing Confidential and Other Held Jobs
78
Printing Information Pages
80
Canceling a Print Job
80
Copying
81
Making Copies
81
Copying Photos
82
Copying on Specialty Media
82
Customizing Copy Settings
83
Placing Information on Copies
88
Canceling a Copy Job
88
Understanding the Copy Options
89
Lexmark MX410 Series User Manual (321 pages)
Brand:
Lexmark
| Category:
Printer
| Size: 9.74 MB
Table of Contents
Table of Contents
2
Safety Information
7
Conventions
7
Learning about the Printer
10
Finding Information about the Printer
10
Selecting a Location for the Printer
11
Printer Configurations
12
Understanding the Basic Functions of the Scanner
13
Using the ADF and Scanner Glass
14
Understanding the Printer Control Panel
15
Using the Printer Control Panel
15
Understanding the Colors of the Sleep Button and Indicator Lights
15
Understanding the Home Screen
16
Using the Touch-Screen Buttons
17
Setting up and Using the Home Screen Applications
19
Finding the IP Address of the Computer
19
Finding the IP Address of the Printer
19
Accessing the Embedded Web Server
19
Customizing the Home Screen
20
Understanding the Different Applications
20
Activating the Home Screen Applications
21
Setting up Remote Operator Panel
24
Exporting and Importing a Configuration
25
Additional Printer Setup
26
Installing Internal Options
26
Installing Hardware Options
42
Attaching Cables
45
Setting up the Printer Software
46
Networking
47
Verifying Printer Setup
51
Loading Paper and Specialty Media
53
Setting the Paper Size and Type
53
Configuring Universal Paper Settings
53
Loading Trays
53
Loading the Multipurpose Feeder
58
Linking and Unlinking Trays
62
Paper and Specialty Media Guide
65
Using Specialty Media
65
Paper Guidelines
67
Supported Paper Sizes, Types, and Weights
70
Printing
74
Printing a Document
74
Printing from a Mobile Device
75
Printing from a Flash Drive
76
Printing Confidential and Other Held Jobs
78
Printing Information Pages
80
Canceling a Print Job
80
Copying
81
Making Copies
81
Copying Photos
82
Lexmark MX410 Series Manual (110 pages)
Product Study Guide
Brand:
Lexmark
| Category:
All in One Printer
| Size: 4.52 MB
Table of Contents
Table of Contents
5
Laser Printer Naming Convention
9
Product Lineup
10
Lexmark Ms31 X /Ms41
10
Technical Information
11
Printer Specifications: MS310/312/315/410/415/510/610
11
Print Speed : Ms31 X /Ms41 X /Ms510/Ms610 Series
14
Time to First Print (Ttfp): Ms31
14
Lexmark Mx310/Mx410/Mx510/Mx610 Series
15
Media Options: Ms31X/Ms41X/Ms510/Ms610 Series
15
Technical Information
16
Specifications: MX310/MX410/MX510/MX610
16
Duty Cycle: Mx310/Mx410/Mx51X/Mx61X
17
Print Speed: Mx310/Mx410/Mx51X/Mx61X
17
Time to First Print (TTFP): Mx310/Mx410/Mx51X/Mx61X
17
Scanner and Fax Specifications: Mx310/Mx410/Mx51X/Mx61X
18
ADF Scan Speed: Mx310/Mx410/Mx51X/Mx61X
19
Time to First Copy (TTFC): Mx310/Mx410/Mx51X/Mx61X
19
Media Options: MX310/MX410/MX510/MX610
20
Theory of Operation
21
Electrophotographic Process
21
EP Process Components Cross-Sectional
22
Paper Transport System and Enhancements
23
Base Engine Features and Updates
23
Paper Transport System Key Components: MS310/MS312/MS315/MS410/MS415
25
Paper Transport System Key Components: MS510/MS610 and Mx310/Mx410/Mx51X/Mx61X
26
Print Engine Paper Path: MS510/MS610 and MX510/MX610 Series
28
Paper Jam Locations: MS310/MS312/MS315/MS410/MS415
29
Paper Jam Locations: MS510/MS610 Series
30
Paper Jam Locations: Mx310/Mx410/Mx51X
31
Paper Jam Locations: Mx61X
32
Scanner System: MX310/MX410/MX510/MX610
33
ADF Theory of Operation
33
ADF Key Components: MX310
35
ADF Paper Path: MX310
36
ADF Key Components: Mx410/Mx51X/Mx61X
37
ADF Paper Path: Mx410/Mx51X/Mx61X
38
Flatbed Key Components: Mx310/Mx410/Mx51X/Mx61X
39
Control Panel and Menus
40
Ms310D/Dn Control Panel
40
Buttons and Functions
40
Administrative Menu: Ms310D/Dn
41
Service Menus: MS310
42
Ms312Dn and Ms410D/Dn Control Panel
44
Buttons and Functions
44
Administrative Menu: Ms312Dn and Ms410D/Dn
45
Service Menus: MS410 and MS412
46
Ms315Dn/Ms415Dn/Ms510Dn Control Panel
48
Ms610Dn Control Panel
48
Buttons and Functions: Ms315Dn/Ms415Dn/Ms510Dn and Ms610Dn
49
Administrative Menu: Ms315Dn/Ms415Dn/Ms510Dn and Ms610Dn
50
Service Menus: Ms315Dn/Ms415Dn/Ms510Dn and Ms610Dn
51
Ms610De Control Panel
54
Buttons and Functions
54
Administrative Menu: Ms610De
55
Service Menus: Ms610De
56
Mx310Dn Control Panel
59
Mx410De/Mx510De/Mx511De Control Panel
59
Mx610De/Mx611De/Mx611Dhe Control Panel
59
Buttons and Functions: Mx310/Mx410/Mx51X/Mx61X
60
Mx310/Mx410/Mx51X Home Screen Menus
61
Mx61X Home Screen Menus
62
Administrative Menu: Mx310/Mx410/Mx51X/Mx61X
63
Service Menus: Mx310/Mx410/Mx51X/Mx61X
64
Lexmark MX410 Series Administrator's Manual (52 pages)
Embedded Web Server-Security: Administrator's Guide
Brand:
Lexmark
| Category:
Printer
| Size: 0.53 MB
Table of Contents
Table of Contents
2
Security Devices Covered in this Guide
4
Simple Security Devices
4
Advanced Security Devices
4
Using Security Features in the Embedded Web Server
5
Understanding the Basics
5
Authentication and Authorization
5
Groups
7
Access Controls
7
Security Templates
7
Limiting Access with Basic Security Setup
8
Configuring Building Blocks
8
Creating a Password for Advanced Security Setup
8
Creating a Password through Web Page Password Protect
9
Creating a PIN for Advanced Security Setup
9
Creating a PIN through Panel PIN Protect
10
Setting up Internal Accounts
10
Connecting Your Printer to an Active Directory Domain
11
Using LDAP
13
Using LDAP+GSSAPI
15
Configuring Kerberos 5 for Use with LDAP+GSSAPI
17
Setting up a CA Certificate Monitor
19
Downloading the CA Certificates Immediately
19
Securing Access
19
Setting a Backup Password
19
Setting Login Restrictions
20
Using a Security Template to Control Function Access
20
Managing Certificates and Other Settings
22
Installing a Certificate Authority Certificate on the Device
22
Configuring the Device for Certificate Information
23
Creating a New Certificate
24
Viewing, Downloading, and Deleting a Certificate
24
Setting Certificate Defaults
25
Configuring Confidential Printing
25
Enabling and Disabling USB Devices
26
Erasing Temporary Data Files from the Hard Disk
27
Configuring Security Audit Log Settings
27
Connecting the Printer to a Wireless Network Using the Embedded Web Server
29
Configuring 802.1X Authentication
29
Setting up SNMP
31
Configuring the TCP/IP Port Access Setting
32
Configuring Ipsec Settings
32
Enabling the Security Reset Jumper
33
Securing the Hard Disk and Other Installed Memory
33
Statement of Volatility
33
Erasing Volatile Memory
34
Erasing Non-Volatile Memory
34
Configuring out of Service Erase
35
Completely Erasing Printer Hard Disk Memory
36
Configuring Printer Hard Disk Encryption
36
Scenarios
38
Scenario: Printer in a Public Place
38
Scenario: Standalone or Small Office
39
Scenario: Network Running Active Directory
39
Advertisement
Related Products
Lexmark MX417de
Lexmark MX711 Series
Lexmark MX812
Lexmark MX711de
Lexmark MX320 Series
Lexmark MX826ade
Lexmark MX721ADE
Lexmark MX-C407P
Lexmark MX-C357F
Lexmark MX522
Lexmark Categories
Printer
All in One Printer
Printer Accessories
Software
Print Server
More Lexmark Manuals
Login
Sign In
OR
Sign in with Facebook
Sign in with Google
Upload manual
Upload from disk
Upload from URL