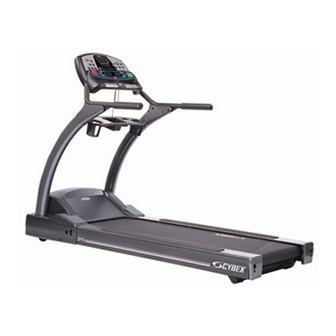
CYBEX Pro+ Owner's Service Manual
Cardiovascular systems
Hide thumbs
Also See for Pro+:
- Owner's service manual (105 pages) ,
- Service manual (70 pages) ,
- Service manual (3 pages)

Related Manuals for CYBEX Pro+


Summary of Contents for CYBEX Pro+
- Page 1 Cybex Pro+ Treadmill Owner’s & Service Manual Cardiovascular Systems Part Number LT-17730-4 Rev E www.cybexinternational.com...
- Page 3 Owner’s & Service Manual Cardiovascular Systems Part Number LT-17730-4 Rev E Cybex and the Cybex logo are registered trademarks of Cybex International, Inc. Safety Sentry™ is a registered trademark of Cybex international, Inc. Polar is a registered trademark of Polar. DISCLAIMER: Cybex International, Inc.
-
Page 5: About This Manual
About This Manual An Owner’s & Service Manual is shipped with each Cybex Pro+ Treadmill. To purchase additional copies of this manual or any other Cybex manual, please do one of the following: • Order online at www.eCybex.com • Fax your order to 508-533-5183 •... -
Page 6: Declaration Of Conformity
Medway MA, 02053, USA Conforms to: Directives: 73/23/EEC, 89/336/EEC Standards: EN957-1, EN957-6, EN60335-1, EN50081-1 Cybex TROTTER Elite, Cybex Sport, Cybex Pro, Cybex Pro+ Product Name: Models: 450T, 500T, 520T, 530T Attention: European Sales Director European Contact: Floor 2, 56 Bridge Street,... -
Page 7: Table Of Contents
Cybex Pro+ Treadmill Owner’s & Service Manual Table of Contents Front Pages Setup & Assembly About this Manual ....i Warnings/Cautions ....5-1 Choosing &... - Page 8 This page intentionally left blank...
-
Page 9: Safety
The power requirements for the Cybex Pro+ treadmill include a grounded, dedicated circuit, rated for one of the following: 115 VAC ±5%, 60 Hz and 20 amps; 208/220 VAC, 60 Hz, 15 amps or 230 VAC ±5%, 50 Hz and 15 amps. -
Page 10: Important Safety Instructions
Cybex Pro+ Treadmill Owner’s & Service Manual outlet having the same configuration as the plug. Do not use a ground plug adapter to adapt the power cord to a non-grounded outlet. Important Safety Instructions (Save These Instructions) ! DANGER: To reduce the risk of electric shock, always unplug this treadmill from the electrical outlet immediately after using it and before cleaning it. - Page 11 • DO NOT attempt repairs, electrical or mechanical. Seek qualified repair personnel when servicing. If you live in the USA, contact Cybex Customer Service at 800-766-3211 (then press 64). If you live outside the USA, contact Cybex Customer Service at 508-533-4300.
-
Page 12: Warning Decals
Service chapter in this manual or on Cybex web site at ecybex.com. Warning Decals Warning decals indicate a potentially hazardous situation, which, if not avoided, could result in death or serious injury. The warning decals used on the Cybex Pro+ are shown below. Safety Page 1-4... - Page 13 Cybex Pro+ Treadmill Owner’s & Service Manual Underneath Motor Cover Safety Page 1-5...
- Page 14 Cybex Pro+ Treadmill Owner’s & Service Manual VARNING KOPPLA IFRÅN STRÖMMEN INNAN SERVICE UTFÖRS. Safety Page 1-6...
-
Page 15: Caution Decals
Caution decals indicate a potentially hazardous situation, which, if not avoided, may result in minor or moderate injury. There are no caution decals used on the Cybex Pro+ treadmill. However, there is a caution in the installation instructions for initial installation only. See below. -
Page 16: Emergency Stop Key (E-Stop)
Cybex Pro+ Treadmill Owner’s & Service Manual Emergency Stop Key (e-stop) The e-stop key functions as the emergency stop. In an emergency situation, remove the e-stop key and the treadmill will come to a stop. Before using the treadmill, clip the e-stop key as described below. -
Page 17: Technical Specifications
Cybex Pro+ Treadmill Owner’s & Service Manual 2 - Technical Specifications Specifications Length: 79” (200 cm) Width: 32” (82 cm) Running Area: 20” x 58” (51 cm x 147 cm) Weight of Product: 385 lbs. (173 kg) Shipping Weight 415 lbs. (187 kg) Speed Range: 0.5 to 12.4 mph (0.8 to 20 kph) in 0.1 mph or 0.1 kph increments... - Page 18 Cybex Pro+ Treadmill Owner’s & Service Manual This page intentionally left blank Specifications Page 2-2...
-
Page 19: Operation
Cybex Pro+ Treadmill Owner’s & Service Manual 3 - Operation Read and understand all instructions and warnings prior to using the treadmill. See all of the safety related information located in chapter 1. Terms & Symbols Used This section lists some of the common terms and symbols used in this chapter. Other terms and symbols are listed in this chapter as appropriate. -
Page 20: Quick Operation Guide
Cybex Pro+ Treadmill Owner’s & Service Manual Quick Operation Guide NOTE: Maximum user weight is 400 lbs. (181 kg). The following is a quick overview of the operation of the treadmill. For more information read Detailed Operation Guide in this chapter. NOTE: Times specified in this chapter reflect the treadmills defaults. - Page 21 Cybex Pro+ Treadmill Owner’s & Service Manual ! CAUTION: Do not stand on the running belt when starting the treadmill. Always place your feet on the two top steps when beginning a workout. 3. Place your feet on the two top steps located on each side of the running belt.
- Page 22 / km wireless manual cardio 9 holes heart rate receiver Cybex International, Inc. Medway, MA USA (508) 533-4300 www.eCybex.com Made in USA Safety Sentry ™ time stop quick start speed incline e-stop Figure 1 9. Press the Speed —...
-
Page 23: Stopping The Treadmill
Cybex Pro+ Treadmill Owner’s & Service Manual Stopping the Treadmill Press Stop once to pause your workout for 20 seconds (default setting) and to enter the Workout Review. The belt will stop and the elevation will return to 0%, but all workout settings and data will remain in memory for the pre-selected time. -
Page 24: Control During Operation
Cybex Pro+ Treadmill Owner’s & Service Manual Control During Operation Control keys on the display are usable during operation and may be pressed at any time to make adjustments in speed, elevation or data readouts. Changing Speed — Press the Speed —... -
Page 25: Displaying Heart Rate
Workout Review for 20 seconds (default setting). Displaying Heart Rate In order for the Cybex Pro+ to display your heart rate, you must either use a Polar compatible heart rate transmitter belt (not included) or hold the handgrips to use Contact Heart Rate. -
Page 26: Heart Rate Led
Figure 4 become acclimated. With the Cybex Pro+, you may choose from five different programs. Each program provides ten levels of difficulty for a choice of fifty different preprogrammed options. You may also use Manual Mode. With this unique combination of programs, you can tailor your workout to... -
Page 27: Manual Mode
Cybex Pro+ Treadmill Owner’s & Service Manual achieve exactly the fitness goals you desire, including: weight loss, conditioning, endurance or maintenance of overall health. The program choices are summarized as follows: Manual Mode You control speed, elevation, and time. 5K Run... -
Page 28: The Workout Profile
Cybex Pro+ Treadmill Owner’s & Service Manual The Workout Profile The Workout Profile matrix in the center of the display uses columns of lights to show the progress of your workout. The height of the column represents METS, specifically the highest METS you reached in that period. -
Page 29: 5K Run
Cybex Pro+ Treadmill Owner’s & Service Manual 5K Run Profiles Show Level 10 12.4 20.0 12.0 19.0 18.0 11.0 17.0 10.0 16.0 15.0 14.0 13.0 12.0 11.0 Speed 10.0 Warm Up Program Cool Down in Minutes Segments in Minutes in 400 Meters (0.248 Miles) -
Page 30: Holes
Cybex Pro+ Treadmill Owner’s & Service Manual 9 Holes Program Overview In this program, the user chooses their speed as they go. The level of the program uses variations in the elevation. As the level goes up so does the level of intensity. Like the golf course, there are uphill and downhill sections, which not only contribute to the intensity of the exercise but also provide the additional adaptation to covering varied terrain. - Page 31 Cybex Pro+ Treadmill Owner’s & Service Manual 9 Holes Profiles Show Level 10 12.4 20.0 12.0 19.0 18.0 11.0 17.0 10.0 16.0 15.0 14.0 13.0 12.0 11.0 Speed 10.0 User Selected Program Segments in Yards Elevation % Program Segments in Yards...
-
Page 32: Heart Rate
Cybex Pro+ Treadmill Owner’s & Service Manual Heart Rate Program Overview The Heart Rate Control program is interactive. By selecting a predetermined heart rate, the treadmill will adapt the elevation and speed to keep the users heart rate at that level. This program is exceptionally useful for those individuals just starting out as well as the athlete. - Page 33 Cybex Pro+ Treadmill Owner’s & Service Manual Heart Rate Based on Age, Selective HR and Response to Exercise 12.4 20.0 12.0 19.0 18.0 11.0 17.0 10.0 16.0 15.0 14.0 13.0 12.0 11.0 Speed 10.0 Warm Program Segments Cool in Minutes...
-
Page 34: Cardio
Cybex Pro+ Treadmill Owner’s & Service Manual Cardio Program Overview This program was designed for the exercise participant who wants to improve the overall efficiency of their cardio-respiratory system. Unlike some of the other treadmill programs that incorporate low and moderate intensity segments, the Cardio program contains overall higher intensity levels with more moderate recovery segments. - Page 35 Cybex Pro+ Treadmill Owner’s & Service Manual Cardio Profiles Show Level 10 at 20 Minutes 12.4 20.0 12.0 19.0 18.0 11.0 17.0 10.0 16.0 15.0 14.0 13.0 12.0 11.0 Speed 10.0 Warm Program Segments Cool in Minutes Down Elevation %...
-
Page 36: Weight Loss
Cybex Pro+ Treadmill Owner’s & Service Manual Weight Loss Program Overview This program was designed to help individuals of all fitness levels achieve their weight loss goals through a protocol that incorporates both low and moderate intensity activity. Because walking has become a popular mode of exercise for those looking to lose weight, all levels of this program are performed at walking speeds. -
Page 37: Manual
Cybex Pro+ Treadmill Owner’s & Service Manual Weight Loss Profiles Show Level 10 at 20 Minutes 12.4 20.0 12.0 19.0 18.0 11.0 17.0 10.0 16.0 15.0 14.0 13.0 12.0 11.0 Speed 10.0 Warm Program Segments Cool in Minutes Down Elevation %... - Page 38 Cybex Pro+ Treadmill Owner’s & Service Manual This page intentionally left blank Operation Page 3-20...
-
Page 39: Preventive Maintenance
NOTE: Worn or damaged components shall be replaced immediately or the treadmill removed from service until the repair is made. NOTE: Cybex is not responsible for performing regular inspection and maintenance actions for your treadmill. Instruct all personnel in equipment inspection and maintenance actions and also in accident reporting/recording. -
Page 40: Running Belt Maintenance
Cybex Pro+ Treadmill Owner’s & Service Manual NOTE: Do not spray cleaning solution directly on the treadmill. Direct spraying could cause damage to the electronics and may void the warranty. ! WARNING: To prevent electrical shock, be sure that power is shut off and the treadmill is unplugged from the electrical outlet before performing any cleaning or maintenance procedures. - Page 41 E. Walk on the belt to see if it still slips. If it does restart this procedure at step 1 A. If you have to do this procedure three times and it still slips check the drive belt tension in the Service chapter or call Cybex Customer Service. Follow the next step to be sure the belt is centered.
- Page 42 Cybex Pro+ Treadmill Owner’s & Service Manual A. With the treadmill running at 5 mph (8 kph) observe the running belt. If the belt tracks off center to the right or left the deck will become exposed. Use a 3/4” socket wrench to tighten the rear roller bolt on the side of the treadmill toward which the belt is moving.
- Page 43 Running Belt and Deck in the Service chapter. 7. Clean under the belt. A. To minimize the effect of friction between the deck and the running belt, Cybex recommends cleaning the underside of the running belt and the top of the running deck surface by wiping them with a clean, dry towel.
-
Page 44: Other Preventive Maintenance
Cybex Pro+ Treadmill Owner’s & Service Manual 8. Secure the top steps. A. Place each top step in position. See Figure 4. B. Using a Phillips head screwdriver, tighten the three screws that hold each top step in place. See Figure 4. -
Page 45: Service Schedule
Cybex Pro+ Treadmill Owner’s & Service Manual Service Schedule Preventive Maintenance Page 4-7... -
Page 46: Log Sheet
Cybex Pro+ Treadmill Owner’s & Service Manual Log Sheet Serial Number Date of Installation Date of Data Collection Total Miles/Kilometers Total Hours Motor Current @ 3 mph (4.8 kph) Motor Voltage @ 12.4 mph (20 kph) - without load - with load... -
Page 47: Setup & Assembly
Cybex Pro+ Treadmill Owner’s & Service Manual 5 - Setup & Assembly Warnings/Cautions All warnings and cautions listed in this chapter are as follows: ! WARNING: Use extreme caution when assembling the treadmill. Failure to do so could result in injury. -
Page 48: Electrical Power Requirements
A. Lift up and remove the cardboard sleeve that surrounds the treadmill. B. Check to be sure that the following items are present. Check off ( ✔) each item as you find it. See Figure 1. If any of the parts are missing contact Cybex Customer Service. Setup &... - Page 49 Cybex Pro+ Treadmill Owner’s & Service Manual Item Qty Part Number Description Varies Base with uprights and console attached AX-16724 Motor cover, center, with decals PL-16465 Motor cover, right (in box) PL-16464 Motor cover, left (in box) AX-16956 Hardware pack (in box)
- Page 50 Cybex Pro+ Treadmill Owner’s & Service Manual C. Check off ( ✔) each item in the hardware pack as you find it. See Figure 2. Item Qty Part Number Description HS-16929 Screw, hex head whiz-lock 3-8-16 x 5-8 HS-16950 Screw, button head 5-16-18 x 7-8 HS-16939 Screw, Phillips head sems 10-32 x .75...
- Page 51 Cybex Pro+ Treadmill Owner’s & Service Manual ! CAUTION: A minimum of two people are required to lift, move and assemble this treadmill. Always use proper lifting methods when moving heavy items. 4. Lift and move the treadmill. A. At least two people should lift and move the treadmill to a level location where you intend to leave it.
- Page 52 Cybex Pro+ Treadmill Owner’s & Service Manual 6. Verify the model, voltage and color. A. Verify that you have the correct model by looking at the console and reading the model name. B. Verify that you have the correct voltage by looking at the lower board and reading the voltage sticker.
- Page 53 Cybex Pro+ Treadmill Owner’s & Service Manual Figure 7 B. Using the hex key provided, tighten the two pivot screws on the handrail. See Figure 8. Pivot Screws Figure 8 9. Remove the left side panel. A. Pull the left side panel away from the base. See Figure 9.
- Page 54 Cybex Pro+ Treadmill Owner’s & Service Manual Front routing: a. Unwind the power cord and route it under the upright. b. Slide the grommet into the front exit hole with the curved end first. See Figure 10. c. Wire tie the cord down. See Figure 10.
- Page 55 Cybex Pro+ Treadmill Owner’s & Service Manual 11. Attach the motor cover (three pieces). A. Using a Phillips head screwdriver, partially tighten each motor cover side (left and right) with four 10-32 x .75 Phillips head screws. See Figure 12.
- Page 56 Cybex Pro+ Treadmill Owner’s & Service Manual Emergency Stop Button Emergency Stop Key Figure 13 Setup & Assembly Page 5-10...
-
Page 57: Testing The Treadmill Operation
(I). 3. The control panel will light up and be in the Dormant Mode. NOTE: Cybex recommends that the treadmill be unplugged or the on/off (I/O) power switch turned off (O) when it is not in use. 4. Press the Quick Start key. The treadmill begins a countdown “3...2...1” and sounds a tone for each count. -
Page 58: Setting Operation Options
Cybex Pro+ Treadmill Owner’s & Service Manual 11. Run the treadmill through its full % grade range. Press the Incline key until the treadmill reaches its highest grade (15%). Next press the Incline key until the treadmill is down to -2% grade. Ensure the power cord is not being pinched under the front of the treadmill. - Page 59 Cybex Pro+ Treadmill Owner’s & Service Manual Safety Sentry — This is how long the running belt will keep moving if the user steps off the treadmill. Choices are between 0 seconds (none) and 60 second. Default is 20 seconds. Choosing “none” will disable this feature. NOTE: See Safety Sentry in Chapter 3 for further detail.
- Page 60 Cybex Pro+ Treadmill Owner’s & Service Manual This page intentionally left blank Setup & Assembly Page 5-14...
-
Page 61: Customer Service
Contact your authorized Cybex dealer on all warranty-related matters. Your local Cybex dealer will request an RMA from Cybex, if applicable. Under no circumstances will defective parts or equipment be accepted by Cybex without proper RMA and an Automated Return Service (ARS) label. - Page 62 The serial number begins with a letter, for example: R09-101331100. 4. At Cybex’s discretion, the technician may request that you return the problem part(s) to Cybex for evaluation and repair or replacement. The technician will assign you an RMA number and will send you an ARS label.
-
Page 63: Damaged Parts
Cybex Pro+ Treadmill Owner’s & Service Manual Damaged Parts Materials damaged in shipment should not be returned for credit. Shipping damages are the responsibility of the carrier (UPS, Federal Express, trucking companies, etc.) Apparent Damage — Upon receipt of your shipment, check all boxes carefully. Any damage seen with a visual check must be noted on the freight bill and signed by the carrier's agent. - Page 64 Cybex Pro+ Treadmill Owner’s & Service Manual This page intentionally left blank Customer Service Page 6-4...
-
Page 65: Service
! WARNING: All maintenance activities shall be performed by qualified personnel. Failure to do so could result in serious injury. ! CAUTION: Use only Cybex replacement parts when servicing. Failure to do so could result in personal injury. ! WARNING: Disconnect the power cord before beginning this procedure. -
Page 66: Test Mode
/ km wireless manual cardio 9 holes heart rate receiver Cybex International, Inc. Medway, MA USA (508) 533-4300 www.eCybex.com Made in USA Lower Safety Sentry ™ time Overlay stop quick start speed incline e-stop Figure 1... -
Page 67: Led Functions
Cybex Pro+ Treadmill Owner’s & Service Manual LED Functions LEDs are used to indicate the status of many of the treadmill inputs. After entering Test Mode refer to the following list to check that these LEDs are functioning properly: Heart LED — Blinks on with every signal from the contact heart rate receiver. -
Page 68: Error Codes
Cybex Pro+ Treadmill Owner’s & Service Manual Error Codes Error codes notify you of a problem condition and are displayed on the center of the console. These codes can also help to indicate the part of the treadmill most likely to be causing the problem. - Page 69 Cybex Pro+ Treadmill Owner’s & Service Manual motor cover of each Cybex Pro+ treadmill. By performing these procedures you can evaluate the performance of your drive motor and help prevent premature failure. Tools Required • Phillips head screwdriver • Voltage meter 1.
-
Page 70: Speed Sensor Adjustment
E. Note the reading on the voltage meter then carefully remove both leads. Call Cybex Customer Service to find out if the reading is within an acceptable range. - Page 71 Cybex Pro+ Treadmill Owner’s & Service Manual 4. Adjust the speed sensor gap (if needed). A. Using a Phillips head screwdriver, loosen the screw that attaches the speed sensor to the motor saddle. See Figure 3 (speed sensor screw). B. Adjust the gap between the speed sensor and the flywheel to 3/16” (.48 cm) and tighten the screw.
-
Page 72: Ir Compensation
Cybex Pro+ Treadmill Owner’s & Service Manual IR Compensation NOTE: This procedure is required after replacing the lower control board or the drive motor. Tools Required • Phillips head screwdriver • Plastic (or non-conductive), flat head screwdriver 1. Please read instructions thoroughly before performing this procedure. -
Page 73: Speed Calibration
Cybex Pro+ Treadmill Owner’s & Service Manual F. Using a plastic small flat head screwdriver, turn the IR control slightly in one direction as follows: • Turn clockwise to remove the slack from the belt • Turn counter-clockwise to remove the vibration or surging from the belt G. -
Page 74: Running Belt & Deck
Cybex Pro+ Treadmill Owner’s & Service Manual Running Belt & Deck NOTE: During this procedure you will have the option to remove the running deck, running belt, rubber mounts, rear roller, front roller and drive belt. Follow this procedure from step 1 even though the heading for some of these procedures will appear before the step where you remove that part. -
Page 75: Rear Roller
Cybex Pro+ Treadmill Owner’s & Service Manual 4. Remove the side panels. A. Pull each side panel out and off the treadmill. See Figure 5. 5. Remove the top steps. A. Using a Phillips head screwdriver, remove the three screws that hold one of the top steps in place. -
Page 76: Front Roller
Cybex Pro+ Treadmill Owner’s & Service Manual 7. Loosen the deck. A. Using a 7/16” open-end or socket wrench, remove the ten screws and ten washers that hold the deck in place. See Figure 7. NOTE: Leave the deck in place until step 9B. -
Page 77: Drive Belt
Cybex Pro+ Treadmill Owner’s & Service Manual B. Lift one side of the deck and slide it out of the running belt. C. Tilt up the left side of the front roller and slip the running belt off. 10. Inspect the rubber mounts. - Page 78 Cybex Pro+ Treadmill Owner’s & Service Manual D. Confirm that the drive belt is positioned three grooves over from the face of the flywheel and three grooves over from the face of the pulley. See Figure 10. NOTE: Failure to align the drive belt could cause squeaking.
-
Page 79: Drive Motor
Cybex Pro+ Treadmill Owner’s & Service Manual 20. Secure the motor cover. A. Lower the motor cover center into position. See Figure 2. B. Using a Phillips head screwdriver, tighten the three screws on each side. NOTE: Be sure the screws are catching the center motor cover’s holes. - Page 80 Cybex Pro+ Treadmill Owner’s & Service Manual 4. Remove the old drive motor. A. Using 7/16” open end wrench, remove the nut on each motor strap and remove the motor straps from the motor saddle. See Figure 12. B. Slip the drive belt around the flywheel pulley and off the motor. See Figure 13.
-
Page 81: Motor Brushes
Cybex Pro+ Treadmill Owner’s & Service Manual D. If you are replacing the drive belt, slip the drive belt off the front roller pulley and discard it. 7. Attach the front roller. A. Slide the new drive belt around the front roller. - Page 82 Cybex Pro+ Treadmill Owner’s & Service Manual ! CAUTION: If the drive motor is warm wait until it is cool to the touch before proceeding. The inside components of the drive motor may be hot. ! WARNING: Keep the motor dry. Do not get the inside of the motor wet.
- Page 83 A. Squeeze each rectangular brush covers, insert it into the holes and then release. B. Push the round brush cover into its hole until it is flush with the motor. NOTE: If a cover is damaged, order Cybex replacement part number EH-16954 for the round cover or EH-16955 for the rectangular cover.
- Page 84 Cybex Pro+ Treadmill Owner’s & Service Manual C. Using a straight-edge (such as the lower Nuts Motor Strap board shield), line up the face of the Screws Motor Exit flywheel pulley with the face of the front (Position Wire roller pulley until they are flush. See...
- Page 85 Cybex Pro+ Treadmill Owner’s & Service Manual Tie Cables Away Wire Ties from Fan NOTE: The ferrite Ferrite is for internationally installed motors. Figure 18 E. Refer to the lower board shield to Clips (3) confirm the locations for the connectors and check to see that all of the cables are connected firmly.
-
Page 86: Elevation Motor
Cybex Pro+ Treadmill Owner’s & Service Manual Elevation Motor Tools Required • Phillips head screwdriver • Wooden block 4” (10 cm) tall (2) • 9/16” Open end wrench • 9/16” Socket wrench ! WARNING: Disconnect the power cord before beginning this procedure. Keep wet items away from inside parts of the treadmill. - Page 87 Cybex Pro+ Treadmill Owner’s & Service Manual 6. Calibrate the elevation motor. A. The switch should be at zero elevation Elevation Frame before adjusting the tube nut. If necessary Motor connect the elevation motor, bring the elevation up to 1% incline and then back down to 0%.
-
Page 88: Lower Control Board
Cybex Pro+ Treadmill Owner’s & Service Manual Lower Control Board NOTE: You will remove and replace the entire lower bracket in this procedure. Tools Required • Phillips head screwdriver • 3/8” Nutdriver or socket wrench • ESD (Electro Static Discharge) grounding strap ! WARNING: Disconnect the power cord before beginning this procedure. - Page 89 Cybex Pro+ Treadmill Owner’s & Service Manual B. Remove the entire bracket with its lower board. NOTE: Cybex may want this part back for evaluation. Contact Cybex Customer Service at 800-766-3211 and press 64 when prompted. 6. Replace the lower control board and bracket.
-
Page 90: Power Cord
Cybex Pro+ Treadmill Owner’s & Service Manual 8. Secure the line filter. A. Using a Phillips head screwdriver, secure the two screws that hold the line filter to the lower control board bracket. 9. Secure the wires. A. Check to see that all of the cables are connected firmly in their proper place. -
Page 91: Power Switch
Cybex Pro+ Treadmill Owner’s & Service Manual 2. Remove the motor cover. A. Using a Phillips head screwdriver, loosen three screws on each motor cover side (left and right). See Figure 2. B. Lift the motor cover center up and off the treadmill. The screws will stay in place. See Figure 2. -
Page 92: Line Filter
Cybex Pro+ Treadmill Owner’s & Service Manual Line Filter NOTE: If you are replacing the line filter follow steps 7 and 8. If not skip to step 9. 7. Replace the line filter (optional). A. Disconnect the fast-on that goes from the line filter to the drive motor (green cable). -
Page 93: Upper Display Board
Cybex Pro+ Treadmill Owner’s & Service Manual Brown Blue Shown From Front of Switch with “I” Toward Black White the Top Access Hole Power Cord Behind Base Brackets Figure 23 D. With the ground wire through the access hole to the lower control bracket, put the ground wire terminal on the stud on the lower board bracket. - Page 94 Cybex Pro+ Treadmill Owner’s & Service Manual A. Using a Phillips head screwdriver, remove the nine screws that hold the console back to the console front. B. Gently pull off the console back. 3. Remove the display board. A. Disconnect these cables from the display board: the display cable (2 connectors), the two upper switch membranes, the lower switch membrane, the contact heart rate cable, the CSAFE board to display board jumper and the upper to lower board jumper.
-
Page 95: Contact Heart Rate Board
Cybex Pro+ Treadmill Owner’s & Service Manual 5. Connect the cables. A. Connect these cables into the display board: the display cable (2 connectors), the two upper switch membranes, the lower switch membrane, the contact heart rate cable, the CSAFE board to display board jumper and the upper to lower board jumper. See Figure 24. -
Page 96: Contact Heart Rate Grips
Cybex Pro+ Treadmill Owner’s & Service Manual 4. Attach the new heart rate board. Molex Double Placeholder Connector A. Locate the side of the heart rate (Top) (Right) board with the two holes and Heart Rate place the molex placeholder over to Display the top three pins. - Page 97 Cybex Pro+ Treadmill Owner’s & Service Manual 6. Route the new heart rate cable. A. Connect the double connector into the right side of the heart rate board. See Figure 25. B. Locate the short and long side of the heart rate Black Wire cable.
-
Page 98: Csafe Board
Cybex Pro+ Treadmill Owner’s & Service Manual B. Locate the small bump on the metal contact prong and on the connectors. See Figure 31. C. Connect the each cable to a metal prong with the bumps lined up. See Figure 31. -
Page 99: Display Cable
Cybex Pro+ Treadmill Owner’s & Service Manual B. Using a Phillips head screwdriver, remove the three screws that hold the CSAFE board to the console. 4. Attach the new CSAFE board. A. Gently push the CSAFE connector into its port on the display board. See Figure 24. - Page 100 Cybex Pro+ Treadmill Owner’s & Service Manual B. Lift the motor cover center up and off the treadmill. The screws will stay in place. See Figure 2. 4. Remove the left junction covers. A. Using a Phillips head screwdriver, remove the three screws that hold the left junction covers in place.
- Page 101 Cybex Pro+ Treadmill Owner’s & Service Manual NOTE: “Right” and “left” denote user orientation. Console Back Cover Bottom Hole Left Junction P3 and P8 Covers Connectors on Wire Screws (9) Screws (3) Upper Display Holder Board Display Cable Upright Shield...
-
Page 102: Display Overlays
Phillips head screws. Display Overlays NOTE: This procedure will cover the upper and/or lower display overlay. They are removed and replaced the same on the Cybex Pro+ treadmill. Tools Required • Phillips head screwdriver • ESD (Electro Static Discharge) grounding strap •... -
Page 103: Parts List
Cybex Pro+ Treadmill Owner’s & Service Manual 3. Remove the display overlay. A. While wearing an ESD strap, disconnect the switch membranes (two upper and one lower) from the display board. See Figure 19. B. Use a razor blade to peel up a corner of the display overlay and pull off the overlay. - Page 104 Cybex Pro+ Treadmill Owner’s & Service Manual ITEM PART NO. DESCRIPTION PL-16738 Plug, Power Cord Grommet DE-16992 Decal, ETL UL-1647 Only Removed PC-16496 End Cap, Left, (Choose a Standard or Custom Color) PC-16497 End Cap, Right, (Choose a Standard or Custom Color)
- Page 105 Cybex Pro+ Treadmill Owner’s & Service Manual ITEM PART NO. DESCRIPTION HW-00180 Washer, Lock Split 1/4 HS-15757 Bolt, Tap 1/4-28 x 1.0 H x HD PLTD PC-16379 Cover, Junction Outer, Right, (Choose a Standard or Custom Color) PC-16380 Cover, Junction Inner, Right, (Choose a Standard or Custom Color)
- Page 106 Cybex Pro+ Treadmill Owner’s & Service Manual This page intentionally left blank Service Page 7-42...
- Page 107 Cybex Pro+ Treadmill Owner’s & Service Manual Page 7-43...
-
Page 108: Schematic
SPEED DN SHIELD (NOT USED) ROW 1 SWITCH ROW 2 SWITCH ROW 3 SWITCH COL 1 SWITCH E-STOP MAGNET COL 2 SWITCH BOTTOM SWITCH MEMBRANE E-STOP KEY SW-17187 Cybex Pro+ Schematic Page 7-44 Cybex Pro+ Treadmill Owner’s & Service Manual... - Page 110 10 Trotter Drive Medway, MA 02053 • 508-533-4300 • FAX 508-533-5183 www.cybexinternational.com • Techhelp@cybexintl.com • techpubs@cybexintl.com...