Table of Contents
Advertisement
Advertisement
Table of Contents

Related Manuals for GEM genesys xp


Summary of Contents for GEM genesys xp
- Page 1 D I G I T A L K E Y B O A R D S owner’s manual genesys xp •English...
- Page 2 SPECIAL MESSAGES ALARM SYMBOLS: The exclamation mark within an equi lat er al triangle is intended to alert. Generalmusic electronics prod ucts could present la bels sim i lar to that The lightning fl ash with arrowhead symbol, within an equilat- eral triangle, is intended to alert the user to the presence of dis played in this section.
-
Page 3: Table Of Contents
Checking The Operating System Release Page 4 How To Upgrade The Operating System Page 4 System Set Up Page Page 5 How To Use The Genesys Xp As A Stand Alone Unit Page 6 Introduction Page 6 Starting The Instrument Page 6... - Page 4 H Properties Page 45 Appendix To The Edit And Disk Function Chapter Page 46 A Very Special Save Function: Save A Midifile Page 46 To Transform A Standard Midifile Into A Gem Song Format Page 47 Genesys xp manual index...
- Page 5 Page 54 Examples Page 54 Using Midifiles With Harmony Track Page 54 Classic Vintage Vocoder Effect Page 55 Play Live the Genesys Xp: The Resources Page 57 Definition: Preset Page 57 Definition: Memories Page 57 Select Genesys Xp Presets Page 57...
- Page 6 Genesys xp manual index The Sample Editor Page 70 Sample Editor Option Page 70 Assign Sample Page 71 F6 Sample Editing Page 71 Storing Samples Page 72 F2 Save Page 72 Genesys Xp Resource Architecture Page 73 Keyboard Harmony Page 74...
- Page 7 Genesys xp manual index Edit The Song Events Page 92 Erase Page 92 Move Page 93 Copy Page 93 Quantize Page 94 Insert Measures Page 94 Delete Measures Page 94 Velocity Page 95 Transpose Page 95 Microscope Page 95 Master Track...
-
Page 9: Genesys Xp Package Contents
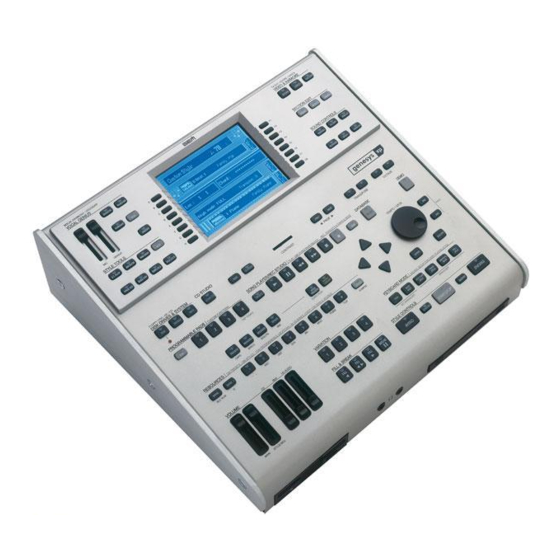
Congratulations for purchasing Genesys xp ! You can now realize your full musical potential using the the most advanced technology in a gear which is ideal for live performing. Please read accurately the content of this manual, where each procedure for the correct usage of the instrument is described. - Page 10 Genesys xp Control panel All the Genesys xp functions are controlled from the control panel. A to H function buttons, to select or recall data PARTS shifts the screen in inside the various display menus. song or style musical parts.
- Page 11 Genesys xp Control panel the F1 to F8 function buttons, selects 320x240 graphic LCD backlit VIDEO & KARAOKE buttons access and control or recalls data inside the display display the multimedia files information contained in menu.
-
Page 12: Checking The Operating System Release
In the higher part of the display the currently installed O.S. data is reported. Please compare this date with the one of the O.S. CD included in the Genesys xp package. In case the CD has a later date, please upgrade the instrument. -
Page 13: System Set Up Page
System set up page Other system set up page options: By accident, the O.S. corrupt some of its internal files, this could cause some malfuction or fault. Use this option to restore the operating system direclty from the hard disk. -
Page 14: Starting The Instrument
How to use the genesys xp as a stand alone unit This chapter explains the use of the Genesys xp as a standing alone unit, taking care about the functions related with live music playing. Genesys xp block diagram INTRODUCTION To use Genesys xp live as a stand alone unit needs to be properly configured. -
Page 15: Repertoire Creating
The following chapter explains how to properly configurate Genesys Xp as a stand-alone unit for live performances. The Genesys xp factory set includes only demo files on the internal hard disk. Gem's proprietary song repertoire is supplied in a included CD ROM. In this section of the manual, the CD Rom will be used as a reference for repertoire creating operations. - Page 16 NOTE While a GEM song is playing, it is possible to visualize in the display its multimedia contents (Lyrics, Chords, Score) By simply pressing the SCORE or LYRICS button on the panel, the display shows the multimedia contents of the file.
- Page 17 These buttons fast move (forward and backward) the playing file. again the PLAY button, the BEWARE! song will start at the same Playing midifiles in direct-to-disk mode these keys are point where it was stopped. disabled To use the genesys xp as a stand alone unit Page9...
-
Page 18: Song Screen, Selecting A Midi Song Format
Once a song is selected and play it is possible to visualize a page containing some important playing informations. Song screen, selecting a MIDI song format Select a GEM song in the song player main page and play it, then press the button ESCAPE... -
Page 19: Song Screen Selecting An Audio File Format
Adjust the global volume Adjust the global volume of the Genesys xp of the MIDI song format of the audio CD of the audio CD of the Wave song file To use the genesys xp as a stand alone unit Page11... -
Page 20: Managing The Entire Repertoire In A Db List
Concept: The Genesys xp can organize and manage your repertoire, direct by the internal hard disk, using any of the Genesys xp compatible music files. Once the files are stored in the hard disk it is possible to select and play them by number, author and title, without interruptions . - Page 21 Select first the destination driver by pressing E/F function buttons Select the folder to be removed with the UP/DOWN CURSOR Remove the selected folder with the F6 function button To use the genesys xp as a stand alone unit Page13...
-
Page 22: Copy Mp3 Files Or Midifiles Using The Collect Function
Copy MP3 files or MIDIFILES using the COLLECT function The COLLECT function is similar to the multicopy. The multicopy is specially designed to works with GEM song format, whereas the COLLECT is the function to copy other file formats like MP3 and MIDIFILES (for further information about this topic please refer to the part of this manual explaing the audio and MIDI formats compatible with Genesys xp). - Page 23 Remove the selected file using the F6 function button Using the same procedure you can in the internal Genesys xp hard disk other compatible files such as MIDIFILES or WAV files. Once all the files you need for your performance are copied in the hard disk, a DB list can be easily created.
-
Page 24: Db List Creating
DB scan. This operation is necessary to recognize and organize the music files you have copied in the hard disk. Press F7 EDIT, then DB SCAN to execute the operation Page16 To use the genesys xp as a stand alone unit... - Page 25 XXX of this visualize all the refer to the files EDIT chapters of this manual for a manual files contained in complete explanation of these topics. the DB list To use the genesys xp as a stand alone unit Page17...
-
Page 26: Perform With The Db List
The DB list default mode orders the song Pressing the RIGHT CURSOR to order by artist by number (the real files position in the again the song list is ordered hard disk) by title (alphabetical) Page18 To use the genesys xp as a stand alone unit... -
Page 27: Realtime Transpose The Midi Songs Using Db List
WARNING! Transpose does not affect audio files such as MP3 or WAV. Using Genesys xp It is possible only to transpose MIDI files format. Visualize the music files multimedia contents Just press the SCORE or LYRICS button on the panel and the display will show the multimedia contents of the file. For further details please refer to the SCORE &... -
Page 28: Fast Songs Searching In The Db List: Function Search
Fast songs searching in the DB list: function SEARCH During a music performance with the Genesys xp, you may have a request from your audience for a particular song title. In this case the instrument offers a fast search function to select the song in a minimum lapse of time. This is a very effective function especially if your repertoire includes many pieces of music. -
Page 29: Db List Edit Menu
DB list EDIT menu The Genesys xp DB list features an EDIT for a further control in the song data management. The edit menu is now showed in the screen. Use the UP/ Enter the DB list main page and press the function button... - Page 30 We have already analyzed the DB scan procedure and its importance. Please repeat the DB scan procedure whenever you copy new music files in the hard disk to upgrade your repertoire. Page22 To use the genesys xp as a stand alone unit...
-
Page 31: How To Program A Play List
PLAY list Press the function button F7 NEW to create a new play list Select a file in the hard disk using the CURSOR, then press ENTER To use the genesys xp as a stand alone unit Page23... - Page 32 Shifts a position up/down a F8 BACK selected file in the play list Returns to the DB list main MODIFY page Allows to modify the number, artist, title attributes of the files Page24 To use the genesys xp as a stand alone unit...
-
Page 33: Use The Genesys Xp Sequencer To Edit Midi Songs
Use the Genesys xp sequencer to edit MIDI songs In this chapter we analyse some easy-to-use and easy edit procedure based on the Genesys xp sequencer. The edit operations regards only some global aspect of a song, not the MIDI event editing. Please refer to the specific chapter in this manual. - Page 34 Press the SELECT button on the panel are loaded into the memory. A song is now loaded in the Ramfile, the memory area where the Genesys xp sequencer reads the song data. The song is now ready for editing. Page26...
-
Page 35: To Change The Song Key
Once all the tracks are transposed press STORE on the panel The TRANSPOSE is the first parameter in the edit menu Press ENTER to confirm editing in the song performance To use the genesys xp as a stand alone unit Page27... - Page 36 Press the function button F2 M TRANSP EN Set ENABLE or DISABLE using the DIAL (or the INC/DEC buttons) Select the track using the UP/DOWN CURSOR buttons Press STORE then ENTER to confirm editing Page28 To use the genesys xp as a stand alone unit...
- Page 37 Press STORE then ENTER to confirm editing NOTE: remember to press the button PART on the main panel to swich the tracks from 9 to 16 (then 17- 24, 25-32). To use the genesys xp as a stand alone unit Page29...
- Page 38 . F7 VEL. CURVE ( VELOCITY CURVE In this menu it is possible to set the dynamic response of the keyboard. 8 different response curves can be set Genesys xp. Selection Curve Type...
-
Page 39: Move To The Edit Parts Page
Repeat this operation as many times as you need Select the track using the UP/DOWN CURSOR buttons Once the programming is completed, press STORE then ENTER to confirm editing. To use the genesys xp as a stand alone unit Page31... - Page 40 Press ENTER to confirm The new track is now available in the song. Double press the Select the track number to create with the DIAL button PART to visualize. Page32 To use the genesys xp as a stand alone unit...
- Page 41 For further information please refer to the next chapter DESCRIPTION: TRACK STATUS. NOTE: The functions CREATE, COPY and ERASE TRACK do not need to be stored in the song performance. To use the genesys xp as a stand alone unit Page33...
- Page 42 We have often used the term TRACK in this chapter. Now we put on focus the different status of a track. DEFINITION: In the Genesys xp architecture is called TRACK the structure who control the sounds and all their related parameters...
- Page 43 Assign the audio auxiliary out to the tracks F5 3D EFFECT Access the 3D effect control menu F8 MIXER LOCK exclude the mixing level from the song performance recalling To use the genesys xp as a stand alone unit Page35...
- Page 44 Repeat the operation as many time as you need. Once your edit is complete remenber to press STORE then ENTER to confirm it. NOTE: to listen the effect of panning, the Genesys xp has to be connected to a stereo speaker system.
- Page 45 F5 3D EFFECT This menu controls the parameters of the 3D effect. This effect add to the Genesys xp global sound more punchness and Press the function button F5 3D Effect Increase (or decrease) the 3D effect by rotating the DIAL Note adding the effect, the stereophonic front will increase.
- Page 46 To edit the effect assigned to a MIDI songs The Genesys xp has a very powerful dsp generating a wide range of studio quality effects. The dsp programming make part of song perfromance data, thus every aspect of a song mixing can be stored in a Gem songfile.
- Page 47 Genesys xp, increasing the global sound definition and avoiding dangerous resonances. Enter in the function page by pressing the F3 button, then adjust the value using the DIAL This is a global function, it is not included in the song performance parameters.
- Page 48 In case more songs are stored in memory, you can select user styles, memories, are stored in ram their folders are them with the UP/DOWN CURSOR automatically showed in the scrreen. Page40 To use the genesys xp as a stand alone unit...
- Page 49 Select a folder to save using the UP/DOWN CURSOR or create a new one pressing the button G Type the folder name Select the option you prefer Enter the folder you have selected with the RIGHT CURSOR To use the genesys xp as a stand alone unit Page41...
- Page 50 Enter the Collect function (see pag 13) F1 LOAD The Genesys xp data loading operation suppose you select a source driver (where the data are currently stored) and a destination driver (where you want to load the data). SOURCE DESTINATION...
- Page 51 12 of this owner manual F8 COLLECT for the explaination about this topic please refer to page 13 of this owner manual To use the genesys xp as a stand alone unit Page43...
- Page 52 To select the CD utilities a valid support has to be inserted in the drive like the floppy disk, the hard disk and the CD rom The ERASE and FAST-ERASE function works using rewritable CD only (CD-RW) Page44 To use the genesys xp as a stand alone unit...
- Page 53 B HARD DISK C CD ROM D RAM VISUALIZE FOLDERS OR FILES PROPERTIES Select a drive and a file (or folder) Press the H function button to visualize the properties To use the genesys xp as a stand alone unit Page45...
- Page 54 APPENDIX TO THE EDIT AND DISK FUNCTION CHAPTER APPENDIX TO THE EDIT AND DISK FUNCTION CHAPTER A very special save function The Genesys xp has a special export function allowing the instrument to convert a GEM song file into a standard MIDI file. Concept: Concept: A loaded in memory GEM song is converted and exported in standard midifile.
- Page 55 Following the instructions on page 25, it is possible to convert a midifile into a GEM song format, by loading a midifile into the Genesys Xp sequencer memory. Once the file is loaded, you can edit it with the same procedure as the GEM songs, and save it on the hard disk (or in a floppy), in GEM song format.
- Page 57 Concept: The vocal genius section has a double function: to process a vocal signal connected to the Genesys xp Mic Audio In and to use this signal as carrier to generate a realtime controlled 4 voices harmonization. Thanks to its hard disk recording section, Genesys xp allows to record your vocal performances in a wave file .
- Page 58 DESCRIPTION: DESCRIPTION: VU-METER F1 LEFT-RIGHT Visualizes the volume level Visualize the MIC input Sets the external input as a set with the MIC slider volume level double L/R LINE input DELAY F2 MIC-LINE SEND Sets the reverb and volume...
- Page 59 F8 LOCK All the previous parameters can be stored in one of the Genesys xp performances (song performances, recalled by the se- quencer and memories recalled in real time).For particular performing situation, you may find it more confortable to use the VOCAL GENIUS section in realtime, disengaging the memory parameters recall.
- Page 60 The harmony section generates, using your voice as carrier signal, up to four backing voices. The result is a very interesting vocal ensemble effect. The harmony voices are taken by the MIDI events received by the Genesys xp, played in realtime by a MIDI keyboard or sent by a song from the sequencer.
- Page 61 F3 EDIT Press F3 to enter in the harmony voices parameters edit page NAVIGATION DATA INPUT Waveform SINUS TRIANGLE MODULATION Add Low Frequency Oscillator SQUARE modulation to the harmony RANDOM voices. SAMPLE/HOLD PITCH FILTER AUTO CORRECTION...
- Page 62 Using midifiles with harmony track Some midifiles or Gem song formats can contain a midi track (usually track #5), which instructs the harmony voices when and how they should sing. The Genesys Xp re ceives these instructions in Vocoder Mode.
- Page 63 Check each voice is enabled and its volume level is set to the maximum. In vocoder mode, the harmony voices do not respond to the split. For this example you can select the Genesys xp in FULL mode. Now, in order to hear how the harmony voices respond, turn down the volume of the sound assigned to the part. Press ESCAPE to return to the home screen and then reduce the UPPER volume slider to minimum.
- Page 65 Concept: Genesys xp is a very powerful workstation arranger, a sampler and a synthesizer at the same time. All the realtime function can be controlled via MIDI by a master keyboard and are fully integrated with the song player and vocal genius. Now, first of all, connect the MIDI Out of your master controller (master keyboard, digital piano, MIDI accordion, guitar controller etc.),...
- Page 66 PRO SPLIT This innovative feature was custom designed for the Genesys xp. In PRO SPLIT mode, the chords recognition is divided into two parts: bass and accompaniment. The bass is controlled by the left side of the split, while the other accompaniment parts are controlled by the chords played on the right side of the split.
- Page 67 As you can see, the Edit Parts menu is the same as at page 28 Press ENTER to enter in the edit parts menu in the song edit chapter of this manual. Genesys Xp includes the same parameters in the parts assigned to the player/sequencer and those assigned to MIDI realtime control.
- Page 68 Freeze Chord Locks the current chord (pedal held), allowing you to play freely with both hands across the entire key-board without triggering changes in the Style auto-accompaniment. The function deactivates at pedal release. Page60 Realtime use of the Genesys xp...
- Page 69 MULTIPEDAL MODE The multipedal is a new pedal unit specially designed for Genesys xp. This unit has six switch pedals, and the Genesys xp can connect up to three pedal units, from the rear panel pedal input jacks, up to eighteen programmable switch pedals at maximum.
- Page 70 This menu provides an easy and fast way to customize the sound assigned to the selected part. Even for non expert users in synth programming can modify the Genesys xp sounds. The display shows the screen containing eight main parameters of the sound that can immediately be selected and modified.
- Page 71 Press ESCAPE two times from the previous page, select the SOUND EDIT (PRO) menu with the cursor, then press ENTER. NAVIGATION ENTER MENU This is a menu for really expert users, where all of the Genesys xp synthesys parameters are available and all sounds can be modified or completely redesigned. This is the sound pro edit main page.
- Page 72 The option and parameters used to shape the Balance tracking curve, A straight line running from point 1 to point 2 corresponds to the (Segment, Point, Key and Level), are identical to those explained for the lowest possible resolution. Volume Tracking. Page64 Realtime use of the Genesys xp...
- Page 73 Pressing Compare activates two new commands: F3 SEARCH WAVE permits an alphanumerical research (by name or number) of a wave stored in the Genesys xp ram memory. ..Type the name Press ENTER to confirm Realtime use of the Genesys xp Page65...
- Page 74 The initial Loop point is represented by an arrow [ ]To eliminate The Key On Envelope must have at least one segment, (the the loop, select the segment and select “Del Segm.”. Attack phase), which cannot be cancelled. Page66 Realtime use of the Genesys xp...
- Page 75 Filters connected in series [Filter 1, Filter 2]. Filters enhance or attenuate certain frequencies of the Waveforms. The sound changes according to the type of filter selected. The Genesys xp filters are 2 pole filters with roll off curves at 12 dB per octave. If both filters are programmed with identical parameter values, they become a single 4 pole filter with a roll off curve of 24 dB per octave, perfect for those classic analog synth sounds.
- Page 76 NOTE while negative values act inversely with increased Aftertouch. Value range: Tracking curves and envelopes have the same screen and +/-7. 0 = no response. parameters as the amplitude in the previous chapter. Page68 Realtime use of the Genesys xp...
- Page 77 2. If you save the new RAM-Sound to an existing RAM-Sound, the existing file will be irremediably lost without warning. Be absolutely sure, therefore, that you have stored the existing RAM-Sound to disk or Hard disk before confirming the save procedure. Realtime use of the Genesys xp Page69...
-
Page 78: The Sample Editor
The Sample editor Genesys xp is equipped with a huge sample RAM memory 32 Mbytes, to accommodate the samples you wish to load. This memory can be used to increase the sound database of the instrument. Sample can be loaded on board in compatible format, or directly sampled using the SAMPLE function in recording studio. - Page 79 Once you’ve loaded in the samples that you need, the only essential step you need to take before you can save them is to ASSIGN, (or “map”) your samples to a specific range of keys. Only assigned samples become a part of a Waveform which you can then save to the Genesys xp Wave Library. When you load a new Waveform into Sample Translator, the samples that constitute the Waveform are shown assigned to specific key ranges.
-
Page 80: Storing Samples
F2 SAVE The SAVE operation is used to save assigned Samples to the Genesys xp. A Waveform can contain one or more assigned samples, provided that each is assigned to a specific keyboard range. Once your samples have been assigned, press the SAVE button, (F2), to save the Waveform to the Genesys xp Wave Library. - Page 81 GENESYS XP RESOURCES ARCHITECTURE Realtime use of the Genesys xp Page73...
-
Page 82: Keyboard Harmony
No left hand chord required.. HARMONY TYPE STRUCTURE Harmony example. The left hand plays a chord in C Major. The black notes represent the melody, the white notes the harmony added by the Harmony option. Page74 Realtime use of the Genesys xp... -
Page 83: Select Genesys Xp Styles
F1-F8 recall the Style in the selected families Genesys xp has 128 internal styles (+128 user styles) divided in 8 STYLES FAMILIES. In Each screen you can recall 16 styles. Pressing the PAGE PREV/NEXT button you can enter the User styles area. - Page 84 ‘stray’. FINGERED 2 At least three notes must be played to obtain the fully programmed pattern. If less than three notes are played, the arranger recognizes the chord but triggers a ‘partial’ accompaniment. Page76 Realtime use of the Genesys xp...
-
Page 85: To Change The Split Point
The Split Point is a general parameter (not linked to a particular memories) which is conserved in memory when the instrument is turned off. The new setting is lost when the “Reset All” operation is carried out or if the backed-RAM loses its data due to the total discharge of the battery. Realtime use of the Genesys xp Page77... - Page 86 All the parameters at your disposal in the EDIT SOUND menu can Part NOTE: be customized according with your needs. Part Part Using Genesys xp in realtime with EFFECT 1 Part EFFECT BLOCK A EFFECT 2 Part...
-
Page 87: Drum Kit Edit
DRUM KIT EDIT In Genesys xp is it possible a full edit of the drumkit recalled by song or by styles. Select the parts assigned to the styles pressing the function buttons F1-F2 PARTS in the main screen, and select the track n.10 usually assigned to the drumkit. - Page 88 4) Select a different stlyle Preset number (from 1 to 8) to store 5) Press ENTER to confirm Leaving the above parameters unchanged the edited preset will be overwrited to the current one Page80 Realtime use of the Genesys xp...
- Page 89 MEMORIES The memories is the higher memory hyerarchy level in Genesys xp. You can recall in a touch of a button an entire snapshot of the instrument. Preset, style, effect, and other associated parameters as tempo speed, vocal genius set can be selected immediately to switch between differen music genres and atmospheres.
- Page 90 THE MUSIC LIBRARY The music library consists of a series of already programmed set ups to start playing immediately using Genesys xp. Each set up is prepared to play a famous evergreen song. RECALL THE FUNCTION...
-
Page 91: The Recording Studio Section
NEW STEREO WAVE RECORDING MENU Enables the internal hard disk recorder of the Genesys xp to record a stereo audio file in WAVE standard format. This is the format to use in order to later create an audio CD. - Page 92 RECORDING SCREEN ..Recording..STOP Press F1 or F2 to STOP recording Once your performance is complete, press STOP to stop record. The following screen appears in the display S.O.S._01 Type a name for your recording session...
-
Page 93: The Wave Editor Menu
THE WAVE EDITOR MENU The WAVE EDITOR menu gives access to some very useful functions to be used with Wave file. Select a wave file in the song player section then press the button EDIT. NAVIGATION... - Page 94 VOCAL REMOVER This function is similar to the one found on many karaoke machines, which can be used to reduce and sometimes completely remove the vocals from a CD track. To remove the vocals from a CD-track you must first convert the track to a WAVE file.
-
Page 95: New Mono Wave Recording Menu
MONO SAMPLE RECORDING This option allows to sample a mono sample. This sample can be use to be loaded in the sample RAM area of the Genesys xp. In this way you can acquire exernal sounds using the MIC/LINE input of the instrument. This function also permit to sample the other resource of the Genesys xp : sequencer, audio CD , Mp3. -
Page 96: Cd Studio
CD STUDIO Genesys xp has a built-in Combo DVD-CD-RW unit. We have already seen in the previous sections of this manual its main features as reading device. In this chapter we’ll see the option to use CD-RW as Genesys xp mass storage unit. - Page 97 In the Genesys xp can be used the following support: DVD ROM Only as ROM (ready only) archive support containing Genesys xp compatible data. CD-R (CD Recordable) Blank CD which can be written only once. After burning they can be used as a normal music CD or CD-ROM.
-
Page 98: The Sequencer
THE SEQUENCER Genesys xp has a powerful MIDI sequencer to compose or arrange your music. We have already seen the main features of this function in the Song Player/Song Edit chapter. Please refer to this part of the manual for further information. Press F3-F4 NEW SONG to enter the sequencer main page. -
Page 99: Starting Record
F6 TIME TEMPO PAGE LOCATOR PLAY REC MODE Recording and playback options for The Song Locators indicates the the Song. current position of the Song, expressed in measures, beats and resolution Linear causes the Song to play or be (tick). -
Page 100: Edit The Song Events
EDIT THE SONG EVENTS Once your songs is completed you can easily edit all the MIDI events you have recorded on each track. Press the EDIT button in SONG/PLAYER RECORDING STUDIO section to enter the edit menu. - Page 101 MOVE ENTER MENU NAVIGATION DATA INPUT The function MOVE shifts events from one point of the selected track to another. PARAMETERS: FROM LOCATOR - TO LOCATOR Determines the start and end point of the part to move. It is possible to specify the measure, beat and resolution (tick).
- Page 102 QUANTIZE An auto-corrector of timing errors. Includes triplet and swing quantize values. F1 Note OFF Quantize - Quantization of the NOTE ON events F2 Note OFF Quantize - Quantization of the NOTE OFF event. After a Note On quantization,...
- Page 103 VELOCITY Modifies the key Velocity. This parameter represents the speed with which a note is played, or its intensity. Generally, the greater the velocity the higher the volume. Velocity also affects the filter of many sounds, rendering them brighter with increased velocity.
- Page 104 MASTER TRACK The Master Track editor allows you to modify the events recorded in the Master track which contains events pertaining to the general controls of the Song.This Track records changes in Performance, general Volume (Pedal Volume), Effect Changes, Effect Volume, Scale, Tempo changes, initial Time Signature and the Score Key.
- Page 105 Genesys xp sequencer has a powerful editor to modify or insert multimedia informations like: lyrics, score or chord in a song file. We suggest to use this function at the best to connect to the Genesys xp a standard PC PS2 keyboard .
-
Page 106: Easy Song Recording Mode
EASY SONG RECORDING MODE The EASY SONG recording method exploits existing Styles in order to record your keyboard tracks with automatic accompaniments. This method is a quick and easy way of recording which does not involve the more advanced options common to the more traditional Song Record method. -
Page 107: New Style Recording
NEW STYLE RECORDING The NEW STYLE recording option allows to create a new Style or to copy an existing one and modify its RIFF . Press the function button F7 (or F8) to enter the style programming page. - Page 108 SCALE CONVERTER Programming a Style based on the Major scale, the Genesys xp arranger will automatically convert a minor or 7th chord accordingly. This allows you to limit your User Style recording times by, for example, recording only the Major riff of Variation 1, in order that when you play with the recorded style, a minor or 7th chord will be automatically adjusted for the change.
-
Page 109: The Copy Function
USER STYLE EDIT Once recorded a new style it is possible to fine edit all its events. Most of the edit option of this menu are common with the SONG EDIT option already analyzed in the previous section, where you can refer to for more information. Two peculiar functions of the STYLE EDIT menu are the COPY and the MASK functions. -
Page 110: The Mask Function
THE MASK FUNCTION The MASK function permits to reduce the amount of riffs you need to create a style. MASK works by taking riffs from one variation and then allowing you to mute certain instruments to create a simpler version for use as another variation. The Mask function only works with the basic riffs of a variation. -
Page 111: The User Styles Locations
THE USER STYLES LOCATIONS The styles you have created in the NEW STYLE menu are located in the USER STYLE memory area. Press the respective function buttons to recall and the buttons 1 to 8 on the panel select the USER families. Up to 128 USER STYLES can be stored in this memory area. -
Page 112: The Video Karaoke Section
The Genesys xp is equipped with two different video out connectors: TV and S-Video. These allow you to connect the instrument to a TV or video projector to display a larger image of the internal screen. The Genesys xp also offers special modes which allow the TV to show score and/or lyrics. The choice of which connector to use depends on the type of VIDEO IN connectors on your TV or video projector. - Page 113 Bank Select Turning this on allows an external instrument to access all of the Genesys xp internal sounds via midi. If this is turned off, only bank 1, (the General Midi bank) is accessible.
- Page 114 This channel, independent from all other settings defined under the MIDI menu, defines the way to control the Genesys xp by an external MIDI controller. For example, if you set up a style to play in ACCOMP . SPLIT mode and then try to play the Genesys xp from an external controller keyboard connected to either of the MIDI IN ports, you would normally only be able to play one of the constituent parts of the overall setting depending on the midi channel that the controller keyboard is sending on.
-
Page 115: The System Setting Menu
HARD requires greater pressure to achieve the effect. PEDAL POLARITY The Genesys xp can accept up to three footswitches which you will connect to the DAMPER, PED 1 and PED 2 jacks. There are two different types of footswitches available called Normally Open and Normally Closed. - Page 116 This menu visualizes the OPERATING SYSTEM RELEASE DATA (see in the first section allows you to switch to the Italian system, where chord names are shown as Do, Re, of the manual - UPGRADE GENESYS XP THE OPERATING SYSTEM ). and the internal Mi etc.
-
Page 117: The Programmable Pad
Select the function and Tap on the pad. Start Playing a Style the tempo will be syncronized to your tapping. SAVING YOUR PAD SETTINGS Each programmable PAD set up can be stored in the Genesys xp MEMORIES parameters. As you can see, a LOCK (F8) function it is available to disable the parameter recalling by the MEMORIES. -
Page 118: Mp3 Lyrics Editor
Displaying Mp3 Lyrics Mp3 lyrics operate in a slightly different way than midifiles or GEM song lyrics do, because they are highlighted one line at a time instead of one word at a time. While this is slightly less convenient for learning an unfamiliar song, it offers the great advantage that the lyrics can be created as a normal text file on a computer and then loaded into the editor where you can add the synchronization tags. - Page 119 Copyright by Generalmusic all right reserved 2004 Release 1.0...
- Page 120 STOCK CODE 271409 Specifi cations are subject to change without prior notice. PRINTED IN CHINA Generalmusic S.p.A. Via delle Rose, 12 47842 S.Giovanni in Marignano (RN) - Italy Tel. +39 0541 959511Fax +39 0541 957404 www.generalmusic.com...