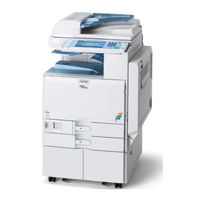
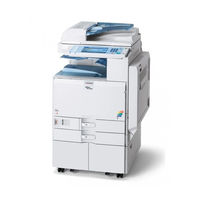
Sign In
Upload
Manuals
Brands
Ricoh Manuals
All in One Printer
Aficio MP C3500 SPF
Ricoh Aficio MP C3500 SPF Manuals
Manuals and User Guides for Ricoh Aficio MP C3500 SPF. We have
6
Ricoh Aficio MP C3500 SPF manuals available for free PDF download: Facsimile Reference Manual, Operating Instructions Manual, Network Manual, Safety Information Manual, Specifications
Ricoh Aficio MP C3500 SPF Facsimile Reference Manual (298 pages)
Facsimile Reference
Brand:
Ricoh
| Category:
All in One Printer
| Size: 11.49 MB
Table of Contents
Operating Instructions
1
Manuals for this Machine
3
Table of Contents
5
Notice
11
Important Safety Instructions
13
Caution
13
How to Read this Manual
14
Symbols
14
Names of Major Functions
14
Reading the Display
15
Reading the Display Panel and Using Keys
16
Simplified Display
18
Function List
19
Send Settings
20
Reception Settings
20
Initial Settings
21
1 Transmission
23
Transmission Modes
23
Selecting Type of Transmission
24
Memory Transmission
25
Sending Multiple Originals Using the Exposure Glass
28
Parallel Memory Transmission
29
Automatic Redial
30
Dual Access
30
Simultaneous Broadcast
30
Immediate Transmission
31
Sending Multiple Originals Using the Exposure Glass
33
Displaying Confirmation of Transmission
34
IP-Fax Functions
35
Terminology
37
Notes on Using IP-Fax
38
Functions Not Available for IP-Fax Transmission
38
Internet Fax Functions
39
Notes on Using Internet Fax
40
Functions Not Available by E-Mail Transmission
41
Functions Not Available by E-Mail Reception
42
E-Mail Subject
42
T.37 Full Mode
43
Placing Originals
44
Setting the Original Orientation
46
Scanning Two-Sided Originals
47
Acceptable Original Sizes
50
Paper Size and Scanned Area
51
Original Sizes Difficult to Detect
53
Transmission with Image Rotation
54
Stamp
55
Scan Settings
57
Scan Type
57
JBIG Transmission
59
Resolution
59
Scan Size
61
Auto Detect
62
Regular
63
Area
64
Mixed Original Sizes
66
Density (Contrast)
68
Mixing Scan Settings for a Multiple Page Original
70
Changing the Line Port
71
Simultaneous Broadcast Using Multiple Line Ports
73
Specifying a Destination
74
Sending over a Fax Line
74
Entering a Pause
75
Entering a Tone
76
Sending by IP-Fax
77
Regarding IP-Fax Destinations
79
Sending to an E-Mail Address
80
Bypassing the SMTP Server
83
Using the Address Book to Specify Destinations
86
Switching the Titles in the Address Book
87
Specifying Group Destinations
88
Selecting Destinations from Recent Destinations
89
Programming Destinations in the Address Book
91
Registering Entered Destinations to the Address Book
93
Searching for a Destination in the Address Book
94
Search by Destination Name
95
Search by Fax Number/Ip-Fax Destination
97
Search by E-Mail Address
100
Search Using Advanced Search
102
Search by Registration Number
105
On Hook Dial
107
Manual Dial
109
Sender Settings
111
PIN Code Transmission
114
Advanced Features
116
Setting SUB Codes for Transmission
116
Setting a Password
119
Setting SEP Codes for Reception
119
Entering a Password
122
SEP Code RX Reserve Report
122
SEP Code RX Result Report
123
Canceling a Transmission
124
Before the Original Is Scanned
124
While the Original Is Being Scanned
124
While the Original Is Being Transmitted
125
Before the Transmission Is Started
127
Confirming a Transmission
130
Checking the Storage Result (Memory Storage Report)
132
2 Other Transmission Features
133
Sending at a Specific Time (Send Later)
133
Requesting a Reception Notice
135
Setting an E-Mail Destination as a BCC
137
Confirming Transmission Results by E-Mail
138
Entering the Subject
140
Entering the Text
143
Transmission Options
145
Standard Message Stamp
145
Auto Reduce
146
Label Insertion
148
Closed Network
150
SUB Code Transmission
151
SEP Code Reception
152
Fax Header Print
154
3 Reception
157
Types of Reception
157
Immediate Reception
157
Memory Reception
158
Substitute Reception
159
Receiving Documents Unconditionally
160
Receiving Documents According to Parameter-Specified Settings
160
Reception Modes
162
Manual Reception
162
Auto Reception
162
Switching the Reception Mode
163
Receiving Internet Fax Documents
164
Auto E-Mail Reception
164
Manual E-Mail Reception
165
Received Images
165
Reception Functions
167
Routing Received Documents
167
Routing Received Documents with SUB Code
167
Transferring Received Documents
168
SUB Code Transfer Report
168
Forwarding Received Documents
169
SMTP Reception Using Internet Fax
170
Routing E-Mail Received Via SMTP
171
JBIG Reception
172
Auto Fax Reception Power-Up
172
Printing Options
173
Print Completion Beep
173
Checkered Mark
173
Center Mark
174
Reception Time
174
Two-Sided Printing
175
180-Degree Rotation Printing
176
Multi-Copy Reception
176
Image Rotation
177
Page Separation and Length Reduction
178
Page Reduction
179
TSI Print (Transmitting Subscriber Identification Print)
179
If There Is no Paper of the Correct Size
180
Setting Priority Trays
180
Just Size Printing
181
Having Incoming Documents Printed on Paper from the Bypass Tray
181
Where Incoming Documents Are Delivered - Output Tray
182
Specifying Tray for Lines
182
Tray Shift
183
4 Changing/Confirming Communication Information
185
Changing the Settings of Files in Memory
185
Deleting a Destination from a Simultaneous Broadcast
186
Adding a Destination
188
Changing the Transmission Time
190
Changing the SMTP Server Setting
192
Printing a File from Memory
195
Printing a List of Files in Memory (Print TX File List)
197
Resending a File
199
Checking the Transmission Result (Transmission File Status)
201
Confirming on Display
201
Confirming by Report
202
Confirming by E-Mail
203
Confirming by Report and E-Mail
203
Communication Result Report (Memory Transmission)
204
Immediate TX Result Report (Immediate Transmission)
204
Communication Failure Report
205
Checking the Reception Result (Reception File Status)
206
Confirming on Display
206
Confirming by Report
207
Journal
207
Print Journal
208
Printing the Journal
208
All
209
Print Per File no
210
Print Per User
211
Journal
213
Transmitting Journal by E-Mail
215
Journal by E-Mail
215
Printing/Deleting Received and Stored Documents (Print/Delete Stored Reception File)
216
Printing Received and Stored Documents
217
Deleting Received and Stored Documents
218
Printing a File Received with Memory Lock
219
Personal Boxes
221
Printing Personal Box Documents
222
Confidential File Report
223
Information Boxes
224
Storing Documents in Information Boxes
225
Printing Information Box Documents
227
Deleting Information Box Documents
228
5 Storing a Document
231
Sending a Stored File
231
Storing a Document
232
Programming a User Name
234
Setting a File Name
235
Setting a Password
235
Sending Stored Documents
236
Specifying Documents from [File List]
239
Specifying Documents by [User Name]
239
Specifying Documents by [File Name]
240
Displaying a Preview
240
Printing Stored Documents
241
Changing Stored Document Information
243
Changing a User Name
245
Changing the File Name
246
Changing the Password
246
Deleting a Stored Document
247
6 Fax Via Computer
249
Sending Fax Documents from Computers
249
Before Use
250
Using the Software
250
LAN-Fax Driver
250
Address Book
251
LAN-Fax Cover Sheet Editor
251
Auto Run Program
252
Installing Individual Applications
252
Setting LAN-Fax Driver Properties
253
Setting Print Properties
254
Making Settings for Option Configuration
255
Basic Transmission
256
Specifying a Destination Using a Destination List
257
Specifying a Destination Using Address Book
257
Specifying a Destination by Directly Entering a Fax Number, Internet Fax Destination, or IP-Fax Destination
258
Specifying Options
259
To Send a Fax Document at a Specific Time
259
To Print a Sender Stamp
259
To Attach a Cover Sheet
260
To Specify Two-Sided Printing
260
To Display Preview
260
Saving as Files
260
To Store the Fax Document on the Document Server
261
Checking Transmission Using LAN-Fax Driver
262
Confirming Transmission Results by E-Mail
262
LAN-Fax Result Report
263
Printing and Saving
264
Editing Address Book
264
Programming New Destinations
265
Editing Programmed Destinations
266
Deleting Programmed Destinations
266
Using the Machine's Address Book Data in the Destination List of the LAN-Fax
267
Editing Fax Cover Sheets
267
Creating a Cover Sheet
268
Attaching a Created Cover Sheet
269
Managing Facsimile Functions Using Smartdevicemonitor for Admin
270
LAN-Fax Operation Messages
270
Viewing Fax Information Using a Web Browser
271
Viewing, Printing, and Deleting Received Fax Documents Using a Web Image Monitor
271
Viewing Received Fax Documents Using a Web Browser
271
Printing Fax Information Using a Web Browser
272
Deleting Fax Information Using a Web Browser
273
Programming Destination Information from Web Browser
273
To Edit Machine Properties Already Programmed
274
To Add New Receiver
275
Delivering Files Received by Fax
276
7 Appendix
277
Checking the Memory Status
277
Programs
278
Registering and Changing Keystroke Programs
278
Registering a Priority Function Using a Program
280
Changing a Program Name
281
Deleting a Program
282
Using a Program
283
Optional Equipment
284
Expansion Memory (28MB: DIMM)
284
Handset
284
Extra G3 Interface Unit
284
Specifications
285
Specifications Required for the Internet Fax Destination Machines
287
Maximum Values
288
Index
290
Advertisement
Ricoh Aficio MP C3500 SPF Operating Instructions Manual (172 pages)
Scanner Reference
Brand:
Ricoh
| Category:
All in One Printer
| Size: 5.62 MB
Table of Contents
Operating Instructions
1
Manuals for this Machine
3
Table of Contents
5
How to Read this Manual
9
Symbols
9
About the Scanner Functions
10
Display Panel
11
Simplified Display
12
Confirmation Displays
13
Scanner Features
17
1 Sending Scan Files by E-Mail
19
Before Sending Scan Files by E-Mail
19
Outline of Sending Scan Files by E-Mail
19
Preparation for Sending by E-Mail
20
Registering E-Mail Addresses in the Address Book
20
E-Mail Screen
21
Basic Operation for Sending Scan Files by E-Mail
22
Switching to the E-Mail Screen
25
Specifying E-Mail Destinations
26
Selecting the Destination from the Machine's Address Book
26
Entering an E-Mail Address Manually
30
Selecting Destinations by Searching an LDAP Server
31
Registering a Directly-Entered Destination in the Address Book
34
Specifying the E-Mail Sender
35
Selecting a Sender from the List
35
Using a Registration Number to Specify a Sender Name
36
Selecting the Sender by Searching the Machine's Address Book
37
Specifying the E-Mail Subject
39
Specifying the E-Mail Message
40
Selecting a Message from the List
40
Manual Entry of a Message
41
Simultaneous Storage and Sending by E-Mail
42
Sending the URL by E-Mail
43
2 Sending Scan Files to Folders
45
Before Sending Files by Scan to Folder
45
Outline of Sending Scan Files by Scan to Folder
45
Preparation for Sending by Scan to Folder
48
Registering Destination Folders in the Address Book
49
Scan to Folder Screen
50
Basic Operations When Using Scan to Folder
51
Switching to the Scan to Folder Screen
53
Specifying Scan to Folder Destinations
54
Selecting the Destination from the Machine's Address Book
54
Sending Files to a Shared Network Folder
58
Sending Files to an FTP Server
61
Sending Files to an NDS Tree or Netware Server
63
Registering the Path to the Selected Destination in the Address Book
67
Simultaneous Storage and Sending by Scan to Folder
68
3 Storing Files Using the Scanner Function
69
Before Storing Files
70
Outline of File Storage under the Scanner Function
70
Basic Operation for Storing Scan Files
72
Specifying File Information for a Stored File
74
Specifying a User Name
74
Specifying a File Name
75
Specifying a Password
76
Displaying the List of Stored Files
77
List of Stored Files
77
Searching the List of Stored Files
78
Checking Stored Files
80
Checking a Stored File Selected from the List
80
Checking Stored Files from a Client Computer
82
Sending a Stored File
83
Sending Stored Files
83
Managing Stored Files
85
Deleting a Stored File
85
Changing Data for a Stored File
86
4 Delivering Scan Files
91
Before Delivering Files
91
Outline of Scan File Delivery
91
Preparing to Deliver a File
92
Installing Desktopbinder Lite from the Supplied CD-ROM
93
Network Delivery Scanner Screen
94
Basic Operation for Delivering Files
95
Switching to the Network Delivery Scanner Screen
98
Specifying Delivery Destinations
99
Selecting Destinations Registered in the Delivery Server's Address Book
99
Specifying the Sender
103
Selecting a Sender from the Sender List in the Delivery Server's Destination List
103
Selecting the Sender by Entering the Registration Number
104
Selecting a Sender by Searching the Delivery Server's Destination List
105
Specifying the Subject of the E-Mail to be Transmitted Via the Delivery Server
107
Simultaneous Storage and Delivery
108
5 Scanning Originals with the Network TWAIN Scanner
109
Before Using the Network TWAIN Scanner
109
Outline of the Network TWAIN Scanner
110
Preparing to Use the Network TWAIN Scanner
111
Installing the TWAIN Driver from the Supplied CD-ROM
112
Basic Network TWAIN Scanner Operation
113
6 Various Scan Settings
115
Scan Settings
115
Items for Specifying Scan Settings
116
Scan Type
116
Resolution
117
Scan Size
117
Edit
125
Adjusting Image Density
126
Setting of Original Feed Type
127
Original Orientation
127
Original Settings
129
Stamp
131
Batch, SADF
132
Divide
133
Scanning Multiple Pages of Originals as One File
134
Setting File Type and File Name
136
Setting File Type
136
Setting File Name
138
Security Settings to PDF Files
140
Programs
144
Registering Frequently Used Setting
145
Recalling a Registered Content
146
Changing a Registered Program
147
Deleting a Program
148
Changing the Registered Program Name
148
Registering Initial Values for Initial Display
149
Scan Settings When Using Twain Scanner
150
Setting Original Orientation on the TWAIN Scanner
150
When Scanning Originals of Mixed Sizes Using TWAIN Scanner
152
7 Appendix
153
Relationship between Resolution and Original Size
153
When Using E-Mail, Folder Sending, Storing or Network Delivery Function
154
When Using as a TWAIN Scanner
155
Relationship between File Type Specified for Scanning and File Types for Sending E-Mail and Folder
157
Software Supplied on CD-ROM
159
Quick Install
159
TWAIN Driver
159
Desktopbinder Lite
160
Values of Various Set Items for Transmission/Storage/Delivery Function
162
Transmission Function
162
Storage Function
164
Network Delivery Function
165
Specifications
166
Index
167
Ricoh Aficio MP C3500 SPF Network Manual (140 pages)
Ricoh Aficio 1027: Network Guide
Brand:
Ricoh
| Category:
All in One Printer
| Size: 3.46 MB
Table of Contents
Manuals for this Machine
3
Table of Contents
5
How to Read this Manual
9
Symbols
9
Setting up the Machine on a Network
10
Initial Settings Overview
10
Initial Settings
13
1 Using a Printer Server
31
Preparing Printer Server
31
Printing Notification Via Smartdevicemonitor for Client
32
Using Netware
33
Setting up as a Print Server (Netware 3.X)
34
Setting up as a Print Server (Netware 4.X, 5 / 5.1, 6 / 6.5)
35
Using Pure IP in the Netware 5 / 5.1 or 6 / 6.5 Environment
36
Setting up as a Remote Printer (Netware 3.X)
38
Setting up as a Remote Printer (Netware 4.X, 5 / 5.1, 6 / 6.5)
40
2 Monitoring and Configuring the Printer
43
Using Web Image Monitor
43
Displaying Top Page
45
When User Authentication Is Set
46
About Menu and Mode
47
Access in the Administrator Mode
49
Displaying Web Image Monitor Help
49
Using Smartdevicemonitor for Admin
50
Installing Smartdevicemonitor for Admin
51
Changing the Network Interface Board Configuration
51
Locking the Menus on the Machine's Control Panel
52
Changing the Paper Type
53
Managing User Information
53
Configuring the Energy Saver Mode
56
Setting a Password
56
Checking the Machine Status
57
Changing Names and Comments
57
Load Fax Journal
58
Viewing and Deleting Spool Print Jobs
59
Managing Address Information
59
Using Smartdevicemonitor for Client
60
Monitoring Printers
60
Checking the Machine Status
60
When Using IPP with Smartdevicemonitor for Client
61
Printer Status Notification by E-Mail
62
Auto E-Mail Notification
63
On-Demand E-Mail Notification
64
Mail Authentication
64
On-Demand E-Mail Notification
65
Remote Maintenance by Telnet
67
Using Telnet
67
Access
68
Appletalk
69
Authfree
69
Autonet
69
Bonjour(Rendezvous)
70
Btconfig
71
Devicename
71
Dhcp
72
Diprint
73
Dns
73
Domainname
75
Help
75
Hostname
75
Ifconfig
76
Info
77
Ipp
77
Ipv6
78
Lpr
78
Netware
78
Passwd
79
Prnlog
79
Route
79
Set
80
Show
82
Slp
82
Smb
82
Snmp
83
Sntp
85
Spoolsw
86
Sprint
86
Ssdp
86
Ssh
87
Status
87
Syslog
87
Upnp
87
Web
88
Wiconfig
89
Wins
92
Snmp
93
Getting Printer Information over the Network
94
Current Printer Status
94
Printer Configuration
103
Understanding the Displayed Information
104
Print Job Information
104
Print Log Information
105
Configuring the Network Interface Board
106
Message List
113
System Log Information
113
Printing Files Directly from Windows
121
Setup
121
Using a Host Name Instead of an Ipv4 Address
121
Printing Commands
123
3 Special Operations under Windows
121
4 Appendix
125
When Using Windows Terminal Service / Metaframe
125
Operating Environment
125
Supported Printer Drivers
125
Limitations
125
Using DHCP
127
Using Autonet
128
Precautions
129
Connecting a Dial-Up Router to a Network
129
Netware Printing
131
When the Optional IEEE 802.11B Interface Unit Is Installed
131
Information about Installed Applications
133
Rsa ® Bsafe
133
Specifications
134
Index
136
Advertisement
Ricoh Aficio MP C3500 SPF Safety Information Manual (128 pages)
Ricoh Aficio 1027: Supplementary Guide
Brand:
Ricoh
| Category:
Software
| Size: 2.83 MB
Table of Contents
Manuals for this Machine
3
Table of Contents
5
How to Read this Manual
9
Symbols
9
1 Windows Configuration
11
Using the Desktop Binder-Smartdevicemonitor for Client Port
11
Installing Desktop Binder-Smartdevicemonitor for Client
11
Installing the Postscript 3 Printer Driver (Windows 95 / 98 / Me - TCP/IP)
12
Installing the Postscript 3 Printer Driver (Windows 95 / 98 / Me - IPP)
13
Installing the Postscript 3 Printer Driver (Windows 2000 - TCP/IP)
15
Installing the Postscript 3 Printer Driver (Windows 2000 - IPP)
16
Installing the Postscript 3 Printer Driver (Windows XP, Windows Server 2003 - TCP/IP)
18
Installing the Postscript 3 Printer Driver (Windows XP, Windows Server 2003 - IPP)
19
Installing the Postscript 3 Printer Driver (Windows NT 4.0 - TCP/IP)
20
Installing the Postscript 3 Printer Driver (Windows NT 4.0 - IPP)
22
Changing the Port Settings for Desktop Binder-Smartdevicemonitor for Client
23
Using the Standard TCP/IP Port
25
Installing the Postscript 3 Printer Driver (Windows 2000)
25
Installing the Postscript 3 Printer Driver (Windows XP, Windows Server 2003)
26
Using the LPR Port
28
Installing the Postscript 3 Printer Driver (Windows 2000)
28
Installing the Postscript 3 Printer Driver (Windows XP, Windows Server 2003)
29
Installing the Postscript 3 Printer Driver (Windows NT 4.0)
30
Using as the Windows Network Printer
31
Installing the Postscript 3 Printer Driver (Windows 95 / 98 / Me)
31
Installing the Postscript 3 Printer Driver (Windows 2000)
32
Installing the Postscript 3 Printer Driver (Windows XP, Windows Server 2003)
33
Installing the Postscript 3 Printer Driver (Windows NT 4.0)
34
Using as the Netware Print Server / Remote Printer
35
When Using the Postscript 3 Printer Driver
35
Installing the Printer Driver Using USB
36
Windows 98 SE / Me - USB
36
Windows 2000 - USB
38
Windows XP, Windows Server 2003 - USB
39
Troubleshooting for Using USB
40
Printing with Parallel Connection
41
Installing the Postscript 3 Printer Driver (Windows 95 / 98 / Me)
41
Installing the Postscript 3 Printer Driver (Windows 2000)
42
Installing the Postscript 3 Printer Driver (Windows XP, Windows Server 2003)
43
Installing the Postscript 3 Printer Driver (Windows NT 4.0)
44
Installing the Printer Driver Using IEEE 1394 (SCSI Print)
45
Windows 2000
45
Windows XP, Windows Server 2003
47
Printing with Bluetooth Connection
49
Supported Profiles
49
Printing with Bluetooth Connection
50
If a Message Appears During Installation
52
Making Option Settings for the Printer
53
Setting up the Printer Driver
54
Windows 95 / 98 / Me - Accessing the Printer Properties
54
Windows 2000 - Accessing the Printer
56
Windows XP, Windows Server 2003 - Accessing the Printer Properties
58
Windows NT 4.0 - Accessing the Printer Properties
60
2 Mac os Configuration
63
Mac os
63
Installing the Postscript 3 Printer Driver and PPD File
63
Setting up PPD Files
64
Setting up Options
64
Installing Adobe Type Manager
65
Installing Screen Fonts
65
Changing to Ethertalk
66
Mac os X
67
Installing the PPD Files
67
Setting up the PPD File
67
Setting up Options
68
Using USB Interface
68
Using Bonjour (Rendezvous)
69
Changing to Ethertalk
70
Configuring the Printer
71
3 Using Postscript
73
Setting up Options
73
Printing a Document
75
Job Type
76
User Code
97
Paper Selection
98
Paper Size
98
Fit to Paper
98
Input Slot
99
Resolution
99
Orientation Override
100
Gradation
100
Toner Saving / Level Color
101
Duplex Printing
101
Collate
103
Windows Xp
103
Paper Type
104
Destination Tray
104
Staple
105
Punch
105
Z-Fold
106
Watermark
106
Watermark Text
106
Watermark Font
107
Watermark Size
107
Watermark Angle
107
Watermark Style
108
Color Mode
108
Color Setting
109
Color Profile
110
Black over Print
111
Gray Reproduction
111
Dithering
112
CMYK Simulation Profile
113
Image Smoothing
113
Separate into CMYK
114
Color Control
114
4 Printer Utility for Mac
115
Installing Printer Utility for Mac
115
Starting Printer Utility for Mac
116
Mac os X
116
Printer Utility for Mac Functions
117
Downloading PS Fonts
118
Displaying Printer's Fonts
118
Deleting Fonts
119
Initializing the Printer Disk
119
Page Setup
120
Printing Fonts Catalog
120
Printing Fonts Sample
120
Renaming the Printer
120
Restarting the Printer
121
Downloading Postscript Files
122
Selecting the Zone
122
Displaying the Printer Status
123
Launching the Dialogue Console
123
Index
125
Ricoh Aficio MP C3500 SPF Operating Instructions Manual (136 pages)
Troubleshooting
Brand:
Ricoh
| Category:
All in One Printer
| Size: 5.89 MB
Table of Contents
Operating Instructions
1
Troubleshooting
1
Manuals for this Machine
3
Table of Contents
5
How to Read this Manual
9
Symbols
9
Names of Major Options
10
1 When the Machine Does Not Operate as Wanted
11
Indicators
11
Panel Tone
12
Checking Machine Status and Settings
13
When an Indicator to the Right of a Function Key Is Lit
16
When You Have Problems Operating the Machine
17
Document Server
20
When a Job Is Not Performed
22
2 Troubleshooting When Using the Copy Function
27
When a Message Appears
27
When You Cannot Make Clear Copies
31
When You Cannot Make Copies as Wanted
33
When Memory Is Full
37
3 Troubleshooting When Using the Facsimile Function
39
Adjusting the Volume
39
When a Message Appears
41
When You Cannot Send or Receive Fax Messages as Wanted
48
When Memory Is Full
51
If an Error Report Is Printed
52
Turning off the Main Power / in the Event of Power Failure
53
When an Error Occurs Using Internet Fax
54
Error Mail Notification
54
Error Report (E-Mail)
54
Server-Generated Error E-Mail
54
4 Troubleshooting When Using the Printer Function
55
When a Message Appears During Installation of the Printer Driver
55
Windows 95/98/Me
55
Windows 2000
56
Windows XP, Windows Server 2003
56
Windows NT 4.0
57
If USB Connection Fails
58
When a Message Appears
59
Status Messages
59
Alert Messages
60
Checking the Error Log
61
When You Cannot Print
62
Other Printing Problems
65
When Pictbridge Printing Does Not Work
71
5 Troubleshooting When Using the Scanner Function
73
When Scanning Is Not Done as Expected
73
When You Cannot Send Scanned Files
74
When Stored Files Cannot be Accessed
74
When You Cannot Browse the Network to Send a Scan File
74
When the TWAIN Driver Cannot be Started
74
When Stored Files Cannot be Edited
75
When the Network Delivery Function Cannot be Used
75
Operations Are Not Possible When Messages Appear
75
When a Message Is Displayed
76
When a Message Is Displayed on the Control Panel
76
When a Message Is Displayed on the Client Computer
83
6 Adding Paper, Toner and Staples
87
Loading Paper
87
Loading Paper into the Paper Trays
88
Loading Paper into the Large Capacity Tray (LCT)
89
Changing the Paper Size
91
Changing the Paper Size in the Paper Tray
92
Adding Toner
97
Inserting Toner
98
When Toner Remains
99
Sending Faxes or Scanned Documents When Toner Has Run out
99
Used Toner
99
Maintenance
100
Adjusting the Color Registration
100
Auto Color Calibration
102
Adding Staples
106
Sr790
106
Finisher SR3030 and Booklet Finisher SR3020
107
Booklet Finisher SR3020 (Saddle Stitch)
108
Replacing the Stamp Cartridge
109
7 Clearing Misfeeds
111
Removing Jammed Paper
111
Locating Jammed Paper
112
Removing Jammed Paper
113
Removing Jammed Staples
119
Sr790
119
Finisher SR3030 and Booklet Finisher SR3020
120
Booklet Finisher SR3020 (Saddle Stitch)
121
Removing Punch Waste
122
Finisher SR3030 and Booklet Finisher SR3020
122
8 Remarks
125
Where to Put Your Machine
125
Machine Environment
125
Moving
127
Power Connection
128
Access to the Machine
129
Maintaining Your Machine
130
Cleaning the Exposure Glass
130
Cleaning the Exposure Glass Cover
131
Cleaning the Auto Document Feeder
131
Cleaning the Dustproof Glass
132
Index
133
Ricoh Aficio MP C3500 SPF Specifications (8 pages)
Aficio MP C2500/C3000 & C3500/C4500 Series Color Multifunctional Systems
Brand:
Ricoh
| Category:
All in One Printer
| Size: 0.99 MB
Advertisement
Related Products
Ricoh Aficio MP C3500
Ricoh Aficio MP C3501
Ricoh MP C3503
Ricoh Aficio MP C3500 EFI
Ricoh Aficio MP C3501G
Ricoh Aficio MP C3000 EFI
Ricoh Aficio MP C3300
Ricoh AFICIO MP C305SP
Ricoh AFICIO MPC300
Ricoh MPC3300
Ricoh Categories
All in One Printer
Printer
Digital Camera
Copier
Printer Accessories
More Ricoh Manuals
Login
Sign In
OR
Sign in with Facebook
Sign in with Google
Upload manual
Upload from disk
Upload from URL