Sign In
Upload
Manuals
Brands
Minolta Manuals
Copier
Di351
Minolta Di351 Manuals
Manuals and User Guides for Minolta Di351. We have
5
Minolta Di351 manuals available for free PDF download: Service Manual, Manual, Operator's Manual
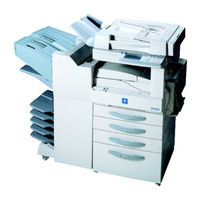
Minolta Di351 Service Manual (362 pages)
Brand:
Minolta
| Category:
Printer
| Size: 5 MB
Table of Contents
General
4
Service Manual
1
Table of Contents
4
1 Safety Information
5
Laser Safety Label
7
2 Specification
10
3 Precautions for Installation
13
Installation Site
13
Power Source
13
Grounding
13
4 Precautions for Use
14
To Ensure that the Copier Is Used in an Optimum Condition
14
Operating Environment
14
Power Requirements
14
Note
14
5 Handling of Consumables
15
6 Other Precautions
16
7 System Options
17
Mechanical/ Electrical
19
1 Cross-Sectional View
21
2 Copying Process
22
3 Drive System
24
5 Cpu Overrun Monitor Function
26
Processing Performed During Watchdog Function
26
6 Image Stabilization System
27
7 Imaging Cartridge (I/C)
28
I/C Drive Mechanism
29
Identification and Life of I/C
29
Grounding of the PC Drum
30
9 Drum Charging
31
Ozone Fan
32
10 Ir Section
33
Construction of the Exposure Section
34
Image Processing Flow
35
Scanner and 2Nd/3Rd Mirrors Carriage Moving Mechanism
36
Scanner Moving Mechanism
36
11 Original Size Detecting System
37
Original Size Detecting Operation
38
Original Size Detection
38
Original Size Detection Timing
39
12 Ph Section
40
Laser Emission Timing
41
13 Developing Unit
42
Sleeve/Magnet Roller
43
Developing Bias
43
ATDC Sensor Automatic Adjustment
44
Toner Replenishing Control
44
Toner Empty Control (T/C Recovery Mode)
45
Toner Bottle Home Position Detection Mechanism
46
Toner Bottle Vibration Mechanism
46
Main Hopper Toner Replenishing Mechanism
47
Sub Hopper Toner Replenishing Mechanism
48
Sub Hopper Toner Empty Detection Control
48
14 Paper Take-Up/Feed Section
49
St Drawer-In-Position Detection
49
St Drawer Paper Empty Detection
50
St Drawer Paper Near-Empty Detection
50
St Drawer Paper Lifting Plate
51
St Drawer Paper Size Detection
51
Paper Size Table According to Sensor/Switch Conditions
52
Drawer Paper Take-Up Mechanism
53
Paper Separating Mechanism
53
Drawer Paper Take-Up Control
54
Paper Take-Up Interval Control
54
Paper Take-Up Retry Control
54
Paper Take-Up Roll
54
Double Feed Paper Take-Up Control (35-Cpm Copier Only)
55
15 Manual Bypass Tray
56
Manual Bypass Paper Take-Up Control
56
Manual Bypass Paper Empty Detection
56
16 Synchronizing Rollers
57
Paper Dust Remover
57
Synchronizing Roller Drive Mechanism
58
17 Image Transfer and Paper Separation
59
PC Drum Paper Separator Fingers
59
18 Pc Drum Cleaning
60
19 Erase Lamp
61
20 Fusing Unit
62
Fusing Unit Drive Mechanism
63
Fusing Temperature Control
64
Temperature Control Table During Standby State and Copy Cycle
64
CPM Control
64
21 Paper Exit Unit
65
22 Other Units and Mechanisms
66
Memory Backup
66
Flash Memory
66
Interior Cooling Mechanism
67
I/C Cooling Mechanism
67
Fusing Section Cooling Mechanism
68
Power Supply Section Cooling Mechanism
69
Safety Precautions for Inspection and Service
72
Used Batteries Precautions
76
Precautions for Service
77
Handling of the Pc Drum
80
I Nstallation
84
Installation Imaging Unit
89
Unpacking
89
Imaging Unit Installation
89
When Removing the Imaging Unit
91
Installation the Copy Table/Copy Desk (Ct-2/CD-2M)
92
Unpacking the Copy Table
92
Unpacking the Copy Desk
92
Installing the Copy Table/Copy Desk
94
Adjusting the Adjusters
95
Attaching the Paper Feed Unit to the Copy Table
95
Attaching the Paper Feed Unit to the Copy Desk
96
Installation Js-100
97
Unpacking
97
Installing the Third Tray
97
Installation Js-201
100
Unpacking
100
Job Tray Installation
101
Copy Tray Set-Up
103
INSTALLATION OT-102 (Shift Tray)
104
Unpacking
104
Shift Tray Installation
105
Copy Tray Setting-Up
107
Installation Ad-15
108
Unpacking
108
Automatic Duplex Unit Setting-Up
108
Switching the Tension Strength of the Automatic
110
Duplex Unit Wire
110
Reference Gap Adjustment
110
Installation Af-9
113
Unpacking
113
Installing ADF Kit
113
Components
116
Installation
116
Checking for Zoom Adjust
118
Registration Adjustment
119
Checking for Registration
120
Registration Adjustment
121
Installation Afr-17
123
Unpacking
123
Installing
123
Checking and Adjusting the Skewed Feeding
125
Checking and Adjusting the Document Stop Position
126
In the 1-Side Original Mode
126
Checking the Document Stop Position
129
In the 2-Sided Original Mode
129
Adjusting the Document Stop Position
130
Checking and Adjusting the Document Stop Position in the Single Feed Copy Mode
131
Checking the Document Stop Position
131
Adjusting the Document Stop Position
132
Checking and Adjusting the Position of the Rear Guide Plate
133
Adjusting the Position of the Rear Guide Plate
134
Checking and Adjusting the Position of the Guide Plate in the Single Feed Copy Mode
134
Checking the Position of the Rear Guide Plate
134
Adjusting the Position of the Single Feed Copy
135
Checking the Position of the Single Feed Copy
135
Securing the Stoppers
135
Installation Fn-109 / Fn-110
136
Unpacking the Finisher
137
Installing the Accessories
140
Installing the Horizontal Transport Unit
141
Adjusting the Height and Tilt of the Finisher
142
Connecting the Hookup Cord
143
Installing the Tray and Protective Guide
143
Affixing the Labels
144
Checking the Hole-Punching Positions (FN-109 Only)
145
Adjusting the Hole-Punching Positions (FN-109 Only)
146
Removing the Rail
146
Installation Fn-504
147
Unpacking
147
Attaching the Finisher Set Pin
149
Attaching the Pipe
149
How to Remove the Pipe
150
Installing the Transport Unit
150
Adjusting the Height of the Finisher
151
Attaching the Labels
153
Connecting the Cable
153
Adjusting the Placement of the Punch Hole
154
Attaching the Holder for the Instruction Manual
156
Installation Pf-117
157
Unpacking
157
Stopper Installation
158
Support Adjustment
158
Cabinet Setup
159
Paper Size Setting
160
Attaching the Paper Size Label
161
Registration Adjustment
162
Installation Pf-118 / Pf-119
164
Unpacking
164
Installation to the Copier
165
Connecting the Paper Feed Unit to the Copier
166
Connecting the Paper Feed Unit to the Paper Feed Unit
168
Changing the Paper Size of the Paper Feed Unit
170
(Fixed Cassette)
172
Paper Size Input for the Fixed Cassette
173
Affixing the Labels
174
Adjust the Paper Reference Position
175
Precautions for Handling the Laser Equipment
182
Service Instructions
182
Parts Which Must Not be Touched
183
Maintenance Schedule
189
Optical Section
194
Image Transfer Section
205
Developing Section
207
Fusing Section
208
Control Panel Keys
244
Pwb Location
247
Utility Mode
249
Utility Mode Function Tree
249
Touch Panel Display
267
Security Mode
272
Settings in the Security Mode
273
Adjust Mode
275
Adjust Mode Function Tree
275
Settings in the Adjust Mode
276
Initial Mode
277
Troubleshooting
296
Troubleshooting
297
1 Introduction
299
Reading the Text
299
2 I/O Check
299
Electrical Components Check Procedure
299
I/O Check List
300
3 Paper Transport Failure
306
Paper Misfeed
306
Size Error
308
Misfeed Detection Sensor Layout
309
Types of Misfeed Detection and Detection Timings
310
1St Drawer Take-Up Misfeed
310
Manual Bypass Take-Up Misfeed
310
Separator/Fusing/Exit Misfeed
316
Paper Take-Up/Transport Misfeed (2Nd Fixed Paper Size Cassette
319
Paper Take-Up Misfeed
322
Duplex Turnover/Take-Up Misfeed
324
4 Malfunction
327
Detection Timing by Malfunction Code
327
C0010 I/C Motor Malfunction
327
C0045: Cooling Fan Motor Malfunction
327
C004C: Ozone Fan Motor Malfunction
327
C004E Power Unit Cooling Fan Motor Malfunction
327
C0070: Main Hopper Toner Replenishing Motor Malfunction
327
C0214: Abnormal Image Transfer Voltage
327
C0510: Abnormally Low Fusing Temperature
328
C0520 Abnormally High Fusing Temperature
328
C0650: Faulty Scanner Home Position Sensor
337
C0991: Lift 1 Ascent Motion Failure
339
C0995: LCC Transport Motor Failure to Turn
339
C0999: Lift 2 Ascent Motion Failure
339
C099D: LCC Communication Error
339
C0F32: Faulty ATDC Sensor C0F33: ATDC Adjustment Failure
342
C10XX to C13XX
343
The Copier Does Not Turn on
344
5 Image Failure
345
Image Failure Troubleshooting
345
Initial Checks
345
Troubleshooting Procedures Classified by Image Failure
346
Blank Copy
346
Black Copy
347
Low Image Density
348
Foggy Background
349
Black Streaks or Bands
350
Black Spots
351
Blank Streaks or Bands
352
Void Areas
353
Smear on Back
354
(10) Uneven Image Density
355
(11) Gradation Reproduction Failure
356
(12) Rough Image
357
(13) Periodically Uneven Image
358
6 Abort Codes
359
List of Abort Codes
359
Advertisement
Minolta Di351 Manual (342 pages)
Brand:
Minolta
| Category:
Copier
| Size: 5 MB
Table of Contents
Table of Contents
1
1 Introduction
9
We Want You to be a Satisfied Customer
9
Preserving the Environment
10
Takeback and Reutilisation
10
What Is Energy Star
10
Use of Recycled Paper
10
Guide to this Manual
11
How Is this Manual Structured
11
A Brief Explanation of the Conventions Used in this Manual
13
A Brief Explanation of Important Concepts and Symbols
15
2 Getting to Know Your Copier
17
System Overview
17
Copier Di251/Di351 (External)
17
Copier Di251/Di351 (Internal)
20
Optional Equipment
21
Original Cover OC-3
21
Automatic Document Feeder AF-9
22
Duplexing Document Feeder AFR-17
23
Finisher FN-109/FN-110
24
Option Tray JS-100
25
Mailbin Finisher FN-504
26
Shift Tray OT-100 (Only for the Di251)
27
Sorter JS-201
27
Duplex Unit AD-15
28
Paper Drawer PF-118/PF-119
29
Large Capacity Cassette PF-117
30
Copy Table
31
Paper Feed Cabinet
31
Memory Expansion Module
31
Printer Controller Pi3502
31
The Safe Use of Your Copier
32
Laser Safety
37
Internal Laser Radiation
37
Noise Emission
38
Safety Label
39
Data on the Manufacturer's Name Plate
42
Transporting the Copier
43
Setting up the Copier
43
Environmental Requirements
43
Installation Site
43
Space Requirements for the Copier
44
Storing Supplies
44
Connecting the Copier
45
Switching the Copier on and off
45
Switching the Copier on
45
Switching the Copier off
46
Control Panel Keys and Indicators
47
Overview
47
The Touch Screen
50
Operating the Touch Screen
50
Structure of Touch Screen Menus
51
Adding Paper
53
Filling the 1St Drawer
54
Filling the 2Nd Drawer
56
Filling the PF-119 Paper Drawer (Optional)
58
Filling the PF-118 Paper Drawer (Optional)
60
Filling the PF-117 Large Capacity Cassette (Optional)
62
Placing Copy Paper Onto the Single Feed Tray
64
Replacing the Toner Bottle
65
Replacing the Imaging Unit
68
Replacing the Staple Cartridge
71
Finisher FN-109
72
Finisher FN-110
74
Mailbin Finisher FN-504
76
Shutting down the Copier
78
Please Observe These Precautions
79
Proper Use of Your Copier
79
3 Initial Steps
81
Step-By-Step Instructions on Copying Your Documents
81
Entering the Access Number
84
Checking Copier Settings
85
Entering the Number of Copies
85
Starting the Copy Cycle
86
Interrupting the Copy Cycle
86
Stopping the Copy Cycle
87
Resetting Copier Settings
87
Using the Document Feeders
88
Copying Originals Using the Automatic Document Feeder
89
Processing Originals Using the Duplexing Document Feeder
90
Feeding Originals of Different Sizes
92
Loading 2In1 Originals for Page Separation
94
Placing Originals on the Glass
95
Paper Originals and Transparent Originals
95
Books and Bound Originals
96
Using Memory Recall
97
Using the Job List
98
Viewing the Job List
98
Submitting a Print Job
99
Deleting a Print Job from the Job List
100
Other Functions
101
Automatic Drawer Switching
101
Automatic Reset of Copier Settings
101
Energy Save Mode
101
Auto Shut off
101
Sleep Mode
101
Automatic Shut-Off for the Background LCD Light
102
Auto Copy Start
102
4 Customizing Your Copy
103
Basic Settings
103
Enabling Auto Paper Select Mode
104
Selecting a Paper Drawer Manually
105
Specifying the Paper Type for the 1St Drawer
106
Defining a Custom Paper Size for the 1St Drawer
108
Storing Custom Paper Sizes for the 1St Drawer
110
Loading a Saved Paper Size for the 1St Drawer
113
Specifying the Paper Type for the Single Feed Tray
115
Specifying the Paper Size for the Single Feed Tray
116
Storing a Custom Paper Size for the Single Feed Tray
117
Single Feed Tray
117
Loading a Saved Paper Size for the Single Feed Tray
119
Enabling Auto Size
120
Selecting a Fixed Zoom Factor
121
Selecting a Zoom Factor Using the Arrow Keys
122
Specifying a Proportional Zoom Factor
123
Specifying an Unproportional Zoom Factor
125
Saving Proportional Zoom Factors
127
Loading Saved Zoom Factors
129
Non-Sorted Copies
130
Sort/Group Copies
131
Stapling Copies
133
Punching Copies
142
Original>Copy Functions
144
Selecting a Copy Mode
147
Specifying the Alignment of the Original
149
Copying Originals with File Margins
150
Copying Books
152
Copying 2In1 Originals
157
Density Settings
159
Toggling Auto Exposure
160
Making Copies Lighter or Darker
161
Changing the Density Mode
162
Auxiliary Functions
163
Inserting a Cover Sheet
164
Inserting Separator Pages
167
OHP Interleaving
170
Adding a Margin to Your Copy
173
Erasing a Margin or Frame Around Your Copy
175
Duplicating Images Onto a Copy
177
Printing Background Record Numbers
181
Separate Scan
183
5 Combining Functions
185
Original: 1-Sided, Copy: 1-Sided
187
Original: 1-Sided, Copy: 2-Sided
190
Original: 2-Sided (File Margin Left), Copy: 1-Sided
193
Original: 2-Sided (File Margin Left), Copy: 2-Sided
196
Original: 2-Sided (File Margin Above), Copy: 1-Sided
199
Original: 2-Sided (File Margin Above), Copy: 2-Sided
202
6 Utility
205
Customizing User's Choice Settings
206
Configuring User's Choice Settings
207
User's Choice [1/6]
209
User's Choice [2/6]
210
User's Choice [3/6]
212
User's Choice [4/6]
214
User's Choice [5/6]
216
User's Choice [6/6]
218
Counter
219
Job Recall
220
Recalling a Stored Copy Job Program
220
Saving a Copy Job Program
222
Checking the Settings of a Copy Job Program
224
Deleting a Stored Copy Job Program
226
User Management
228
Confirmation Beep
228
Alarm Beep
230
The Drying Procedure
231
Adding Toner
232
Cleaning the Control Panel
233
Using Administrative Management Functions
234
Limiting the Number of Copies
235
Locking Auto Shut off Mode
237
Turning on the Copy Counter
239
Calling up Copy Track Data
241
Setting up Administrator Numbers
243
Setting up Access Numbers
245
Setting Copy Limits for Access Numbers
247
Printing Copy Track Data
249
Resetting Individual Access Numbers
250
Resetting All Access Numbers
251
Network Configuration
252
On Line
253
Test Print
253
7 Troubleshooting
255
If You Are Not Satisfied with Your Copy
255
If a Message Appears on the Touch Screen
257
If an Icon Appears on the Touch Screen
258
How to Clear a Paper Misfeed
259
Main Unit
260
Duplex Unit
266
Duplexing Document Feeder AFR-9
268
Automatic Document Feeder AFR-7
270
Mailbin Finisher FN-504
280
Shift Tray/Sorter JS-201
284
How to Release a Staple Jam
287
Mailbin Finisher FN-504
292
How to Resolve a Paper Size Error
295
These Functions Cannot be Combined
298
Basic Settings
299
Orig.>Copy Settings
302
Density
305
Auxiliary Functions
306
Other
308
8 Appendix
309
Care of the Unit
309
Cleaning
309
Cleaning the Touch Screen
311
Cleaning the Automatic Document Feeder
313
Copier Maintenance
314
Specifications
315
Copier Di251/Di351
315
Duplexing Document Feeder AFR-17
317
Automatic Document Feeder AF-9
318
Large Capacity Cassette PF-117
318
Paper Tray PF-118/PF-119
319
Duplex Unit AD-15
319
Option Tray JS-100
323
Mailbin Finisher FN-504
324
Sorter JS-201
326
Shift Tray OT-100 (Only for the Di251)
327
Paper Size Tables
328
Metric
328
Inch
328
Zoom Factor Tables
329
Metric Areas
329
Inch Areas
330
CE Label (Declaration of Conformity)
331
Certifications on the Manufacturer's Name Plate
332
Directory of Abbreviations
333
Index
334
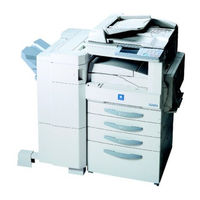
Minolta Di351 Service Manual (196 pages)
Brand:
Minolta
| Category:
Printer
| Size: 3 MB
Table of Contents
Dis/Reassembly, Adjustment
14
Service Manual
1
Safety Precautions for Inspection and Service
2
Other Precautions
5
Used Batteries Precautions
6
Handling of the Pc Drum
10
Table of Contents
14
1 Service Instructions
16
Identification of Fuses and Circuit Breakers
16
Precautions for Handling the Laser Equipment
16
Parts Which Must Not be Touched
17
Other Screws
17
Red Painted Screws
17
Variable Resistors on Board
17
2 Disassembly/Reassembly
18
Doors, Covers, and Exterior Parts: Identification and Removal Procedures
18
Removal of Circuit Boards and Other Electrical Compoments
21
Maintenance Schedule
23
Paper Take-Up/Transport Section
25
Removal of the Paper Dust Remover Assy
25
Removal of the Paper Take-Up Roll
25
Cleaning of the Paper Dust Remover Assy
26
Removal of the Synchronizing Roller Gear and Synchronizing Roller Bushing
26
Cleaning of the Side Cover
27
Optical Section
28
Removal of the PH Unit
28
Cleaning of the Scanner Rails/Bushings
31
Removal of the CCD Unit
31
Cleaning of the Lens
32
Cleaning of the Mirrors
32
Cleaning of the Original Glass
32
Removal of the Scanner
33
Removal of the Scanner Drive Cables
34
Winding of the Scanner Drive Cables
35
Image Transfer Section
39
Cleaning of the Comb Electrode
39
Removal of the Image Transfer Roller Assy
39
Cleaning of the Pre-Image Transfer Guide Plate
40
Removal of the Ozone Filter
40
Developing Section
41
Removal of the Imaging Cartridge
41
Fusing Section
42
Removal of the Fusing Unit
42
Removal of the Fusing Roller Heater Lamp, Right Fusing Roller, and Left Fusing Roller
43
Remove the Fusing Roller Thermistor, Fusing Roller Hearter Lamp Fuse, and Fusing Roller Thermostat
46
3 Adjustment
47
Adjustment Jigs and Tools Used
47
Adjustment Requirement List
47
Adjustment Items List
48
Adjustment of Scanner Motor Timing Belt Tension
49
Electrical/Image Adjustment
50
Touch Panel Adj
50
Original Size Detecting Sensor Adjustment (F7-1
51
Loop Adjustment
52
Edge Erase
53
Registration (CD) (Printer
56
Registration (FD) (Printer
58
Registration (IR
60
Zoom Adjust (IR
64
IR-Erasure Width
68
Book Center Erase
69
Focus-Positioning of the Scanner and 2Nd/3Rd Mirrors Carriage
70
4 Miscellaneous
72
Installation of the Key Counter Socket (Option
72
Remounting the Eeprom (Ic3A
73
Adjust Data Input
74
Switches on Pwbs, Tech. Rep. Settings
76
1 Control Panel Keys and Touch Panel
78
Control Panel Keys
78
Explanation of the Touch Panel
79
Basis Screen
79
Warning Screens
80
2 FUNCTION of SWITCHES and OTHER PARTS on Pwbs
81
PWB Location
81
PWB-A (Master Board
81
PWB-F (Control Panel
82
3 Utility Mode
83
Utility Mode Selection Screen
83
Utility Mode Function Tree
83
Settings in the Utility Mode
84
User's Choice Mode
84
User Management
90
Admin. Management
91
4 Tech. Rep. Mode
93
Tech. Rep. Mode Menu Screen
93
Tech. Rep. Mode Function Setting Procedure
93
Tech. Rep. Mode Menu Function Tree
94
Setting in the Tech. Rep. Mode
95
Tech. Rep. Mode
95
Administrator # Input
99
Counter
99
Function
102
I/O Check
103
Movement Check
103
RD Mode
104
(10) Level History
105
ROM Version
105
5 Security Mode
106
Security Mode Menu Screen
106
Security Mode Setting Procedure
106
Settings in the Security Mode
107
6 Adjust Mode
109
Adjust Mode Menu Screen
109
Adjust Mode Setting Procedure
109
Adjust Mode Function Tree
109
Settings in the Adjust Mode
110
Printer
110
7 Initial Mode
111
Initial Mode Menu Screen
111
Initial Mode Setting Procedure
111
Settings in the Initial Mode
112
Data/Conditions Cleared by Reset Switches
113
User's Choice Function Tree
114
Settings in the Utility Mode
115
9 Soft Switch Set
116
Soft Switch Initial Value Table
116
Set Contents of Soft Switches
117
Troubleshooting
131
1 Introduction
133
Reading the Text
133
2 I/O Check
133
Electrical Components Check Procedure
133
I/O Check List
134
3 Paper Transport Failure
140
Paper Misfeed
140
Size Error
142
Misfeed Detection Sensor Layout
143
Types of Misfeed Detection and Detection Timings
144
1St Drawer Take-Up Misfeed
144
Manual Bypass Take-Up Misfeed
144
Separator/Fusing/Exit Misfeed
150
Paper Take-Up/Transport Misfeed (2Nd Fixed Paper Size Cassette
152
Paper Take-Up Misfeed
155
Duplex Turnover/Take-Up Misfeed
158
4 Malfunction
161
Detection Timing by Malfunction Code
161
C0010 I/C Motor Malfunction
161
C0045: Cooling Fan Motor Malfunction
161
C004C: Ozone Fan Motor Malfunction
161
C004E Power Unit Cooling Fan Motor Malfunction
161
C0070: Main Hopper Toner Replenishing Motor Malfunction
161
C0510 Abnormally Low Fusing Temperature
162
C0520 Abnormally High Fusing Temperature
162
C0650 Faulty Scanner Home Position Sensor
162
C0651: Faulty Scanner Home Position Sensor 2
162
C0991: Lift 1 Ascent Motion Failure
173
C0995: LCC Transport Motor Failure to Turn
173
C0999: Lift 2 Ascent Motion Failure
173
C099D: LCC Communication Error
173
C0F32: Faulty ATDC Sensor C0F33: ATDC Adjustment Failure
176
C10XX to C13XX
177
The Copier Does Not Turn on
178
5 Image Failure
179
Image Failure Troubleshooting
179
Initial Checks
179
Troubleshooting Procedures Classified by Image Failure
180
Blank Copy
180
Black Copy
181
Low Image Density
182
Foggy Background
183
Black Streaks or Bands
184
Black Spots
185
Blank Streaks or Bands
186
Void Areas
187
Smear on Back
188
(10) Uneven Image Density
189
(11) Gradation Reproduction Failure
190
(12) Rough Image
191
(13) Periodically Uneven Image
192
6 Abort Codes
193
List of Abort Codes
193
Advertisement
Minolta Di351 Service Manual (199 pages)
Brand:
Minolta
| Category:
All in One Printer
| Size: 5 MB
Table of Contents
Table of Contents
78
Other Precautions
5
1 Control Panel Keys and Touch Panel
80
Control Panel Keys
80
Explanation of the Touch Panel
81
Basis Screen
81
Warning Screens
82
2 FUNCTION of SWITCHES and OTHER PARTS on Pwbs
83
PWB Location
83
PWB-A (Master Board
83
PWB-F (Control Panel
84
3 Utility Mode
85
Utility Mode Selection Screen
85
Utility Mode Function Tree
85
Settings in the Utility Mode
86
User's Choice Mode
87
Admin. Management
93
4 Tech. Rep. Mode
95
Tech. Rep. Mode Menu Screen
95
Tech. Rep. Mode Function Setting Procedure
95
Touch Panel Display
103
Function
104
(10) Level History
107
ROM Version
107
5 Security Mode
109
Settings in the Security Mode
109
6 Adjust Mode
111
Adjust Mode Menu Screen
111
Adjust Mode Setting Procedure
111
Adjust Mode Function Tree
111
Settings in the Adjust Mode
112
Printer
112
7 Initial Mode
113
Initial Mode Menu Screen
113
Initial Mode Setting Procedure
113
Troubleshooting
132
Table of Contents
134
1 Introduction
136
Reading the Text
136
2 I/O Check
136
Electrical Components Check Procedure
136
I/O Check List
137
3 Paper Transport Failure
143
Paper Misfeed
143
Size Error
145
Misfeed Detection Sensor Layout
146
Types of Misfeed Detection and Detection Timings
147
1St Drawer Take-Up Misfeed
147
Manual Bypass Take-Up Misfeed
147
Separator/Fusing/Exit Misfeed
153
Paper Take-Up Misfeed
155
Paper Take-Up/Transport Misfeed (2Nd Fixed Paper Size Cassette
155
Duplex Turnover/Take-Up Misfeed
161
4 Malfunction
164
Detection Timing by Malfunction Code
164
Troubleshooting Procedures by Malfunction Code
168
C0010: I/C Motor Malfunction
168
C0045: Cooling Fan Motor Malfunction
168
C004C: Ozone Fan Motor Malfunction
168
C004E: Power Unit Cooling Fan Motor Malfunction
168
C0070: Main Hopper Toner Replenishing Motor Malfunction
168
C0214: Abnormal Image Transfer Voltage
171
C0510: Abnormally Low Fusing Temperature
172
C0520: Abnormally High Fusing Temperature
172
C0650: Faulty Scanner Home Position Sensor
174
C0651: Faulty Scanner Home Position Sensor 2
174
C0991: Lift 1 Ascent Motion Failure
176
C0995: LCC Transport Motor Failure to Turn
176
C0999: Lift 2 Ascent Motion Failure
176
C099D: LCC Communication Error
176
C0F32: Faulty ATDC Sensor C0F33: ATDC Adjustment Failure
179
C10XX to C13XX
180
The Copier Does Not Turn on
181
5 Image Failure
182
Image Failure Troubleshooting
182
Initial Checks
182
Troubleshooting Procedures Classified by Image Failure
183
Blank Copy
183
Black Copy
184
Low Image Density
185
Foggy Background
186
Black Streaks or Bands
187
Black Spots
188
Blank Streaks or Bands
189
Void Areas
190
Smear on Back
191
(10) Uneven Image Density
192
(11) Gradation Reproduction Failure
193
(12) Rough Image
194
(13) Periodically Uneven Image
195
6 Abort Codes
196
List of Abort Codes
196
Minolta Di351 Operator's Manual (233 pages)
Brand:
Minolta
| Category:
Copier
| Size: 5 MB
Advertisement
Related Products
Minolta Di3510f
Minolta Di150f
Minolta Di151
Minolta Di181
Minolta Di251
Minolta Di470
Minolta Di650
Minolta Di2510f
Minolta Di1611
Minolta Di 1610
Minolta Categories
Digital Camera
Film Camera
Printer
Copier
All in One Printer
More Minolta Manuals
Login
Sign In
OR
Sign in with Facebook
Sign in with Google
Upload manual
Upload from disk
Upload from URL