IDEC SmartAXIS Touch FT1A Series Manuals
Manuals and User Guides for IDEC SmartAXIS Touch FT1A Series. We have 4 IDEC SmartAXIS Touch FT1A Series manuals available for free PDF download: User Manual, Instruction Sheet
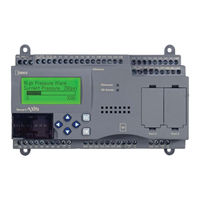
IDEC SmartAXIS Touch FT1A Series User Manual (1232 pages)
Brand: IDEC
|
Category: Controller
|
Size: 50 MB
Table of Contents
-
-
-
-
Stop Input144
-
Reset Input145
-
Catch Input168
-
Interrupt Input170
-
Input Filter175
-
Analog Input177
-
Timer Interrupt180
-
Analog Output182
-
Analog Cartridge184
-
Ladder Monitor193
-
Clock Function197
-
Remote Host List202
-
Chapter 4 Screen
205-
Screen Overview205
-
Screen Types205
-
Screen Size205
-
-
-
Creating Screens206
-
Opening Screens206
-
Saving Screens208
-
Closing Screens210
-
-
Deleting Screens214
-
Reusing Screens216
-
-
-
Base Screen218
-
Popup Screen226
-
-
-
Overview241
-
Drawing Objects242
-
Part Types243
-
Buttons243
-
Lamps243
-
Data Displays243
-
Charts243
-
Commands244
-
-
-
-
-
Bit Button273
-
Word Button289
-
Key Button321
-
Multi-Button340
-
Keypad362
-
Selector Switch366
-
Potentiometer381
-
-
Chapter 8 Lamps
391 -
-
Numerical Input417
-
Character Input439
-
Picture Display456
-
Message Display469
-
Calendar545
-
-
-
Bar Chart559
-
Line Chart577
-
Pie Chart597
-
Meter606
-
-
-
Script Command641
-
Multi-Command647
-
Timer662
-
-
Overview721
-
-
-
Overview755
-
Using the Data779
-
-
-
Overview793
-
Using the Data809
-
-
-
Overview815
-
Using the Data825
-
-
-
Overview833
-
-
-
-
Script Manager877
-
Script Editor878
-
Global Script882
-
-
Format List884
-
-
-
Bit Functions904
-
Word Functions905
-
Important Notes921
-
-
Overview925
-
Password Input960
-
-
-
-
Overview968
-
-
-
Downloading1047
-
Uploading1054
-
Clear1058
-
Formatting1062
-
System Information1063
-
-
-
Device Monitor1085
-
Ladder Monitor1089
-
-
USB Flash Drives1099
-
USB Autorun Function1116
-
-
-
Bit Devices1127
-
HMI Device Addresses1133
-
-
Word Devices1136
-
-
-
Maintenance Screen1143
-
System Mode Overview1145
-
Settings1147
-
Initial Setting1147
-
Clock Setting1151
-
Run1151
-
Top Page1152
-
-
-
-
Touch1153
-
Packing Contents1153
-
Type Number1154
-
Part Names1155
-
External Interfaces1157
-
Specifications1166
-
Dimensions1168
-
Installation1170
-
Wiring1175
-
-
Analog Cartridge1181
-
Packing Contents1181
-
Type Number1181
-
Part Names1181
-
Specifications1182
-
Dimensions1184
-
Installation1184
-
Wiring1185
-
-
-
-
Error Messages1187
-
Error Information1189
-
General Error Codes1189
-
-
Handling Problems1192
-
Advertisement
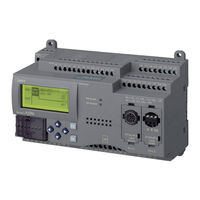
IDEC SmartAXIS Touch FT1A Series User Manual (393 pages)
Brand: IDEC
|
Category: Controller
|
Size: 11 MB
Table of Contents
-
Hapter
9 -
-
Save Project81
-
Exit Windldr86
-
-
Catch Input120
-
Interrupt Input122
-
Input Filter126
-
Analog Input127
-
Timer Interrupt129
-
Memory Cartridge137
-
SD Memory Card140
-
Message Settings148
-
Clock Function157
-
Network Settings160
-
Remote Host List163
-
HMI Function
165-
Basic Operations167
-
Device Addresses
193 -
-
Remote I/O
293-
Remote I/O Slave298
-
Scripts
305 -
Troubleshooting
341
-
Appendix
367-
System Software367
-
Cables374
-
Type List381
-
Fonts383
-

IDEC SmartAXIS Touch FT1A Series User Manual (393 pages)
Table of Contents
-
Hap Ter7
-
Features13
-
Remote I/O19
-
Dimensions50
-
Power Supply68
-
Save Project85
-
Exit Windldr90
-
Catch Input124
-
Interrupt Input126
-
Input Filter130
-
Analog Input131
-
Timer Interrupt133
-
Memory Cartridge141
-
SD Memory Card144
-
Message Settings152
-
Clock Function161
-
Network Settings164
-
Remote Host List167
-
Basic Operations171
-
Device Addresses197
-
FB List221
-
Remote I/O Slave302
-
Scripts309
-
Important Notes343
-
Troubleshooting345
-
P P en DI X371
-
System Software371
-
Cables375
Advertisement
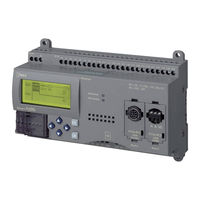
IDEC SmartAXIS Touch FT1A Series Instruction Sheet (118 pages)
Brand: IDEC
|
Category: Controller
|
Size: 3 MB
Table of Contents
-
日本語
7 -
English
45-
1 Packing
46 -
3 Part Names
48 -
6 Dimensions
63 -
8 Wiring
70
-
-
汉语
83-
1 包装目录
84 -
2 型号构成
85 -
3 各部分名称
86 -
4 外部接口
88-
串行接口 (Port88
-
输入输出端子89
-
输入端子规格91
-
输出端子规格95
-
-
6 外形尺寸
101-
有关设置场所的注意事项103
-
有关环境温度的注意事项103
-
安装方法105
-
安装方位的限制事项106
-
盒的安装方法107
-
电源端子上的配线108
-
与外部设备连接时的注意事项109
-
连接计算机时的注意事项109
-
-
10 维护和检查
112
-
Advertisement