Sign In
Upload
Manuals
Brands
HP Manuals
Switch
Procurve Series 4100GL
HP Procurve Series 4100GL Manuals
Manuals and User Guides for HP Procurve Series 4100GL. We have
6
HP Procurve Series 4100GL manuals available for free PDF download: Management And Configuration Manual, Function Manual, Manual, Installation And Getting Started Manual, Operating
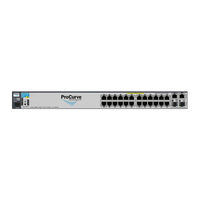
HP Procurve Series 4100GL Management And Configuration Manual (504 pages)
Brand:
HP
| Category:
Switch
| Size: 6.17 MB
Table of Contents
5
Table of Contents
11
11 Port-Based Virtual Lans (Vlans) and Gvrp
20
Conventions
20
Command Syntax Statements
21
Command Prompts
21
Screen Simulations
20
Getting Started
20
Introduction
22
Related Publications
23
Getting Documentation From the Web
24
Sources for More Information
25
Need Only a Quick Start
25
To Set Up and Install the Switch in Your Network
27
1 Selecting A Management Interface
27
Contents
28
Overview
28
Understanding Management Interfaces
28
1 Selecting a Management Interface
29
Advantages of Using the Menu Interface
30
Advantages of Using the CLI
31
Advantages of Using the HP Web Browser Interface
32
Advantages of Using HP Toptools for Hubs & Switches
35
2 Using The Menu Interface
35
Contents
36
Overview
36
2 Using the Menu Interface
37
Starting and Ending a Menu Session
38
How to Start a Menu Interface Session
39
How to End a Menu Session and Exit From the Console
41
Main Menu Features
43
Screen Structure and Navigation
46
Rebooting the Switch
48
Menu Features List
49
Where to Go From Here
51
3 Using The Command Line Interface (Cli)
51
Contents
52
Accessing the CLI
52
Overview
52
Using the CLI
53
Privilege Levels at Logon
54
Privilege Level Operation
54
Operator Privileges
55
Manager Privileges
57
How to Move Between Levels
58
Listing Commands and Command Options
58
Listing Commands Available at Any Privilege Level
60
Command Option Displays
61
Displaying CLI "Help
63
Configuration Commands and the Context Configuration Modes
52
3 Using the Command Line Interface (CLI)
66
CLI Control and Editing
67
4 Using The Hp Web Browser Interface
67
Contents
68
Overview
68
4 Using the HP Web Browser Interface
69
General Features
70
Starting an HP Web Browser Interface Session with the Switch
70
Using a Standalone Web Browser in a PC or UNIX Workstation
71
Using HP Toptools for Hubs & Switches
73
Tasks for Your First HP Web Browser Interface Session
73
Viewing the "First Time Install" Window
74
Creating Usernames and Passwords in the Browser Interface
76
Using the Passwords
76
Using the User Names
77
If You Lose a Password
77
Online Help for the HP Web Browser Interface
78
Support/Mgmt Urls Feature
79
Support URL
79
Help and the Management Server URL
81
Status Reporting Features
81
The Overview Window
82
The Port Utilization and Status Displays
82
Port Utilization
84
Port Status
85
The Alert Log
85
Sorting the Alert Log Entries
86
Alert Types
87
Viewing Detail Views of Alert Log Entries
88
The Status Bar
89
Setting Fault Detection Policy
91
5 Switch Memory And Configuration
91
Contents
91
5 Switch Memory and Configuration
92
Overview
92
Overview of Configuration File Management
94
Configuration Changes
94
Using the CLI to Implement Configuration Changes
98
Using the Menu and Web Browser Interfaces to Implement Configuration Changes
99
Using the Menu Interface to Implement Configuration Changes
100
Rebooting From the Menu Interface
101
Using the Web Browser Interface to Implement Configuration
101
Changes
102
Using Primary and Secondary Flash Image Options
102
Displaying the Current Flash Image Data
104
OS Downloads
105
Local OS Replacement and Removal
107
Rebooting the Switch
109
Operating Notes
111
6 Interface Access, System Information, And Friendly Port Names
111
Contents
112
Overview
112
6 Interface Access, System Information, and Friendly Port Names
113
Inbound Telnet
114
Menu: Modifying the Interface Access
115
CLI: Modifying the Interface Access
118
Denying Interface Access By Terminating Remote Management
118
Sessions
119
System Information
120
Menu: Viewing and Configuring System Information
121
CLI: Viewing and Configuring System Information
124
Web: Configuring System Parameters
125
Using Friendly (Optional) Port Names
125
Configuring and Operating Rules for Friendly Port Names
126
Configuring Friendly Port Names
128
Displaying Friendly Port Names with Other Port Data
131
7 Configuring IP Addressing
131
Contents
132
Overview
132
7 Configuring IP Addressing
133
IP Configuration
134
Just Want a Quick Start with IP Addressing
134
IP Addressing with Multiple Vlans
135
IP Addressing in a Stacking Environment
135
Menu: Configuring IP Address, Gateway, and Time-To-Live (TTL)
137
CLI: Configuring IP Address, Gateway, and Time-To-Live (TTL)
139
Web: Configuring IP Addressing
139
How IP Addressing Affects Switch Operation
140
Dhcp/Bootp Operation
143
Network Preparations for Configuring Dhcp/Bootp
144
File Downloads
144
IP Preserve: Retaining VLAN-1 IP Addressing Across Configuration
148
Globally Assigned IP Network Addresses
149
8 Time Protocols
149
Contents
149
8 Time Protocols
150
Overview
150
Timep Time Synchronization
150
SNTP Time Synchronization
151
Overview: Selecting a Time Synchronization Protocol or Turning Off Time Protocol Operation
151
General Steps for Running a Time Protocol On the Switch
152
Disabling Time Synchronization
152
SNTP: Viewing, Selecting, and Configuring
153
Menu: Viewing and Configuring SNTP
156
CLI: Viewing and Configuring SNTP
156
Viewing the Current SNTP Configuration
157
Configuring (Enabling or Disabling) the SNTP Mode
161
Timep: Viewing, Selecting, and Configuring
162
Menu: Viewing and Configuring Timep
164
CLI: Viewing and Configuring Timep
164
Viewing the Current Timep Configuration
165
Configuring (Enabling or Disabling) the Timep Mode
168
SNTP Unicast Time Polling with Multiple SNTP Servers
169
Address Prioritization
169
Adding and Deleting SNTP Server Addresses
170
Menu Interface Operation with Multiple SNTP Server Addresses Configured
170
Menu Interface Operation with Multiple SNTP Server Addresses
170
Configured
171
SNTP Messages in the Event Log
173
9 Optimizing Traffic Flow With Port Controls, Port Trunking, And Port-Based Priority
173
Contents
174
Overview
174
Viewing Port Status and Configuring Port Parameters
177
Menu: Viewing Port Status and Configuring Port Parameters
178
CLI: Viewing Port Status and Configuring Port Parameters
181
Web: Viewing Port Status and Configuring Port Parameters
182
Port Trunking
183
Series 4100GL Switches Port Trunk Features and Operation
184
Trunk Configuration Methods
188
Menu: Viewing and Configuring a Static Trunk Group
190
CLI: Viewing and Configuring a Static or Dynamic Port Trunk Group
190
Using the CLI to View Port Trunks
190
CLI: Viewing and Configuring a Static or Dynamic Port
190
Trunk Group
193
Using the CLI to Configure a Static or Dynamic Trunk Group
196
Web: Viewing Existing Port Trunk Groups
197
Trunk Group Operation Using LACP
199
Default Port Operation
200
LACP Notes and Restrictions
202
Trunk Group Operation Using the "Trunk" Option
202
Trunk Operation Using the "FEC" Option
203
How the Switch Lists Trunk Data
203
Outbound Traffic Distribution Across Trunked Links
205
Configuring Port-Based Priority for Incoming Packets
205
The Role of 802.1Q VLAN Tagging
206
Outbound Port Queues and Packet Priority Settings
207
Operating Rules for Port-Based Priority On Series 4100GL Switches
208
Configuring and Viewing Port-Based Priority
209
Messages Related to Prioritization
209
Troubleshooting Prioritization
211
10 Configuring For Network Management Applications
211
Contents
212
Using SNMP Tools to Manage the Switch
212
Overview
213
SNMP Management Features
213
Configuring for SNMP Access to the Switch
214
SNMP Communities
214
Menu: Viewing and Configuring SNMP Communities
216
CLI: Viewing and Configuring Community Names
218
Trap Receivers and Authentication Traps
222
Advanced Management: RMON
212
10 Configuring for Network Management Applications
223
Cdp
223
Introduction
224
CDP Terminology
225
General CDP Operation
225
Outgoing Packets
226
Incoming CDP Packets
229
Configuring CDP On the Switch
230
Viewing the Switch's Current CDP Configuration
230
Viewing the Switch's Current CDP Neighbors Table
231
Clearing (Resetting) the CDP Neighbors Table
232
Configuring CDP Operation
234
Effect of Spanning Tree (STP) On CDP Packet Transmission
235
How the Switch Selects the IP Address to Include in Outbound CDP Packets
236
CDP Neighbor Data and MIB Objects
238
Operating Notes
241
11 Port-Based Virtual Lans (Vlans) And Gvrp
242
Overview
243
Port-Based Virtual Lans (Static Vlans)
246
Overview of Using Vlans
246
VLAN Support and the Default VLAN
246
The Primary VLAN
247
Per-Port Static VLAN Configuration Options
249
General Steps for Using Vlans
249
Notes On Using Vlans
250
Menu: Configuring VLAN Parameters
250
To Change VLAN Support Settings
252
Adding or Editing VLAN Names
253
Adding or Changing a VLAN Port Assignment
255
CLI: Configuring VLAN Parameters
261
Web: Viewing and Configuring VLAN Parameters
262
VLAN Tagging Information
266
The Secure Management VLAN
267
Preparation
268
Configuration
269
Operating Notes for Management Vlans
270
Effect of Vlans On Other Switch Features
270
Spanning Tree Operation with Vlans
270
IP Interfaces
271
VLAN MAC Addresses
271
Port Trunks
271
Port Monitoring
271
VLAN Restrictions
273
Gvrp
274
General Operation
276
Per-Port Options for Handling GVRP "Unknown Vlans
278
Per-Port Options for Dynamic VLAN Advertising and Joining
280
GVRP and VLAN Access Control
280
Port-Leave From a Dynamic VLAN
281
Planning for GVRP Operation
281
Configuring GVRP On a Switch
282
Menu: Viewing and Configuring GVRP
283
CLI: Viewing and Configuring GVRP
286
Web: Viewing and Configuring GVRP
286
GVRP Operating Notes
289
12 Multimedia Traffic Control With IP Multicast (Igmp)
289
Contents
289
12 Multimedia Traffic Control with IP Multicast (IGMP)
290
Overview
291
General Operation and Features
292
IGMP Terms
293
IGMP Operating Features
293
Basic Operation
293
Enhancements
294
CLI: Configuring and Displaying IGMP
298
Web: Enabling or Disabling IGMP
299
How IGMP Operates
300
Operation with or Without IP Addressing
301
Automatic Fast-Leave IGMP
302
Forced Fast-Leave IGMP
303
Configuration Options for Forced Fast-Leave
303
Listing the Forced Fast-Leave Configuration
305
Configuring Per-Port Forced Fast-Leave IGMP
306
Using the Switch As Querier
306
Querier Operation
307
The Switch Excludes Well-Known or Reserved Multicast Addresses From IP Multicast Filtering
308
Number of IP Multicast Addresses Allowed
Advertisement
HP Procurve Series 4100GL Management And Configuration Manual (547 pages)
Brand:
HP
| Category:
Switch
| Size: 7.29 MB
Table of Contents
5
Table of Contents
19
Contents
20
About the Feature Descriptions
20
Introduction
20
1 Getting Started
21
Conventions
21
Command Syntax Statements
21
Command Prompts
22
Screen Simulations
22
Port Identity Convention for Examples
22
Related Publications
24
Getting Documentation From the Web
25
Sources for More Information
26
Need Only a Quick Start
27
Contents
28
Overview
28
Selecting a Management Interface
28
Understanding Management Interfaces
29
Advantages of Using the Menu Interface
30
Advantages of Using the CLI
31
Advantages of Using the HP Web Browser Interface
32
Advantages of Using HP Toptools for Hubs & Switches
35
Contents
36
Overview
36
3 Using the Menu Interface
37
Starting and Ending a Menu Session
38
How to Start a Menu Interface Session
39
How to End a Menu Session and Exit From the Console
41
Main Menu Features
43
Screen Structure and Navigation
46
Rebooting the Switch
48
Menu Features List
49
Where to Go From Here
51
Contents
52
Accessing the CLI
52
Overview
52
Using the CLI
53
Privilege Levels at Logon
54
Privilege Level Operation
54
Operator Privileges
55
Manager Privileges
57
How to Move Between Levels
58
Listing Commands and Command Options
58
Listing Commands Available at Any Privilege Level
60
Command Option Displays
61
Displaying CLI "Help
63
Configuration Commands and the Context Configuration Modes
52
4 Using the Command Line Interface (CLI)
66
CLI Control and Editing
67
Contents
68
Overview
68
5 Using the HP Web Browser Interface
69
General Features
70
Starting an HP Web Browser Interface Session with the Switch
70
Using a Standalone Web Browser in a PC or UNIX Workstation
71
Using HP Toptools for Hubs & Switches
73
Tasks for Your First HP Web Browser Interface Session
73
Viewing the "First Time Install" Window
74
Creating Usernames and Passwords in the Browser Interface
77
Online Help for the HP Web Browser Interface
78
Support/Mgmt Urls Feature
79
Support URL
79
Help and the Management Server URL
81
Status Reporting Features
81
The Overview Window
82
The Port Utilization and Status Displays
84
Port Status
85
The Alert Log
86
Alert Types
88
The Status Bar
89
Setting Fault Detection Policy
91
Contents
91
6 Switch Memory and Configuration
92
Overview
92
Overview of Configuration File Management
95
Using the CLI to Implement Configuration Changes
95
Configuration Changes
98
Using the Menu and Web Browser Interfaces to Implement Configuration Changes
98
Configuration Changes Using the Menu Interface
100
Rebooting From the Menu Interface
101
Configuration Changes Using the Web Browser Interface
102
Using Primary and Secondary Flash Image Options
102
Displaying the Current Flash Image Data
104
OS Downloads
105
Local OS Replacement and Removal
107
Rebooting the Switch
109
Operating Notes
111
Contents
112
Overview
113
Interface Access: Console/Serial Link, Web, and Telnet
114
Menu: Modifying the Interface Access
115
CLI: Modifying the Interface Access
118
Denying Interface Access By Terminating Remote Management
118
Sessions
119
System Information
120
Menu: Viewing and Configuring System Information
121
CLI: Viewing and Configuring System Information
124
Web: Configuring System Parameters
125
Using Friendly (Optional) Port Names
125
Configuring and Operating Rules for Friendly Port Names
126
Configuring Friendly Port Names
128
Displaying Friendly Port Names with Other Port Data
131
Contents
131
8 Configuring IP Addressing
132
Overview
133
IP Configuration
134
Just Want a Quick Start with IP Addressing
134
IP Addressing with Multiple Vlans
134
IP Configuration
135
IP Addressing in a Stacking Environment
135
Menu: Configuring IP Address, Gateway, and Time-To-Live (TTL)
137
CLI: Configuring IP Address, Gateway, and Time-To-Live (TTL)
141
Web: Configuring IP Addressing
141
How IP Addressing Affects Switch Operation
142
Dhcp/Bootp Operation
145
Network Preparations for Configuring Dhcp/Bootp
146
IP Preserve: Retaining VLAN-1 IP Addressing Across Configuration File Downloads
150
Globally Assigned IP Network Addresses
151
Contents
151
9 Time Protocols
152
Overview
152
Timep Time Synchronization
152
SNTP Time Synchronization
153
Overview: Selecting a Time Synchronization Protocol or Turning Off Time Protocol Operation
153
General Steps for Running a Time Protocol On the Switch
154
Disabling Time Synchronization
154
SNTP: Viewing, Selecting, and Configuring
155
Menu: Viewing and Configuring SNTP
158
CLI: Viewing and Configuring SNTP
164
Timep: Viewing, Selecting, and Configuring
165
Menu: Viewing and Configuring Timep
166
CLI: Viewing and Configuring Timep
171
SNTP Unicast Time Polling with Multiple SNTP Servers
172
Address Prioritization
172
Adding and Deleting SNTP Server Addresses
174
Menu Interface Operation with Multiple SNTP Server Addresses
174
Configured
174
SNTP Messages in the Event Log
175
Contents
175
10 Optimizing Traffic Flow with Port Controls, Port Trunking, and Port-Based Priority
176
Overview
176
Viewing Port Status and Configuring Port Parameters
179
Menu: Viewing Port Status and Configuring Port Parameters
180
CLI: Viewing Port Status and Configuring Port Parameters
183
Web: Viewing Port Status and Configuring Port Parameters
184
Port Trunking
185
Port Trunk Features and Operation
186
Trunk Configuration Methods
190
Menu: Viewing and Configuring a Static Trunk Group
192
CLI: Viewing and Configuring a Static or Dynamic Port Trunk
192
Group
195
Using the Cli to Configure a Static or Dynamic Trunk Group
198
Web: Viewing Existing Port Trunk Groups
198
Trunk Group Operation Using LACP
203
Lacp Notes and Restrictions
205
Trunk Group Operation Using the "Trunk" Option
205
Trunk Operation Using the "FEC" Option
206
How the Switch Lists Trunk Data
206
Outbound Traffic Distribution Across Trunked Links
208
Configuring Port-Based Priority for Incoming Packets
208
The Role of 802.1Q VLAN Tagging
209
Outbound Port Queues and Packet Priority Settings
210
Operating Rules for Port-Based Priority
211
Configuring and Viewing Port-Based Priority
212
Messages Related to Prioritization
212
Troubleshooting Prioritization
213
Contents
213
11 Configuring for Network Management Applications
214
Using SNMP Tools to Manage the Switch
214
Overview
214
SNMP Management Features
215
Configuring for SNMP Access to the Switch
216
Configuring for SNMP Version 3 Access to the Switch
217
SNMP Version 3 Commands
218
Snmpv3 Enable
219
SNMP Version 3 Users
222
Group Access Levels
223
SNMP Communities
225
Menu: Viewing and Configuring Non-Snmp Version 3
225
Communities
227
CLI: Viewing and Configuring SNMP Community Names
229
SNMP Notification and Traps
231
Trap Features
234
Using the CLI to Enable Authentication Traps
235
Advanced Management: RMON
236
Cdp
236
Introduction
237
CDP Terminology
238
General CDP Operation
238
Outgoing Packets
239
Incoming CDP Packets
242
Configuring CDP On the Switch
243
Viewing the Switch's Current CDP Configuration
243
Viewing the Switch's Current CDP Neighbors Table
244
Clearing (Resetting) the CDP Neighbors Table
245
Configuring CDP Operation
247
Effect of Spanning Tree (STP) On CDP Packet Transmission
248
CDP Packets
249
CDP Neighbor Data and MIB Objects
251
Operating Notes
253
Contents
253
12 Port-Based Virtual Lans (Vlans) and GVRP
254
Overview
255
Port-Based Virtual Lans (Static Vlans)
258
Overview of Using Vlans
258
VLAN Support and the Default VLAN
258
The Primary VLAN
260
Per-Port Static VLAN Configuration Options
261
General Steps for Using Vlans
261
VLAN Operating Notes
262
Menu: Configuring VLAN Parameters
267
CLI: Configuring VLAN Parameters
273
Web: Viewing and Configuring VLAN Parameters
274
VLAN Tagging Information
278
The Secure Management VLAN
282
Effect of Vlans On Other Switch Features
283
VLAN Restrictions
285
Gvrp
286
General Operation
288
Per-Port Options for Handling GVRP "Unknown Vlans
290
Per-Port Options for Dynamic VLAN Advertising and Joining
292
GVRP and VLAN Access Control
293
Planning for GVRP Operation
293
Configuring GVRP On a Switch
299
GVRP Operating Notes
302
Overview
302
13 Multimedia Traffic Control with IP Multicast (IGMP)
303
General Operation and Features
304
IGMP Terms
305
IGMP Operating Features
306
CLI: Configuring and Displaying IGMP
311
How IGMP Operates
313
Operation with or Without IP Addressing
313
Automatic Fast-Leave IGMP
315
Forced Fast-Leave IGMP
318
Configuring Per-Port Forced Fast-Leave IGMP
311
Web: Enabling or Disabling IGMP
319
Using the Switch As Querier
320
Excluding Well-Known or Reserved Multicast Addresses From IP Multicast Filtering
321
Excluding Well-Known or Reserved Multicast Addresses From IP Multicast Filtering
323
And 802.1D Spanning Tree Protocol (STP)
323
Contents
324
Overview
326
How Spanning Tree Operates
328
Spanning Tree Options: RSTP (802.1W) and STP (802.1D)
328
RSTP (802.1W)
328
Stp (802.1D)
HP Procurve Series 4100GL Function Manual (306 pages)
Access Security Guide ProCurve 2600, 2600-PWR, 2800, 4100, 6108 Series
Brand:
HP
| Category:
Switch
| Size: 2.18 MB
Table of Contents
1
Access Security Guide
5
Table of Contents
13
Product Documentation
13
About Your Switch Manual Set
14
Feature Index
17
Contents
18
Getting Started
18
Introduction
18
Overview of Access Security Features
19
Management Access Security Protection
20
General Switch Traffic Security Guidelines
21
Conventions
21
Feature Descriptions By Model
21
Command Syntax Statements
22
Command Prompts
22
Screen Simulations
22
Port Identity Examples
23
Sources for More Information
24
Need Only a Quick Start
24
IP Addressing
25
To Set Up and Install the Switch in Your Network
27
Contents
28
Configuring Username and Password Security
28
Overview
30
Configuring Local Password Security
30
Menu: Setting Passwords
31
CLI: Setting Passwords and Usernames
32
Web: Setting Passwords and Usernames
33
Front-Panel Security
33
When Security Is Important
34
Front-Panel Button Functions
36
Configuring Front-Panel Security
41
Password Recovery
43
Password Recovery Process
45
Web and MAC Authentication for the Series 2600/2600-PWR and 2800 Switches
45
Contents
46
Overview
47
Client Options
48
General Features
49
How Web and MAC Authentication Operate
49
Authenticator Operation
53
Terminology
54
Operating Rules and Notes
56
General Setup Procedure for Web/Mac Authentication
56
Do These Steps before You Configure Web/Mac Authentication
58
Additional Information for Configuring the RADIUS Server to Support MAC Authentication
59
Configuring the Switch to Access a RADIUS Server
61
Configuring Web Authentication
61
Overview
62
Configure the Switch for Web-Based Authentication
66
Configuring MAC Authentication On the Switch
66
Overview
67
Configure the Switch for Mac-Based Authentication
70
Show Status and Configuration of Web-Based Authentication
71
Show Status and Configuration of Mac-Based Authentication
73
Show Client Status
75
TACACS+ Authentication
75
Contents
76
Overview
77
Terminology Used in TACACS Applications
79
General System Requirements
79
General Authentication Setup Procedure
82
Configuring TACACS+ On the Switch
82
Before You Begin
83
CLI Commands Described in This Section
83
Viewing the Switch's Current Authentication Configuration
84
Viewing the Switch's Current TACACS+ Server Contact Configuration
85
Configuring the Switch's Authentication Methods
89
Configuring the Switch's TACACS+ Server Access
94
How Authentication Operates
94
General Authentication Process Using a TACACS+ Server
96
Local Authentication Process
97
Using the Encryption Key
98
Controlling Web Browser Interface Access When Using TACACS+ Authentication
98
Controlling Web Browser Interface Access When Using TACACS
98
Authentication
99
Messages Related to TACACS+ Operation
99
Operating Notes
101
RADIUS Authentication and Accounting
101
Contents
102
Overview
103
Terminology
104
Switch Operating Rules for RADIUS
105
General RADIUS Setup Procedure
106
Configuring the Switch for RADIUS Authentication
107
Outline of the Steps for Configuring RADIUS Authentication
108
Configure Authentication for the Access Methods You Want RADIUS
108
To Protect
108
Configure Authentication for the Access Methods You Want
110
Configure the Switch to Access a RADIUS Server
112
Configure the Switch's Global RADIUS Parameters
116
Local Authentication Process
117
Controlling Web Browser Interface Access When Using RADIUS Authentication
117
Configuring RADIUS Accounting
119
Operating Rules for RADIUS Accounting
119
Steps for Configuring RADIUS Accounting
119
Configuring RADIUS Accounting
122
Reports to the Radius Server
125
Viewing RADIUS Statistics
125
General RADIUS Statistics
127
RADIUS Authentication Statistics
128
RADIUS Accounting Statistics
129
Changing Radius-Server Access Order
131
Messages Related to RADIUS Operation
133
Configuring Secure Shell (SSH)
133
Contents
134
Overview
136
Terminology
137
Prerequisite for Using SSH
137
Public Key Formats
138
Steps for Configuring and Using SSH for Switch and Client Authentication
140
General Operating Rules and Notes
141
Configuring the Switch for SSH Operation
141
Assign Local Login (Operator) and Enable (Manager) Password
142
Generate the Switch's Public and Private Key Pair
144
Provide the Switch's Public Key to Clients
147
Enable SSH On the Switch and Anticipate SSH Client Contact Behavior
147
Enable SSH On the Switch and Anticipate SSH Client
150
Configure the Switch for SSH Authentication
153
Use an SSH Client to Access the Switch
153
Further Information On SSH Client Public-Key Authentication
159
Messages Related to SSH Operation
161
Configuring Secure Socket Layer (SSL)
161
Contents
162
Overview
163
Terminology
165
Prerequisite for Using SSL
165
Steps for Configuring and Using SSL for Switch and Client Authentication
166
General Operating Rules and Notes
167
Configuring the Switch for SSL Operation
167
Assign Local Login (Operator) and Enable (Manager) Password
169
Generate the Switch's Server Host Certificate
171
Comments On Certificate Fields
177
Enable SSL On the Switch and Anticipate SSL Browser Contact
181
Behavior
181
Common Errors in SSL Setup
Advertisement
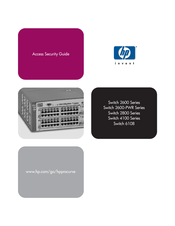
HP Procurve Series 4100GL Manual (300 pages)
Access Security Guide
Brand:
HP
| Category:
Switch
| Size: 3.68 MB
Table of Contents
5
Table of Contents
14
1 Getting Started
14
Introduction and Applicable Switches
14
About the Feature Descriptions
15
Overview of Access Security Features
17
General Switch Traffic Security Guideline
18
Command Syntax Conventions
18
Simulating Display Output
18
Command Prompts
19
Screen Simulations
19
Port Identity Convention for Examples
19
Related Publications
21
Getting Documentation From the Web
22
Sources for More Information
23
Need Only a Quick Start
23
To Set Up and Install the Switch in Your Network
25
Contents
26
2 Configuring Username and Password Security
26
Overview
28
Configuring Local Password Security
28
Menu: Setting Passwords
29
CLI: Setting Passwords and Usernames
30
Web: Setting Passwords and Usernames
31
Front-Panel Security
31
When Security Is Important
33
Front-Panel Button Functions
36
Configuring Front-Panel Security
41
Password Recovery
43
Password Recovery Process
45
3 Web and MAC Authentication for the Series 2600/2600-PWR and 2800 Switches
45
Contents
46
Overview
47
Client Options
48
General Features
49
How Web and MAC Authentication Operate
49
Authenticator Operation
53
Terminology
54
Operating Rules and Notes
56
General Setup Procedure for Web/Mac Authentication
56
Do These Steps before You Configure Web/Mac Authentication
58
Additional Information for Configuring the RADIUS Server to Support MAC Authentication
59
Configuring the Switch to Access a RADIUS Server
61
Configuring Web Authentication On the Switch
61
Overview
62
Configure the Switch for Web-Based Authentication
66
Configuring MAC Authentication On the Switch
66
Overview
67
Configure the Switch for Mac-Based Authentication
70
Show Status and Configuration of Web-Based Authentication
72
Show Status and Configuration of Mac-Based Authentication
74
Client Status
75
Contents
76
4 TACACS+ Authentication
76
Overview
77
Terminology Used in TACACS Applications
79
General System Requirements
79
General Authentication Setup Procedure
82
Configuring TACACS+ On the Switch
82
Beforeyou Begin
83
CLI Commands Described in This Section
83
Viewing the Switch's Current Authentication Configuration
84
Viewing the Switch's Current TACACS+ Server Contact Configuration
85
Configuring the Switch's Authentication Methods
89
Configuring the Switch's TACACS+ Server Access
94
How Authentication Operates
94
General Authentication Process Using a TACACS+ Server
96
Local Authentication Process
97
Using the Encryption Key
98
Controlling Web Browser Interface Access When Using TACACS+ Authentication
98
Controlling Web Browser Interface Access When Using TACACS
98
Authentication
99
Messages Related to TACACS+ Operation
99
Operating Notes
101
5 RADIUS Authentication and Accounting
101
Contents
102
Overview
103
Terminology
104
Switch Operating Rules for RADIUS
105
General RADIUS Setup Procedure
106
Configuring the Switch for RADIUS Authentication
106
Outline of the Steps for Configuring RADIUS Authentication
108
Configure Authentication for the Access Methods You Want RADIUS
108
To Protect
110
Configure the Switch to Access a RADIUS Server
112
Configure the Switch's Global RADIUS Parameters
116
Local Authentication Process
117
Controlling Web Browser Interface Access When Using RADIUS Authentication
117
Configuring RADIUS Accounting
117
Authentication
119
Configuring RADIUS Accounting
119
Operating Rules for RADIUS Accounting
119
Steps for Configuring RADIUS Accounting
122
Reports to the Radius Server
125
Viewing RADIUS Statistics
125
General RADIUS Statistics
127
RADIUS Authentication Statistics
128
RADIUS Accounting Statistics
129
Changing Radius-Server Access Order
131
Messages Related to RADIUS Operation
133
6 Configuring Secure Shell (SSH)
133
Contents
134
Overview
136
Terminology
137
Prerequisite for Using SSH
137
Public Key Formats
138
Steps for Configuring and Using SSH for Switch and Client Authentication
140
General Operating Rules and Notes
141
Configuring the Switch for SSH Operation
141
Assigning a Local Login (Operator) and Enable (Manager) Password
142
Generating the Switch's Public and Private Key Pair
144
Providing the Switch's Public Key to Clients
147
Enabling SSH On the Switch and Anticipating SSH Client Contact
147
Behavior
150
Configuring the Switch for SSH Authentication
153
Use an SSH Client to Access the Switch
153
Further Information On SSH Client Public-Key Authentication
159
Messages Related to SSH Operation
161
7 Configuring Secure Socket Layer (SSL)
161
Contents
162
Overview
163
Terminology
165
Prerequisite for Using SSL
165
Steps for Configuring and Using SSL for Switch and Client Authentication
166
General Operating Rules and Notes
167
Configuring the Switch for SSL Operation
167
Assigning a Local Login (Operator) and Enable (Manager)Password
169
Generating the Switch's Server Host Certificate
171
Comments On Certificate Fields
177
Enabling SSL On the Switch and Anticipating SSL Browser Contact
181
Behavior
181
Common Errors in SSL Setup
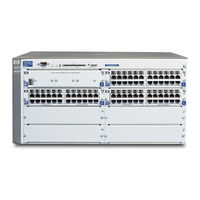
HP Procurve Series 4100GL Installation And Getting Started Manual (90 pages)
Brand:
HP
| Category:
Switch
| Size: 6.8 MB
Table of Contents
5
Table of Contents
9
Introducing the HP Procurve Series 4100GL Switches
11
Front of the Switch
12
Leds
14
LED Mode Select Button and Indicator Leds
15
Console Port
15
Reset Button
15
Clear Button
16
Back of the Switch
16
Power Connector
16
Slot for Redundant Power Supply
17
Switch Features
19
Included Parts
19
Installing the Series 4100GL Switches
20
Installation Procedures
20
Summary
21
Installation Precautions
22
Installation Precautions (Continued)
23
Prepare the Installation Site
23
Cabling Infrastructure
24
Installation Location
25
Install Switch Modules
27
Optional) Install Second Power Supply
29
Verify the Switch Passes Self Test
30
LED Behavior
31
Mount the Switch
31
Rack or Cabinet Mounting
34
Horizontal Surface Mounting
35
Wall Mounting
36
Connect the Switch to a Power Source
36
Connect the Network Devices
37
Optional) Connect a Console to the Switch
37
Terminal Configuration
38
Direct Console Access
38
Telnet Console Access
39
Hot Swapping Switch Modules
39
Adding or Replacing Modules
39
Changing the Module Type
40
Example Network Topologies
40
Basic Connectivity
41
Use As an Edge Switch
42
Stacking the Switches
43
Getting Started with Switch Configuration
43
Recommended Minimal Configuration
44
Using the Switch Setup Screen
46
Where to Go From Here
47
Using the IP Address for Remote Switch Management
47
Starting a Telnet Session
47
Starting a Web Browser Session
49
Basic Troubleshooting Tips
49
Troubleshooting
52
Diagnosing with the Leds
53
Diagnostic Tips
57
Proactive Networking
58
Hardware Diagnostic Tests
58
Testing the Switch By Resetting It
58
Checking the Switch Leds
58
Checking Console Messages
59
Testing Twisted-Pair Cabling
59
Testing Switch-To-Device Network Communications
59
Testing End-To-End Network Communications
60
Restoring the Factory Default Configuration
61
Downloading New Code
HP Procurve Series 4100GL Operating (28 pages)
Version G.07.50 Operating System
Brand:
HP
| Category:
Switch
| Size: 0.44 MB
Table of Contents
3
Table of Contents
5
Software Management
5
Downloading Switch Documentation and Software From the Web
6
Downloading Software to the Switch
6
TFTP Download From a Server
8
Xmodem Download From a PC or Unix Workstation
9
Saving Configurations While Using the CLI
9
HP Procurve Switch Software Key
10
Enhancements in Release G.07.XX
10
New Enhancements in Release G.07.5X
10
New Enhancements in Release G.07.2X
10
Documentation for New Enhancements
11
Clarification of Time Zone Issue
12
Problem Reports
12
Software Fixes
12
Release G.07.50 11/11/03
14
Release G.07.27 9/05/03
15
Release G.07.23
17
Release G.05.06
18
Release G.05.05
19
Release G.05.04 11/4/02
20
Release G.05.03
23
Release G.04.05
24
Release G.04.01
25
Release G.03.13 12/13/02
26
Release G.03.11
Share and save
Advertisement
Related Products
HP ProCurve 4104GL
HP ProCurve 4108gl Bundle
HP 4100 Series
HP ProCurve 4148
HP ProCurve 4140gl
HP ProCurve 4148gl
HP ProCurve 4160gl
HP StorageWorks 4/16 SAN Switch
HP StorageWorks 4/32 - SAN Switch
HP Voltaire 4036
HP Categories
Desktop
Laptop
Server
Switch
Monitor
More HP Manuals
×
Login
Sign In
OR
Sign in with Facebook
Sign in with Google
×
Upload manual
Upload from disk
Upload from URL