Sign In
Upload
Manuals
Brands
Fuji Xerox Manuals
All in One Printer
Color C60
Fuji Xerox Color C60 Manuals
Manuals and User Guides for Fuji Xerox Color C60. We have
3
Fuji Xerox Color C60 manuals available for free PDF download: User Manual, System Administrator Manual, Instruction Manual
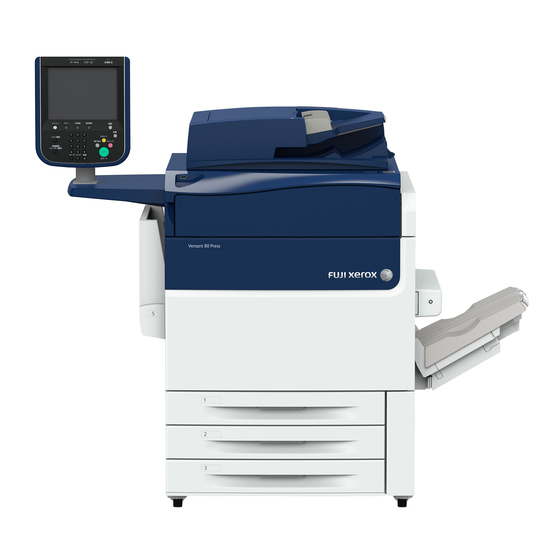
Fuji Xerox Color C60 User Manual (365 pages)
Brand:
Fuji Xerox
| Category:
All in One Printer
| Size: 14.06 MB
Table of Contents
Table of Contents
3
Before Using the Machine
11
Preface
12
Types of Manuals
14
Using this Guide
15
Organization of this Guide
15
Conventions
16
About License
18
Rsa Bsafe
18
Heimdal
18
JPEG Code
18
Libcurl
18
Freebsd
19
Openldap
20
Des
21
Aes
22
TIFF (Libtiff)
22
ICC Profile (Little Cms)
22
XML Paper Specification (XPS)
22
EDICT and COMPDIC
22
Cyrus SASL
23
Newlib
23
About Qt
37
About Software Applied to LGPL
37
Other Licenses
45
Legal Notice
46
Product Overview
47
Machine Components
48
Power Source
57
Switching the Main Power on
57
Switching the Power on
57
Switching the Power off
58
Switching the Main Power off
58
Ground Fault Interrupter
60
Power Saver Mode
62
Entering the Power Saver Mode
62
Exiting the Power Saver Mode
63
Control Panel
64
Screens and Buttons Displayed
66
About the Services Home Screen
67
Web Applications
69
Print Mode
70
Touch Screen
71
Entering Text
73
Copy
75
Copying Procedure
76
Step 1 Loading Documents
76
Step 2 Selecting Features
78
Step 3 Entering a Quantity
79
Step 4 Starting the Copy Job
79
Step 5 Confirming the Copy Job in Job Status
80
Operations During Copying
81
Stopping the Copy Job
81
Changing the Number of Copies
82
Interrupting the Copy Job
83
Simple Copy
84
Paper Supply (Selecting the Paper for Copying)
84
Reduce/Enlarge (Making Enlarged/Reduced Copies)
85
Sided Copying (Making 2 Sided Copies)
86
Auto Detect/Color/Black & White (Selecting the Color for Copying)
86
Lighten/Darken (Adjusting the Copy Density)
87
Pages Per Side (Copying Two Pages Onto One Sheet)
87
Staple
88
Copy
89
Reduce/Enlarge (Making Enlarged/Reduced Copies)
89
Paper Supply (Selecting the Paper for Copying)
93
Output Color (Selecting the Color for Copying)
96
Sided Copying (Making 2 Sided Copies)
100
Copy Output (Specifying Finishing Options)
100
Pages Per Side (Copying Multiple Pages Onto One Sheet)
100
Lighten/Darken (Adjusting the Copy Density)
100
Image Quality
102
Original Type (Selecting the Document Type)
102
Image Options (Adjusting Copy Density/Sharpness/Saturation of Images)
104
Image Enhancement (Erasing the Background Color of Documents/Adjusting Contrast)
104
Color Effects (Selecting an Image Quality)
105
Color Balance (Adjusting Color Balance)
106
Color Shift (Adjusting the Color Tone)
107
Gloss Level (Enhancing Gloss of the Document)
108
Layout Adjustment
109
Sided Copying (Making 2 Sided Copies)
110
Book Copying (Copying Facing Pages Onto Separate Sheets)
111
Sided Book Copying (Making 2 Sided Copies of Facing
112
Original Size (Specifying the Scan Size for the Document)
114
Mixed Size Originals (Scanning Different Size Documents Simultaneously)
114
Edge Erase (Erasing Edges and Margin Shadows of the Document)
116
Image Shift (Adjusting the Image Position)
117
Invert Image (Making Reversed Copies of Images)
120
Original Orientation (Specifying the Orientation of Loaded Documents)
120
Image Rotation (Changing the Orientation of Images)
121
Output Format
123
Sided Copying (Making 2 Sided Copies)
123
Select [Copy] on the Services Home Screen
123
Booklet Creation (Creating a Bound Booklet)
124
Covers (Attaching Covers to Copies)
128
Pages Per Side (Copying Multiple Pages Onto One Sheet)
129
Poster (Making Enlarged Copies Spread over Multiple Sheets)
130
Repeat Image (Making Multiple Copies on One Sheet)
132
Annotations (Adding a Comment/A Date/Page Numbers to Copies)
133
Watermark (Printing Control Numbers on the Background of Copies)
139
Secure Watermark (Managing Document Security)
142
Tab Margin Shift (Copying on Tab Stock Paper)
144
Face Up/Down Output (Specifying Face up or Down)
145
Folding (Outputting Bi-Folded/Tri-Folded Paper)
146
Preset Repeat Image (Making Multiple Copies on a Single Sheet)
147
Transparency Options (Inserting Blank Sheets between Transparencies)
148
Copy Output (Specifying Finishing Options)
150
ID Card Copy (Copying both Sides of an ID Card)
156
Job Assembly
157
Build Job (Processing Documents Scanned with Different Settings as One Job)
157
Select [Copy] on the Services Home Screen
157
Sample Job (Checking the Finished Output of the Copy)
161
Combine Original Sets (Adding Originals)
162
Delete Outside/Delete Inside (Deleting Outside or Inside of the Selected Area)
163
Stored Programming (Calling a Stored Program for Build Job)
165
Scan
167
Scanning Procedure
168
Step 1 Loading Documents
168
Step 2 Selecting the Features
170
Step 3 Starting the Scan Job
173
Step 4 Confirming the Scan Job in Job Status
174
Step 5 Saving the Scanned Data
174
Operations During Scanning
176
Stopping the Scan Job
176
Previewing the Scanned Images During a Scan Job
177
Changing Scan Settings
181
WSD Stands for Web Services on Devices
181
E-Mail
183
Address Book
184
Address Book (Specifying a Destination Using the Address Book [Type 1])
184
Address Book (Specifying a Destination Using the Address Book [Type 2])
187
Add New Address (Registering a Recipient on the Address Book)
190
New Recipient (Specifying an E-Mail Address)
191
Add Me (Adding the Sender's Address)
192
Recipient(S) (Editing a Recipient)
193
From (Setting the Sender's Address)
194
Subject (Setting the Subject)
195
Message (Entering the E-Mail Body)
195
Preview (Previewing the Scanned Images During a Scan Job)
195
Color Scanning (Selecting an Output Color)
196
Sided Scanning (Scanning both Sides of a Document)
197
Original Type (Selecting the Document Type)
198
File Format (Selecting a File Format for Output Data)
198
Searchable Text
201
Language of the Original
204
Network Scanning
211
Preview (Previewing the Scanned Images During a Scan Job)
212
Color Scanning (Selecting an Output Color)
212
Sided Scanning (Scanning both Sides of a Document)
212
Original Type (Selecting the Document Type)
212
File Format (Selecting a File Format for Output Data)
212
Scan to PC
213
Transfer Protocol (Selecting a Transfer Protocol)
214
Address Book
214
Address Book (Specifying a Destination Using the Address Book [Type 1])
215
Address Book (Specifying a Destination Using the Address Book [Type 2])
216
Add New Address (Registering a Destination PC on the Address Book)
217
Browse (Specifying a Destination PC by Browsing Your Network)
219
Specifying a Destination (Specifying a Destination PC Using the Screen Keyboard)
220
Preview (Previewing the Scanned Images During a Scan Job)
222
Color Scanning (Selecting an Output Color)
222
Sided Scanning (Scanning both Sides of a Document)
222
Original Type (Selecting the Document Type)
222
File Format (Selecting a File Format for Output Data)
222
Store to Folder
223
Color Scanning (Selecting an Output Color)
223
Sided Scanning (Scanning both Sides of a Document)
224
Original Type (Selecting the Document Type)
224
Preview (Previewing the Scanned Images During a Scan Job)
224
Store to USB
225
Save in (Specifying a Storage Location in the USB Memory Device)
228
Details (Displaying the Details of a Storage Location in the USB Memory Device)
229
Preview (Previewing the Scanned Images During a Scan Job)
229
Color Scanning (Selecting an Output Color)
230
Sided Scanning (Scanning both Sides of a Document)
230
Original Type (Selecting the Document Type)
230
File Format (Selecting a File Format for Output Data)
230
Store & Send Link
231
Scan to (Displaying the E-Mail Address of the Authenticated User)
231
From (Displaying the E-Mail Address of the Authenticated User)
232
Subject (Setting the Subject)
232
Message (Entering the E-Mail Body)
232
Color Scanning (Selecting an Output Color)
232
Sided Scanning (Scanning both Sides of a Document)
232
Original Type (Selecting the Document Type)
232
Preview (Previewing the Scanned Images During a Scan Job)
232
File Format (Selecting a File Format for Output Data)
233
Store to WSD
234
Computer (Starting a Scan Job Via Computer Operation)
234
This Device (Storing Data Scanned by the Machine on a Network Computer)
235
Advanced Settings
237
Color Scanning (Selecting an Output Color)
237
Original Type (Selecting the Document Type)
237
Photographs (Scanning a Color Photograph)
238
Image Options (Adjusting Scan Density and Image Sharpness)
238
Image Enhancement (Erasing the Background Color of Documents/Adjusting Contrast)
239
Shadow Suppression (Suppressing the Document Background)
239
Color Space (Specifying the Color Space)
240
Layout Adjustment
241
Resolution (Specifying a Scanning Resolution)
241
On the Services Home Screen, Select [E-Mail], [Store to Folder], [Network Scanning], [Scan to PC], [Store & Send Link], or [Store to USB]
241
Sided Scanning (Scanning both Sides of a Document)
242
Book Scanning (Scanning Facing Pages on Separate Sheets)
242
Original Size (Specifying a Scan Size)
243
Mixed Size Originals (Scanning Different Size Documents Simultaneously)
244
Edge Erase (Erasing Edges and Margin Shadows in the Document)
246
Reduce/Enlarge (Specifying a Scanning Ratio)
247
Original Orientation (Specifying the Orientation of the Loaded Documents)
248
E-Mail Options/Filing Options
249
Quality/File Size (Specifying an Image Compression Ratio When Scanning)
249
On the Services Home Screen, Select [E-Mail], [Store to Folder], [Network Scanning], [Scan to PC], [Store & Send Link], or [Store to USB]
249
WSD Stands for Web Services on Devices
249
File Format (Selecting a File Format for Output Data)
250
Read Receipts (Specifying Read Receipts)
250
Split Send (Sending in Sections)
251
File Name (Specifying a Name for the File to be Sent)
251
Reply to (Specifying a Reply Address)
252
File Name Conflict (Setting the Action to be Taken for File Name Conflict)
253
File Name (Specifying a Name for the File to be Saved)
253
Encryption (Sending E-Mail Encrypted by S/MIME)
254
Digital Signature (Sending E-Mail with a Digital Signature by S/MIME)
254
Login Name
254
Password
254
Meta Data
255
Send from Folder
257
Folder Operating Procedure
258
Step 1 Opening the [Send from Folder] Screen
258
Step 2 Selecting a Folder
259
Step 3 Checking/Selecting Files in a Folder
259
Step 4 Operating Files in a Folder
259
Selecting a Folder under Scan & Other Jobs
260
Checking/Operating Files in a Folder
261
Checking File Details
263
Printing Files in a Folder
267
Batch Print
268
Configuring/Starting Job Flow
270
[Link Job Flow Sheet to Folder] Screen
272
Job Flow Restrictions
274
Job Flow Sheets
275
Job Flow Procedure
276
Step 1 Opening the [Job Flow Sheets] Screen
276
Step 2 Selecting a Job Flow Sheet
276
Step 3 Confirming/Changing the Job Flow Sheet
277
Step 4 Starting the Job Flow Sheet
277
Selecting/Changing a Job Flow Sheet
278
Stored Programming
281
Stored Programming Overview
282
Registering/Deleting/Renaming Stored Programs
283
Registering Stored Programs
284
Notes and Restrictions on Registering Stored Programs
284
Registering Stored Programs for Build Job
285
Deleting Stored Programs
287
Entering/Changing a Stored Program Name
287
Assigning/Changing Icons for Stored Programs
287
Calling a Stored Program
288
Calling a Stored Program for Build Job
289
Web Applications
291
Web Applications Overview
292
Accessing Web Applications
293
Accessing Using Buttons Registered on the Services Home Screen
294
Media Print (Text and Photos)
295
Overview of Media Print
296
Supported Media and File Formats
297
Notes and Restrictions on Media Print
297
Inserting USB Memory Device
299
Media Print - Text
302
Selecting Files
302
[Select from List] Screen
302
Media Print - Photos
304
Selecting Files
304
[Select from List] Screen
305
Selecting the Printing Options
306
Media Print - Photos
306
Media Print - Text
307
Index Print
308
10 Job Status
309
Job Status Overview
310
Checking Current/Pending Jobs
311
Checking Completed Jobs
313
Printing and Deleting Stored Jobs
315
Secure Print
315
Sample Set
319
Delayed Print
322
Charge Print
325
Private Charge Print
328
Printing Pending Jobs
333
Handling Error Terminations
334
11 Computer Operations
335
Features Overview
336
Print
337
Print Features
337
Direct Printing
338
Setup
339
Printing
339
E-Mail Printing
340
Setup
340
Receiving E-Mail
340
Importing Scanned Data
341
Importing to a TWAIN Compatible Application
341
Importing Using Stored File Manager 3
343
Importing Using Centreware Internet Services
346
Centreware Internet Services
348
Browser Settings
350
Proxy Server and Port Number
350
Starting Centreware Internet Services
350
12 Appendix
353
Glossary
354
Index
359
Advertisement
Fuji Xerox Color C60 System Administrator Manual (178 pages)
Brand:
Fuji Xerox
| Category:
All in One Printer
| Size: 3.5 MB
Table of Contents
Table of Contents
3
1 Introduction
13
Overview
13
Configuration Steps
13
More Information
14
2 Initial Setup
15
Physical Connection
15
Initial Setup at the Control Panel
15
The Installation Wizard
15
Configuration Report
16
Printing the Configuration Report
16
System Administrator Access at the Control Panel
16
Locking or Unlocking the Printer
16
Manually Setting the Printer's Ethernet Interface Speed
17
Assigning a Network Address
17
Viewing Services and Options
17
Centreware Internet Services
18
Accessing Centreware Internet Services
18
Enabling Services and Options
18
Enabling Services and Options at the Control Panel
18
Enabling Features in Centreware Internet Services
19
Changing the System Administrator Password
19
Using the Configuration Overview Page
19
Assigning a Name and Location to the Printer
20
3 Paper Tray Settings
21
Accessing Paper Tray Settings
21
Setting Custom Paper Name/Color
21
Establishing Start-Up Attributes
22
Paper Type Priority
22
Setting Paper Type Priority
22
Setting Paper Tray Attributes
23
Change Paper Settings During Loading
24
Establishing Bypass Tray Defaults
24
Customizing the Paper Supply Screen
25
Paper Tray Priority
26
Setting Paper Tray Priority
26
Managing Auto Tray Switching
26
Image Quality
27
Specifying Image Quality Settings
28
4 Image Quality and Calibration
31
Setting Image Quality for the Scanner
31
Calibrating Image Color
33
Two-Sided Color Scanning Calibration
33
5 Network Configuration
35
Tcp/Ip
35
Enabling TCP/IP
35
Configuring TCP/IP Settings at the Control Panel
36
Manually Configuring an Ipv4 Network Address
36
Manually Configuring an Ipv6 Network Address
36
Configuring Ipv4 Dynamic Address Settings
36
Configuring Ipv6 Dynamic Address Settings
37
Configuring DNS/DDNS Settings
37
Configuring Settings for Ipv4
37
Configuring TCP/IP Settings in Centreware Internet Services
38
DNS Configuration for Ipv4
38
Zero-Configuration Networking
39
Configuring Settings for Ipv6
39
DNS Configuration for Ipv6
40
Snmp
40
Enabling SNMP
40
Configuring SNMP
40
Editing SNMP V1/V2C Properties
41
Editing SNMP V3 Settings
42
Adding IP Trap Destination Addresses
42
Lpd
43
Enabling LPD
43
Configuring LPD
43
Raw TCP/IP Printing
44
Enabling Port 9100
44
Configuring Port 9100
44
Smtp
44
Configuring SMTP Server Settings
45
Configuring Optional SMTP Settings
45
Ldap
46
Configuring LDAP Server Settings
46
Defining User Mappings
46
Configuring LDAP Custom Filters
47
Pop3
48
Http
48
Enabling HTTP
48
Configuring HTTP Settings
49
Proxy Server
49
Microsoft Networking
50
Configuring WINS
50
Ipp
50
Enabling IPP
50
Configuring IPP
50
Webdav
51
Enabling Webdav
51
Configuring Webdav
51
Wsd
51
Enabling WSD
51
Configuring WSD
52
6 Security
53
Setting up Access Rights
53
Overview
53
Authentication
53
Authorization
54
Personalization
54
Local Authentication
54
Setting up Local Authentication
54
Defining User Information
55
Specifying Login Requirements
55
Network Authentication
55
Setting up Network Authentication
55
Configuring Authentication Server Settings for Kerberos
56
Configuring Authentication Server Settings for SMB
56
Configuring Authentication Server Settings for LDAP
57
Authentication Using a Card Reader System
57
Setting up Authentication for Xerox® Secure Access
57
Configuring Xerox® Secure Access Login Settings
58
Setting up Authentication for a USB Smartcard Reader System
59
Configure Network Authentication Settings
59
Enable Smartcard Settings
59
Set the Smartcard Certificate Verification Mode
59
Set the Smartcard Logout Timing
60
Controlling Access to Tools and Features
60
Controlling Access for All Users
60
Controlling Access for a Group of Users
61
User Roles Access Setup
61
Device Access Setup
62
Service Access Setup
62
Feature Access Setup
63
Digital Certificates
63
Installing a Digital Certificate
63
Creating a Self-Signed Certificate
64
Creating a Request
64
Uploading a Certificate
65
Managing Certificates
65
Certificate Revocation Retrieval Settings
65
Secure HTTP and SSL/TLS
66
Configuring Secure HTTP (SSL/TLS)
66
S/Mime
67
Ipsec
68
Configuring Ipsec
68
Configuring 802.1X
69
FIPS140-2 Data Encryption
70
Overwriting Image Data
70
Manually Deleting Image Data
70
Scheduling Routine Deletion of Image Data
71
IP Filtering
71
Creating an IP Filter Rule
71
Audit Log
72
Enabling Audit Log
72
Saving an Audit Log
72
Interpreting the Audit Log
72
PDF and XPS Signatures
73
Address Book Security
74
Controlling Centreware Internet Services Address Book Access
74
Controlling Control Panel Address Book Access
74
Restricting Access to Job Information
74
Hiding or Password Protecting Completed Job Information
74
Hiding Active Job Information
75
Hiding or Displaying Network Settings
75
7 Printing
77
Selecting Print Mode Options
77
Managing Banner Sheet Printing Options
77
Enabling Banner Sheet Printing in Centreware Internet Services
78
Enabling Banner Sheet Printing from the Control Panel
78
Enabling Banner Sheet Printing in the Print Driver
78
Print Service Settings
79
Configuring Print Service Settings
79
Configuring Media Print Service Settings
80
UNIX®, Linux®, and AS/400 Printing
80
Xerox® Services for UNIX® Systems (XSUS)
80
Supported Printing Models
81
Installing XSUS
81
Download the Files
82
Perform the Installation Procedure
82
Launching XSUS
82
Printing from a Linux® Workstation
82
Installing the Xerox® PPD on the Workstation
83
Adding the Xerox® Printer
83
Printing with CUPS
83
Installing the WSCO and Setting up Print Queues
84
8 Image Registration Setups
85
Adjusting Image Alignment
85
Alignment Adjustment Procedure
86
Adjusting Fold Position
87
Fold Position Adjustment
87
Single Fold Position Adjustment
88
Booklet Position Adjustment
88
C Fold Position Adjustment
89
Z Fold Position Adjustment
89
Z Fold Half Sheet Position Adjustment
90
9 Copying
91
Specifying Default Copy Settings
91
Creating Copy Feature Presets
91
Copy Control
92
Original Size Defaults
92
Reduce and Enlarge Presets
92
Defining Custom Colors
93
10 Scanning
95
Configuring General Scan Service Settings
95
Setting Scan Defaults
95
Setting Scan to PC Defaults
95
Scanning to a Folder on the Printer
96
Managing Folders and Scanned Files
96
Creating and Editing a Folder
96
Scheduling Deletion of Files Stored in Folders
97
Configuring Scan Folder Service Settings
97
Scanning to an Email Address
98
Configuring Email Settings
98
Editing Default Email Settings
99
Network Scanning
101
Enabling Network Scanning
101
Configuring Network Scanning
101
Configuring File Repository Settings
102
Ftp
102
Smb
103
Http/Https
104
CGI Scripts
105
Configuring the Default Template
106
Editing File Destination Settings
106
Adding Metadata Fields
107
Configuring Other Default Template Scanning Options
107
Configuring Template Pool Repository Settings
108
Updating the List of Templates at the Control Panel
108
Configuring a Validation Server
108
Scanning to a User's Home Folder
109
Configuring Scan to Home
109
Scanning to a USB Drive
110
Enabling Scan to USB Functionality
110
Job Flow Sheets
110
Create a Folder
111
Create a Job Flow Sheet
111
Job Flow Sheet Restrictions
113
Link the Job Flow Sheet to a Folder
113
Xerox® Scan Utility
114
Enabling Network Scan Utility 3
114
11 Faxing
115
Embedded Fax
115
Enabling Embedded Fax
115
Configuring Embedded Fax Settings
116
Configure Fax Control Settings
116
Setting Fax Defaults
118
Setting Incoming Fax Options
118
Fax Forwarding
118
Selecting the Folder Where Received Faxes Are Stored
119
Reduce/Enlarge Presets
119
Original Size Defaults
119
Fax Confirmation Report
120
Server Fax
120
Enabling Server Fax
120
Configure a Server Fax Filing Repository
121
Configuring a Fax Repository Using FTP
121
Configure a Fax Repository Using SMB
121
Configure a Fax Repository Using SMTP
122
Server Fax Confirmation Report and Job Log
122
Internet Fax
123
Configuring Internet Fax Settings
123
Configure Internet Fax Control Settings
123
Internet Fax Defaults Settings
124
Configuring Incoming Internet Fax Print Options
124
Configuring Outgoing Internet Fax Options
124
Configuring an Internet Fax Confirmation Report
125
Internet Fax Addresses
125
LAN Fax
125
Session Initiation Protocol Fax
125
Enabling SIP Fax
126
Configuring SIP Gateway Registration
126
Configuring T.38 Settings
127
Configuring SIP Settings at the Printer Control Panel
127
12 Accounting
129
Xerox® Standard Accounting
129
Configuring Xerox® Standard Accounting
130
Creating a Group Account
130
Creating a New User Account and Setting Usage Limits
131
Maximum Usage Limits
132
Resetting Usage Data Values
132
Resetting Standard Accounting to Factory Default Settings
132
Printing a Standard Accounting Report
132
Network Accounting
133
Enabling and Configuring Network Accounting
133
Configuring Accounting Login Screen Settings
134
Accounting and Billing Device Settings
134
Enabling Accounting in Print Drivers
135
Enabling Accounting in a Windows Print Driver
135
Enabling Accounting in an Apple Macintosh Print Driver
135
13 Administrator Tools
137
Monitoring Alerts and Status
137
Setting up Job Completion Alerts
137
Setting up Machine Status Alerts
138
Setting up Billing Meter Read Alerts
138
Setting up Supplies Data Alerts
138
Configuring Stored File Settings
139
Touch Screen Settings
139
Setting Default Touch Screen Settings
139
Taking the Printer Offline
140
Restarting the Printer in Centreware Internet Services
140
Restarting the Printer from the Control Panel
141
View Usage and Billing Information
141
Usage Counters
141
Billing Information
142
Cloning
142
Saving Printer Settings
142
Installing a Clone File
143
Address Books
143
Public Address Book
143
Editing the Public Address Book as a .Csv File
144
Importing an Address Book File
144
Adding and Editing Address Book Entries
145
Font Management Utility
145
Customizing Printer Contact Information
145
Updating the Printer Software
146
Updating the Software
146
Date and Time Settings
146
Fax Speed Dial Setup Settings
147
Watermarks and Annotations
148
Watermarks
148
Universal Unique ID
148
Forced Annotations
149
Memory Settings
149
14 Secure Access
151
Pre-Requisites
151
Installation
151
Connecting the USB Card Reader
151
Configuring the USB Card Reader
152
Upload the Equitrac Provider and Libraries
152
Checking the Status of the Plug-Ins
153
Deactivating Plug-Ins
153
Activating Plug-Ins
153
Configuring Xerox® Secure Access for Authentication
154
Optional Steps: Access Control
154
Enabling Xerox® Secure Access Settings
155
Disable the USB Card Reader
156
Deactivating Equitrac Provider and Libraries for USB Card Readers
156
Disabling Plug-In Features
156
Disconnect USB Card Reader from the Device USB Port
157
15 Authentication (CAC)
159
Supported Card Types
159
Supported Card Readers
160
Requirements
160
16 Customization and Expansion
161
Xerox® Extensible Interface Platform
161
Enabling Extensible Services
161
Installing Custom Services Software
161
Enabling Extensible Service Registration
162
Auxiliary Interface Kit
162
17 Xerox® Remote Print Services
163
Configuration Planning
164
Printing the Configuration Report
164
Configuring Xerox® Remote Print Services
165
Accessing Centreware Internet Services
165
Configuring the DNS Server
165
Configuring the Proxy Server
166
Communication Status
167
Enrolling and Setting up Communication
168
Accessing the Meter Assistant
169
Accessing the Supplies Assistant
169
Accessing the Maintenance Assistant
170
Troubleshooting
171
Scenario 1: the Device Cannot Access the Internet
171
Scenario 2: Proxy Server Settings Are Incorrect
173
Scenario 3: the DNS Settings Are Incorrect
174
Scenario 4: Unconfirmed Support for Smart Esolutions/Xerox® Remote Print Services Features
174
Scenario 5: Connectivity Failed Following Device Reboot
175
Additional Information
175
Fuji Xerox Color C60 Instruction Manual (41 pages)
Color Printer with Integrated Fiery Ex-i and Fiery EX Print Server
Brand:
Fuji Xerox
| Category:
Printer
| Size: 1.4 MB
Table of Contents
Table of Contents
3
What Does this Document Mean to Me
4
Product Overview
4
Monthly Print Volume Range
4
Product Configuration
5
Space Requirements (Minimum Service Clearance)
5
Installation Requirements
7
General Installation Requirements
7
Responsibility Matrix
9
Product Specifications
10
Security
10
Engine Specifications
10
DMP Features
11
Multi-Model Driver 2 (MMD2)
11
Network Scanner Specifications
11
Image Quality
12
Copy/Print Speed
15
Paper / Throughput
15
Paper Tray Capabilities
17
Document Handler
18
Billing Meters
18
Auditron Function
19
Cost Recovery
19
Envelopes
19
Accessories/Options
21
Finishing Options & Specifications
21
Feeder Options & Specifications
28
Support
29
Customer Support
29
Remote Services
29
Supplies
30
Consumables & Ordering
30
Toner Cartridges
30
Safety Data Sheets
31
Approvals
31
Integrated Fiery Colour Server Ex-I and EX Print Server
31
System Start-Up
31
Microsoft Windows Certificate of Authenticity (COA)
31
Specifications
32
Running Antivirus Software
33
Security
33
Non-Standard Paper Size Support
33
Customer Service and Support
33
Adobe PDF Print Engine
33
File Creation
33
Supported File Formats
34
Key Features and Considerations
34
Purchasable Options
35
Variable Information
36
Network Specifications for EX-I Integrated Fiery and EX Print Colour Servers
36
Printing Services
36
Client Specifications
37
Ppds and Print Drivers
37
Fiery System Software Limitations
37
Business Validation Document
37
Advertisement
Advertisement
Related Products
Fuji Xerox ApeoSport C6550I
Fuji Xerox ApeosPort-V C6675
Fuji Xerox ApeosPort-V C6676
Fuji Xerox apeosport-v c6685
Fuji Xerox ApeosPort-VI C6671
Fuji Xerox ApeosPort-VII C6688
Fuji Xerox ApeosPort C6570
Fuji Xerox ApeosPort-IV C3375
Fuji Xerox ApeosPort-V C3320
Fuji Xerox DocuCentre-V C3376
Fuji Xerox Categories
All in One Printer
Printer
Copier
Scanner
Office Equipment
More Fuji Xerox Manuals
Login
Sign In
OR
Sign in with Facebook
Sign in with Google
Upload manual
Upload from disk
Upload from URL