Sign In
Upload
Manuals
Brands
Fuji Xerox Manuals
All in One Printer
ApeosPort-V C3320
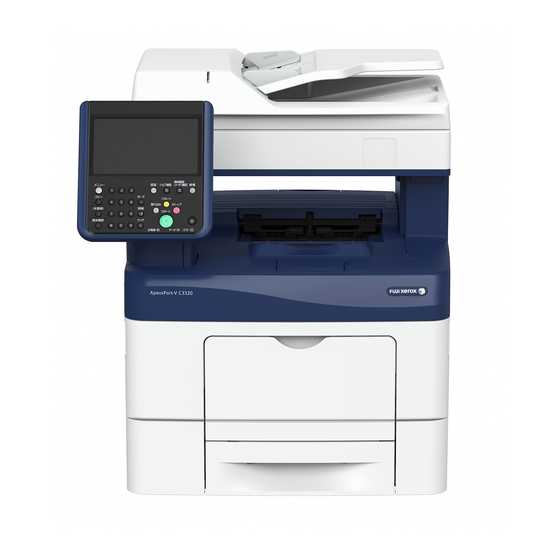
Fuji Xerox ApeosPort-V C3320 Manuals
Manuals and User Guides for Fuji Xerox ApeosPort-V C3320. We have
3
Fuji Xerox ApeosPort-V C3320 manuals available for free PDF download: Administrator's Manual, User Manual, Quick Reference
Fuji Xerox ApeosPort-V C3320 Administrator's Manual (633 pages)
Brand:
Fuji Xerox
| Category:
All in One Printer
| Size: 19.79 MB
Table of Contents
Table of Contents
3
1 Before Using the Machine
13
Preface
14
Types of Manuals
15
Using this Guide
16
Organization of this Guide
16
Conventions
17
Interface Cables
19
Using the Ethernet Interface
19
Using the USB Interface
19
Power Saver Mode
21
Changing the Interval for Entering Power Saver Mode
21
Customizing the Control Panel
23
Changing the Screen Default
23
Setting the Screen after Auto Clear
24
Customizing the Button Layout
25
Network Scanning
26
Assigning Services to the Custom Buttons
29
Adjusting Screen Brightness
31
Touch Screen
32
Important Security Instructions
34
Entering Text
35
2 Paper and Other Media
37
Paper Types
38
Loadable Quantity and Weight
38
Standard Paper
40
Supported Paper
40
Special Paper
41
Unusable Paper
42
Loading Paper
43
Loading Paper in Trays 1 and 2
43
Loading Paper in Tray 5 (Bypass Tray)
45
Changing the Paper Settings
48
3 Maintenance
51
Replacing Consumables
52
Replacing Toner Cartridges
54
Replacing Waste Toner Container
56
Replacing Drum Cartridges (for Customers Having a Spot Maintenance Contract)
58
Cleaning the Machine
63
Cleaning the Exterior
63
Cleaning the Touch Screen
63
Cleaning the Scanner
64
Cleaning the Document Feeder Rollers
64
Cleaning the Color Toner Density (CTD) Sensor
65
Cleaning the Raster Optical Scanner (ROS) Window
68
Cleaning the Paper Tray Rollers
71
Executing Calibration
74
Adjusting Color Registration
78
Auto Color Registration
78
Side Color Registration
79
Printing a Report/List
81
Deleting a Private Charge Print Job with an Invalid User ID
82
Setting Restore Tool
83
4 Machine Status
85
Overview of Machine Status
86
Machine Information
87
General Information
87
Paper Tray Status
88
Print Reports
88
Error History Report
89
Copy Reports
90
Printer Reports
90
Scan Reports
92
Fax Reports
93
Folder List
94
Auditron Reports
95
Automatically Printed Reports/Lists
97
Job Counter Report
95
Broadcast Report
97
Overwrite Hard Disk
98
Print Mode
98
Transmission Report
97
Retrieve Programming
99
Default Programming
100
Fax Receiving Mode
101
Press the <Machine Status> Button
101
Faults
102
Supplies
103
Billing Information
104
User Account Billing Information
105
5 Tools
107
On the [Machine Information] Screen
108
Step 3 Selecting [Tools]
109
Step 4 Selecting a Setting Item on the [Tools] Screen
109
Step 5 Setting a Feature
111
Step 6 Exiting System Administration Mode
111
System Settings Procedure
108
Step 1 Entering System Administration Mode
108
Step 2 Entering the System Administrator User ID and Passcode
108
Tools Menu List
112
Common Service Settings
127
Machine Clock/Timers
127
Auto Clear
128
Auto Print
128
Daylight Savings
129
Power Saver Settings
129
Time Zone
129
Audio Tones
130
Connection Interval
128
Ntp Time Synchronization
128
Control Panel Select Tone
130
Scheduled Power off
130
Auto Clear Alert Tone
131
Default Language
132
Screen Default
132
Screen/Button Settings
132
Fault Tone
131
Reconfirm E-Mail Recipient
133
Screen Brightness
133
Keyboard Input Restriction
134
Paper Tray Settings
136
Paper Tray Attributes
136
Paper Tray Attributes During Loading
137
Customize Paper Supply Screen
137
Paper Tray Priority
138
Paper Type Priority
138
Image Quality Adjustment
139
Reports
140
Print Reports Button
140
Job History Report
140
Maintenance
142
Delete All Data
143
Software Options
143
Watermark
144
Software Upgrade
144
Default Watermark Effect
145
Force Annotation
146
Print Universal Unique ID (Apeosport Series Models Only)
148
Image Log Control (Apeosport Series Models Only)
148
Print Position
148
Image Log Control
150
Notify Job Completion by E-Mail
151
Plug-In Settings
151
Other Settings
152
Auto Job Promotion
152
Default Print Paper Size
152
Data Encryption
153
Encryption Key for Confidential Data
154
Service Rep. Restricted Operation
154
Restrict Recipient Selection Method
155
Data Indicator
156
Software Download
155
Paused Job Handling
156
Copy Service Settings
157
Copy Tab - Features Allocation
157
Preset Buttons
158
Copy Defaults
158
Color Shift
160
Copy Control
163
Maximum Stored Pages
163
Memory Full Procedure
163
Annotations - Comment Density
164
Custom Colors
165
Original Size Defaults
165
Reduce/Enlarge Presets
165
Annotations - Create Comments
166
Connectivity & Network Setup
167
Port Settings
167
Port 9100
169
Smb Client
169
Receive E-Mail
170
Send E-Mail
170
Protocol Settings
172
Upnp Discovery
170
Ethernet Settings
172
Ipv4 - Gateway Address
174
Ipv4 - Ip Filter
174
Machine's E-Mail Address/Host Name
175
Proxy Server Settings
176
EP Proxy Server Setup
177
Outgoing/Incoming E-Mail Settings
178
Http Proxy Server Name
178
Pop3 Server Settings
178
Smtp Server Settings
179
Remote Authentication/Directory Service
180
Kerberos Server Settings
180
Smb Server Settings
184
Security Settings
185
Pdf/Docuworks/Xps Signature Settings
187
Ieee 802.1X Settings
188
Other Settings
189
Domain Filtering
190
Output Destination for E-Mail
190
Print Service Settings
191
Allocate Memory
191
Delete Form
192
Other Settings
193
Print Area
193
Substitute Tray
193
Resume Job after Print Error
194
Unregistered Forms
194
Banner Sheet
195
Banner Sheet Offset
195
Print User ID
195
Postscript Font Absence
196
Postscript Font Substitution
196
Scan Service Settings
198
Screen Defaults
198
Color Scanning
199
File Format
199
Original Type
199
Scan Defaults
199
Shadow Suppression
200
Language of the Original
201
Scan to PC Defaults
201
Transfer Protocol
201
Login Credential to Access Destination
201
Original Size Defaults
202
Output Size Defaults
202
Reduce/Enlarge Presets
203
Other Settings
203
Background Suppression Level
203
Searchable Text
201
Shadow Suppression Level
203
Tiff Format
204
Image Transfer Screen
204
Searchable - Page Orientation
205
Url File Expiration
205
Fax Service Settings
206
Fax Screen Default
206
Screen Defaults
206
Transmission Screen
206
Fax Defaults
207
Transmission Header Text
207
Confirmation Options
207
Fax Control
208
Internet Fax Subject
208
Re-Enter Recipients
208
Chain Dial
209
Transmission Interval
210
Batch Send
210
Sided Printing
211
Re-Enter Group Recipients
209
Pseudo-Photo Gradation Mode
211
Direct Fax
212
Fax Received Options
213
Block Unknown Fax Numbers
213
Reduce/Enlarge Presets
214
Original Size Defaults
214
Local Terminal Information
215
Skip Blank Pages
212
Company Logo
215
Internet Fax Control
216
Local Name
215
Internet Fax Path
216
Profile for Broadcast Job
216
Broadcast Starting Rate
217
Delivery Confirmation Method
217
Fax Transfer Maximum Data Size
218
E-Mail/Internet Fax Service Settings
219
E-Mail Control
219
Maximum Address Entries
219
Print Delivery Confirmation Mail
220
Split Send Method
220
Edit E-Mail Recipients
221
Maximum Split Count
221
Address Book Settings
222
Folder Service Settings
223
Print & Delete Confirmation Screen
223
Standard Size Threshold Value
223
Quality/File Size for Retrieval
224
Job Flow Service Settings
225
Media Print Service Settings
226
Expiration Date for Files in Folder
227
Stored File Settings
227
Stored Job Expiration Date
227
Print Job Confirmation Screen
228
Web Applications Service Setup
230
Server Certificate Verification Settings
230
Server Setup
232
Other Settings
233
Web Applications Version
234
Web Browser Setup
234
Setup
236
Create Folder
236
Folder Name
237
Delete Files after Retrieval
237
Stored Programming
238
Create Job Flow Sheet
238
Restrictions on Using Job Flow
239
Create New Job Flow Sheet
240
E-Mail Notification
245
Create Job Flow Sheet Keyword
246
Add Address Book Entry
246
Address Type
248
Given Name
249
S/Mime Certificate
249
Server Name/Ip Address
250
Fax Number
251
Starting Rate
251
Delay Start
252
Relay Broadcast
252
Internet Fax Profile
253
Create Fax Group Recipients
253
Add Fax Comment
254
Paper Tray Attributes
255
Accounting
256
Create/View User Accounts
256
User ID
257
User Name
257
Reset Total Impressions
259
View Accounts
259
Reset User Accounts
260
System Administrator's Meter (Copy Jobs)
261
Accounting Type
261
Local Accounting
261
Network Accounting
261
Xerox Standard Accounting
261
Accounting Login Screen Settings
262
Alternative Name for User ID
262
Mask User ID
262
Fax Billing Data
263
Charge Rate Per Unit
263
Accounting/Billing Device Settings
263
Accounting/Billing Device
264
Interrupt Mode
264
Authentication/Security Settings
266
System Administrator Settings
266
System Administrator's Login ID
266
System Administrator's Passcode
266
Authentication
267
Login Type
267
Access Control
268
Create Authorization Groups
269
Create/View User Accounts
269
Reset User Accounts
269
User Details Setup
270
Maximum Login Attempts by System Administrator
272
Passcode Policy
272
Charge/Private Print Settings
273
Receive Control
273
Save as Private Charge Print Job
274
Allow User to Disable Active Settings
275
Job Status Default
275
Active Jobs View
275
Completed Jobs View
275
Overwrite Hard Disk
276
Number of Overwrites
276
6 Centreware Internet Services Settings
279
Installation of Centreware Internet Services
280
Configuration on the Machine
280
Preparations
280
Starting Centreware Internet Services
282
Configuring Machine Settings Using Centreware Internet Services
283
7 Printer Environment Settings
287
Print Overview
288
Using the Machine as a Network Printer
288
Local Connection
289
Supported Operating Systems
289
Installation When Using USB Port
290
Step 1 Preparations
290
Step 2 Configuration on the Machine
290
Step 3 Configuration on the Computer
291
Centreware Internet Services Setting Items
291
Installation When Using TCP/IP (Lpd/Port 9100)
292
Step 1 Preparations
292
Step 2 Configuration on the Machine
292
Step 3 Configuration on the Computer
293
Centreware Internet Services Setting Items
293
Installation When Using Internet Printing Protocol (IPP)
295
Step 1 Preparations
295
Step 2 Configuration on the Machine
295
Step 3 Configuration on the Computer
296
Centreware Internet Services Setting Items
296
8 E-Mail Environment Settings
297
E-Mail Overview
298
Preparations
299
Installation Procedures
301
Step 1 Enabling Port and Setting up TCP/IP
301
Step 2 Configuring E-Mail Environment
302
Centreware Internet Services Setting Items
303
9 Scanner Environment Settings
305
Scan Service Overview
306
WSD Stands for Web Services on Devices
306
Scan to My Folder
307
Store to Wsd
307
Configuration of Store to Folder
308
Step 1 Enabling Port and Setting up TCP/IP
308
Step 2 Registering a Folder
309
Step 3 Configuring on the Computer
309
Configuration of Scan to PC
310
Step 1 Preparations
310
Step 2 Enabling Port and Setting up TCP/IP
311
Step 3 Configuration on the Computer
312
Configuration of Store to USB
313
Step 1 Available USB Memory Devices
313
Step 2 Centreware Internet Services Setting Items
313
Configuration of Network Scanning (Job Template Scanning)
314
Step 1 Preparations
314
Step 2 Enabling Ports and Setting up TCP/IP
314
Step 3 Configuring the SNMP Port
315
Step 4 Configuration on the Computer
315
Configuration of Scan to My Folder
317
Step 1 Preparations
317
Step 2 Enabling SMB Port and Setting up TCP/IP
317
Step 3 Configuring Remote Authentication
318
Step 4 Configuring Scan to My Folder
319
Step 5 Configuration on the Computer
321
Configuration of Job Flow Sheets
322
Step 1 Enabling Ports and Setting up TCP/IP
322
Step 2 Configuring the SNMP Port
323
Step 3 Configuration on the Computer
323
Configuration of Store & Send Link
324
Step 1 Configuring E-Mail
324
Step 2 Enabling Authentication
324
Step 3 Other Settings
324
Step 4 Centreware Internet Services Setting Items
324
Device Information
325
Configuration of Store to WSD
326
Step 1 Preparations
326
Step 2 Enabling Port
326
Step 3 Confirmation on the Computer
327
10 Using the Internet Fax Service
329
Internet Fax Overview
330
Preparations
330
E-Mail Environment
330
System Requirements for the Machine
330
Installation Procedures
332
Step 1 Enabling Port and Setting up TCP/IP
332
Step 2 Configuring E-Mail Environment
333
Step 3 Testing the Internet Fax
334
11 Using the Server Fax Service
335
Server Fax Overview
336
Preparations
336
System Requirements for the Machine
336
Installation Procedure
337
Installation Overview
337
Step 1 Fax Settings
337
Step 2 Setting the Server Fax Feature
338
12 Encryption and Digital Signature Settings
341
Encryption and Digital Signature Overview
342
Types of Certificate
342
Encryption Features for Communication
342
Encryption and Digital-Signature Features for Scan Files
343
Configuration of HTTP Communications Encryption
344
Installation Overview
344
Step1 Configuration on the Machine
344
Step2 Configuration on the Computer
345
Configuration of Encryption Using Ipsec
346
Installation Overview
346
Step1 Import and Configuration of a Certificate
346
Step2 Configuration on the Machine (Configuration of Ipsec)
347
Step3 Configuration on the Computer
348
Configuration of E-Mail Encryption/Digital Signature
349
Installation Overview
349
Step1 Configuration on the Machine
349
Step2 Configuration on Sender and Recipient
351
Configuration of Pdf/Docuworks/Xps Signature
353
Installation Overview
353
Step1 Configuration on the Machine
353
Step2 Configuration on the Computer
355
13 Authentication and Accounting Features
357
Overview of Authentication and Accounting Feature
358
Types of User
358
User Roles and Authorization Groups
358
Access Control
359
Authorization Groups
359
Types of Authentication
360
Feature Access
360
Login to Local Accounts
360
Authentication Methods
361
Types of Account Administration
361
Authentication and Accounting Relationship
362
Jobs Manageable by Account Administration
362
Services Controlled by Authentication
366
Overview
366
Combination of Authentication and Account Administration Types
366
Authentication for Job Flow Sheets and Folders
369
Creating / Using Job Flow Sheet
369
When the Authentication Feature Is Enabled
369
Creating / Using Folder
370
When the Authentication Feature Is Disabled
370
Configuration for Authentication
372
Installation Overview
372
Enabling Authentication
372
Changing the Default Authorization Group Settings
375
Creating an Authorization Group
375
Configuration for IC Card Reader (Optional)
377
Step 1 Preparations
377
Step 2 Logout Method Using the Smart Card
377
Step 3 Registering Smart Card Information
378
Configuration for Account Administration
379
Step 1 Selecting an Accounting Type
379
Step 2 Registering User Information
379
User Authentication Operations
381
Authenticating Login Users
381
Changing Passcode
382
Advertisement
Fuji Xerox ApeosPort-V C3320 User Manual (429 pages)
Brand:
Fuji Xerox
| Category:
Copier
| Size: 14.01 MB
Table of Contents
Table of Contents
3
Before Using the Machine
13
Preface
14
Types of Manuals
15
Using this Guide
16
Organization of this Guide
16
Conventions
17
Safety Notes
18
Electrical Safety
19
Machine Installation
20
Operational Safety
23
Consumable
26
Regulation
27
Radio Frequency Emissions (Class B)
27
Product Safety Certification (CB)
27
Environment
28
About License
29
Rsa Bsafe
29
Heimdal
29
JPEG Code
29
Libcurl
29
Freebsd
30
Openldap
31
Des
32
Aes
33
TIFF (Libtiff)
33
ICC Profile (Little Cms)
33
XML Paper Specification (XPS)
33
EDICT and COMPDIC
33
Cyrus SASL
34
Newlib
34
About QT
48
About Software Applied to LGPL
48
Other Licenses
56
Legal Notice
57
Product Overview
59
Machine Components
60
Power Source
63
Switching the Main Power on
63
Switching the Power on
63
Switching the Power off
64
Switching the Main Power off
64
Switching the Power off from Remote Location
65
Power Saver Mode
66
Entering the Power Saver Mode
66
Exiting the Power Saver Mode
67
Control Panel
68
Screens and Buttons Displayed
71
About the Services Home Screen
72
Activity Report
76
Print Mode
76
Touch Screen
77
Entering Text
79
Copy
81
Copying Procedure
82
Step 1 Loading Documents
82
Step 2 Selecting Features
84
Step 3 Entering a Quantity
85
Step 4 Starting the Copy Job
86
Step 5 Confirming the Copy Job in Job Status
87
Operations During Copying
88
Stopping the Copy Job
88
Changing the Number of Copies
89
Interrupting the Copy Job
90
Simple Copy
91
Paper Supply (Selecting the Paper for Copying)
91
Reduce/Enlarge (Making Enlarged/Reduced Copies)
92
Sided Copying (Making 2 Sided Copies)
93
Auto Detect / Color / Black & White (Selecting the Color for Copying)
93
Lighten/Darken (Adjusting the Copy Density)
94
Pages Per Side (Copying Two Pages Onto One Sheet)
94
Original Orientation (Specifying the Orientation of Loaded Documents)
94
Copy
95
Reduce/Enlarge (Making Enlarged/Reduced Copies)
95
Paper Supply (Selecting the Paper for Copying)
98
Output Color (Selecting the Color for Copying)
100
Sided Copying (Making 2 Sided Copies)
105
Copy Output (Specifying Finishing Options)
105
Pages Per Side (Copying Multiple Pages Onto One Sheet)
105
Lighten/Darken (Adjusting the Copy Density)
105
Image Quality
106
Original Type (Selecting the Document Type)
106
Image Options (Adjusting Copy Density/Sharpness/Saturation of Images)
107
Image Enhancement
108
(Erasing the Background Color of Documents/Adjusting Contrast)
108
Color Effects (Selecting an Image Quality)
109
Color Balance (Adjusting Color Balance)
110
Color Shift (Adjusting the Color Tone)
111
Layout Adjustment
112
Sided Copying (Making 2 Sided Copies)
112
Book Copying (Copying Facing Pages Onto Separate Sheets)
113
Sided Book Copying (Making 2 Sided Copies of Facing
115
Original Size (Specifying the Scan Size for the Document)
116
Edge Erase (Erasing Edges and Margin Shadows of the Document)
117
Image Shift (Adjusting the Image Position)
119
Margin Shift
120
Invert Image (Making Reversed Copies of Images)
121
Original Orientation (Specifying the Orientation of Loaded Documents)
121
Output Format
123
Sided Copying (Making 2 Sided Copies)
123
Booklet Creation (Creating a Bound Booklet)
123
Covers (Attaching Covers to Copies)
125
Pages Per Side (Copying Multiple Pages Onto One Sheet)
127
Repeat Image (Making Multiple Copies on One Sheet)
128
Annotations (Adding a Comment/A Date/Page Numbers to Copies)
130
Watermark (Printing Control Numbers on the Background of Copies)
135
Preset Repeat Image (Making Multiple Copies on a Single Sheet)
137
Copy Output (Specifying Finishing Options)
138
ID Card Copy (Copying both Sides of an ID Card)
139
Job Assembly
141
Build Job (Processing Documents Scanned with Different Settings as One Job)
141
Select [Copy] on the Services Home Screen
141
Sample Job (Checking the Finished Output of the Copy)
145
Combine Original Sets (Adding Originals)
146
Delete Outside/Delete Inside (Deleting Outside or Inside of the Selected Area)
147
Stored Programming (Calling a Stored Program for Build Job)
148
Fax
149
Fax Procedure
150
Step 1 Loading Documents
150
Step 2 Selecting Features
152
Step 3 Specifying Destinations
153
Step 4 Starting the Fax Job
154
Step 5 Confirming the Fax Job in Job Status
155
Operations During Faxing
156
Stopping the Fax Job
156
Previewing the Read Images During a Fax Job
157
Changing the Scan Settings
160
About Internet Fax
161
Internet Fax Features
161
Sending Internet Fax
163
Receiving Internet Fax
164
Useful Features
165
About Server Fax
168
Sending Server Fax
168
Simple Fax
170
Specifying a Destination Using the Numeric Keypad
170
Speed Dialing (Specifying a Destination Using an Address Number)
171
Previewing the Read Images During a Simple Fax Job
172
Resolution (Specifying the Scanning Resolution)
172
Original Size (Selecting the Document Size)
173
Sided Scanning (Transmitting 2-Sided Originals)
173
Fax/Internet Fax
174
Fax / Internet Fax (Selecting Fax / Internet Fax )
174
Add (Sending Faxes to Multiple Recipients)
175
Specifying a Destination Using the Address Book
175
Address Book (Specifying a Destination Using the Address Book [Type 1])
175
Address Book (Specifying a Destination Using the Address Book [Type 2])
178
Speed Dialing (Specifying a Destination Using an Address Number)
180
Add New Address (Registering a Destination on the Address Book)
181
Specifying a Destination Using the Keyboard Screen
183
Specifying a Destination Using the Redial Feature
184
Entering Specific Symbols
184
Removing/Confirming a Recipient
185
Previewing the Read Images During a Fax/Internet Fax Job
185
Lighten/Darken (Adjusting Fax Density)
186
Original Size (Specifying the Scan Size for the Original)
186
Sided Scanning (Transmitting 2-Sided Originals)
186
Resolution (Specifying the Scanning Resolution)
188
Layout Adjustment
189
Sided Scanning (Transmitting 2-Sided Originals)
189
Original Type (Selecting the Document Type)
189
Resolution (Specifying the Scanning Resolution)
190
Original Size (Specifying the Scan Size for the Original)
190
Book Faxing (Scanning Facing Pages Onto Separate Sheets)
190
Reduce/Enlarge (Specifying a Scan Ratio)
191
Lighten / Darken (Adjusting Fax Density)
192
Fax/Internet Fax Options
193
Acknowledgement Report (Confirming Transmission Results)
193
Starting Rate (Selecting a Communication Mode)
195
Priority Send/Delay Start (Specifying Send Priority/Send Time)
196
Transmission Header Text (Adding Sender Name and Phone Number to Faxes)
197
Cover Page (Transmitting Documents with a Cover Page)
198
Internet Fax Subject (Specifying the Internet Fax Subject)
200
Internet Fax Message (Editing the Internet Fax Mail Contents)
200
Recipient Print Sets (Printing Multiple Sets at the Remote Machine)
201
Pages Per Side (Combining Multiple Pages into One Sheet)
202
Remote Folder (Using Remote Folder)
202
F Code (Using F Code Transmission)
205
Internet Fax Profile (Specifying Internet Fax Profiles)
208
Encryption (Sending Internet Fax Encrypted by S/MIME)
209
Digital Signature (Sending Internet Fax with a Digital Signature by S/MIME)
210
More Options
211
Remote Polling (Retrieving Files from Remote Machines)
211
Select [Fax/Internet Fax] on the Services Home Screen
211
Store for Polling
213
(Storing Files on the Machine that a Remote Machine Can Retrieve)
213
On-Hook (Confirming Remote Machine Response Prior to Transmission)
215
Broadcast
217
Broadcast Send (Transmitting to Multiple Recipients)
217
Relay Broadcast (Transmitting Documents through a Relay Station)
218
Remote Relay Broadcast (Performing Relay Broadcast to Remote Locations)
221
Receiving Faxes
225
Switching between Auto Receive and Manual Receive
225
Using Auto Receive
226
Using Manual Receive
226
Using Folder Receive
226
Facsimile Information Services
227
Using the Receiver
227
When Not Using a Receiver
227
Scan
229
Scanning Procedure
230
Step 1 Loading Documents
230
Step 2 Selecting the Features
232
Step 3 Starting the Scan Job
235
Step 4 Confirming the Scan Job in Job Status
236
Step 5 Saving the Scanned Data
236
Operations During Scanning
238
Stopping the Scan Job
238
Previewing the Scanned Images During a Scan Job
239
Changing Scan Settings
242
E-Mail
244
Address Book
245
Address Book (Specifying a Destination Using the Address Book [Type 1])
245
Address Book (Specifying a Destination Using the Address Book [Type 2])
248
Add New Address (Registering a Recipient on the Address Book)
251
New Recipient (Specifying an E-Mail Address)
252
Add Me (Adding the Sender's Address)
254
Recipient(S) (Editing a Recipient)
254
From (Setting the Sender's Address)
255
Subject (Setting the Subject)
256
Message (Entering the E-Mail Body)
256
Preview (Previewing the Scanned Images During a Scan Job)
257
Color Scanning (Selecting an Output Color)
257
Original Size (Specifying a Scan Size)
258
Sided Scanning (Scanning both Sides of a Document)
258
File Format (Selecting a File Format for Output Data)
260
Searchable Text
262
Language of the Original
264
Network Scanning
271
Preview (Previewing the Scanned Images During a Scan Job)
272
Color Scanning (Selecting an Output Color)
272
Original Size (Specifing a Scan Size)
272
Sided Scanning (Scanning both Sides of a Document)
272
File Format (Selecting a File Format for Output Data)
272
Scan to PC
273
Transfer Protocol (Selecting a Transfer Protocol)
274
Address Book
274
Address Book (Specifying a Destination Using the Address Book [Type 1])
275
Address Book (Specifying a Destination Using the Address Book [Type 2])
276
Add New Address (Registering a Destination PC on the Address Book)
277
Browse (Specifying a Destination PC by Browsing Your Network)
279
Specifying a Destination (Specifying a Destination PC Using the Screen Keyboard)
281
Preview (Previewing the Scanned Images During a Scan Job)
283
Color Scanning (Selecting an Output Color)
283
Original Size (Specifing a Scan Size)
283
Sided Scanning (Scanning both Sides of a Document)
283
File Format (Selecting a File Format for Output Data)
283
Store to Folder
284
Color Scanning (Selecting an Output Color)
284
Original Size (Specifing a Scan Size)
285
Sided Scanning (Scanning both Sides of a Document)
285
Preview (Previewing the Scanned Images During a Scan Job)
285
Store to USB
286
Save in (Specifying a Storage Location in the USB Memory Device)
290
Details
290
(Displaying the Details of a Storage Location in the USB Memory Device)
290
Preview (Previewing the Scanned Images During a Scan Job)
291
Color Scanning (Selecting an Output Color)
291
Original Size (Specifing a Scan Size)
291
Sided Scanning (Scanning both Sides of a Document)
291
File Format (Selecting a File Format for Output Data)
292
Store & Send Link
293
Scan to (Displaying the E-Mail Address of the Authenticated User)
293
From (Displaying the E-Mail Address of the Authenticated User)
294
Subject (Setting the Subject)
294
Message (Entering the E-Mail Body)
294
Color Scanning (Selecting an Output Color)
294
Original Size (Specifing a Scan Size)
294
Sided Scanning (Scanning both Sides of a Document)
294
Preview (Previewing the Scanned Images During a Scan Job)
294
File Format (Selecting a File Format for Output Data)
295
Store to WSD
296
Computer (Starting a Scan Job Via Computer Operation)
296
This Device (Storing Data Scanned by the Machine on a Network Computer)
297
Advanced Settings
299
Color Scanning (Selecting an Output Color)
299
Original Type (Selecting the Document Type)
299
Photographs (Scanning a Color Photograph)
300
Image Options (Adjusting Scan Density and Image Sharpness)
300
Image Enhancement
301
(Erasing the Background Color of Documents/Adjusting Contrast)
301
Image Enhancement (Erasing the Background Color of Documents/Adjusting Contrast)
301
Shadow Suppression (Suppressing the Document Background)
302
Color Space (Specifying the Color Space)
302
Layout Adjustment
304
Resolution (Specifying a Scanning Resolution)
304
Sided Scanning (Scanning both Sides of a Document)
305
Book Scanning (Scanning Facing Pages on Separate Sheets)
305
Original Size (Specifying a Scan Size)
306
Edge Erase (Erasing Edges and Margin Shadows in the Document)
306
Reduce/Enlarge (Specifying a Scanning Ratio)
308
Original Orientation (Specifying the Orientation of the Loaded Document)
309
E-Mail Options/Filing Options
310
Quality/File Size (Specifying an Image Compression Ratio When Scanning)
310
On the Services Home Screen, Select [E-Mail], [Store to Folder], [Network Scanning], [Scan to PC], [Store & Send Link], or [Store to USB]
310
On the Services Home Screen, Select [E-Mail]
310
File Format (Selecting a File Format for Output Data)
311
Read Receipts (Specifying Read Receipts)
311
Split Send (Sending in Sections)
312
File Name (Specifying a Name for the File to be Sent)
312
Reply to (Specifying a Reply Address)
313
File Name Conflict (Setting the Action to be Taken for File Name Conflict)
313
File Name (Specifying a Name for the File to be Saved)
314
Encryption (Sending E-Mail Encrypted by S/MIME)
314
Digital Signature (Sending E-Mail with a Digital Signature by S/MIME)
315
Login Name
315
Password
315
Meta Data
315
Send from Folder
317
Folder Operating Procedure
318
Step 1 Opening the [Send from Folder] Screen
318
Step 2 Selecting a Folder
318
Step 3 Checking/Selecting Files in a Folder
319
Step 4 Operating Files in a Folder
319
Selecting a Folder
320
Checking/Operating Files in a Folder
321
Checking File Details
323
Printing Files in a Folder
326
Sided Printing
327
File Details
327
Configuring/Starting Job Flow
328
[Link Job Flow Sheet to Folder] Screen
329
Job Flow Restrictions
332
Job Flow Sheets
333
Job Flow Procedure
334
Step 1 Opening the [Job Flow Sheets] Screen
334
Step 2 Selecting a Job Flow Sheet
334
Step 3 Confirming/Changing the Job Flow Sheet
335
Step 4 Starting the Job Flow Sheet
335
Selecting/Changing a Job Flow Sheet
336
Fuji Xerox ApeosPort-V C3320 Quick Reference (100 pages)
Brand:
Fuji Xerox
| Category:
All in One Printer
| Size: 8.25 MB
Table of Contents
Table of Contents
3
1 Before Using the Machine
5
Preface
6
Using this Guide
7
Prerequisite Knowledge
7
Organization
7
Conventions
8
Safety Notes
9
Electrical Safety
10
Machine Installation
11
Operational Safety
15
Consumable
18
Regulation
19
Radio Frequency Emissions (Class B)
19
Product Safety Certification (CB)
19
Environment
20
Illegal Copies and Printouts
21
2 Product Overview
23
Machine Components
24
Control Panel
27
Power Source
29
Switching the Main Power on
29
Switching the Power on
29
Switching the Power off
30
Switching the Main Power off
30
Power Saver Mode
32
Entering the Power Saver Mode
32
Exiting the Power Saver Mode
33
Screen Brightness
34
3 Basic Operations
35
Copying Procedure
36
Step 1 Loading Documents
36
Document Feeder
36
Step 2 Selecting Features
38
Step 3 Entering a Quantity
39
Step 4 Starting the Copy Job
39
Step 5 Confirming the Copy Job in Job Status
40
Stopping the Copy Job
41
Fax Procedure
43
Step 1 Loading Documents
43
Step 2 Selecting Features
43
Step 3 Specifying Destinations
44
Step 4 Starting the Fax Job
45
Step 5 Confirming the Fax Job in Job Status
46
Stopping the Fax Job
46
Printing Procedure
48
Scanning Procedure
49
Step 1 Loading Documents
49
Step 2 Selecting the Features
49
Store to Usb
50
Store to Wsd
50
Step 3 Starting the Scan Job
51
Step 4 Confirming the Scan Job in Job Status
52
Step 5 Saving the Scanned Data
53
Stopping the Scan Job
53
Other Scan Services
55
Creating Folders
57
Changing the Default Settings
58
4 Paper and Other Media
59
Usable Paper
60
Weights of Usable Paper
60
Supported Paper Types
60
Standard Paper
60
Unusable Paper
61
Loading Paper
62
Loading Paper in Trays 1 and 2
62
Loading Paper in Tray 5 (Bypass Tray)
63
Changing the Paper Settings
66
Advertisement
Advertisement
Related Products
Fuji Xerox ApeosPort-II C3300
Fuji Xerox ApeosPort-IV C3375
Fuji Xerox ApeosPort-IV C3373
Fuji Xerox ApeosPort-V C3374
Fuji Xerox DocuCentre-V C3376
Fuji Xerox apeosport-iv C3370
Fuji Xerox apeosport-iv C3371
Fuji Xerox DocuPrint C3290 FS
Fuji Xerox ApeosPort C3570
Fuji Xerox ApeosPort C3070
Fuji Xerox Categories
All in One Printer
Printer
Copier
Scanner
Office Equipment
More Fuji Xerox Manuals
Login
Sign In
OR
Sign in with Facebook
Sign in with Google
Upload manual
Upload from disk
Upload from URL