Sign In
Upload
Manuals
Brands
Dentsply Sirona Manuals
Dental equipment
CEREC Omnicam AC
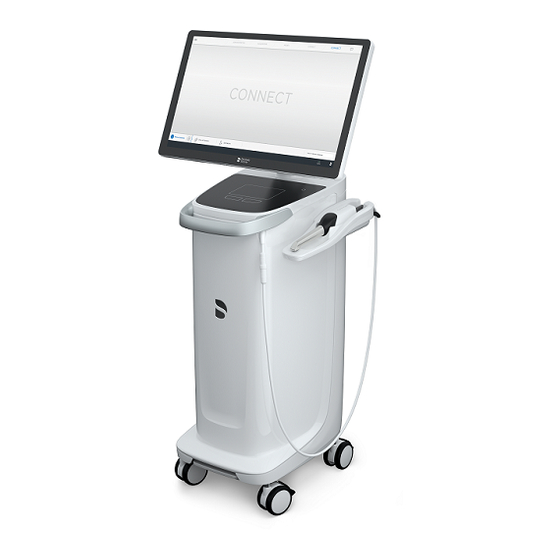
Dentsply Sirona CEREC Omnicam AC Manuals
Manuals and User Guides for Dentsply Sirona CEREC Omnicam AC. We have
5
Dentsply Sirona CEREC Omnicam AC manuals available for free PDF download: Operating Instructions Manual, Service Manual, Unpacking And Installation Instructions
Dentsply Sirona CEREC Omnicam AC Operating Instructions Manual (192 pages)
Brand:
Dentsply Sirona
| Category:
Dental equipment
| Size: 8 MB
Table of Contents
English
6
Table of Contents
6
General Data
9
Dear Customer
9
Contact Information
9
General Information about These Operating Instructions
10
General Conventions and Structure of the Document
11
Structure of the Document
11
Identification of the Danger Levels
11
Formats and Symbols Used
11
Operating Conventions
12
Notes to the Repository
13
Warranty and Liability
14
Intended Use
15
Legend
16
Safety Instructions
18
Disturbance of Data Transmission
18
Basic Safety Information
18
Prerequisites
18
Connecting the Unit
18
General Safety Information
19
Movement and Stability of the Unit
21
Maintenance and Repair
21
Modifications to the Product
21
Accessories
22
Safety Labels
22
Electrostatic Charge
24
ESD Warning Labels
24
ESD Protective Measures
24
About the Physics of Electrostatic Charges
25
Wireless Phone Interference with Equipment
26
Integration in a Network or Connection to a Modem
27
Disposal
28
Product Description
29
Technical Description
29
Technical Data
31
Controls and Functional Elements
33
Overview of the Front Panel
33
Overview of the Rear Panel
34
Operating State LED
35
Certification
36
Electromagnetic Compatibility
37
Electromagnetic Emission
37
Interference Immunity
38
Working Clearances
41
Installation and Startup
42
Transport and Unpacking
42
Disposal of Packaging Materials
42
Scope of Supply
42
Initial Startup
43
Plug Connections
43
Using a Trackball (if Provided, Depending on the Configuration)
44
Insert Battery (Optional)
45
Switching the Units on
47
Switching the Units off
48
Battery-Backed Operation (Optional)
49
Operation
52
Working with the Touch Monitor
52
Adjusting the Position of the Monitor
52
Touch Functionality
53
Adjusting Touch-Sensitivity and Buzzer Volume
54
Scanner Warm-Up Time
54
Scanner Setup
55
Taking Optical Impressions with the Scanner
56
Scanner Guide
58
Occlusal Scan
59
Buccal Scan
59
Lingual Scan
60
Approximal Surface Scan
60
Single and Multiple Buccal Registration
61
Scanning the Quadrant and Jaw
61
Completing Measurements
64
Software for the Scanner
65
Cut out Model Areas
65
Maintenance
66
Cleaning, Disinfection and Sterilization
67
Cleaning Agents and Disinfectants
67
Cleaning Agents
67
Wiping Disinfectants
67
High-Level Disinfectants
67
Uncritical Surfaces Including Monitor
68
Trackball Holder (if Available)
69
Scanner
69
General Information
70
Components of the Scanner
70
Removing the Mirror Sleeve
71
D3696
71
Refitting the Mirror Sleeve
72
Mirror Sleeve Reprocessing Overview
72
Preliminary Cleaning of the Mirror Sleeve
73
Disinfecting the Scanner Body and the Mirror Sleeve
73
High-Level Disinfection of the Mirror Sleeve
74
Set)
74
Dry Heat Sterilization of the Mirror Sleeve
79
Using Disposable Sleeves
80
Calibrating the Scanner
81
Color Calibration
84
Replacing the Main Fuse
87
Charging the Battery
88
Replacing the Battery
89
Disposal
90
Disposal of the Storage Battery Pack
91
Appendix
92
Making Backup Copies
92
Seal on PC Slide-In Module
92
Windows Update
92
Index
93
Français
98
Chère Cliente, Cher Client
101
Coordonnées
101
Indications Générales
101
Remarques Générales Relatives À la Notice D'utilisation
102
Conventions Générales Et Structure du Document
103
Structure du Document
103
Identification des Niveaux de Danger
103
Mises en Page Et Symboles Utilisés
103
Conventions de Commande
104
Indications Relatives Au Lieu de Conservation
105
Garantie Et Responsabilité
106
Utilisation Conforme
107
Explication des Marquages
108
Consignes de Sécurité
110
Consignes de Sécurité de Base
110
Conditions Nécessaires
110
Raccordement de L'appareil
111
Consignes de Sécurité Générales
111
Déplacement Et Stabilité de L'appareil
113
Entretien Et Remise en État
113
Modifications Apportées Au Produit
114
Accessoires
115
Dysfonctionnements de la Transmission de Données
110
Autocollants de Sécurité
115
Charge Électrostatique
117
Etiquettes D'avertissement ESD
117
Mesures de Protection ESD
117
A Propos du Processus Physique D'apparition des Charges Électrostatiques
118
Perturbation des Appareils Provoquée Par Les Téléphones Mobiles
119
Intégration Dans un Réseau Ou Raccordement À un Modem
120
Elimination du Produit
121
Description du Produit
122
Description Technique
122
Caractéristiques Techniques
124
Eléments de Commande Et de Fonctions
126
Vue D'ensemble de la Face Avant
126
Vue D'ensemble de la Face Arrière
127
DEL D'état de Fonctionnement
128
Certification
129
Compatibilité Électromagnétique
130
Émissions Électromagnétiques
130
Immunité Aux Perturbations
131
Distances de Protection
134
Mise Au Rebut du Matériel D'emballage
135
Montage Et Mise en Service
135
Transport Et Déballage
135
Étendue de la Livraison
135
Mise en Service
136
Fiches de Raccordement
136
Mise en Place de la Boule de Commande (Le Cas Échéant, Selon la Configuration)
137
Mise en Place de L'accu (Option)
138
Mise en Marche des Appareils
140
Mettre Les Appareils À L'arrêt
141
Mode Secouru (Option)
142
Commande
145
Utilisation du Moniteur Tactile
145
Adaptation de la Position du Moniteur
145
Fonctionnalité Tactile
146
Réglage de la Sensibilité du Pavé Tactile Et du Volume de L'avertisseur
147
Temps de Chauffage du Scanner
148
Réglage du Scanner
149
Prises D'empreinte Avec Le Scanner
150
Guidage du Scanner
153
Balayage Occlusal
154
Balayage Buccal
154
Balayage Lingual
155
Balayage des Surfaces Proximales
155
Recalage Buccal Simple Ou Multiple
156
Enregistrer Les Quadrants Et la Mâchoire
156
Boucler Les Mesures
159
Logiciel Pour Le Scanner
160
Découper des Zones du Modèle
160
Maintenance
161
Nettoyage, Désinfection Et Stérilisation
162
Produits de Nettoyage Et Désinfectants
162
Produits de Nettoyage
162
Lingettes Désinfectantes
162
Désinfectants de Niveau Élevé
162
Surfaces Non Critiques y Compris Moniteur
163
Support du Trackball (Le Cas Échéant)
164
Scanner
164
Remarques Générales
165
Composants du Scanner
165
Déposer la Douille-Miroir
166
Emmancher la Douille-Miroir
167
Vue D'ensemble du Retraitement de la Douille-Miroir
167
Pré-Nettoyage de la Douille-Miroir
168
Cette Étape Permet de Désinfecter Le Corps du Scanner Et la Douille-Miroir
168
Désinfection Ultra-Efficace de la Douille-Miroir
169
Stérilisation À L'air Chaud
174
Utilisation de Douilles Jetables
175
Calibrage du Scanner
176
Calibrage de la Couleur
179
Remplacer Le Fusible Principal
182
Recharger L'accu
183
Remplacer L'accu
184
Élimination
185
Mise Au Rebut du Jeu D'accus
186
Annexe
187
Copies de Sécurité (Backup)
187
Sceau Sur Le Tiroir PC
187
Windows Update
187
Index
188
Advertisement
Dentsply Sirona CEREC Omnicam AC Service Manual (134 pages)
Brand:
Dentsply Sirona
| Category:
Medical Equipment
| Size: 11 MB
Table of Contents
Table of Contents
2
General Information
6
Additional Information
7
Structure of the Document
8
Identification of the Danger Levels
8
Formats and Symbols Used
8
Safety Instructions
9
Qualification of Service Personnel
9
Changes to the Unit
9
Electrostatic Discharge
9
Ventilation Slots
9
Disconnecting the Power Supply
10
Replacing Parts
10
Measurements
10
Important Instructions after Repair / Maintenance
11
Safety Labels
11
Wireless Phone Interference with Equipment
13
Integration in a Network or Connection to a Modem
13
Disposal
14
Technical Data
15
PC Overview
17
CEREC Primescan AC / Primescan AC Components
17
CEREC Omnicam AC /Omnicam AC Components
18
Overview of the Connections on the PC
19
Service Tools
21
Teamviewer
21
OTC" Radio Module Tool
22
Dromni" Omnicam Diagnostics Program
23
Drprimescan" Primescan Diagnostics Program
26
Dentsply Sirona Restore Solution
29
Objective
29
Compatible Pcs
30
Prerequisites for Performing this Procedure
31
When Can the Procedure Not be Used
31
It Is Lost
31
Performing the Restore Process
32
Connecting the USB Stick
32
Systems Without a Separate Keyboard
32
Systems with a Separate Physical Keyboard
32
Proceeding with the Process
32
Final Steps
33
Scanner
34
Calibrating the Scanner
34
Color Calibration
37
Scanner Test and Diagnostics
40
CEREC Primescan / Primescan
40
Scanner Test and Diagnostics for CEREC Primescan / Primescan
40
Test Instruction for Inspecting the Voltage Output on the Interface Card
45
CEREC Omnicam / Omnicam
46
Scanner Test and Diagnostics for CEREC Omnicam
46
Omnicam
46
Repair
50
General Information on Assembly
50
Removing Covers and Holders
51
Removing and Installing Covers
51
Cover Overview
51
Opening the Service Cover
52
Closing the Service Cover
52
Left Cover
52
Right Cover
54
Front Cover
55
Replacing the Kinematics Cover
57
Replacing the CEREC Primescan / Primescan Scanner Holder
58
Replacing the CEREC Omnicam / Omnicam Scanner Holder
59
Replacing the Heater
60
Replacing Parts (Without Removing Covers)
61
Replacing Parts (Without Removing the Service Cover)
61
Replacing the Main Fuse
61
Adjusting the Footswitch
62
Replacing Double Castors
62
Replacing the Monitor USB Cover
63
Replacing the Footswitch
64
Replacing the Camera Cable
65
Replacing the O-Ring
71
Replacing Parts (by Removing the Service Cover)
73
Replace the Monitor Kinematics
73
Replacing the Monitor
85
Control Unit
89
Replacing the PC Including the Power Supply Unit
94
Replace Battery (Optional)
100
Replacing the DVD Drive (Optional)
101
Opening the PC
102
Replacing the SSD Module
102
Replacing the Hard Drive
103
Replacing the WLAN Card
104
Replacing the Interface Card
104
Replace the Graphic Card
105
Closing the PC
107
Replacing Parts (Whereby the Removal of Covers Is Necessary)
108
Replace Internal Scanner Cable
108
Completely Replacing the Power Input
108
Replacing the Fan
111
Replacing the Fan Power Pack
112
Replacing the Radio Module
113
Replacing the Footswitch Cable
114
Replace the Handle
114
Settings and Adjustments
115
Set the Monitor Kinematics
115
Removing the Covers
115
Adjust the Monitor Kinematics
119
Check Tightness
121
Readjust the Monitor Kinematics
122
Reattach the Covers
123
Maintenance
127
Clean the PC Fans
127
Replacing/Cleaning the Filter
127
Circuit Diagrams
129
CEREC Primescan AC / Primescan AC
129
CEREC Omnicam AC / Omnicam AC
130
Dentsply Sirona CEREC Omnicam AC Operating Instructions Manual (90 pages)
Brand:
Dentsply Sirona
| Category:
Dental equipment
| Size: 6 MB
Table of Contents
Table of Contents
2
General Data
5
Dear Customer
5
Contact Data
5
General Information about These Operating Instructions
6
General Conventions and Structure of the Document
7
Structure of the Document
7
Identification of the Danger Levels
7
Formats and Symbols Used
7
Operating Conventions
8
Notes to the Repository
9
Warranty and Liability
10
Intended Use
11
Further Use of Sirona Dental CAD/CAM System
14
Legend
14
Safety Instructions
16
Disturbance of Data Transmission
16
Basic Safety Information
16
Prerequisites
16
Connecting the Unit
16
General Safety Information
17
Movement and Stability of the Unit
19
Maintenance and Repair
19
Modifications to the Product
19
Accessories
20
Safety Labels
20
Electrostatic Charge
22
ESD Warning Labels
22
ESD Protective Measures
22
About the Physics of Electrostatic Charges
23
Wireless Phone Interference with Equipment
24
Integration in a Network or Connection to a Modem
25
Disposal
26
Product Description
27
Technical Description
27
Technical Data
29
Controls and Functional Elements
31
Overview of the Front Panel
31
Overview of the Rear Panel
32
Operating State LED
33
Certification
34
Electromagnetic Compatibility
35
Electromagnetic Emission
35
Interference Immunity
36
Working Clearances
39
Installation and Startup
40
Transport and Unpacking
40
Disposal of Packaging Materials
40
Scope of Supply
40
Initial Startup
41
Plug Connections
41
Inserting the Battery
43
Switching the Units on
45
Switching the Units off
46
Operation
47
Working with the Touch Monitor
47
Adjusting the Position of the Monitor
47
Touch Functionality
48
Adjusting Touch-Sensitivity and Buzzer Volume
49
Scanner Warm-Up Time
49
Scanner Setup
50
Taking Optical Impressions with the Scanner
51
Scanner Guide
53
Occlusal Scan
54
Buccal Scan
54
Lingual Scan
55
Approximal Surface Scan
55
Single and Multiple Buccal Registration
56
Scanning the Quadrant and Jaw
56
Completing Measurements
59
Software for the Scanner
60
Cut out Model Areas
60
Maintenance
61
Cleaning, Disinfection and Sterilization
62
Cleaning Agents and Disinfectants
62
Cleaning Agents
62
Wiping Disinfectants
62
High-Level Disinfectants
62
Uncritical Surfaces Including Monitor
63
Scanner
64
General Information
65
Components of the Scanner
65
Removing the Mirror Sleeve
66
D3696
66
Refitting the Mirror Sleeve
67
Mirror Sleeve Reprocessing Overview
67
Preliminary Cleaning of the Mirror Sleeve
68
Disinfecting the Scanner Body and the Mirror Sleeve
68
High-Level Disinfection of the Mirror Sleeve
69
Set)
69
Dry Heat Sterilization of the Mirror Sleeve
74
Using Disposable Sleeves
75
Calibrating the Scanner
76
Color Calibration
79
Replacing the Main Fuse
82
Charging the Battery
83
Replacing the Battery
84
Disposal
85
Disposal of the Storage Battery Pack
86
Appendix
87
Making Backup Copies
87
Seal on PC Slide-In Module
87
Windows Update
87
Index
88
Advertisement
Dentsply Sirona CEREC Omnicam AC Service Manual (84 pages)
Brand:
Dentsply Sirona
| Category:
Medical Equipment
| Size: 10 MB
Table of Contents
Table of Contents
2
General Information
5
Additional Information
6
Structure of the Document
7
Identification of the Danger Levels
7
Formats and Symbols Used
7
Safety Instructions
8
Qualification of Service Personnel
8
Changes to the Unit
8
Electrostatic Discharge
8
Ventilation Slots
8
Disconnecting the Power Supply
8
Replacing Parts
9
Measurements
9
Important Instructions after Repair / Maintenance
10
Safety Labels
10
Wireless Phone Interference with Equipment
12
Integration in a Network or Connection to a Modem
12
Disposal
13
Technical Data
14
PC Overview
16
CEREC Primescan AC / Primescan AC Components
16
CEREC Omnicam AC /Omnicam AC Components
17
Overview of the Connections on the PC
18
Service Tools
19
Teamviewer
19
Dentsply Sirona Restore Solution V2.0
19
Objective
19
Compatible Pcs
20
Prerequisites for Performing this Procedure
20
When Can the Procedure Not be Used
20
It Is Lost
20
Performing the Restore Process
21
Connecting the USB Stick
21
Systems Without a Separate Keyboard
21
Systems with a Separate Physical Keyboard
21
Proceeding with the Process
21
Final Steps
22
Scanner
23
Calibrating the Scanner
23
Color Calibration
26
Repair
29
General Information on Assembly
29
Removing Covers and Holders
30
Removing and Installing Covers
30
Cover Overview
30
Opening the Service Cover
31
Closing the Service Cover
31
Left Cover
31
Right Cover
33
Front Cover
34
Replacing the Kinematics Cover
36
Replacing the CEREC Primescan / Primescan Scanner Holder
37
Replacing the CEREC Omnicam / Omnicam Scanner Holder
38
Replacing Parts (Without Removing Covers)
39
Replacing Parts (Without Removing the Service Cover)
39
Replacing the Main Fuse
39
Adjusting the Footswitch
40
Replacing Double Castors
40
Replacing the Monitor USB Cover
41
Replacing the Footswitch
42
Replacing the Camera Cable
43
Replacing Parts (by Removing the Service Cover)
49
Replacing the Monitor
49
Control Unit
53
Replacing the PC Including the Power Supply Unit
58
Replace Battery (Optional)
64
Replacing the DVD Drive (Optional)
65
Opening the PC
66
Replacing the SSD Module
66
Replacing the Hard Drive
67
Replacing the WLAN Card
67
Replacing the Interface Card
68
Replace the Graphic Card
68
Closing the PC
70
Replacing Parts (Whereby the Removal of Covers Is Necessary)
71
Completely Replacing the Power Input
71
Replacing the Fan
73
Replacing the Fan Power Pack
74
Replacing the Radio Module
75
Replacing the Footswitch Cable
76
Replacing the Handle
76
Maintenance
77
Replacing/Cleaning the Filter
77
Circuit Diagrams
78
CEREC Primescan AC / Primescan AC
78
CEREC Omnicam AC / Omnicam AC
79
Re-Test
80
When Is the Re-Test Carried out
80
Description of Device Type
80
To be Carried out on Completion of the Test
80
What the Test Steps Involve
80
Visual Inspection
80
Protective Ground Wire Resistance
81
Device Leakage Current
81
Insulation Resistance
81
Functional Test
82
Dentsply Sirona CEREC Omnicam AC Unpacking And Installation Instructions (16 pages)
Brand:
Dentsply Sirona
| Category:
Dental equipment
| Size: 1 MB
Table of Contents
Table of Contents
2
1 Packaging Box
3
2 Removing Parts from the Lower Section of the Packaging
4
3 Taking the Unit out of Its Packaging
5
4 Assembling the Unit
6
Opening the Service Cover
6
Insert Battery (Optional)
7
Installing the Monitor
8
Using a Trackball (if Provided, Depending on the Configuration)
10
Plug Connections
11
Inserting the USB Connector Wireless Module
11
Closing the Service Cover
12
Using a Power Cable Holder (Accessories)
12
5 Putting the System into Operation
13
Switching the Units on
13
Configure Software
14
Advertisement
Related Products
Dentsply Sirona CEREC Zirconia meso
Dentsply Sirona CEREC MC
Dentsply Sirona CEREC MC X
Dentsply Sirona Ceram.x Spectra ST
Dentsply Sirona Ceram.x Spectra ST Effects
Dentsply Sirona CEREC MC XL
Dentsply Sirona CEREC AF Connect
Dentsply Sirona CEREC AI
Dentsply Sirona CEREC Primemill US
Dentsply Sirona Digital Cure
Dentsply Sirona Categories
Dental equipment
Medical Equipment
Indoor Furnishing
Scanner
Computer Hardware
More Dentsply Sirona Manuals
Login
Sign In
OR
Sign in with Facebook
Sign in with Google
Upload manual
Upload from disk
Upload from URL