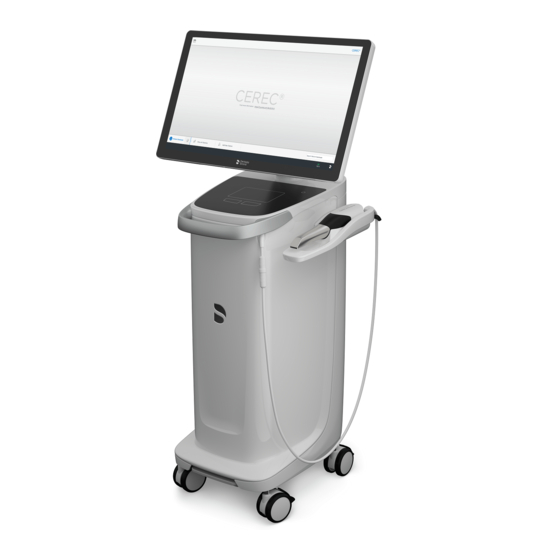
Dentsply Sirona Primescan AC Service Manual
Hide thumbs
Also See for Primescan AC:
- Operating instructions manual (192 pages) ,
- Service manual (134 pages) ,
- Unpacking and installation instructions (16 pages)

Related Manuals for Dentsply Sirona Primescan AC


Summary of Contents for Dentsply Sirona Primescan AC
- Page 1 12.2018 New as of: CEREC Primescan AC, Primescan AC, CEREC Omnicam AC, Omnicam AC Service Manual English...
-
Page 2: Table Of Contents
Table of contents Dentsply Sirona Service Manual CEREC Primescan AC, Primescan AC, CEREC Omnicam AC, Omnicam AC Table of contents General information ....................General information ..................Additional information .................. Structure of the document................1.3.1 Identification of the danger levels .......... - Page 3 Dentsply Sirona Table of contents Service Manual CEREC Primescan AC, Primescan AC, CEREC Omnicam AC, Omnicam AC 2.2.6.3 Systems with a separate physical keyboard....2.2.6.4 Proceeding with the process ........2.2.7 Final steps..................Scanner ........................Calibrating the scanner ................Color calibration ...................
- Page 4 Table of contents Dentsply Sirona Service Manual CEREC Primescan AC, Primescan AC, CEREC Omnicam AC, Omnicam AC 4.3.2.11 Replace the graphic card..........4.3.2.12 Closing the PC.............. Replacing parts (whereby the removal of covers is necessary)....4.4.1 Completely replacing the power input..........
-
Page 5: General Information
Dentsply Sirona 1 General information Service Manual CEREC Primescan AC, Primescan AC, CEREC Omnicam AC, Omnicam AC General information General information Nominal line voltage ranges The acquisition unit works in the following ranges: Rated line voltage 100-240 V ~ / 50-60Hz Nominal current 4.7 - 1.8 A... -
Page 6: Additional Information
1 General information Dentsply Sirona Service Manual CEREC Primescan AC, Primescan AC, CEREC Omnicam AC, Omnicam AC Additional information In addition, you also require: Wiring diagrams CEREC Primescan AC / Primescan AC / CEREC Omnicam AC / Omnicam AC Order No.: "66 83 119"... -
Page 7: Structure Of The Document
Dentsply Sirona 1 General information Service Manual CEREC Primescan AC, Primescan AC, CEREC Omnicam AC, Omnicam AC Structure of the document 1.3.1 Identification of the danger levels To prevent personal injury and material damage, please observe the warning and safety information provided in these operating instructions. -
Page 8: Safety Instructions
1 General information Dentsply Sirona Service Manual CEREC Primescan AC, Primescan AC, CEREC Omnicam AC, Omnicam AC Safety instructions 1.4.1 Qualification of service personnel The installation, commissioning, and repairs may only be performed by personnel authorized by Dentsply Sirona for this purpose. -
Page 9: Replacing Parts
Dentsply Sirona 1 General information Service Manual CEREC Primescan AC, Primescan AC, CEREC Omnicam AC, Omnicam AC CAUTION Damage/danger resulting from unauthorized alterations Modifications to the device may only be performed following prior consultation with us. We are not liable for unauthorized alterations of any kind. -
Page 10: Important Instructions After Repair / Maintenance
1 General information Dentsply Sirona Service Manual CEREC Primescan AC, Primescan AC, CEREC Omnicam AC, Omnicam AC 1.4.8 Important instructions after repair / maintenance To ensure a safe operating condition for the device, the following checks must be performed after repair / maintenance: ●... - Page 11 Dentsply Sirona 1 General information Service Manual CEREC Primescan AC, Primescan AC, CEREC Omnicam AC, Omnicam AC Plug connections of external interfaces CAUTION Adaptation of acquisition unit to external components Additional devices connected to external interfaces must be tested according to the relevant standards, e.g.: EN 60601-1:2006 + Cor.:2010 + A1:2013,...
-
Page 12: Wireless Phone Interference With Equipment
1 General information Dentsply Sirona Service Manual CEREC Primescan AC, Primescan AC, CEREC Omnicam AC, Omnicam AC 1.4.10 Wireless phone interference with equipment The use of mobile wireless phones in practice or hospital environments must be prohibited to ensure safe operation of the unit. -
Page 13: Disposal
Dentsply Sirona 1 General information Service Manual CEREC Primescan AC, Primescan AC, CEREC Omnicam AC, Omnicam AC 1.4.12 Disposal In accordance with Directive 2012/19/EU and national disposal regulations regarding old electrical and electronic devices, please be advised that such items must be disposed of in a special way within the European Union (EU). -
Page 14: Technical Data
1 General information Dentsply Sirona Service Manual CEREC Primescan AC, Primescan AC, CEREC Omnicam AC, Omnicam AC Technical data Type designation CEREC Primescan AC / Primescan AC / CEREC Omnicam AC / Omnicam Rated line voltage 100 - 240 VAC /50 - 60 Nominal current 5.0 –... - Page 15 Dentsply Sirona 1 General information Service Manual CEREC Primescan AC, Primescan AC, CEREC Omnicam AC, Omnicam AC Dimensions and weight Dimensions W x H x D in mm 408 (537) x 1190 x 443 in inches 16.06 (21.14) x 46.85 x 17.44 Weight ●...
-
Page 16: Pc Overview
1 General information Dentsply Sirona Service Manual CEREC Primescan AC, Primescan AC, CEREC Omnicam AC, Omnicam AC PC overview 1.6.1 CEREC Primescan AC / Primescan AC components Component For hardware version V1.7.1 Power supply unit: Fortron FSP650-70UA Mainboard: MSI Z370 PC PRO (MS-7B49 V1.0) -
Page 17: Cerec Omnicam Ac /Omnicam Ac Components
Dentsply Sirona 1 General information Service Manual CEREC Primescan AC, Primescan AC, CEREC Omnicam AC, Omnicam AC 1.6.2 CEREC Omnicam AC /Omnicam AC components Component For hardware version V1.1.1 Power supply unit: Fortron FSP650-70UA Mainboard: MSI Z370 PC PRO (MS-7B49 V1.0) -
Page 18: Overview Of The Connections On The Pc
1 General information Dentsply Sirona Service Manual CEREC Primescan AC, Primescan AC, CEREC Omnicam AC, Omnicam AC 1.6.3 Overview of the connections on the PC... -
Page 19: Service Tools
Dentsply Sirona 2 Service tools Service Manual CEREC Primescan AC, Primescan AC, CEREC Omnicam AC, Omnicam AC Service tools TeamViewer For remote diagnostics and assistance through customer support from Dentsply Sirona, TeamViewer Quicksupport is preinstalled. No Internet connection is required for this. -
Page 20: Compatible Pcs
2 Service tools Dentsply Sirona Service Manual CEREC Primescan AC, Primescan AC, CEREC Omnicam AC, Omnicam AC 2.2.2 Compatible PCs Dentsply Sirona Restore Solution v2.0 is compatible with the PCs of the following devices: ● CEREC Primescan AC, Primescan AC ●... -
Page 21: Performing The Restore Process
Dentsply Sirona 2 Service tools Service Manual CEREC Primescan AC, Primescan AC, CEREC Omnicam AC, Omnicam AC 2.2.6 Performing the restore process 2.2.6.1 Connecting the USB stick ü The conditions for performing this process are met (see preceding section). 1. Insert the USB stick with the Restore Solution into a USB port on the device. -
Page 22: Final Steps
2 Service tools Dentsply Sirona Service Manual CEREC Primescan AC, Primescan AC, CEREC Omnicam AC, Omnicam AC 2.2.7 Final steps You must carry out the following work upon conclusion of the restore processes in order that the device can be operated as previously: 1. -
Page 23: Scanner
Dentsply Sirona 3 Scanner Service Manual CEREC Primescan AC, Primescan AC, CEREC Omnicam AC, Omnicam AC Scanner Calibrating the scanner The measurement procedure used by the system requires the use of a calibrated scanner. The CEREC Primescan / Primescan / CEREC Omnicam / Omnicam scanner is calibrated ex works. - Page 24 3 Scanner Dentsply Sirona Service Manual CEREC Primescan AC, Primescan AC, CEREC Omnicam AC, Omnicam AC Calibrating the scanner 1. Remove the protective cap from the calibration set. 2. Mount the calibration set on the tip of the scanner until it locks into place.
- Page 25 Dentsply Sirona 3 Scanner Service Manual CEREC Primescan AC, Primescan AC, CEREC Omnicam AC, Omnicam AC Measuring the position of the exit window 1. Mount the bottom side of the calibration set to the tip of the scanner. 2. Click on the "OK" button.
-
Page 26: Color Calibration
3 Scanner Dentsply Sirona Service Manual CEREC Primescan AC, Primescan AC, CEREC Omnicam AC, Omnicam AC Color calibration General information NOTE Faulty color analysis The color analysis can be negatively impacted due to strong light incidence and it can lead to varying results. - Page 27 Dentsply Sirona 3 Scanner Service Manual CEREC Primescan AC, Primescan AC, CEREC Omnicam AC, Omnicam AC Color-calibrating the scanner NOTE Only use color calibration set with clean, dry CEREC Primescan / Primescan / CEREC Omnicam / Omnicam scanner In order to achieve optimum results, the CEREC Primescan / Primescan / CEREC Omnicam / Omnicam scanner must be clean, disinfected and dry before color calibration.
- Page 28 3 Scanner Dentsply Sirona Service Manual CEREC Primescan AC, Primescan AC, CEREC Omnicam AC, Omnicam AC Do not continue using a damaged color-calibration set; instead, contact your distributor to purchase a new one. Replacing the color calibration set NOTE Regularly replacing the color calibration set In order to achieve optimum results, the color calibration set must be replaced regularly.
-
Page 29: Repair
Dentsply Sirona 4 Repair Service Manual CEREC Primescan AC, Primescan AC, CEREC Omnicam AC, Omnicam AC Repair General information on assembly DANGER Potentially lethal shock hazard People can be injured or electrical components of the unit destroyed. ➢ Switch off the unit prior to beginning work. -
Page 30: Removing Covers And Holders
4 Repair Dentsply Sirona Service Manual CEREC Primescan AC, Primescan AC, CEREC Omnicam AC, Omnicam AC Removing covers and holders 4.2.1 Removing and installing covers 4.2.1.1 Cover overview... -
Page 31: Opening The Service Cover
Dentsply Sirona 4 Repair Service Manual CEREC Primescan AC, Primescan AC, CEREC Omnicam AC, Omnicam AC 4.2.1.2 Opening the service cover 1. Turn the turning bolt with a screwdriver (> 5) or another suitable implement (a coin or suchlike) approx. 90° counterclockwise up to the stop. - Page 32 4 Repair Dentsply Sirona Service Manual CEREC Primescan AC, Primescan AC, CEREC Omnicam AC, Omnicam AC 2. Flip the footswitch down. 3. Unscrew the left screw (B). 4. Remove the left cover by pulling it out downwards slightly and then...
-
Page 33: Right Cover
Dentsply Sirona 4 Repair Service Manual CEREC Primescan AC, Primescan AC, CEREC Omnicam AC, Omnicam AC 4.2.1.5 Right cover 1. Unscrew the 3 screws (A). 2. Flip the footswitch down. 3. Unscrew the right screw (B). 66 81 832 D3696... -
Page 34: Front Cover
4 Repair Dentsply Sirona Service Manual CEREC Primescan AC, Primescan AC, CEREC Omnicam AC, Omnicam AC 4. Remove the right cover by pulling it out downwards slightly and then to the rear. 4.2.1.6 Front cover IMPORTANT First remove scanner holder or handle In order for the front cover to be able to be removed, the scanner holder must first be removed. - Page 35 Dentsply Sirona 4 Repair Service Manual CEREC Primescan AC, Primescan AC, CEREC Omnicam AC, Omnicam AC 1. Unscrew the 3 screws (A). 2. Unscrew the 3 screws (B). 66 81 832 D3696 D3696.076.01.01.02 12.2018...
-
Page 36: Replacing The Kinematics Cover
4 Repair Dentsply Sirona Service Manual CEREC Primescan AC, Primescan AC, CEREC Omnicam AC, Omnicam AC 3. Press the 2 Pilz connectors (C) from behind out of the grommets. Alternatively: Loosen the cover by pulling on the bottom part of the front cover until the Pilz connector audibly disengages. -
Page 37: Replacing The Cerec Primescan / Primescan Scanner Holder
Dentsply Sirona 4 Repair Service Manual CEREC Primescan AC, Primescan AC, CEREC Omnicam AC, Omnicam AC 4.2.2 Replacing the CEREC Primescan / Primescan scanner holder CEREC Primescan / CEREC Primescan / Primes- Primescan scanner holder can scanner holder cover parts set... -
Page 38: Replacing The Cerec Omnicam / Omnicam Scanner Holder
4 Repair Dentsply Sirona Service Manual CEREC Primescan AC, Primescan AC, CEREC Omnicam AC, Omnicam AC 4.2.3 Replacing the CEREC Omnicam / Omnicam scanner holder CEREC Omnicam / Omni- CEREC Omnicam / Omnicam cam scanner holder cover scanner holder parts set... -
Page 39: Replacing Parts (Without Removing Covers)
Dentsply Sirona 4 Repair Service Manual CEREC Primescan AC, Primescan AC, CEREC Omnicam AC, Omnicam AC Replacing parts (without removing covers) 4.3.1 Replacing parts (without removing the service cover) 4.3.1.1 Replacing the main fuse DANGER Potentially lethal shock hazard People can be injured or electrical components of the unit destroyed. -
Page 40: Adjusting The Footswitch
4 Repair Dentsply Sirona Service Manual CEREC Primescan AC, Primescan AC, CEREC Omnicam AC, Omnicam AC 4.3.1.2 Adjusting the footswitch 1. Flip the footswitch down. 2. Turn the adjusting screw (A), until (when the footswitch is in a closed state) it audibly actuates the tab (B) of the microswitch. -
Page 41: Replacing The Monitor Usb Cover
Dentsply Sirona 4 Repair Service Manual CEREC Primescan AC, Primescan AC, CEREC Omnicam AC, Omnicam AC 4.3.1.4 Replacing the monitor USB cover 1. Open the monitor USB cover. 2. Remove the monitor USB cover by using your left hand to bend the... -
Page 42: Replacing The Footswitch
4 Repair Dentsply Sirona Service Manual CEREC Primescan AC, Primescan AC, CEREC Omnicam AC, Omnicam AC 4.3.1.5 Replacing the footswitch 1. Remove the scanner from the holder and set it safely aside. For a device with a trackball, remove the trackball from the spherical recess. -
Page 43: Replacing The Camera Cable
Dentsply Sirona 4 Repair Service Manual CEREC Primescan AC, Primescan AC, CEREC Omnicam AC, Omnicam AC 4.3.1.6 Replacing the camera cable IMPORTANT Perform the replacement of the camera cable in a dust-free environment. Primescan 1. Attach the tool (A) (REF 6399229) to the cover nut (B) with the two pins. - Page 44 4 Repair Dentsply Sirona Service Manual CEREC Primescan AC, Primescan AC, CEREC Omnicam AC, Omnicam AC 7. Release the two screws and remove the strain relief cover (F) from the camera housing. IMPORTANT Ensure that no dust particles penetrate into the interior of the camera.
- Page 45 Dentsply Sirona 4 Repair Service Manual CEREC Primescan AC, Primescan AC, CEREC Omnicam AC, Omnicam AC 12. Place the strain relief cover (F) onto the camera housing and fix it with the two screws (tightening torque: 30 N cm). 13. Place the dust protection sticker (D) supplied in the package into the depicted position on the camera housing and stick it down firmly.
- Page 46 4 Repair Dentsply Sirona Service Manual CEREC Primescan AC, Primescan AC, CEREC Omnicam AC, Omnicam AC 17. Attach the tool (A) (REF 6399229) to the cover nut (B) with the two pins and turn it using a torque wrench (tightening torque: 2.5 Nm).
- Page 47 Dentsply Sirona 4 Repair Service Manual CEREC Primescan AC, Primescan AC, CEREC Omnicam AC, Omnicam AC 6. Carefully disconnect the connector (E) from the camera and remove the camera cable. 7. Detach the spacer (F) and the camera cover from the old camera cable and push it over the new camera cable in the order presented.
- Page 48 4 Repair Dentsply Sirona Service Manual CEREC Primescan AC, Primescan AC, CEREC Omnicam AC, Omnicam AC 11. Push the spacer (F) onto the camera housing. Make sure that the thick part of the spacer is pointing downwards. 12. Attach the camera cover (C) onto the camera.
-
Page 49: Replacing Parts (By Removing The Service Cover)
Dentsply Sirona 4 Repair Service Manual CEREC Primescan AC, Primescan AC, CEREC Omnicam AC, Omnicam AC 4.3.2 Replacing parts (by removing the service cover) 4.3.2.1 Replacing the monitor NOTE Risk of damage to the display caused by mechanical impact. ➢ Do NOT subject active display area to any mechanical pressure. - Page 50 4 Repair Dentsply Sirona Service Manual CEREC Primescan AC, Primescan AC, CEREC Omnicam AC, Omnicam AC 3. Unscrew the locking plate mini DIN connector (1 screw A). 4. Detach the three cables that run from the monitor to the PC from the PC and unscrew the ground cable.
- Page 51 Dentsply Sirona 4 Repair Service Manual CEREC Primescan AC, Primescan AC, CEREC Omnicam AC, Omnicam AC 1. Guide the 4 monitor cables through the opening and insert the monitor. 2. Route the 4 monitor cables as follows: HDMI cable and USB cable on the right;...
- Page 52 4 Repair Dentsply Sirona Service Manual CEREC Primescan AC, Primescan AC, CEREC Omnicam AC, Omnicam AC 6. Insert the USB connector. 7. Insert the HDMI connector. 8. Re-tighten the locking plate mini DIN connector with 1 screw (A). 9. Route the cables as shown and clip them into the holders.
-
Page 53: Control Unit
Dentsply Sirona 4 Repair Service Manual CEREC Primescan AC, Primescan AC, CEREC Omnicam AC, Omnicam AC 4.3.2.2 Control unit 4.3.2.2.1 Removing and inserting the control unit Removal ü The monitor is removed; see "Replacing the monitor [→ 49]". 1. Unscrew the fastening screws (A) from the locking plates. - Page 54 4 Repair Dentsply Sirona Service Manual CEREC Primescan AC, Primescan AC, CEREC Omnicam AC, Omnicam AC 5. Raise the complete control unit upwards slightly and carefully. 6. Detach the USB connector and the connector of cable L1. 7. Remove the control unit.
- Page 55 Dentsply Sirona 4 Repair Service Manual CEREC Primescan AC, Primescan AC, CEREC Omnicam AC, Omnicam AC 4. Push the left locking plate forwards up to the stop and then screw it back on again with the screw. Perhaps help things along by simultaneously pressing the control unit downwards slightly on the relevant side.
- Page 56 4 Repair Dentsply Sirona Service Manual CEREC Primescan AC, Primescan AC, CEREC Omnicam AC, Omnicam AC 4.3.2.2.2 Removing and inserting the control unit cable ü The monitor is removed; see "Replacing the monitor [→ 49]". 1. Raise the complete control unit carefully upwards slightly (see "Removing and inserting the control unit ...
- Page 57 Dentsply Sirona 4 Repair Service Manual CEREC Primescan AC, Primescan AC, CEREC Omnicam AC, Omnicam AC 4.3.2.2.3 Removing and inserting the interface cables ü The monitor is removed; see "Replacing the monitor [→ 49]". 1. Raise the complete control unit carefully upwards slightly (see "Removing and inserting the control unit ...
-
Page 58: Replacing The Pc Including The Power Supply Unit
4 Repair Dentsply Sirona Service Manual CEREC Primescan AC, Primescan AC, CEREC Omnicam AC, Omnicam AC 4.3.2.3 Replacing the PC including the power supply unit Removal 1. Open the service cover (see "Opening the service cover [→ 31]"). 2. If the option is available, remove the battery (see "Replace battery (optional) ... - Page 59 Dentsply Sirona 4 Repair Service Manual CEREC Primescan AC, Primescan AC, CEREC Omnicam AC, Omnicam AC 5. Unscrew the locking plate mini DIN connector (1 screw A). 6. Remove all connectors from the PC. 7. Unscrew the 3 screws (A).
- Page 60 4 Repair Dentsply Sirona Service Manual CEREC Primescan AC, Primescan AC, CEREC Omnicam AC, Omnicam AC 10. Detach the connector of the power supply from the rear side of the power supply unit. Installation 1. Insert the connector of the power supply into the socket of the rear side of the power supply unit.
- Page 61 Dentsply Sirona 4 Repair Service Manual CEREC Primescan AC, Primescan AC, CEREC Omnicam AC, Omnicam AC 5. Insert all connectors as shown (for connector assignment, see "Overview of the connections on the PC [→ 18]"). 6. Route the cables and clip them into the holders.
- Page 62 4 Repair Dentsply Sirona Service Manual CEREC Primescan AC, Primescan AC, CEREC Omnicam AC, Omnicam AC 9. Screw on the partition plate (2 screws). 10. If the option is available, install the battery again (see "Replace battery (optional) [→ 64]"). 11. Close the service cover (see "Closing the service cover [→ 31]").
- Page 63 Dentsply Sirona 4 Repair Service Manual CEREC Primescan AC, Primescan AC, CEREC Omnicam AC, Omnicam AC 6. Plug the new power supply unit into the guide tabs. Make sure that the foam rubber strip (A) is not dislocated through the insertion of the power supply unit.
-
Page 64: Replace Battery (Optional)
4 Repair Dentsply Sirona Service Manual CEREC Primescan AC, Primescan AC, CEREC Omnicam AC, Omnicam AC 4.3.2.4 Replace battery (optional) Service cover 2 guide rails Storage battery 2 guide pins 2 fastening screws 1. Open the service cover (see "Opening the service cover [→ 31]"). -
Page 65: Replacing The Dvd Drive (Optional)
Dentsply Sirona 4 Repair Service Manual CEREC Primescan AC, Primescan AC, CEREC Omnicam AC, Omnicam AC 4.3.2.5 Replacing the DVD drive (optional) 1. Open the service cover on the rear side (see "Opening the service cover [→ 31]"). 2. Detach the DVD drive connector. -
Page 66: Opening The Pc
4 Repair Dentsply Sirona Service Manual CEREC Primescan AC, Primescan AC, CEREC Omnicam AC, Omnicam AC 4.3.2.6 Opening the PC ü The PC is removed (see "Replacing the PC including the power supply unit [→ 58]"). 1. Turn the PC onto its side as shown. -
Page 67: Replacing The Hard Drive
Dentsply Sirona 4 Repair Service Manual CEREC Primescan AC, Primescan AC, CEREC Omnicam AC, Omnicam AC 4. Insert the new SSD module and push it downwards on the right side. 5. Screw the SSD module down tightly with the fastening screw. -
Page 68: Replacing The Interface Card
4 Repair Dentsply Sirona Service Manual CEREC Primescan AC, Primescan AC, CEREC Omnicam AC, Omnicam AC 2. Remove the screw from the PCI slot plate and pull the WLAN card up and out of the PC. 3. Insert the new WLAN card in the slot. - Page 69 Dentsply Sirona 4 Repair Service Manual CEREC Primescan AC, Primescan AC, CEREC Omnicam AC, Omnicam AC 4. Press the connector lock and pull the connector out. 5. Remove the 2 screws of the PCI slot plate. 6. Press the socket lock downwards.
-
Page 70: Closing The Pc
4 Repair Dentsply Sirona Service Manual CEREC Primescan AC, Primescan AC, CEREC Omnicam AC, Omnicam AC 4.3.2.12 Closing the PC 1. Insert the cover so that a gap of roughly 2 cm is kept at the rear. Then tilt the cover down. -
Page 71: Replacing Parts (Whereby The Removal Of Covers Is Necessary)
Dentsply Sirona 4 Repair Service Manual CEREC Primescan AC, Primescan AC, CEREC Omnicam AC, Omnicam AC Replacing parts (whereby the removal of covers is necessary) 4.4.1 Completely replacing the power input ü The power plug is disconnected. ü The cover is detached (see "Removing and installing covers ... - Page 72 4 Repair Dentsply Sirona Service Manual CEREC Primescan AC, Primescan AC, CEREC Omnicam AC, Omnicam AC 3. Lift up the plate cover at the bottom and take it out. 4. Pull both cable lugs off with needle-nosed pliers. 5. Unscrew the 2 screws (A) and remove the power input.
-
Page 73: Replacing The Fan
Dentsply Sirona 4 Repair Service Manual CEREC Primescan AC, Primescan AC, CEREC Omnicam AC, Omnicam AC 8. Insert the plate cover at the top and tilt it downwards. 9. Screw on the screw of the plate cover. 10. Plug the connector (B) back in again. -
Page 74: Replacing The Fan Power Pack
4 Repair Dentsply Sirona Service Manual CEREC Primescan AC, Primescan AC, CEREC Omnicam AC, Omnicam AC 4.4.3 Replacing the fan power pack. ü The right cover is detached (see "Removing and installing covers [→ 30]"). ü The PC is removed (see "Replacing the PC including the power supply unit ... -
Page 75: Replacing The Radio Module
Dentsply Sirona 4 Repair Service Manual CEREC Primescan AC, Primescan AC, CEREC Omnicam AC, Omnicam AC 4.4.4 Replacing the radio module ü The entire cover is detached (see "Removing and installing covers [→ 30]"). 1. Detach the USB connector of the cable (L8) from the radio module. -
Page 76: Replacing The Footswitch Cable
4 Repair Dentsply Sirona Service Manual CEREC Primescan AC, Primescan AC, CEREC Omnicam AC, Omnicam AC 4.4.5 Replacing the footswitch cable ü The entire cover is detached (see "Removing and installing covers [→ 30]"). 1. Unscrew the switch (2 screws). 2. Unplug the connector at the other end of the cable and take the cable out. -
Page 77: Maintenance
Dentsply Sirona 5 Maintenance Service Manual CEREC Primescan AC, Primescan AC, CEREC Omnicam AC, Omnicam AC Maintenance Replacing/cleaning the filter 1. Flip the footswitch down. 2. Pull out the filter. 3. Place a new filter on the footswitch surface. 4. Close the footswitch again. -
Page 78: Circuit Diagrams
6 Circuit diagrams Dentsply Sirona Service Manual CEREC Primescan AC, Primescan AC, CEREC Omnicam AC, Omnicam AC Circuit diagrams CEREC Primescan AC / Primescan AC... -
Page 79: Cerec Omnicam Ac / Omnicam Ac
Dentsply Sirona 6 Circuit diagrams Service Manual CEREC Primescan AC, Primescan AC, CEREC Omnicam AC, Omnicam AC CEREC Omnicam AC / Omnicam AC 66 81 832 D3696 D3696.076.01.01.02 12.2018... -
Page 80: Re-Test
7 Re-test Dentsply Sirona Service Manual CEREC Primescan AC, Primescan AC, CEREC Omnicam AC, Omnicam AC Re-test When is the re-test carried out? The acquisition unit CEREC Primescan AC / Primescan AC / CEREC Omnicam AC / Omnicam AC must be re-tested every time repair/ retrofitting work affecting one of the following components is completed: ●... -
Page 81: Protective Ground Wire Resistance
Dentsply Sirona 7 Re-test Service Manual CEREC Primescan AC, Primescan AC, CEREC Omnicam AC, Omnicam AC 7.4.2 Protective ground wire resistance The protective ground wire resistance of the power cable (measured from plug to socket) must be ≤ 100 mΩ. -
Page 82: Functional Test
7 Re-test Dentsply Sirona Service Manual CEREC Primescan AC, Primescan AC, CEREC Omnicam AC, Omnicam AC 7.4.5 Functional test 1. Once the above test steps have been completed, restore the acquisition unit CEREC Primescan AC / Primescan AC / CEREC Omnicam AC / Omnicam AC to normal operating conditions. - Page 84 We reserve the right to make any alterations which may be required due to technical improvements. © Sirona Dental Systems GmbH Sprache: englisch Printed in Germany D3696.076.01.01.02 12.2018 Ä.-Nr.: 000 000 Sirona Dental Systems GmbH 66 81 832 D3696 Fabrikstr. 31 Order No ...
Need help?
Do you have a question about the Primescan AC and is the answer not in the manual?
Questions and answers