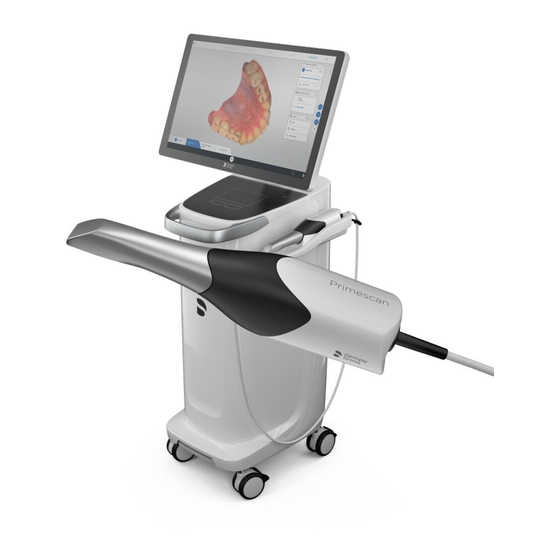
Dentsply Sirona CEREC Primescan AC Unpacking And Installation Instructions
Hide thumbs
Also See for CEREC Primescan AC:
- Service manual (134 pages) ,
- Instructions for use manual (96 pages) ,
- Operating instructions manual (92 pages)
Subscribe to Our Youtube Channel
Summary of Contents for Dentsply Sirona CEREC Primescan AC
- Page 1 09.2018 New as of: CEREC Primescan AC, Primescan AC, CEREC Omnicam AC, Omnicam AC Unpacking and Installation Instructions English...
-
Page 2: Table Of Contents
Table of contents Dentsply Sirona Unpacking and Installation Instructions CEREC Primescan AC, Primescan AC, CEREC Omnicam AC, Omnicam AC Table of contents Packaging box ......................Removing parts from the lower section of the packaging ........Taking the unit out of its packaging ................ -
Page 3: Packaging Box
Dentsply Sirona 1 Packaging box Unpacking and Installation Instructions CEREC Primescan AC, Primescan AC, CEREC Omnicam AC, Omnicam AC Packaging box IMPORTANT Unpacking and installation must be carried out by authorized specialist personnel (technicians) in accordance with the unpacking and installation instructions. -
Page 4: Removing Parts From The Lower Section Of The Packaging
2 Removing parts from the lower section of the packaging Dentsply Sirona Unpacking and Installation Instructions CEREC Primescan AC, Primescan AC, CEREC Omnicam AC, Omnicam AC Removing parts from the lower section of the packaging 1. Remove the monitor cable and place this to one side next to the packaging. -
Page 5: Taking The Unit Out Of Its Packaging
Dentsply Sirona 3 Taking the unit out of its packaging Unpacking and Installation Instructions CEREC Primescan AC, Primescan AC, CEREC Omnicam AC, Omnicam AC Taking the unit out of its packaging 1. Pull the two foil bags and the felt pad from the rollers. -
Page 6: Assembling The Unit
4 Assembling the unit Dentsply Sirona Unpacking and Installation Instructions CEREC Primescan AC, Primescan AC, CEREC Omnicam AC, Omnicam AC Assembling the unit Opening the service cover 1. Turn the cabinet bolt of the service cover with a coin or a screwdriver (>... -
Page 7: Insert Battery (Optional)
Dentsply Sirona 4 Assembling the unit Unpacking and Installation Instructions CEREC Primescan AC, Primescan AC, CEREC Omnicam AC, Omnicam AC Insert battery (optional) Service cover 2 guide rails Storage battery 2 guide pins 2 fastening screws ➢ Slide in the storage battery using the guide rails and guide pins up to the stop and screw it in place with 2 fastening screws (C). -
Page 8: Installing The Monitor
4 Assembling the unit Dentsply Sirona Unpacking and Installation Instructions CEREC Primescan AC, Primescan AC, CEREC Omnicam AC, Omnicam AC Installing the monitor NOTE Risk of damage to the display caused by mechanical impact. ➢ Do NOT subject active display area to any mechanical pressure. - Page 9 Dentsply Sirona 4 Assembling the unit Unpacking and Installation Instructions CEREC Primescan AC, Primescan AC, CEREC Omnicam AC, Omnicam AC 3. Guide the 4 cables through the openings and insert the monitor. 4. Screw the monitor brake on as shown with the 2 screws.
-
Page 10: Using A Trackball (If Provided, Depending On The Configuration)
4 Assembling the unit Dentsply Sirona Unpacking and Installation Instructions CEREC Primescan AC, Primescan AC, CEREC Omnicam AC, Omnicam AC 7. Insert the USB connector. 8. Insert the HDMI connector. 9. Re-tighten the locking plate mini DIN connector with 1 screw (A). -
Page 11: Plug Connections
Dentsply Sirona 4 Assembling the unit Unpacking and Installation Instructions CEREC Primescan AC, Primescan AC, CEREC Omnicam AC, Omnicam AC Plug connections NOTE The CEREC Primescan / Primescan / CEREC Omnicam / Omnicam scanner is a high-precision optoelectronic scanning instrument for non-contact impression taking which requires careful handling. -
Page 12: Closing The Service Cover
4 Assembling the unit Dentsply Sirona Unpacking and Installation Instructions CEREC Primescan AC, Primescan AC, CEREC Omnicam AC, Omnicam AC Closing the service cover 1. Put the service cover back in position and push it up as far as it will 2. -
Page 13: Putting The System Into Operation
Dentsply Sirona 5 Putting the system into operation Unpacking and Installation Instructions CEREC Primescan AC, Primescan AC, CEREC Omnicam AC, Omnicam AC Putting the system into operation Switching the units on NOTE Do not put the unit into operation at low temperatures! If you move the unit to the operating site from a cold environment, condensation may form and result in a short circuit. -
Page 14: Configure Software
5 Putting the system into operation Dentsply Sirona Unpacking and Installation Instructions CEREC Primescan AC, Primescan AC, CEREC Omnicam AC, Omnicam AC NOTE Possible data loss and PC malfunction: Switching the acquisition unit off at the ON button during operation may cause data loss and PC malfunctions. - Page 16 We reserve the right to make any alterations which may be required due to technical improvements. © Sirona Dental Systems GmbH Sprache: englisch Printed in Germany D3696.031.01.01.02 09.2018 Ä.-Nr.: 000 000 Sirona Dental Systems GmbH 6681790 D3696 Fabrikstr. 31 Order No 64625 Bensheim Germany www.dentsplysirona.com...


Need help?
Do you have a question about the CEREC Primescan AC and is the answer not in the manual?
Questions and answers