Daikin CMSQ200A7W1B Manuals
Manuals and User Guides for Daikin CMSQ200A7W1B. We have 5 Daikin CMSQ200A7W1B manuals available for free PDF download: Service Manual, Installation Manual, Operation Manual
Daikin CMSQ200A7W1B Service Manual (502 pages)
SkyAir series
Service Diagnosis
Brand: Daikin
|
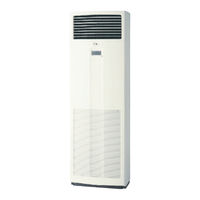
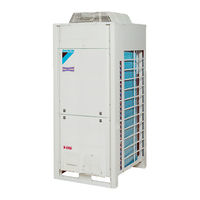
Category: Air Conditioner
|
Size: 2 MB
Table of Contents
-
-
R-KU Series10
-
R-LU Series11
-
-
2.1 Overview36
-
-
-
-
U1 Reverse Phase365
-
-
Outdoor Units458
-
3.110 Check466
-
Warning501
Advertisement

Daikin CMSQ200A7W1B Installation Manual (238 pages)
Brand: Daikin
|
Category: Air Conditioner
|
Size: 6 MB
Table of Contents
-
English
5 -
Deutsch
27-
1 Einleitung
28 -
-
-
-
Français
51 -
Dutch
74 -
Español
96 -
Italiano
119-
1 Presentazione
120 -
-
-
Unknown
143-
1 Èû·áˆá
144 -
3 ÈÏÔÁ‹ Ù˘ I¤Ûë
144 -
-
Ó‰Âûë Ûˆï‹Óˆó148
-
Úôûù·û149
-
-
Ëì·óùè Ô‰Ëá›Â155
-
9 ªfióˆûë ۈϋӈÓ
158 -
15 ª¤Ùú
167
-
-
Português
168-
-
Cuidados Gerais178
-
Русский
191-
1 Введение
192 -
-
Примеры Системы203
-
15 Утилизация
215
-
-
Türkçe
216-
2 Ana Elemanlar
217 -
3 Yer SeçIMI
217 -
8 Saha Kabloları
224-
Genel Ikazlar226
-
Sistem Örnekleri226
-
9 Boru YalıtıMı
229 -
-
Servis Önlemleri232
-
Saha Ayarı232
-
Test Işletimi235
-
-
Daikin CMSQ200A7W1B Service Manual (280 pages)
Table of Contents
-
-
-
Symbol43
-
-
-
-
-
-
-
-
Sibe28159
-
Part 7 Appendix
240-
-
Outdoor Unit241
-
Indoor Unit243
-
-
-
Outdoor Unit244
-
Field Wiring246
-
Indoor Unit247
-
-
-
Outdoor Unit250
-
Indoor Side251
-
-
4 Option List
252
-
Advertisement

Daikin CMSQ200A7W1B Installation Manual (28 pages)
Brand: Daikin
|
Category: Air Conditioner
|
Size: 1 MB
Table of Contents

Daikin CMSQ200A7W1B Operation Manual (10 pages)
Brand: Daikin
|
Category: Air Conditioner
|
Size: 0 MB
Table of Contents
Advertisement