Sign In
Upload
Manuals
Brands
Dürkopp Adler Manuals
Sewing Machine
1767
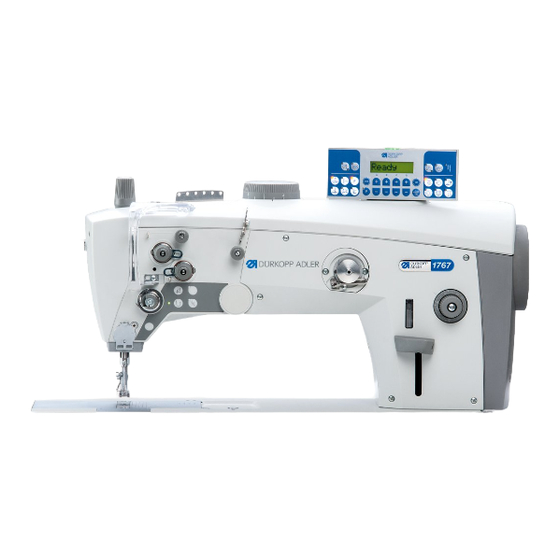
Dürkopp Adler 1767 Manuals
Manuals and User Guides for Dürkopp Adler 1767. We have
2
Dürkopp Adler 1767 manuals available for free PDF download: Service Instructions Manual, Operating Instructions Manual
Dürkopp Adler 1767 Service Instructions Manual (128 pages)
Brand:
Dürkopp Adler
| Category:
Sewing Machine
| Size: 21 MB
Table of Contents
Table of Contents
3
1 About These Instructions
7
For Whom Are These Instructions Intended
7
Representation Conventions - Symbols and Characters
7
Other Documents
9
Liability
9
2 Safety
11
Basic Safety Instructions
11
Signal Words and Symbols Used in Warnings
12
3 Working Basis
15
Order of the Settings
15
Laying the Cables
15
Removing the Covers
16
Access to the Underside of the Machine
16
Removing and Placing the Arm Cover
17
Removing and Placing the Head Cover
18
Removing and Placing the Rear Cover
19
Removing and Placing the
20
Disassembling and Assembling the Tensioning Plate
21
Removing and Placing the Belt Cover
22
Opening and Closing the Throat Plate Slide
23
Disassembling and Assembling the Throat Plate
24
Disassembling and Assembling the Feed Dog
25
Flats on Shafts
26
Locking the Machine in Place
26
Setting the Handwheel into Position
28
4 Positioning the Arm Shaft
29
5 Positioning the Toothed Belt Wheels
31
Positioning the Toothed Belt Wheel on the Motor Shaft
31
Positioning the Upper Toothed Belt Wheel
32
Positioning the Lower Toothed Belt Wheel
33
Setting the Toothed Belt Tension
34
6 Setting the Handwheel Scale
35
7 Latching the Safety Snap-On Coupling
37
8 Setting the Stitch Length Adjusting Wheel
39
Setting the Stitch Length Limit
40
Setting the Basic Eccentric Setting for Forward Stitch and Backward Stitch
42
9 Feed Dog
43
Setting the Feed Dog Position
43
Moving the Feed Dog
44
Moving the Feed Dog Carrier
45
Setting the Feed Dog Movement
46
Setting the Feed Eccentric
46
Setting the Compensating Weight
47
Setting the Feed Stroke Eccentric
48
Setting the Feed Dog Height at Top Dead Center
49
10 Aligning the Needle Bar Linkage
50
Aligning the Needle Bar Linkage Sideways
50
Aligning the Needle Bar Linkage in the Sewing Direction
53
11 Position of the Hook and Needle
54
Setting the Hook Side Clearance
54
Setting the Loop Stroke Position
56
Setting the Needle Bar Height
58
Setting the Needle Guard
60
12 Setting the Bobbin Case Lifter
62
Setting the Lifting Gap
63
Setting the Timing for Opening
64
13 Sewing Feet
65
Setting the Eccentric for the Top Feed Stroke
65
Setting an Even Sewing Foot Stroke
67
Setting the Adjusting Frame
68
Setting the Sewing Foot Lifting Height
69
14 Setting the Thread Tensioning Spring
71
15 Winder
72
Setting the Winder
72
Setting the Winder Wheel
75
Setting the Hook Thread Guide
76
16 Thread Cutter
77
Setting the Height of the Thread-Pulling Knife
77
Setting the Cutoff Curve
78
Setting the Cutting Pressure
80
Setting Point in Time for Cutting
81
17 Short Thread Cutter
83
Setting the Locking Latch
86
Setting the Thread-Pulling Knife
87
Setting the Counter Blade
88
Setting the Cutoff Position
90
18 Setting the Potentiometer
91
19 Programming
93
Control Panel OP1000
93
Display
93
Buttons
94
Using Button Groups
97
Thread Button Group Functions
98
Setting the Start Bartack
98
Setting the Multiple Start Bartack
99
Using the Multiple Start Bartack as the Darning Program
99
Setting the End Bartack
100
Setting the Multiple End Bartack
101
Activating the Thread Cutter
101
Activating the Thread Clamp
101
Setting the Needle Position after Sewing Stop
102
Activating Sewing Foot Lift after Thread Cutter
102
10Activating Sewing Foot Lift after Sewing Stop
102
Activating the Soft Start
103
12Reducing Speed
103
Programming Button Group Functions
104
Setting the Bobbin Piece Counter
104
20 Maintenance
107
Cleaning
108
Areas Requiring Special Cleaning
109
Cleaning the Motor Fan Mesh
110
Lubricating
111
Checking the Oil Level
112
Lubricating the Gear
113
Servicing the Pneumatic System
115
Setting the Operating Pressure
115
Draining the Water Condensation
116
Cleaning the Filter Element
117
Parts List
118
21 Decommissioning
119
22 Disposal
121
23 Troubleshooting
123
Customer Service
123
Errors in Sewing Process
123
24 Technical Data
125
Advertisement
Dürkopp Adler 1767 Operating Instructions Manual (112 pages)
Brand:
Dürkopp Adler
| Category:
Sewing Machine
| Size: 18 MB
Table of Contents
Table of Contents
3
1 About These Instructions
7
For Whom Are These Instructions Intended
7
Representation Conventions - Symbols and Characters
7
Other Documents
9
Liability
9
2 Safety
11
Basic Safety Instructions
11
Signal Words and Symbols Used in Warnings
12
3 Machine Description
17
Components of the Machine
17
Proper Use
17
Declaration of Conformity
18
4 Operation
19
Preparing the Machine for Operation
19
Switching on and off the Machine
20
Inserting/Changing the Needle
21
Inserting or Changing Needles on 1-Needle Machines
22
Inserting or Changing Needles on 2-Needle Machines
23
Threading the Needle Thread
24
Needle Thread Threading on 1-Needle Machines
25
Needle Thread Threading on 2-Needle Machines
28
Winding the Hook Thread
30
Threading the Hook Thread
30
Winding the Hook Thread
32
Replacing the Hook Thread Bobbin
33
Thread Tension
34
Setting the Needle Thread Tension
35
Setting the Hook Thread Tension
37
Setting the Needle Thread Regulator
38
Sewing Feet
39
Lifting the Sewing Feet
39
Locking the Sewing Feet at Top Dead Center
40
Setting the Sewing Foot Pressure
41
Setting the Sewing Foot Stroke
43
Setting the Stitch Length
44
Sewing Backwards
45
Quick Functions on the Push Buttons
46
Sewing
48
5 Programming
51
Control Panel OP1000
51
Display
51
Buttons
53
Using Button Groups
57
Thread Button Group Functions
58
Setting the Start Bartack
58
Setting the Multiple Start Bartack
59
Using the Multiple Start Bartack as the Darning Program
60
Setting the End Bartack
61
Setting the Multiple End Bartack
62
Activating the Thread Cutter
62
Activating the Thread Clamp
63
Setting the Needle Position after Sewing Stop
63
Activating Sewing Foot Lift after Thread Cutter
63
Activating Sewing Foot Lift after Sewing Stop
64
Activating Soft Start
64
Reducing Speed
64
Programming Button Group Functions
65
Setting the Bobbin Piece Counter
66
Activating the Bobbin Stitch Counter
68
6 Maintenance
69
Cleaning
70
Areas Requiring Special Cleaning
71
Cleaning the Motor Fan Mesh
72
Lubricating
73
Servicing the Pneumatic System
75
Setting the Operating Pressure
75
Draining the Water Condensation
77
Cleaning the Filter Element
78
Parts List
79
7 Setup
81
Checking the Scope of Delivery
81
Removing the Transport Locks
81
Assembling the Stand
82
Tabletop
83
Completing the Tabletop
83
Assembling the Tabletop to the Stand
84
Setting the Working Height
85
Assembling the Pedal and Setpoint Device
86
Inserting the Machine Head
87
Assembling the Control Panel
88
Assembling the Oil Extraction Line
91
Electrical Connection
92
Assembling the Control
92
Connecting the Control
93
Connecting the Machine Head
94
Establishing Equipotential Bonding
94
Pneumatic Connection
95
Assembling the Compressed Air Maintenance Unit
96
Setting the Operating Pressure
97
Checking the Lubrication
98
Carrying out a Test Run
99
8 Decommissioning
101
9 Disposal
103
10 Troubleshooting
105
Customer Service
105
Errors in Sewing Process
105
11 Technical Data
109
Advertisement
Related Products
Dürkopp Adler 195
Dürkopp Adler 1130i-5
Dürkopp Adler Beisler 1280-7
Dürkopp Adler Beisler 1281-7
Dürkopp Adler 140341
Dürkopp Adler 140342
Dürkopp Adler 140442
Dürkopp Adler 140331
Dürkopp Adler 140332
Dürkopp Adler 140432
Dürkopp Adler Categories
Sewing Machine
Industrial Equipment
Controller
More Dürkopp Adler Manuals
Login
Sign In
OR
Sign in with Facebook
Sign in with Google
Upload manual
Upload from disk
Upload from URL