Sign In
Upload
Manuals
Brands
AMX Manuals
Touch Panel
Modero ViewPoint MVP-5100
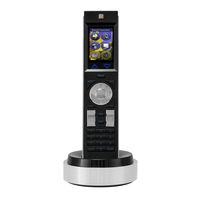
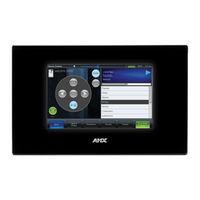
AMX Modero ViewPoint MVP-5100 Touch Panel Manuals
Manuals and User Guides for AMX Modero ViewPoint MVP-5100 Touch Panel. We have
6
AMX Modero ViewPoint MVP-5100 Touch Panel manuals available for free PDF download: Operation/Reference Manual, Installation Manual, Datasheet
Amx Modero ViewPoint MVP-5100 Operation/Reference Manual (274 pages)
Touch Panel Design Program (v2.10 or higher)
Brand:
Amx
| Category:
Software
| Size: 4 MB
Table of Contents
Table of Contents
3
Tpdesign4 Program
21
Overview
21
What's New in Version 2.10
21
Supported Operating Systems
21
Supported Operating System Languages
21
PC Requirements
22
Supported Panel Types
22
Intercom Capabilities for Modero Panels
23
Supported Screen Resolutions
23
Tpdesign4 Work Area
23
Toolbars
25
Show/Hide Toolbars
25
Design View Windows
26
Using the Zoom Controls
27
Workspace Navigator
28
Properties Control Window
29
Properties Control Window - General Tab
29
Properties Control Window - Programming Tab
29
Properties Control Window - States Tab
29
State Manager Window
30
Transfer Status Window
30
Button Preview Window
31
Button Preview Context Menu
31
Magnifier Window
32
Working with Dockable Windows
32
Moving, Docking and Resizing Dockable Windows
32
Toggling the Windows
32
Status Bar
32
Default View
33
Secondary View
33
Print Preview Window
34
Workspace Context Menu
35
Webupdate
35
G4 Panelbuilder
35
G4 Panelpreview
36
Tpdesign4 Project Files
37
Overview
37
Inappropriate File Name Characters
37
Creating a New Project
37
Using the New Project Wizard
38
System-Generated File Names
40
Edit Focus
41
Setting Project Properties
42
Project Properties Dialog - Project Information Tab
42
Applying Password Protection to Your Project File
43
Project Properties Dialog - Panel Setup Information Tab
44
Setting a Power up Page
45
Setting Power up Popup Pages
45
Setting an Inactive Page Flip
46
Project Properties Dialog - Sensors Tab
47
Project Properties Dialog - IR Emitters and Receivers Tab
48
Working with R-4 Remote Controllers
49
Creating a TPD4 Project for R-4 Remote Controllers
49
R-4 Remote Devices - Unsupported Button Types
50
Using Quick Input
50
Undo/Redo Support
51
Using the Workspace Navigator
51
Workspace Navigator - Pages Tab
51
Opening Pages/Popup Pages Via the Workspace Navigator
52
Renaming Pages Via the Workspace Navigator
52
Workspace Navigator - Edit Focus
52
Workspace Navigator - Function Maps Tab
52
Cutting, Copying and Pasting
53
Copying States to the Clipboard
53
Pasting States from the Clipboard
53
Cutting Objects
54
Saving the Active Project as a Different Panel Type
54
Working with Multiple Projects
54
Opening Multiple Projects Simultaneously
54
Copying/Pasting Across Projects
54
Copying/Pasting Pages, Popup Pages and Buttons Across Projects
55
Project Migration (from Previous Versions of Tpdesign4)
55
Converting TPD3 Files to TPD4
55
Using the TPD Conversion Wizard
55
Errors and Warnings Report Dialog
56
Working with Pages
57
Overview
57
Creating a Page
57
Page General Properties
58
Creating a Page Flip
58
Drag & Drop to Set Page Flips
58
Page Flip Actions
59
Page Programming Properties
59
Page State Properties
60
Adding a Fill Color to a Page
61
Adding Text to a Page
61
Adding a Bitmap to a Page
61
Adding an Icon to a Page
62
Working with Transparent Backgrounds
62
Supported Image File Types
63
Displaying a Video Source on a Page
63
Copying Pages
64
Pasting Pages
64
Copying / Pasting a State from a Page
64
Opening Pages/Popup Pages Via the Workspace Navigator
64
Renaming a Page
64
Renaming Pages Via the Workspace Navigator
64
Deleting Pages from a Project
65
Exporting Pages as Image Files
65
Printing Pages
66
Working with Popup Pages
67
Overview
67
Creating a Popup Page
67
Using the Popup Draw Tool
68
Drawing Assist Support for Popup Pages
69
Popup Page General Properties
70
Popup Page Programming Properties
71
Popup Page State Properties
71
Adding a Fill Color to a Popup Page
73
Adding a Bitmap to a Popup Page
73
Adding an Icon to a Popup Page
73
Adding Text to a Popup Page
74
Displaying a Video Source on a Popup Page
74
Copying Popup Pages
74
Pasting Popup Pages
74
Copying / Pasting a State from a Popup Page
75
Popup Page Groups
75
Show/Hide Popup Pages
75
Deleting Popup Pages from a Project
76
Printing Popup Pages
76
Working with Buttons
77
Overview
77
Selection Tool
77
Setting Default Parameters for New Buttons
78
Drawing Tools Toolbar
78
Creating New Buttons
79
Drawing a Button
79
Using the Drawing Assist Features
80
Alignment & Sizing Tool
82
Generated Button Names
84
Setting General Button Properties
85
Setting Button Programming Properties
86
Level Control Types
86
Setting State Properties
87
Editing Button Properties
88
Editing Multiple Selections
88
Apply to All
88
General Buttons
89
Multi-State General Buttons
89
Bargraph Buttons
89
Multi-State Bargraph Buttons
89
Custom Sliders on Multi-State Bargraph Buttons
89
Formatting Codes (Bargraph and Multi-Bargraph Buttons Only)
90
Using Touch Maps for Multi-State Bargraphs Buttons
90
Joystick Buttons
91
Text Input Buttons
91
Input Mask Characters (Text Input Button Only)
91
Input Mask Ranges (Text Input Button Only)
91
Input Mask Operators (Text Input Button Only)
91
Input Mask Next Field Characters (Text Input Button Only)
92
List Box Buttons
92
Adding Text to a Button
92
Additional Foreign Language Support
93
Pre-Rendered Graphics
93
True Type Font Support
93
Computer Control Buttons
92
Takenote Buttons
92
Changing Button Text Color
93
Adding a Bitmap to a Button
94
Adding an Icon to a Button
94
Changing the Button Fill Color
94
Border Styles
95
Creating a Time Button
95
Creating a Date Button
95
Working with Touch Styles and Active Touch
96
Displaying a Video Source on a Button
96
Copying/Pasting Buttons
96
Paste Controls Dialog
97
Searching and Replacing Button Properties
97
Using Quick Input
98
Button Preview Window
99
External Controls (Pushbuttons/Leds)
100
Setting Global General Properties for External Pushbuttons And/Or Leds
101
Setting Global Programming Properties for External Pushbuttons And/Or Leds
101
Setting Page-Specific General Properties for External Pushbuttons And/Or Leds
102
Setting Page-Specific Programming Properties for External Pushbuttons And/Or Leds
102
Copy/Convert External Controls between Panels
102
List Box Buttons
103
Overview
103
G4 Devices that Support List Box Buttons
104
List Box Buttons: Managed Mode
105
List Box Buttons - Container
105
List Box Toolbar
105
Creating List Box Buttons (Managed Mode)
106
Using the Drawing Tools Toolbar with List Box Buttons
107
Setting List Box Container Button Properties
107
List Box Container Properties Vs. Column Properties (Managed Mode)
107
Setting General Properties: List Box Container Buttons
108
Setting Programming Properties: List Box Container Buttons
109
Setting State Properties: List Box Container Buttons
109
List Box Buttons - Columns
110
List Box Buttons - Subordinate Buttons
110
Setting List Box Button Column Properties
111
Setting General Properties: List Box Button Columns
111
Setting State Properties: List Box Button Columns
112
Adding Rows and Columns to a List Box (Managed Mode)
112
Adding Rows
112
Adding Columns
113
Deleting Rows and Columns from a List Box (Managed Mode)
113
Deleting Columns
113
Deleting Rows
113
Cutting, Copying and Pasting a List Box (Managed Mode)
113
Subordinate Button Placement
114
Subordinate Buttons - Drag and Drop Capability
114
List Box Buttons - Resizing Capability
114
List Box Buttons - Navigation Buttons
115
Creating Navigation Buttons
115
Navigation Buttons - Channel Code Values
116
List Box Buttons: Unmanaged Mode
116
Rules for Unmanaged List Box Buttons
117
List Box Buttons - Z-Order
117
Creating List Box Buttons (Unmanaged Mode)
117
Editable Button Properties of an Unmanaged List Box Container Button
118
Editable Button Properties of an Unmanaged List Box Subordinate Button
118
List Data Table
119
Edit List Tables Dialog
119
Creating a Static List Data Table
120
List Data Table Column Types
121
Attaching a Static List Data Table to a List Box Button
121
Editing Cell Data
121
Changing the Port and Address Assignments for a Data List Table
122
Deleting a List Data Table
122
Working with Dynamic List Box Data
123
Dynamic List Box Data
123
Creating a Dynamic List Data Table
123
List Box Commands
123
Data List Commands
123
Ldn
123
Lda
124
Ldr
124
Ldc
124
Ldd
124
Data List Commands - Rules
125
Ldt
125
Ldl
125
Command Structure List View Commands
126
Lvo
126
Lvl
126
Lvp
126
Lvs
127
Lvc
127
Lvf
127
Attaching a Dynamic List Data Table to a List Box Button
128
Example Netlinx Code with List Data
128
Working with Properties
131
Properties Control Window
131
Using the Apply to All Option
132
Using the Prev and Next Buttons
132
General Properties
133
Above Popups
133
Animate Time down
133
Animate Time up
133
Auto-Repeat
133
Border Style
133
Color Depth
133
Column Display Order
133
Column Sort Order
134
Compression
134
Cursor Color
134
Cursor Name
134
Description
134
Disabled
134
Display Type
134
Group
134
Height
134
Hidden
134
Hide Effect
135
Input Mask
135
Left
135
List Column
135
List Column Padding
135
List Display
136
List Table Port
136
List Table Address
136
List Table Wrap
136
List Filter Column
136
List Managed
136
List Offset Enabled
137
List Preferred Row
137
List Preferred Row Height
137
List Row
137
List Row Height
137
List Row Padding
137
List Selectable
137
Lock Button Name
138
Max Text Length
138
Modal
138
Name
138
Page Flip
138
Password
138
Password Character
138
Password Protection
138
Remote Host
138
Remote Port
138
Scale to Fit
139
Show Effect
139
Slider Color
139
Slider Name
139
State Count
139
Takenote Enabled
139
Takenote Host
139
Takenote Port
139
Top
139
Touch Map
139
Touch Style
140
Type
140
Value Direction
140
Width/Height
140
Programming Properties
141
Level Control Repeat
141
Range Drag Increment
141
Level Control Value
141
Level Control Type
141
Range aux Inverted
141
Command Output
141
Level Function
141
Address Code
141
Address Port
141
Level Control Parameters
142
Level Control Repeat
142
Level Control Value
142
String Output Port
142
Range Time down
142
Range Inverted
142
String Output
142
Range Time up
142
Level Code
142
Level Port
142
Active Centering
143
Level Functions
143
Drag Centering
143
Display Only
143
Active
143
Drag
143
Address Codes
143
Basic Address Codes: Date Display
143
Basic Address Codes: Time Display
144
Channel Codes
144
Navigation Buttons - Channel Code Values
144
Basic Channel Codes: Page Flip
145
NXP-PLV Reserved Channel Codes (1-7)
145
Level Codes
145
NXP-PLV Reserved Level Codes (1-11)
145
State Properties
146
Bitmap
146
Bitmap Justification
146
Bitmap X and y Offsets
146
Border Color
146
Border Name
146
Chameleon Image
147
Draw Order
147
Fill Color
147
Font
147
Icon Justification
147
Icon Slot
147
Icon X and y Offsets
147
Marquee Direction
148
Marquee Repeat
148
Overall Opacity
148
Scale Bitmap to Fit
148
Sound
148
Streaming Source
148
Text
148
Text Color
148
Text Effect
149
Text Effect Color
149
Text Justification
149
Text X and y Offsets
149
Video Cropping
149
Video Fill
149
Video Pass-Thru
149
Word Wrap
149
Working with the Property Painter
150
Property Painter Dialog
151
Saving a Properties Set
152
All States Option
150
Workspace Navigator Context Menu
150
Working with States
153
Overview
153
Setting State Properties
154
State Manager Context Menu
154
Adding States to a Multi-State Button
155
Duplicating an Existing State on the Button
155
Adding States from the Clipboard
155
Adding States through Drag-And-Drop
156
State Manager Drag-And-Drop Menu
156
Removing States from a Multi-State Button
157
Deleting States
157
Cutting States to the Clipboard
157
Changing the Order of States
157
Reordering States through the Clipboard
157
Reordering States through Drag-And-Drop
157
Choose Display State Dialog
158
Replacing States on a Page, Popup Page or Button
158
Replacing States from the Clipboard
158
Replacing States through Drag-And-Drop
158
Draw Order (Z-Order)
159
Changing the Draw Order for Selected States
159
Working with Function Codes
161
Overview
161
Function Maps Tab
161
Display Function Codes
162
Function Codes - Limitations
163
0-Setup Port
163
Power Assign
163
The Power Assign Dialog
163
Using Power Assign: 1) Clear Channels
164
Using Power Assign: 2) Assign Codes
164
Begin Assignment at
164
Ensure Contiguous Code Assignment
165
Wrap Within Port ID
165
Colors and Palettes
167
Working with Colors
167
Working with Multiple Color Palettes
168
Creating New Palette Entries
168
Creating Custom Palettes
169
Renaming Palettes
169
Changing the Active Palette
169
Importing Palette Files
169
Exporting Palette Files
170
Copying Palettes
170
Copying Palette Entries
170
Using Custom Palettes to Enable Color Schemes in G4 Panelbuilder
170
Using the Grab and Paint Properties Tools
171
Using the Property Painter
172
Animations and Tweening
175
Using the Animation Wizard
175
Animation Wizard - Select Type (Step 1 of 6)
176
Animation Wizard - Create Sequence (Step 2 of 6)
176
Animation Wizard - Size & Position (Step 3 of 6)
176
Animation Wizard - Assign Frames (Step 4 of 6)
177
Animation Wizard - Appearance (Step 5 of 6)
177
Animation Wizard - Finish (Step 6 of 6)
177
Tweening
178
Creating Color Transition Effects
179
Creating Animated Bitmap Effects
180
Creating Animated Text Effects
181
Tweeners Sub-Menu
181
Chameleon Images
182
Requirements for Chameleon Images
182
Working with Chameleon Images
183
Chameleon Images, Custom Palettes and G4 Panelbuilder
184
Working with Templates
187
Importing Template (*.VAT or *.TPT) Files
187
Working with the System Page Template
187
Copying/Pasting Entire System Pages into a Project
188
Copying/Pasting System Page Elements into a Project Page
188
Working with System Page Keyboards and Keypads
189
System Page Template Reference
189
Exporting Your Project as a G4 Panelbuilder Template
191
Creating a New Project Using G4 Panelbuilder
193
Importing G4 Panelbuilder Templates
194
Creating G4 Panelbuilder Templates
194
Template Requirements
195
Required Template Elements
195
Optional Template Elements
197
Element Specific Conventions
197
Rules for Navigating a Template
198
Template Wide Conventions
198
Creating Navigation Elements
198
Creating Placeholder Elements
199
Placeholder Element Conventions
201
Creating Preview Images
201
Alternate Screen Names for Template Elements
202
Element Specific Conventions
202
Navigation Element Conventions
203
Sub-Navigation Element Conventions
204
Splash Element Conventions
204
Device Element Conventions
205
Feature Element Conventions
205
Sub-Feature Element Conventions
205
Exporting Your Project as a Visualarchitect Template
206
VA Templates - Navigations as Pages
206
VA Templates - Logical Page Scroll Bar Elements
206
VA Templates - Logical Page Info Element
206
VA Templates - Logical Page up and down Elements
207
VA Templates - List Box Page up and down Elements
207
Working with the Resource Manager
209
Resource Manager Dialog - Images Tab
210
Resource Manager Dialog - Dynamic Images Tab
210
Resource Manager Dialog - Slots Tab
210
Resource Manager Dialog - Sounds Tab
211
Editing Image and Sound Files Using External Programs
212
To Edit Image Files
212
To Edit Sound Files
212
Adding an External Editing Program for Image Files
212
Adding an External Editing Program for Sound Files
212
Changing the Default External Image or Sound Editor Program
213
Working with Images
213
Supported Image File Types
213
Importing Image Files to Your Project
214
Assigning Images to Slot Positions
214
Working with Dynamic Images
215
Adding Dynamic Image Files to Your Project
215
Assigning Dynamic Images to Slot Positions
215
Preserve Dynamic Images (Refresh Only at Panel Startup)
215
Working with Dynamo Video
216
Setting up a Dynamo Video Image
216
Motion JPEG Cameras and Servers that Provide Motion JPEG Streaming Output
218
Network Path Information
218
Working with Trendnet IP Cameras
220
Bitmaps Vs. Icons
221
Working with Icons
221
Working with Slot Assignments
221
Assigning Image and Sound Files to Slot Positions
222
State Draw Order (Z-Order)
222
Working with Sound Files
223
Importing Sound Files to Your Project
223
Assigning Sound Files to Slot Positions
223
Exporting Image and Sound Files from Your Project to a Specified Directory
224
Working with Video Fills
224
Streaming Video Fill
224
Advertisement
AMX Modero ViewPoint MVP-5100 Operation/Reference Manual (190 pages)
Brand:
AMX
| Category:
Touch Panel
| Size: 7 MB
Table of Contents
Table of Contents
5
Introduction
13
MVP-5150 Modero® Viewpoint® Wi-Fi Touch Panel, 5.2" and 5
13
Common Application
13
Features
13
Product Specifications
14
MVP-5100 5.2" Modero Viewpoint IR Touch Panel
17
Common Application
17
Features
17
Product Specifications
18
Memory
19
USB Connector Location
19
Table Charging Station Connector Location
20
Basic Operation
20
Audio/Video Capabilities
20
Power Management
20
Cleaning the Touch Overlay and Case
21
Accessories
23
Powering the MVP-TCS-52
24
Connections and Wiring
24
Recharging
24
Cleaning the MVP-TCS-52
24
Wall Charging Station
25
Unlocking the Touch Panel
26
Recharging
27
Installing the MVP-WCS-52
28
Installing the Plastic Back Box
28
Installing the Optional Metal Rough-In Box
32
Other MVP-WCS-52 Installations
33
Configuring Communication
35
Overview
35
IR Communication
35
Modero Setup and System Settings
36
Accessing the Setup and Protected Setup Pages
36
Setting the Panel's Device Number
37
Wireless Settings - Wireless Access Overview (MVP-5150 Only)
37
Dhcp
37
Configuring Wireless Network Access (MVP-5150 Only)
38
Step 1: Configure the Device's Wireless IP Settings (MVP-5150 Only)
38
Wireless Communication Using a DHCP Address
38
Wireless Communication Using a Static IP Address
39
Using the Site Survey Tool
40
Step 2: Configure the Card's Wireless Security Settings
41
Configuring the Device's Wireless Card for Unsecured Access to an AP
41
Automatically Setting SSID
43
Manually Setting SSID
44
Configuring Multiple Wireless Touch Panels to Communicate to a Target AP
45
Panel Downloads and Firmware Updates
46
Touch Panel Setup
46
Configure a Virtual Netlinx Master Via USB
50
Connecting to the Netlinx Master Via Ethernet (MVP-5150 Only)
52
Master Connection to a Virtual Master Via Ethernet
53
Setup Pages
55
Navigation Buttons
56
Protected Setup Pages
56
Information Button
57
Project Information Page
57
Panel Information Page
59
Time & Date Settings Page
61
Audio Settings Page
62
Power Management Page
63
Protected Setup Pages
65
Rebooting and Shutting down the Touch Panel
67
Security Settings (MVP-5150 Only)
68
Protected Setup Navigation Buttons
69
System Settings Page
70
Wireless Settings Page (MVP-5150 Only)
72
Wireless Security
73
Security Modes
74
Open
75
Wep
75
WPA-PSK Settings
76
EAP Security & Server Certificates - Overview
78
Eap-Leap
79
Eap-Fast
81
Eap-Peap
83
EAP-TTLS Settings
85
EAP-TLS Settings
87
Client Certificate Configuration
89
Calibrate Page
90
G4 Web Control Settings Page (MVP-5150 Only)
91
Other Settings
93
Cache Settings Page
94
Password Settings Page
95
Tools
97
Panel Connection Logs Page
97
Panel Statistics Page
98
Connection Utility Page
99
Upgrading Firmware
101
Upgrading the Modero Firmware Via the USB Port
101
Step 3: Confirm and Upgrade the Firmware Via the USB Port
103
A Special Note for Network Interface Connections
105
Uploading IR Codes to the MVP-5100
108
Adding an Existing IR File to Netlinx Studio
110
Adding an AMX IR Database File to Netlinx Studio
111
Adding a Personal IR Database File to Netlinx Studio
113
Programming
115
Overview
115
Page Commands
115
Apg
115
Cpg
115
Dpg
115
Pdr
116
Phe
116
Php
116
Pht
116
Ppa
116
Ppf
117
Ppg
117
Ppk
117
Ppm
117
Ppn
118
Ppt
118
Ppx
118
Pse
118
Psp
118
Pst
119
Ppof
119
Ppog
119
Ppon
120
Programming Numbers
121
RGB Triplets and Names for Basic 88 Colors
121
Font Styles and ID Numbers
123
Border Styles and Programming Numbers
123
Button Commands
125
Ani
125
Apf
126
Bat
126
Bau
126
Bcb
126
Bcf
127
Bct
127
Bdo
127
Bfb
128
Bim
128
Bln
128
Bmc
129
Bmf
130
Bmi
132
Bml
132
Bmp
132
Bnc
133
Bnn
133
Bnt
133
Bop
133
Bor
134
Bos
134
Bpp
134
Brd
134
Bsf
135
Bsm
135
Bso
135
Bsp
135
Bvl
135
Bvn
136
Bvp
136
Bvt
136
Bww
136
Cpf
136
Dld
136
Dpf
137
Ena
137
Fon
137
Gdi
137
Giv
138
Glh
138
Gll
138
Grd
138
Gru
138
Gsc
139
Gsn
139
Ico
139
Irm
140
Jsb
140
Jsi
140
Jst
141
Mbt
141
MDC
141
Sho
141
Tec
141
Tef
142
Top
142
Txt
142
Uni
142
Miscellaneous MVP Strings Back to the Master
143
Undock <Master
143
Dock
143
MVP Panel Lock Passcode Commands
143
Lpc
143
Lpr
143
Lps
143
Text Effects Names
144
Button Query Commands
144
Bcb
145
Bcf
146
Bct
146
Bmp
147
Bop
147
Brd
148
Bww
148
Fon
149
Ico
149
Jsb
150
Jsi
150
Jst
151
Tec
151
Tef
152
Txt
152
Panel Runtime Operations
153
Abeep
153
Adbeep
153
Akb
153
Akeyb
153
Akeyp
153
Akeyr
153
Akp
154
Akr
154
Beep
154
Brit
154
Brt
154
Dbeep
154
Ekp
155
Pkeyp
155
Pkp
155
Setup
155
Shutdown
155
Sleep
155
Sou
156
Tkp
156
Tpageon
156
Tpageoff
156
Vkb
156
Wake
156
Input Commands
157
Cal
157
Kps
157
Vks
157
Embedded Codes
158
Panel Setup Commands
159
Mut
159
Pwd
159
Vol
159
AMX Modero ViewPoint MVP-5100 Operation/Reference Manual (176 pages)
Modero Viewpoint Widescreen Touch Panels
Brand:
AMX
| Category:
Touch Panel
| Size: 3 MB
Table of Contents
FCC Information
3
FCC RF Radiation Exposure Statement
3
Federal Communications Commission (FCC) Statement
3
Table of Contents
5
Introduction
9
MVP-5150 5.2" Modero Viewpoint Wifi Touch Panel
10
MVP-5100 5.2" Modero Viewpoint IR Touch Panel
12
Memory
13
Table Charging Station Connector Locations
13
Basic Operation
14
Audio/Video Capabilities
14
Power Management
14
Cleaning the Touch Overlay and Case
14
Accessories
15
Powering the MVP-TCS-52
16
Connections and Wiring
16
Recharging
16
Cleaning the MVP-TCS-52
16
Table Charging Station
15
Wall Charging Station
17
Unlocking the Touch Panel
18
Recharging
19
Installing the MVP-WCS-52
20
Installing the Plastic Back Box
20
Installing the Optional Metal Rough-In Box
24
Other MVP-WCS-52 Installations
25
Configuring Communication
27
IR Communication
28
Modero Setup and System Settings
29
Accessing the Setup and Protected Setup Pages
29
Setting the Panel's Device Number
30
Wireless Settings - Wireless Access Overview (MVP-5150 Only)
31
Dhcp
31
Configuring Wireless Network Access (MVP-5150 Only)
31
Step 1: Configure the Device's Wireless IP Settings (MVP5150 Only)
31
Wireless Communication Using a DHCP Address
32
Wireless Communication Using a Static IP Address
33
Using the Site Survey Tool
34
Step 2: Configure the Card's Wireless Security Settings
35
Configuring the Device's Wireless Card for Unsecured Access to a WEP
35
Automatically Setting SSID
37
Manually Setting SSID
37
Configuring Multiple Wireless Touch Panels to Communicate to a Target WAP
40
Step 3: Choose a Master Connection Mode
41
Panel Downloads and Firmware Updates
42
Touch Panel Setup
42
Configure a Virtual Netlinx Master Via USB
46
Connecting to the Netlinx Master Via Ethernet (MVP-5150 Only)
48
Master Connection to a Virtual Master Via Ethernet
49
Setup Pages
53
Navigation Buttons
55
Protected Setup Pages
55
Information Button
56
Project Information Page
56
Panel Information Page
58
Time & Date Settings Page
59
Audio Settings Page
60
Battery Settings Page
61
Protected Setup Pages
63
Rebooting and Shutting down the Touch Panel
65
Protected Setup Navigation Buttons
66
System Settings Page
67
Wireless Settings Page (MVP-5150 Only)
69
Wireless Security
72
Open (Clear Text) Settings
73
Static WEP Settings
74
WPA-PSK Settings
75
EAP Security & Server Certificates - Overview
76
EAP-LEAP Settings
78
EAP-FAST Settings
80
EAP-PEAP Settings
82
EAP-TTLS Settings
84
EAP-TLS Settings
86
Client Certificate Configuration
88
Calibration Page
89
Other Settings
90
Cache Settings Page
90
Password Settings Page
91
Upgrading Firmware
93
Upgrading the Modero Firmware Via the USB Port
93
Step 1: Configure the Panel for a USB Connection Type
93
Step 2: Prepare Studio for Communication Via the USB Port
94
Step 3: Confirm and Upgrade the Firmware Via the USB Port
96
A Special Note for Network Interface Connections
98
Uploading IR Codes to the MVP-5100
101
Adding an Existing IR File to Netlinx Studio
103
Adding an AMX IR Database File to Netlinx Studio
104
Adding a Personal IR Database File to Netlinx Studio
106
Programming
107
Overview
107
Page Commands
107
Programming Numbers
113
RGB Triplets and Names for Basic 88 Colors
113
Font Styles and ID Numbers
115
Border Styles and Programming Numbers
116
Button Commands
119
Miscellaneous MVP Strings Back to the Master
138
MVP Panel Lock Passcode Commands
138
Text Effects Names
139
Button Query Commands
140
Panel Runtime Operations
149
Input Commands
153
Embedded Codes
154
Panel Setup Commands
155
Battery Life and Replacement
157
Overview
157
Power Management
157
Battery Replacement
158
Advertisement
AMX Modero ViewPoint MVP-5100 Installation Manual (36 pages)
Battery Replacement & Firmware Upgrade 5.2" Modero ViewPoint Touch Panels
Brand:
AMX
| Category:
Touch Panel
| Size: 1 MB
Table of Contents
Installation Guide
1
Table of Contents
5
Battery Replacement & Firmware Upgrade Guide
7
Overview
7
Requirements
7
Battery Replacement Kits
8
Retrieving Panel Files
9
Overview
9
File Transfers
9
Netlinx Studio
9
Connecting to a Netlinx Master Via TCP/IP
9
Retrieving Panel Files
11
Determining the Device Mapping Information for the Touch Panel
14
Upgrading Panel Firmware
15
Overview
15
Upgrade Paths for 5.2" Modero Viewpoint Panel Firmware
15
MVP-5100 & MVP-5150 Firmware Versions
15
MVP-5100 Firmware Upgrade Paths
15
MVP-5150 Firmware Upgrade Paths
16
MVP-5200I Firmware Versions
16
MVP-5200I Firmware Upgrade Paths
16
Determining the Current Panel Firmware Version
17
Determining the Current Panel Firmware Version (on the Panel)
17
Determining the Current Panel Firmware Version (in Netlinx Studio)
17
Downloading Firmware (ZIP) Files from Www.amx.com
18
MVP-5100 Firmware File (to Upgrade Firmware to V2.66.21)
18
MVP-5150 Firmware File (to Upgrade Firmware to V2.66.21)
18
MVP-5200I Firmware Files (to Upgrade Firmware to V2.66.21)
18
Upgrading the Firmware on the Panels (Netlinx Studio)
20
MVP-5100 and MVP-5150
20
MVP-5200I
21
Battery Removal and Replacement
23
Overview
23
Attention - Read this First
23
Important Notes
23
Discharging the Battery
24
MVP-5200I Battery Removal and Installation
24
Removing the Old Battery from the MVP-5200I
24
Reconnecting the Battery to the MVP-5200I
25
MVP-5100/MVP-5150 Battery Removal and Installation
27
Removing the Old Battery from the MVP-5100 or MVP-5150
27
Installing the New Battery
28
Battery Return Process
30
Reloading Panel Files
31
Overview
31
Validation (Final Step)
35
Overview
35
Operation Complete
35
Amx Modero ViewPoint MVP-5100 Datasheet (2 pages)
5.2” Modero ViewPoint IR Widescreen Touch Panel
Brand:
Amx
| Category:
Touch Panel
| Size: 0 MB
Amx Modero ViewPoint MVP-5100 Installation Manual (2 pages)
5.2" Modero ViewPoint IR Touch Panel
Brand:
Amx
| Category:
Touch Panel
| Size: 0 MB
Advertisement
Related Products
AMX Modero ViewPoint MVP-5150
Amx MVP-KS
AMX Modero Viewpoint MVP-5200i
AMX MVP-9000i
AMX MVP-8400ii
AMX MVP-5200i-GB
AMX MVP-5200i-GW
AMX MVP-9000i-GB
AMX MVP-9000i-GW
AMX MVP-BP
AMX Categories
Touch Panel
Matrix Switcher
Controller
Switch
Keypad
More AMX Manuals
Login
Sign In
OR
Sign in with Facebook
Sign in with Google
Upload manual
Upload from disk
Upload from URL