Table of Contents
Advertisement
Quick Links
Advertisement
Table of Contents

Subscribe to Our Youtube Channel
Related Manuals for Response Protector P500S


Summary of Contents for Response Protector P500S
- Page 1 Protector P500S Solar Wirefree Alarm System Installation & Operating Manual...
-
Page 2: Table Of Contents
FOREWORD CONTENTS Page No. Your decision to purchase a Protector P500S Wirefree INTRODUCTION Alarm System represents a major and sensible step PLANNING AND EXTENDING YOUR towards total protection of your premises, its contents PROTECTOR ALARM SYSTEM and its occupants. CONTROL UNIT... -
Page 3: Introduction
INTRODUCTION The Protector P500S Alarm System contains all components necessary to install a complete system. Items included are: 1 x Control Unit 1 x D.C. Mains Adaptor 2 x Wirefree Passive Infra Red Detectors 2 x Wirefree Magnetic Contact Detectors... -
Page 4: Planning And Extending Your Protector Alarm System
System is designed to give you protection for a many PIR’s and Magnetic Contact Detectors as three bedroomed house. Just add additional and when your require. The Protector P500S Alarm detectors where further protection is needed. Magnetic Contact External Detector... -
Page 5: Control Unit
5. Locate the Control Unit in an easily accessible 2. The position selected must be within reach of a 13A position, between 1.5 and 2 metres above floor level socket. and in a position where it will be seen each day. Protector P500S... -
Page 6: Installation
IMPORTANT NOTE: Be careful when fitting the bottom right-hand screw In order for all detectors to communicate with the not to damage the ribbon cable and ensure that the Control Unit, it is essential that the same House Code Protector P500S... -
Page 7: Jamming Detection
2 weeks prior to leaving the Jamming Detect function ‘ON’ permanently. To select the Jamming Detect function simply set the J.D. Link on the Control Unit PCB to ‘ON’ Alternative Cable Power Supply Jack Socket Entry (knockout) Protector P500S... -
Page 8: Setting Your Access Code
6. The Control Unit Siren will emit two rapid ‘bleeps’ period, depending on the setting of miniature switch 9 to indicate acknowledgment of new Access Code. in the Control Unit as previously described. 7. From now on, only the new Access Code will operate the system. Protector P500S... -
Page 9: Entry Time
The Control Unit is supplied with the ‘Auto Stop’ time (the length of time that the Control Unit Siren and External Siren will sound for when activated) set at 3 minutes. This time can be adjusted if necessary between 1 minute and 10 minutes as follows: Protector P500S... -
Page 10: Wirefree Passive Infra Red Detectors(Pir's)
Drill two 4mm diameter direct sunlight. Passive Infra Red Detectors are not holes and insert the plastic wall plugs and screw the suitable for use in conservatories or draughty areas. bracket to the wall using the screws supplied. Protector P500S... -
Page 11: Setting
Note: A special Pet Lens (order code PL1) is false alarms are experienced, it may be necessary to available direct from Response Electronics PLC (Tel select Two Pulse Count detection. 01372 848586) for installation into the Detector at 2.5 Note: The higher the Pulse Count, the more paces an metres mounting height to allow for pet movement. -
Page 12: Installation
3 seconds. Note: Any other combination of switches 9 and 10 When fixing the Detector to a metal door/window will not operate with your P500S Control Unit. under exceptional circumstances it may be Protector P500S... -
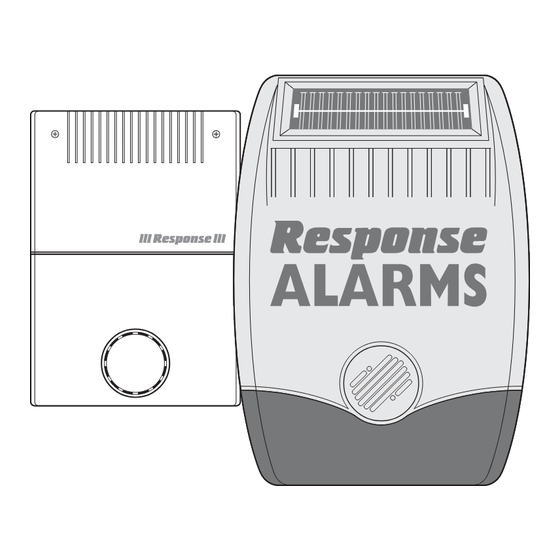
Page 13: External Solar Siren
The Solar Siren contains a sophisticated radio receiver. However, reception of radio signals can be affected by the presence of metallic objects within the vicinity of Protector P500S... -
Page 14: Installation
Hinge the front cover locating tabs over the top edge of DO NOT SET THE “SIREN CODE” TO THE “HOUSE the back-plate, push the base of the Siren cover into CODE” USED IN THE DETECTORS. place and secure with the lower fixing screw. Protector P500S... -
Page 15: Setting The Solar Siren Transmitter Module
Passive to test the system without causing unnecessary Infra-Red Detector. disturbance. Note: When Fully Armed, the Control Unit top green light will be constantly illuminated. (Refer to page 3). Protector P500S... -
Page 16: Battery Monitoring
LED on and the above process is repeated. the detector. If the LED is dim or does not illuminate the battery needs to be replaced. If a Full Alarm condition is initiated accidently, Protector P500S... -
Page 17: Maintenance
CONTROL UNIT (eg garages, sheds etc) we recommend the use of PP3 The Control Unit requires no maintenance. If cleaning Lithium batteries (Response Electronics Plc order code is required, wipe the outside of the casing with a 3005B) in PIR Detectors. -
Page 18: Alarm Record
Delay/Part Arm Installation date Control Unit serial number Use the diagrams below to record your House Code and Siren Code, eg., This information is highly confidential and should be kept in a very safe location. House Code Siren Code Protector P500S... -
Page 19: Trouble Shooting
4. Rechargeable battery low. Power down, fit new Detector to bleep every minute - change battery as initial power up battery and re-power up. required. No response from Passive Infra Red Control Unit will not function Detector (Sirens are sounding) 1. - Page 20 3. Inform the local Environmental Health Authority of the installation and which police station has been informed. 4. Immediately inform your local police station if there is a change to the persons who have access to the system Protector P500S...
-
Page 21: Extending Your System
EXTENDING YOUR PROTECTOR P500S WIREFREE INTRUDER ALARM SYSTEM You may add additional Wirefree Magnetic Contact Detectors and Wirefree PIR Detectors, etc. from the CA2000 range of accessories as required, to give additional protection where needed. The following accessories are also available to extend and enhance your system. - Page 22 For security, Recorded or Registered Post is recommended. 17 Church Road, Great Bookham, Surrey KT23 3PG Telephone: 01372 450960 E-mail: info@wireless-alarms.net www.wireless-alarms.net Protector P500S...
-
Page 23: System Specification
PROTECTOR P500S WIREFREE ALARM SYSTEM SPECIFICATION External Wirefree Passive Control Unit Solar Siren Infra Red Detector Wirefree Smoke Detector (Optional) Internal 110db Siren Siren tones : Intruder Tamper/PA 3 zones - Full Arm, Part Arm and 24 Hour Tamper/PA Case material 3mm Polycarbonate...
Need help?
Do you have a question about the Protector P500S and is the answer not in the manual?
Questions and answers