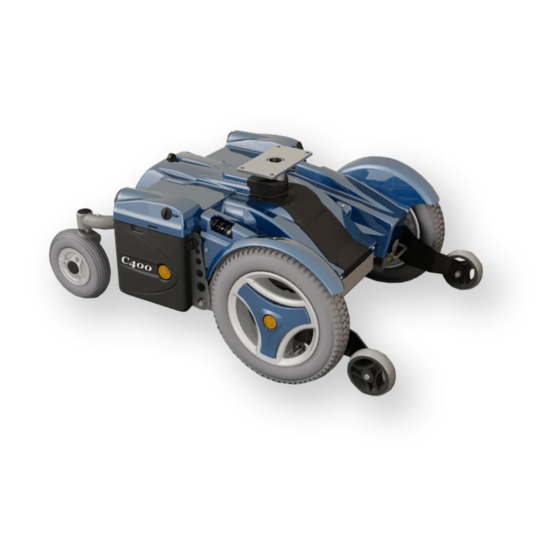
Permobil C400 Service Manual
Power wheelchair
Hide thumbs
Also See for C400:
- Service manual (132 pages) ,
- Owner's manual (84 pages) ,
- Assembly instruction manual (26 pages)
Table of Contents
Advertisement
Advertisement
Table of Contents

Related Manuals for Permobil C400


Summary of Contents for Permobil C400
- Page 1 SERVICE MANUAL Permobil C400 Power wheelchair...
- Page 3 How to contact Permobil Head Office of the Permobil group Produced and published by Permobil AB, Sweden Edition no.3, 2010-06 Order no.: 205225-US-0...
-
Page 4: Table Of Contents
Contents Contents Introduction ..................... 5 Identification plates ..................6 Covers ......................7 Batteries ......................8 Front wheels ....................10 Rear wheels ....................12 Support wheels ....................13 Wheel forks ....................14 Rear wheel suspension ................15 Shock absorbers ................... 16 Slewing brackets ................... -
Page 5: Introduction
Permobil to ensure that the correct information is provided. Technical Support In the event of technical problems, you should contact your dealer, or Permobil Inc. USA at 800-736-0925. Spare parts Spare parts must be ordered through your dealer. -
Page 6: Identification Plates
Identification plates Identification plates Chassis Chassis identification number. Rnet output stage Rnet output stage ID number Rnet control panel Control panel Rnet ID number... -
Page 7: Covers
Identification plates Covers Removing the seat lift cover 1. Raise the seat to the highest position. If the chassis is equiped with fixed seat post, see page 36. If the seat lift does not work normally because the batteries are discharged or the actuator is defective, the seat can be raised/ lowered manually, see page 28. -
Page 8: Batteries
Batteries Batteries WARNINg Be careful when using metal objects when working with batteries. A short-circuit can easily cause an explosion. Always use safety gloves and safety goggles. Removal 1. Place the wheelchair on a level surface. 2. Switch off the main power switch on the control panel. - Page 9 Batteries Batteries Fitting 1. Lift new batteries into the chassis using the battery belt. Leave the battery belt on the batteries. Place the battery with the battery terminals facing backwards, see fig. WARNINg Be careful when using metal objects when working with batteries.
-
Page 10: Front Wheels
Front wheels Front wheels Removal 1. Switch off the main power switch on the control panel. 2. Lift up and chock up the wheelchair chassis so that the wheel in question is free of the ground. 3. Remove the hub cap by pulling it straight out. If necessary, carefully lever it out using a screwdriver in the slot on the cap. - Page 11 Front wheels Front wheels Taking the rim apart The rim can be taken apart to make it possible to fit/remove solid or pneumatic tires. 1. Remove the wheel in question from the wheelchair. See the previous page. 2. If the tire is pneumatic, release the air. WARNINg Ensure that pneumatic tires are not pressurized before the rim is taken apart, otherwise there is a risk of personal injury.
-
Page 12: Rear Wheels
Rear wheels Rear wheels Removal 1. Turn off the main power switch on the control panel. 2. Lift the wheelchair chassis and support it on blocks so that the wheel is off the ground. 3. Remove the hucap (1). 4. Remove the screw (2) and the washer (3). 5. -
Page 13: Support Wheels
Support wheels Support Wheels The support wheels should always be fitted in the upper position, see fig. Removing the support wheels 1. Turn off the main power switch on the control panel. 2. Remove the bolt, see fig. WARNINg Removing the support wheels entails an increased risk of the wheelchair tipping over. -
Page 14: Wheel Forks
Wheel Forks Wheel Forks Removal 1. Switch off the main power switch on the control panel. 2. Lift up and chock up the wheelchair chassis so that the wheel in question is free of the ground. 3. Remove the cap from the top of the link arm. See fig. -
Page 15: Rear Wheel Suspension
Rear wheel suspension Rear wheel suspension Removal 1. Switch off the main power switch on the control panel. 2. Lift up and chock up the wheelchair chassis so that the rear wheel suspension is free of the ground. 3. Remove the rear wheel suspension. It is fitted with a bolt with two washers, see fig. -
Page 16: Shock Absorbers
Shock Absorbers Shock Absorbers Removal 1. Switch off the main power switch on the control panel. 2. Remove the front fender on the side in question, see page 7. 3. Lift up and chock up the wheelchair chassis so that the wheel in question is free of the ground. - Page 17 Shock Absorbers Shock Absorbers Adjustment Before the new shock absorber is mounted, it must be adjusted to the proper value. The spring force can be set to suit different user weights using the adjustment nut. Increase the dimension fo a harder suspension, decrease the dimension for a softer suspension, see fig. Adjustment nut Setting Setting...
-
Page 18: Slewing Brackets
Slewing brackets Slewing brackets Removal 1. Raise the seat to the highest position. If the chassis is equiped with fixed seat post, see page 36. If the seat elevator does not work normally because the batteries are discharged or the actuator is defective, the seat can be raised/lowered manually, see page 28. - Page 19 Slewing brackets Slewing brackets 9. Remove the slewing bracket, it is fitted with screw and washer. For removal of the drive motor, see page 26. Fitting Fit the slewing brackets in the reverse order. Tighten the bolt holding the wheel fork in place with a torque wrench.
-
Page 20: Wheel Lock Release Cable
Wheel lock release cable Wheel lock release cable Removal 1. Raise the seat to the highest position. If the chassis is equiped with fixed seat post, see page 36. If the seat elevator does not work normally because the batteries are discharged or the actuator is defective, the seat can be raised/lowered manually, see page 28. - Page 21 Wheel lock release cable Wheel lock release cable Fitting 1. Fit the cable at the magnetic wheel lock first, then at the release lever. 2. Adjust the cable sleeve length with the adjusting screw (2) so that the cable is sufficiently tensioned so that the wheel lock release sensor (see figure) is actuated just before the cable pulls the release.
-
Page 22: Wheel Lock Release Sensor
Wheel lock release sensor Wheel lock release sensor Removal 1. Switch off the main power switch on the control panel. 2. On wheelchairs with Pilot+ control system, put the circuit breaker in the “OFF” position. It is accessed through a hole in the chassis cover; see page 43. -
Page 23: Magnetic Wheel Lock
Magnetic wheel lock Magnetic wheel lock Removal 1. Raise the seat to the highest position. If the chassis is equiped with fixed seat post, see page 36. If the seat elevator does not work normally because the batteries are discharged or the actuator is defective, the seat can be raised/lowered manually, see page 28. - Page 24 Magnetic wheel lock Fitting 1. Using the adjusting screws, adjust the magnet wheel lock in accordance with the instructions on the back of the magnetic wheel lock; see fig. Wheel lock adjustment is made using the two adjusting screws. Magnetic wheel lock, wheel lock disk, cover and rubber seal disassembled.
- Page 25 Magnetic wheel lock 4. Insert a screw to align the parts. Attach the rubber seal with the drainage hole down. Be attentive to the position of the wheel lock release lever; fit the wheel lock so that the wheel lock release lever is aligned with the motor’s cable bracket.
-
Page 26: Drive Motor
Drive motor Drive motor Removal 1. Raise the seat to the highest position. If the chassis is equiped with fixed seat post, see page 36. If the seat elevator does not work normally because the batteries are discharged or the actuator is defective, the seat can be raised/lowered manually, see page 28. - Page 27 Drive motor Drive motor 9. Remove the drive motor. It is attached with three screws; see fig. Fitting Fit the drive motor in the reverse order. Drive motor mounting screws. Drive motor with gear.
-
Page 28: Seat Elevator
Seat lift Seat lift Manual raising/lowering of electric seat lift If the seat lift does not work normally because the batteries are discharged or the adjustment device is defective, the seat can be raised/lowered manu- ally. 1. Switch off the main power switch on the control panel. - Page 29 Seat lift Seat lift (Applies to older chassis models) Removal 1. Raise the seat to the highest position. If the seat lift does not work normally because the batteries are discharged or the actuator is defective, the seat can be raised/lowered manually, see page 28.
- Page 30 Seat lift Electric Seat Lift Removal 1. Raise the seat lift to its highest position. To raise the seat on a chassis with an electric seat lift that does not work normally because the batteries are discharged or the adjustment device is defective, see page 28.
-
Page 31: Electric Seat Lift
CAUTION When fitting a seat lift to an older, adapted chassis without fixed nuts on the lower holes, use the nuts and washers supplied in the same way as on the upper fixing screws. C400/500 STD Wheelchair chassis C400/500 VS... - Page 32 Seat lift Electric Seat Lift Disconnection 1. Remove the ICS General Module from the chassis. It is fitted with one screw - see figure. 2. Disconnect the contacts on the seat lift cabling to the ICS General Module - see figure below. Connection 1.
- Page 33 Seat lift Electric Seat Lift Adaptation of older chassis An older chassis may have been designed for a different seat lift model. To fit the new type of seat lift, the chassis needs to have two new holes - see figure below. On an older chassis, two new holes need to be drilled to fit the seat lift.
-
Page 34: Seat Lift Motor
Seat lift Seat lift cabling Removal 1. Disconnect the seat lift cabling by disconnecting the contacts on the cables that go to the General Module - see page 32. Disconnect the contacts for the seat lift motor as well. 2. Remove the seat lift sensors, which are held in place by one screw each. Note the positions of the sensors for subsequent fitting - see figure. -
Page 35: Seat Lift Belt
Seat lift Seat lift belt Removal 1. Remove the seat lift - see pages 29-30. 2. Loosen the two screws that hold the seat lift motor’s shaft. Move the shaft sideways so that the belt becomes slack - see figure below. 3. -
Page 36: Fixed Seat Post
Fixed seat post Fixed seat post Adjusting the Seat Height The length of the fixed seat post can be adjusted to five different fixed positions. 1. Switch off the main power switch on the control panel. 2. Loosen the screw that locks the fixed height position of the seat post. -
Page 37: Removal
Fixed seat post Fixed seat post Removal 1. Switch off the main power switch on the control panel. 2. On wheelchairs with Pilot+ control system, put the circuit breaker in the “OFF” position. It is accessed through a hole in the chassis cover; see page 43. -
Page 38: Control Panel
Control panel Control panel R-net Removal 1. Switch off the main power switch on the control panel. 2. Remove the cable ties holding the control panel cabling in place under the arm rest. Note the positions of the cable ties for subsequent fitting. -
Page 39: R-Net Controller
6. Disconnect the electrical connections to the R-net controller, being attentive to their placement: see figure Fitting Assemble in reverse order. Older models of C400 have output stages of type PM80, while later models have output stages of type PM90. When renewing output stages on older models, PM80 may be replaced by PM90. -
Page 40: Esp Module
ESP Module ESP module Removal 1. Raise the seat lift to its highest position. To raise the seat on a chassis with a fixed seat tube, see page 36. To raise the seat on a chassis with an electric seat lift that does not work normally because the batteries are discharged or the adjustment device is defective, see page 28. - Page 41 ESP Module ESP module Fitting 1. Identify the correct holes (the holes are marked with the chassis designation) and fit the ESP module to the bracket using the four screws - see figure. The ESP module is held in place by four screws. 2.
-
Page 42: Ics Master Module
ICS Master module ICS master module The wheelchair seat may be equipped with an ICS control system, and if so, the seat is controlled from the system’s ICS master module. This is fitted in the wheelchair chassis. WARNING! The ICS Master Module must be configured for the seat before being fitted. -
Page 43: Main Fuse
Circuit breaker and fuses Circuit breaker and fuses Resetting the circuit breake The circuit breaker also serves as a battery isolator but is normally referred to as a circuit breaker. Circuit breaker replacement is normally not required; it is of the automatic type that can be reset when tripped. CAUTION A tripped circuit breaker often entails a major electrical fault. -
Page 44: Lights
Lights Lights (Accessories) Removing the front lights 1. Switch off the main power switch on the control panel. 2. Put the circuit breaker in the “OFF” position. It is accessed through a hole in the chassis cover; see page 43. 3. - Page 45 Lights Lights (Accessories) Removing the rear lights 1. Switch off the main power switch on the control panel. 2. Put the circuit breaker in the “OFF” position. It is accessed through a hole in the chassis cover; see page 43. 3.
-
Page 46: Control System
The control system can also be programmed in order to make adjustments needed for a specific user. Standard parameter files can be downloaded from Permobil’s website, www.permobil.se. For more information on programming/adjustment of the Rnet control system and obtaining parameter... -
Page 47: Trouble Shooting
The following troubleshooting guide describes a number of faults and events which may occur when you use your wheelchair, together with suggested remedies. Note that this guide cannot describe all the problems and events which may occur and you should always contact your service contact or Permobil in case of doubt. -
Page 48: Rnet Diagnostics
Diagnostics should only be performed by persons with sound knowledge of the wheelchair’s electronic control system. Incorrect or poorly performed repair works may make it dangerous to use the wheelchair. Permobil accepts no liability for any personal injury or damage to the wheelchair and its surroundings that occurs on account of incorrect or poorly performed repair work. -
Page 49: Example Of A Screen Showing A System Fault
Trouble Shooting guide Troubleshooting R-net Example of a screen showing a system fault Identified module Error message Controller Fault Low Battery Error code 0506 2C00 Identified module This indicates the control system module that detected the problem. Power module JSM= Joystick module Error message The error message provides a brief description of the error type. - Page 50 The system log is accessed by means of programming directly in the system (On Board Programming, OBP). Contact Permobil or your repair engineer for more information on OBP. go to OBP mode • Select System from the menu.
- Page 51 Trouble Shooting guide Troubleshooting R-net Definitions of diagnostics messages When an error message has been displayed and the defective module has been identified, you can use the following definitions to determine the possible cause of the error and what remedial action is required to correct it.
- Page 52 Trouble Shooting guide Troubleshooting R-net Joystick Error The commonest cause for this error is that the joystick was moved away from its central position before and during the time at which the control system was switched on. The screen for a shifted joystick is displayed for 5 seconds.
- Page 53 Trouble Shooting guide Troubleshooting R-net Joystick Calibration Error This occurs when joystick calibration has been unsuccessful. • Go to OBP mode and recalibrate. If the error persists, the joystick module may be defective. Read more in section 5. Latched Timeout This occurs when the control system detects that the programmed block time has been exceeded.
- Page 54 Programming should only be performed by persons with sound knowledge of control systems from PGDT. Incorrect programming can mean that the wheelchair is not safe to use. Permobil cannot be held responsible for losses of any kind if the control system...
- Page 55 Trouble Shooting guide Troubleshooting R-net 3.19 Bad Cable This occurs when the control system detects a connection error in the communication cables between the modules. • Check all cables and connections to ensure there is no stoppage. • Replace any cables with visible damage. Then cycle the voltage. •...
- Page 56 Trouble Shooting guide Troubleshooting R-net 3.22 System Error This occurs when the control system detects an error that cannot be ascribed to a specific module. • Check all cables and connections. • Cycle the voltage. If the error persists and the system includes third-party modules: •...
- Page 57 The necessary information on other tests is available in the wheelchair service manual. Permobil cannot be held responsible for losses of any kind that may arise when these tests are conducted, or that arise as a consequence of further relevant tests not being conducted.
- Page 58 Trouble Shooting guide Troubleshooting R-net Brake test These tests should be carried out on an even surface with at least one meter of free space around the wheelchair. • Switch on the control system. • Check that the screen remains on after start-up. •...
- Page 59 If any part is replaced without Permobil’s approval, the control system’s warranty lapses. CAUTION Permobil cannot be held responsible for losses of any kind arising as a result of a component of the Rnet control system being opened, adjusted or modified without permission.
-
Page 60: Cabling Overview
Cabling overview... -
Page 61: Cabling Overview
Cabling overview Cabling overview... -
Page 62: Index
Index Index Batteries ..........8 Rear wheels ........12 Rear wheel suspension ....15 R-net controller ......... 35 Cabling overview ....... 56 Circuit breaker ........37 Control panel ........34 Seat lift ..........28 Control System ......... 40 Shock absorbers ......16 Covers .......... -
Page 64: Order No.: 205225-Us
Permobil C400 Order no.: 205225-US-0...
Need help?
Do you have a question about the C400 and is the answer not in the manual?
Questions and answers