Table of Contents
Advertisement
Quick Links
Advertisement
Table of Contents

Related Manuals for Elation PowerSpot 575IE


Summary of Contents for Elation PowerSpot 575IE
- Page 1 User Manual Software Version 1.60 Revised 07/2005...
- Page 2 Power Spot 575IE™ ©Elation Professionals® Los Angeles, Ca. wwww.ElationLighting.com Page...
-
Page 3: Table Of Contents
..................19 (MANU) 3.9.1 Manual Drive .................. 20 (LAAU) 3.9.2 Lamp On (automatic) ..............20 3.9.3 Lamp Off (via DMX)..................21 (DLOF) 3.9.4 DMX Input ..................22 (DISP) 3.9.5 LED Display ..................21 ©Elation Professionals® Los Angeles, Ca. wwww.ElationLighting.com Page... - Page 4 Maintenance and Cleaning the Power Spot 575IE™..........39 9.1 Safety Regulations ....................39 9.2 Circumference and Interval..................39 9.3 Cleaning the Optical System..................40 10 Technical Specification....................40 11 Warranty..........................41 12 Dimensions........................43 13 Index ............................ 44 ©Elation Professionals® Los Angeles, Ca. wwww.ElationLighting.com Page...
-
Page 5: Introduction
These instructions contain important information regarding safety during use and maintenance. UNPACKING: Thank you for purchasing the Power Spot 575IE™ by Elation Professional®. Every Power Spot 575IE™ has been thoroughly tested and has been shipped in perfect operating condition. Carefully check the shipping carton for damage that may have occurred during shipping. - Page 6 During the initial operation of this fixture, a light smoke or smell may emit from the interior of the fixture. This is a normal process and is caused by excess paint in the interior of the casing burning off from the heat associated with the lamp. ©Elation Professionals® Los Angeles, Ca. wwww.ElationLighting.com Page...
-
Page 7: Safety Instructions
11. Do not attempt to operate this fixture if the power cord is frayed or damaged. Attention: Lasers of class 3R may injure your retina after a short residence time even without optical instrument. Avoid any direct ex- posure of your eyes! ©Elation Professionals® Los Angeles, Ca. wwww.ElationLighting.com Page... -
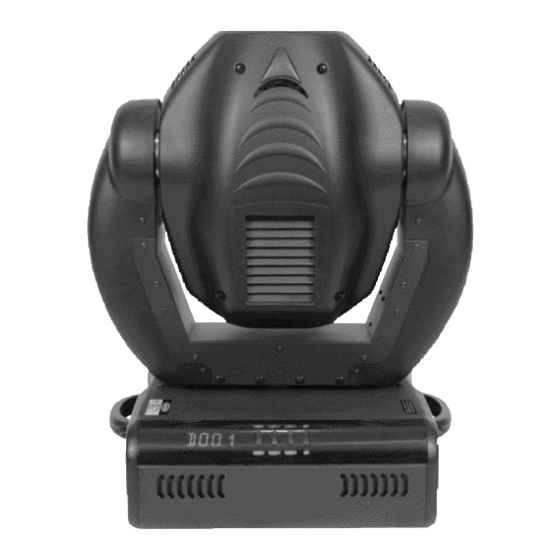
Page 8: Fixture Layout
11. Powercon Connector 12. Power Switch 13. Carrying Handle 14. 4-Segment Menu Display 15 16 17 18 15. Mode Select Button 16. Enter Select Button 17. Down Select Button 18. Up Select Button ©Elation Professionals® Los Angeles, Ca. wwww.ElationLighting.com Page... - Page 9 In the event of fuse failure, always be sure to replace this fuse with an exact match unless otherwise instructed by an authorized Elation technician. 11. Powercon Connector – This power jack is designed to be used only with the Neutrik Powercon adapter included with your fixture.
- Page 10 17. Down Select Button – This button is used to scroll backwards when navigating through the system menu. 18. Up Select Button - This button is used to scroll forward when navigating through the system menu. ©Elation Professionals® Los Angeles, Ca. wwww.ElationLighting.com Page...
-
Page 11: Preparation And Installation
To attach a clamp to the unit, attach a clamp that is rated to handle the weight of the unit to your cam lock. After a clamp has been ©Elation Professionals® Los Angeles, Ca. wwww.ElationLighting.com... - Page 12 The fixture provides a built-in rigging point for a safety cable on the underside of the fixture, be sure to use this point and never secure a safety cable to a carrying handle. ©Elation Professionals® Los Angeles, Ca. wwww.ElationLighting.com Page...
-
Page 13: Connections
Your fixture and your DMX controller require a standard 3-pin XLR connector for data input and data output (Figure Below). If you are making your own cables, be sure to use standard two ©Elation Professionals® Los Angeles, Ca. wwww.ElationLighting.com Page... -
Page 14: Special Note
3-pin XLR DMX line. When inserting standard 5-pin XLR connectors in to a 3-pin line a cable adaptor must be used, these adaptors are readily available at most electric stores. The chart below details a proper cable conversion. ©Elation Professionals® Los Angeles, Ca. wwww.ElationLighting.com Page... -
Page 15: Fuse Requirements
WARNING: • Always disconnect main power before changing the fuse! • Always replace with the exact same type fuse unless otherwise specified by an authorized Elation service technician. Replacing with ® anything other than the specified fuse can severely damage your fixture and will void your manufactures warranty. -
Page 16: Fixture Menu
I R I S Calibration of the IRIS POFS Calibration of the pan-offset TOFS Calibration of the tilt-offset clre Clears internal memory (technician only) ares Adjust Reset (wheels static after reset) VTIL Software version, tilt pc-board ©Elation Professionals® Los Angeles, Ca. wwww.ElationLighting.com Page... -
Page 17: Setting The Dmx - Address
The Test Program engages the fixture’s internal test mode. This function runs a complete test procedure of all functions. Press Enter to launch the self-test or the Mode button to cancel and return to the main menu. ©Elation Professionals® Los Angeles, Ca. wwww.ElationLighting.com Page... -
Page 18: Lamp On/Off (Lamp)
Press the Enter button to confirm the operation or the Mode button to cancel and return to the main menu. (The lamp command will only functions if and when the shutter is closed at the same time). 3.5 Reset RESE ©Elation Professionals® Los Angeles, Ca. wwww.ElationLighting.com Page... -
Page 19: Running Time (Lamp/Unit) (Time)
3.9 Special Functions SPEC This menu option accesses several special features and function of the POWER SPOT SPEC 575IE™. The sub-menu consists of several sub-menus. Navigation details of the ©Elation Professionals® Los Angeles, Ca. wwww.ElationLighting.com Page... -
Page 20: Manual Drive (Manu)
DMX controller you must turn this function off. To toggle between “OFF” and “ON” use the Up and Down buttons. Use the Enter button to confirm your setting. ©Elation Professionals® Los Angeles, Ca. wwww.ElationLighting.com Page... -
Page 21: Lamp Off Via Dmx
000 - 255 Focu Prism wheel 000 - 255 Pris Iris 000 - 255 Iris Lamp off, Reset, Laser 000 - 255 SPEC Movement 000 - 255 Move Pan/Tilt speed 000 - 255 Sped ©Elation Professionals® Los Angeles, Ca. wwww.ElationLighting.com Page... - Page 22 The cooling fan works continuously at max. speed. HIGH This is the default fan setting. In this setting an internal thermal sensor constantly monitors the internal operating temperature and regulates the fan speed to coincide with the internal temperature. ©Elation Professionals® Los Angeles, Ca. wwww.ElationLighting.com Page...
- Page 23 Adjustment of the Tilt-Offsets -99 - +99 TOFS Adjustments in the internal circuit. CLRE Adjust Reset (wheels stand still after the reset) -99 - +99 ARES Software version of Tilt-board -99 - +99 VTIL ©Elation Professionals® Los Angeles, Ca. wwww.ElationLighting.com Page...
-
Page 24: Elation Professionals® Los Angeles, Ca. - Wwww.elationlighting.com
“ON” and “OFF” and confirm once more with the Enter button or use the Mode button to cancel the operation. 3.9.11 Error and Fault Corrections EFLG (These functions are reserved for authorized technicians only) ©Elation Professionals® Los Angeles, Ca. wwww.ElationLighting.com Page... -
Page 25: Error And Information Messages
This message informs you that one of the fixture function wasn’t able to do RsER its reset correct (magnetic sensor, stepping motor, driver on the PCB, cables, etc.). Repair the defect and start the fixture again. ©Elation Professionals® Los Angeles, Ca. wwww.ElationLighting.com Page... -
Page 26: Operating Modes
4.1 Universal DMX Control: This function allows you to use a universal DMX-512 controller such as the Elation® DMX Operator II™ or Elation® Show Designer 2™ to control head movement, the color wheel, the shutter (strobe), and all other DMX traits. A DMX controller allows you to create unique programs tailored to your individual needs. -
Page 27: Master-Slave
Be sure the first unit in the chain is selected as the “master“ ( ) is SVPT turned on in the audio submenu. All other fixtures must be in “slave“ mode ( turned on in the audio submenu. ©Elation Professionals® Los Angeles, Ca. wwww.ElationLighting.com Page... -
Page 28: Dmx Channel Selection (Dmx Protocol)
25,3 color max. 70 BPM open / color 1 (slow) 66..67 42..43 26,1 => 0,86 s color 1, Brilliant Blue (slow) 68..69 44..45 26,9 color 1 / color 2 (slow) 70..71 46..47 27,6 ©Elation Professionals® Los Angeles, Ca. wwww.ElationLighting.com Page... - Page 29 Gobo 6 (fast) 40..47 28..2F 15..17, Gobo 7 (fast) 48..55 30..37 18..20, Gobo 8 (fast) 56..63 38..3F 21..23 Gobo 1 (open, slow) Chaser from gobo to 64..71 40..47 24..26, gobo max. 40 BPM ©Elation Professionals® Los Angeles, Ca. wwww.ElationLighting.com Page...
- Page 30 42..43 26..26, gobo max. 40 BPM => 1,51 s Gobo 2 (slow) 68..71 44..47 27..27, Gobo 3 (slow) 72..75 48..4B 28..29 Gobo 4 (slow) 76..79 4C..4F 30..30, Gobo 5 (slow) 80..83 50..53 31..32 ©Elation Professionals® Los Angeles, Ca. wwww.ElationLighting.com Page...
- Page 31 57..62 Ascend with Shutter, audio 160..175 A0..A 63..68 Descend with Shutter, audio 176..191 B0..B 69..75 Ascend with Shutter 192..207 C0..C 76..81 Descend with Shutter 208..223 D0..D 82..87 Pulse - effect 224..239 E0..E 88..93 ©Elation Professionals® Los Angeles, Ca. wwww.ElationLighting.com Page...
- Page 32 90° 02..03 02..03 180° 04..05 04..05 270° 06..07 06..07 0° 08..09 08..09 90° 10..11 0A..0 180° 12..13 0C..0 270° 14..15 0E..0F 0° 16..17 11..11 90° 18..19 12..13 180° 20..21 14..15 270° 22..23 16..17 ©Elation Professionals® Los Angeles, Ca. wwww.ElationLighting.com Page...
- Page 33 Tilt max. 285° = 1,8 s Lamp ON Shutter open 240..255 F0..FF 94..100 Channel 14 ( min. 3 sec. ) (only if 230..249 6E..9F 92..97 Lamp OFF shutter is closed, channel 9 = 0 ..15) ©Elation Professionals® Los Angeles, Ca. wwww.ElationLighting.com Page...
-
Page 34: Lamp Change
Carefully pull back the socket assembly. 6.2.4 Gently remove the old lamp from it’s socket. If the old lamp has exploded be sure to remove all of the old lamp fragments to prevent damage to the internal ©Elation Professionals® Los Angeles, Ca. wwww.ElationLighting.com Page... - Page 35 (see page 20). Attention: Be sure the lamp is securely seated in the lamp socket. Failure to comply with this warning may cause excessive heat build-up that may cause the internal lens to crack. ©Elation Professionals® Los Angeles, Ca. wwww.ElationLighting.com Page...
-
Page 36: Fuse Replacement
Gently pull out the bad fuse and discard of it properly and replace it with an exact match. Reassemble in reverse order. ©Elation Professionals® Los Angeles, Ca. wwww.ElationLighting.com Page... -
Page 37: Safety Regulations
Replace the gobo and reinsert the retaining spring to secure the new gobo in place. Be sure the retaining spring is insert properly to avoid damage to the wheel. 8.1.5 Reassemble the POWER SPOT 575IE™ in reverse order. Special Notice: ©Elation Professionals® Los Angeles, Ca. wwww.ElationLighting.com Page... - Page 38 Power Spot 575IE™ If you use glass gobos, the non-vaporized side must be fitted towards the lamp direction. Magnet Open Wheel with rotating Gobos Wheel with non rotating Gobos ©Elation Professionals® Los Angeles, Ca. wwww.ElationLighting.com Page...
-
Page 39: Maintenance And Cleaning The Power Spot 575Ie
The inside optical system should be maintained only by qualified technicians. Please contact Elation professionals for recommendation associated with internal cleaning procedures. Safety Regulations • Always disconnect main power before attempting any service related issues! •... -
Page 40: Cleaning The Optical System
9.3.4 Follow the chart above to complete the service procedures. 9.3.5 Replace the shell and tighten the 4 retaining screws. 9.3.6 Be sure the cover has been replaced and all the parts have completely dried before attempting operation. ©Elation Professionals® Los Angeles, Ca. wwww.ElationLighting.com Page... -
Page 41: Technical Specification
375mm (W) x 430mm (L) x 450mm (H) ~ Head vertical Weight (net) 19kg / 42Lbs Please Note: Specifications and improvements in the design of this unit and this manual are subject to change without any prior written notice. ©Elation Professionals® Los Angeles, Ca. wwww.ElationLighting.com Page... -
Page 42: Warranty
® defective parts at its expense, and will absorb all expenses for warranty service and repair labor by reason of defects in material or workmanship. The sole responsibility of Elation Professionals under this warranty shall be limited to the repair of the product, or replacement ®... - Page 43 ® or damage, direct or consequential, arising out of the use of, or inability to use, this product. G. This warranty is the only written warranty applicable to Elation Professionals products and ® supersedes all prior warranties and written descriptions of warranty terms and conditions heretofore published.
-
Page 44: Dimensions
Power Spot 575IE™ 11. Dimensions ©Elation Professionals® Los Angeles, Ca. wwww.ElationLighting.com Page... - Page 45 Power Spot 575IE™ ©Elation Professionals® Los Angeles, Ca. wwww.ElationLighting.com Page...
- Page 46 When installing this fixture be sure that it is mounted in a manner that prevents the audience from directly into the laser beam. Be sure the fixture is mounted in manner that prevents the laser beam from sticking the audience. ©Elation Professionals® Los Angeles, Ca. wwww.ElationLighting.com Page...
-
Page 47: Index
Special Functions ..........20 DMX Protocol ............29 Technical Specification ........41 Error Messages ..........25 Test Program ............ 18 Tilt- movement..........41 Feedback ............25 Fixture Temperature........23 VBG 70............11 Fuse..............15 Weights ............41 Glass Gobos............38 ©Elation Professionals® Los Angeles, Ca. wwww.ElationLighting.com Page... - Page 48 Power Spot 575IE™ Elation Professional 4295 Charter Street Los Angeles, CA. 90058 323-582-3322 / 323-582-3108 fax www.ElationLighting.com / info@ElationLighitng.com ©Elation Professionals® Los Angeles, Ca. wwww.ElationLighting.com Page...
Need help?
Do you have a question about the PowerSpot 575IE and is the answer not in the manual?
Questions and answers