Table of Contents
Advertisement
Quick Links
Advertisement
Table of Contents

Related Manuals for Elation PLATINUM FLX


Summary of Contents for Elation PLATINUM FLX
- Page 1 PLATINUM FLX™ user manual ...
- Page 2 Elation Professional USA | 6122 S. Eastern Ave. | Los Angeles, CA. 90040 323-582-3322 | 323-832-9142 fax | www.elationlighting.com | info@elationlighting.com Elation Professional B.V.
-
Page 3: Table Of Contents
General Guidelines Discharge Lamp Warning Fixture Overview Lamp Installation Fixture Installation Fixture Menu DMX Channel Functions And Values ver1.3.0 ≥ DMX Channel Functions And Values ver1.5.2 ≥ Error Codes Cleaning and Maintenance Technical Specifications Optional Accessories PLATINUM FLX™ User Manual... -
Page 4: General Information
Please do not discard the shipping carton in the trash. Please recycle whenever possible. BOX CONTENTS (2) Omega Brackets (1) 5pin DMX Cable (1) powerCON Cable (1) Safety Cable PLATINUM FLX™ User Manual... - Page 5 You may also visit us on the web at www.elationlighting.com any comments or suggestions. For service related issue please contact Elation Professional®. ELATION SERVICE USA - Monday - Friday 8:00am to 5:00pm PST...
-
Page 6: Warranty
No accessories should be shipped with the product. If any accessories are shipped with the product, Elation Professional® shall have no liability what so ever for loss and/or or damage to any such accessories, nor for the safe return thereof. -
Page 7: Safety Instructions
Do not operate this fixture if the power cord has become frayed, crimped and/or damaged. If the power cord is damaged, replace it immediately with a new one of similar power rating. PLATINUM FLX™ User Manual... -
Page 8: General Guidelines
Use the original packaging and materials to transport the fixture in for service. DO NOT TOUCH the housing bare-hand during its operation. Turn OFF the power and allow approximately 15 minutes for the fixture to cool down before replacing or serving. PLATINUM FLX™ User Manual... -
Page 9: Discharge Lamp Warning
Please note that due to the nature of the Philips™ Platinum 20R Lamp and the optical path of the fixture, the lamp MUST BE replaced at 1,500 hours. Use only Genuine Original Philips™ Platinum 20R Lamps. Other brand lamps may cause damage and void warranty! PLATINUM FLX™ User Manual... -
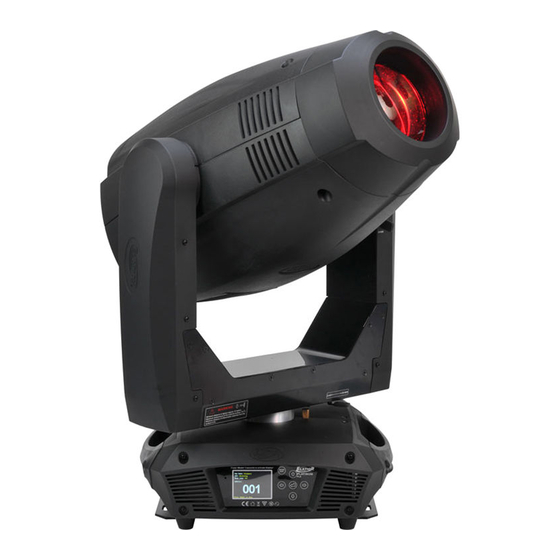
Page 10: Fixture Overview
F I X T U R E O V E R V I E W Lens Carrying Handle(s) LCD Menu Function Display LEFT Button DOWN Button ENTER Button RIGHT Button MODE/ESC Button UP Button Lamp Access/Cover Panel RJ45 Input RJ45 Output 5pin DMX Input 5pin DMX Output powerCON Input Fuse PLATINUM FLX™ User Manual... -
Page 11: Lamp Installation
The fixture will continue to enter hibernation mode until the lamp is replaced and the lamp clock has been reset. To replace the lamp follow the safety guidelines and procedures listed on the next page. PLATINUM FLX™ User Manual... - Page 12 UV Radiation exposure! LAMP INSTALLATION PROCEDURE 1. Place fixture on a flat surface and remove (3) screws marked “A”, “B”, and “C” and then remove lamp cover to access the lamp. (See below) PLATINUM FLX™ User Manual...
- Page 13 2. Gently remove (2) Wires connected to spade terminals on lamp. (See below) 3. Loosen main retaining screw by turning counterclockwise. (See below) 4. Pull retaining bracket towards you and to the left side. (See below) PLATINUM FLX™ User Manual...
- Page 14 5. Pull retention clips towards you away from the lamp. (See below) 6. Using two fingers, gently remove old lamp from the fixture. (See below) 7. Using two fingers, gently install new lamp into the fixture. (See above) 8. Push retention clips towards the lamp. (See below) PLATINUM FLX™ User Manual...
- Page 15 9. Push retaining bracket towards lamp and tighten retaining screw clockwise. (See below) 10. Gently attach (2) Wires to spade terminals on the base of the lamp. (See below) 11. Replace lamp cover and secure (3) screws marked “A”, “B”, and “C”. (See below) PLATINUM FLX™ User Manual...
- Page 16 Please remember the Philips Platinum 20R Lamp is NOT a hot-restrike lamp ™ therefore, you must wait approximately 15 minutes before you can attempt to restrike the lamp once it has been turned off. PLATINUM FLX™ User Manual...
-
Page 17: Fixture Installation
10 times the weight of the fixture. Fixture installation must always be secured with a secondary safety attachment, such as an appropriate safety cable. Never stand directly below the device when mounting, removing or servicing. PLATINUM FLX™ User Manual... - Page 18 Fixture is fully operational in the specific mounting positions as illustrated below. S A F E T Y C A B L E ALWAYS USE A SAFETY CABLE WHENEVER INSTALLING THIS FIXTURE IN A SUSPENDED ENVIRONMENT TO ENSURE THE FIXTURE WILL NOT DROP IF THE CLAMP FAILS. PLATINUM FLX™ User Manual...
- Page 19 The fixture provides a built-in rigging point for a safety cable on the hanging bracket as illustrated above. Be sure to only use the designated rigging point for the safety cable and never secure a safety cable to a carrying handle. PLATINUM FLX™ User Manual...
-
Page 20: Fixture Menu
NOTE: To access the LCD Menu Control Display via the internal battery, press and hold the MODE/ESC button for 3 seconds. The LCD Menu Control Display will shut OFF automatically about 1 minute from the last button press. PLATINUM FLX™ User Manual... - Page 21 . e l a t i o n l i g h t i n g . c o m ELATION© PLATINUM FLX™ S Y S T E M M E N U Features subject to change without any prior written notice.
- Page 22 . e l a t i o n l i g h t i n g . c o m ELATION© PLATINUM FLX™ S Y S T E M M E N U Features subject to change without any prior written notice.
- Page 23 . e l a t i o n l i g h t i n g . c o m ELATION© PLATINUM FLX™ S Y S T E M M E N U Supports Software Versions: ≥ 1.5.2...
- Page 24 . e l a t i o n l i g h t i n g . c o m ELATION© PLATINUM FLX™ S Y S T E M M E N U Supports Software Versions: ≥ 1.5.2...
- Page 25 PERSONALITY – Service Setting - Password Service Password - (050) NOTE: The Service Password MUST be entered in order to access the following menus: RDM PID, Ethernet IP, Ethernet IP Mask, Clear Err. Info, and DFLT Pow. LampOn. PLATINUM FLX™ User Manual...
- Page 26 100%. PAN and TILT functions will still operate if the fixture needs to be positioned to a flat clear surface. With the individual functions, you can focus the light on a flat surface (wall) and perform fine adjustments. PLATINUM FLX™ User Manual...
- Page 27 Slave unit was assigned to. If e.g. a Slave unit is set to “Slave 1” in the menu “Set to Slave”, the Master unit sends “Auto Program Part 1” to the Slave unit. If set to “Slave 2”, the Slave unit receives “Auto Program Part 2”. PLATINUM FLX™ User Manual...
- Page 28 “Auto Pro Part 1”, “Auto Pro Part 2” or “Auto Pro Part 3”, and select which Slave program is to be sent. Selection “Part 1” means, that the Slave unit runs the same program as the master units. ENTER to confirm. MODE/ESC in order to return to the main menu. PLATINUM FLX™ User Manual...
- Page 29 Auto Pro Part 1 is Program 2 Auto Pro Part 2 is Program 3 Auto Pro Part 3 is Program 6 The 3 Slave groups run the Auto Program in certain time segments, as shown in the following picture: PLATINUM FLX™ User Manual...
- Page 30 UV FILTER 128-189 *Clockwise Color Wheel Rotation from FAST to SLOW 190-193 NO Rotation 194-255 *Counterclockwise Color Wheel Rotation from SLOW to FAST COLOR WHEEL FINE ADJUSTMENT 0-255 FINE Adjustment of Color Wheel to Any Position PLATINUM FLX™ User Manual...
- Page 31 0-127 ROTATING Gobo Indexing 128-189 *Clockwise Gobo Rotation from FAST TO SLOW 190-193 NO Rotation 194-255 *Counterclockwise Gobo Rotation from SLOW to FAST ROTATING GOBOS, FINE INDEX ROTATION [GOBO WHEEL 1] 0-255 ROTATING Gobo FINE Indexing PLATINUM FLX™ User Manual...
- Page 32 Shake SLOW to FAST Animation Position 6 190-221 *Clockwise Gobo Wheel Rotation from FAST to SLOW 222-223 NO Rotation 224-255 *Counterclockwise Gobo Wheel Rotation from SLOW to FAST STATIC-STAMPED GOBOS, FINE INDEXING [GOBO WHEEL 2] 0-255 STATIC-STAMPED Gobo FINE Indexing PLATINUM FLX™ User Manual...
- Page 33 Continuous FINE FOCUS Adjustment MOTORIZED ZOOM 0-255 ZOOM Adjustment from SMALL to BIG MOTORIZED ZOOM FINE 0-255 ZOOM FINE Adjustment AUTO FOCUS 0-50 Auto Focus OFF 51-150 151-255 AUTO FOCUS FINE 0-255 Continuous FINE AUTO FOCUS Adjustment PLATINUM FLX™ User Manual...
- Page 34 Intensity 0 to 100% DIMMER INTENSITY FINE 0-255 Dimmer Intensity FINE Adjustment FROST 0-127 OPEN 128-255 100% Frost ANIMATION MOVEMENT SPEED 0-255 Animation Movement Speed from SLOW to FAST CMY & COLOR MACRO SPEED 0-255 Speed FAST to SLOW PLATINUM FLX™ User Manual...
- Page 35 Color Macro 26 240-247 Color Macro 27 248-255 Random C M Y PAN / TILT MOVEMENT SPEED 0-225 MAX to MIN Speed 226-235 Blackout with PAN and TILT Movement 236-245 Blackout with ALL Wheel Movement 246-255 NO Function PLATINUM FLX™ User Manual...
- Page 36 Internal Program 2 (Scene 9-16) 140-159 Internal Program 3 (Scene 17-24) 160-179 Internal Program 4 (Scene 25-32) 180-199 Internal Program 5 (Scene 33-40) 200-219 Internal Program 6 (Scene 41-48) 220-239 Internal Program 7 (Scene 49-56) 240-255 Reserved PLATINUM FLX™ User Manual...
- Page 37 UV FILTER 128-189 *Clockwise Color Wheel Rotation from FAST to SLOW 190-193 NO Rotation 194-255 *Counterclockwise Color Wheel Rotation from SLOW to FAST COLOR WHEEL FINE ADJUSTMENT 0-255 FINE Adjustment of Color Wheel to Any Position PLATINUM FLX™ User Manual...
- Page 38 0-127 ROTATING Gobo Indexing 128-189 *Clockwise Gobo Rotation from FAST TO SLOW 190-193 NO Rotation 194-255 *Counterclockwise Gobo Rotation from SLOW to FAST ROTATING GOBOS, FINE INDEX ROTATION [GOBO WHEEL 1] 0-255 ROTATING Gobo FINE Indexing PLATINUM FLX™ User Manual...
- Page 39 *Clockwise Gobo Wheel Rotation from FAST to SLOW 190-221 [NO FUNCTION IN BEAM MODE] 222-223 NO Rotation *Counterclockwise Gobo Wheel Rotation from SLOW to FAST 224-255 [NO FUNCTION IN BEAM MODE] STATIC-STAMPED GOBOS, FINE INDEXING [GOBO WHEEL 2] 0-255 STATIC-STAMPED Gobo FINE Indexing PLATINUM FLX™ User Manual...
- Page 40 Continuous FINE FOCUS Adjustment MOTORIZED ZOOM 0-255 ZOOM Adjustment from SMALL to BIG MOTORIZED ZOOM FINE 0-255 ZOOM FINE Adjustment AUTO FOCUS 0-50 Auto Focus OFF 51-150 151-255 AUTO FOCUS FINE 0-255 Continuous FINE AUTO FOCUS Adjustment PLATINUM FLX™ User Manual...
- Page 41 Dimmer Intensity FINE Adjustment FROST 0-127 OPEN 128-255 100% Frost ANIMATION MOVEMENT SPEED Animation Movement Speed from SLOW to FAST 0-255 [NO FUNCTION IN BEAM MODE] CMY & COLOR MACRO SPEED 0-255 Speed FAST to SLOW PLATINUM FLX™ User Manual...
- Page 42 Color Macro 26 240-247 Color Macro 27 248-255 Random C M Y PAN / TILT MOVEMENT SPEED 0-225 MAX to MIN Speed 226-235 Blackout with PAN and TILT Movement 236-245 Blackout with ALL Wheel Movement 246-255 NO Function PLATINUM FLX™ User Manual...
- Page 43 Internal Program 2 (Scene 9-16) 140-159 Internal Program 3 (Scene 17-24) 160-179 Internal Program 4 (Scene 25-32) 180-199 Internal Program 5 (Scene 33-40) 200-219 Internal Program 6 (Scene 41-48) 220-239 Internal Program 7 (Scene 49-56) 240-255 Reserved PLATINUM FLX™ User Manual...
-
Page 44: Error Codes
Cyan Wheel Er Gobo Wheel 2 Er Flow Control Er Magenta Wheel Er Prism1 Er LightSource Er Yellow Wheel Er Prism Rot.1 Er LightPipe Er CTO Wheel Er Prism2 Er Color Wheel Er Prism Rot.2 Er PLATINUM FLX™ User Manual... -
Page 45: Cleaning And Maintenance
Regular inspections are recommended to insure proper function and extended life. There are no user serviceable parts inside this fixture, please refer all other service issues to an authorized Elation service technician. Should you need any spare parts, please order genuine parts from your local Elation dealer. -
Page 46: Technical Specifications
700W Max Power Consumption 14°F to 113°F (-10°C to 45°C) APPROVALS / RATINGS CE | IP20 Please Note: Specifications and improvements in the design of this unit and this manual are subject to change without any prior written notice. PLATINUM FLX™ User Manual... - Page 47 3rd party custom gobo vendors for accurate sizing. Please Note: Specifications and improvements in the design of this unit and this manual are subject to change without any prior written notice. PLATINUM FLX™ User Manual...
-
Page 48: Photometric Data
. e l a t i o n l i g h t i n g . c o m PHOTOMETRIC DATA Please Note: Specifications and improvements in the design of this unit and this manual are subject to change without any prior written notice. PLATINUM FLX™ User Manual... -
Page 49: Optional Accessories
O P T I O N A L A C C E S S O R I E S ORDER CODE ITEM TRIGGER CLAMP Heavy Duty Wrap Around Hook Style Clamp DRCFLXTOUR Dual Touring Road Case For Platinum FLX™ EWDMXSYSTEM Wireless DMX System (1 Transmitter, 1 Receiver) AC5PDMX5PRO 5 ft. (1.5m) 5pin PRO DMX Cable CAT6PRO5 5 ft.
Need help?
Do you have a question about the PLATINUM FLX and is the answer not in the manual?
Questions and answers