
Related Manuals for Elation Design Spot 575B


Summary of Contents for Elation Design Spot 575B
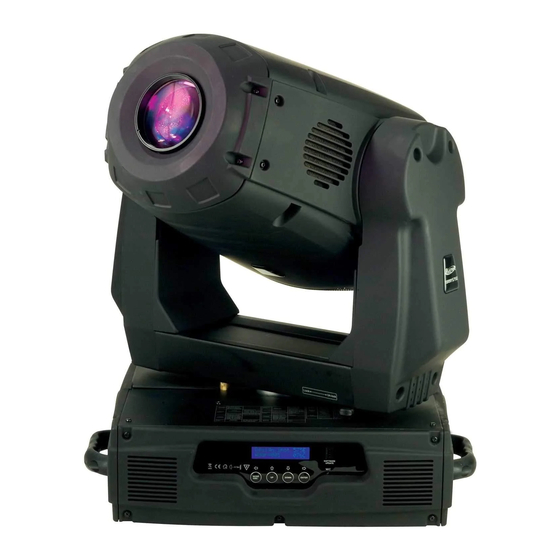
- Page 1 Design Spot 575B Elation Professional 6122 S. Eastern Ave Los Angeles, Ca. 90040 Rev. 11/24/2009...
- Page 2 Design Spot 575B™ ©Elation Professional, Los Angeles CA. Design Spot 575B™...
-
Page 3: Table Of Contents
15. Error Codes……………………………………………………………………………….. 44 16. Cleaning and Maintenance……………………………………………………………… 47 17. Warranty…………………………………………………………………………………... 48 18. Photometric Data………………………………………………………………………… 50 19. Gobo Patterns……………………………………………………………..……………... 51 20. Dimensional Drawings………………………………………………….……………….. 52 21. Circuit Schematic………...………………………………………………………………. 53 22. Technical Specifications…………………………………………...………….………… 54 ©Elation Professional, Los Angeles CA. Design Spot 575B™ Design Spot 575B™... -
Page 4: General Information
INTRODUCTION: Congratulations, you have just purchased one of the most innovative and reliable lighting fixtures on the market today! The Design Spot 575B,™ has been designed to perform reliably for years when the guidelines in this booklet are followed. Please read and understand the instructions in this manual carefully and thoroughly before attempting to operate this unit. -
Page 5: Warranty Registration
Please do not discard the shipping carton in the trash, keep for warranty repair. Please recycle whenever possible. WARRANTY REGISTRATION: The Design Spot 575B™ carries a two year (730 days) limited warranty. Please fill out the enclosed warranty card to validate your purchase. All returned service items whether under warranty or not, must be freight pre-paid and accompany a return authorization (R.A.) number. - Page 6 Only handle the power cord by the plug. Never pull out the plug by tugging the wire portion of the cord. Please be aware that damages caused by manual modifications to the device are not subject to warranty. ©Elation Professional, Los Angeles CA. Design Spot 575B™...
-
Page 7: Safety Instructions
2. Never touch the fixture during normal operation. This can cause severe personal injuries and/or damage to the fixture. 3. Be sure to unplug the Design Spot 575B™ from the power outlet before performing any service related issues. 4. Lamp Replacement; Allow at least 30 minutes after disconnecting main power before you open the Design Spot 575B™. - Page 8 11. Do not attempt to operate this fixture if the power cord has become damaged or frayed. Important Notice: Damages resulting from the disregard of safety and general user instructions found in this user manual are not subject to any warranty claims. ©Elation Professional, Los Angeles CA. Design Spot 575B™ Design Spot 575B™...
-
Page 9: Features
13 DMX Channels (8bit Operation) o 20 DMX Channels (Extended) • 10 User Assignable Program Presets - Internal Program: Edit and save programs to the incorporated EPROM. Maximum of 64 scenes. ©Elation Professional, Los Angeles CA. Design Spot 575B™ Design Spot 575B™... -
Page 10: General Guidelines
Do not permit operation by persons not qualified for operating this type of theatrical fixture, most damages are the result of operations by nonprofessionals. If possible, please use the original packaging to transport the fixture in for service. ©Elation Professional, Los Angeles CA. Design Spot 575B™... -
Page 11: Lamp Installation
• Allow the unit to cool for at least 30 minutes before attempting any type of service. • Before you put the Design Spot 575B™ into operation be sure all covers have been replaced, otherwise you risk damage to the retina and expose to UV radiation! •... -
Page 12: Lamp Optimization
The Design Spot 575B™ lamp holder is aligned at the factory. However, due to slight imperfections in all lamps, fine adjustments will improve light performance. Please follow the procedure below for proper lamp optimization: 1. - Page 13 Please remember that a MSR 575 lamp is not a hot-strike lamp therefore, you must wait approximately 15 minutes before you can attempt to strike the lamp once it has been turned off. ©Elation Professional, Los Angeles CA. Design Spot 575B™ Design Spot 575B™...
-
Page 14: Mounting And Installation
0,5m Mounting The Design Spot 575B™ is fully operational in two different mounting positions, hanging upside-down from a ceiling, or set on a flat level surface (see illustration on next page). Be sure this fixture is kept at least 0.5m (1.5ft) away from any flammable materials (decoration etc.). -
Page 15: Mounting Points
Clamp Mounting The Design Spot 575B™ provides a unique mounting bracket assembly that integrates the hanging yoke as well as the safety cable rigging point in one unit (see the illustration on the next page). When mounting this fixture to truss be sure to secure an appropriately rated clamp to the hanging yoke using a M10 screw fitted through the center hole of the hanging ©Elation Professional, Los Angeles CA. -
Page 16: Securing
Securing the Design Spot 575B™ Regardless of the rigging option you choose for your Design Spot 575B™ always be sure to secure your fixture with a safety cable. The fixture provides a built-in rigging point for a safety cable on the hanging bracket as illustrated above. Be sure to only use the designated rigging point for the safety cable and never secure a safety cable to a carrying handle. -
Page 17: Understanding Dmx
1 to that fixture no matter where it is located in the DMX chain. The Design Spot 575B™ can be controlled via DMX-512 protocol. The Design Spot 575B™ is a 15-channel DMX fixture. The DMX address is set electronically using the controls on the LCD menu. - Page 18 Remember to daisy chain your “in” and “out” data connections, never split or “Y” your DMX connections unless you are using an approved DMX splitter such as the Elation Opto Branch 4™ or DMX Branch/4™. ©Elation Professional, Los Angeles CA. Design Spot 575B™...
-
Page 19: Dmx Termination
Fixture DMX addressing; All fixtures should be given a DMX starting address when using a DMX controller, so the correct fixture responds to the correct control signal. This digital starting address is the ©Elation Professional, Los Angeles CA. Design Spot 575B™... - Page 20 That means changing the settings of one channel will only affect the selected fixture. In the case of the Design Spot 575B™, which is a 15 channel fixture, you should set the starting DMX address of the first unit to 1, the second unit to 16 (15 + 1), the third unit to 31 (15 + 16), and so on.
-
Page 21: Fixture Menu
8. FIXTURE MENU On-Board System Menu: The Design Spot 575B™ comes with an easy to navigate system menu. This next section will detail the functions of each command in the system menu. LCD Control Panel: The control panel located on the side of the fixture allows you to access the main menu and make necessary adjustments to the Design Spot 575B™. - Page 22 User Mode B User Mode C Edit User Mode Max Channel Select Programs Auto Pro Part 1 Auto Pro Part 2 Auto Pro Part 3 ©Elation Professional, Los Angeles CA. ON/OFF Close/Hold/Auto/Music ON/OFF ON/OFF 630/540 ON/OFF Speed 1~ 4 0~99%...
- Page 23 Edit Program Program 1 Program 10 Edit Scenes Edit Scene 001 ~ Edit Scene 250 Rec. Controller XX~XX ©Elation Professional, Los Angeles CA. Program Test (“STEP XX”) Step 01=SCxxx Step 64=SCxxx Pan,Tilt,…… Pan=xxx…… --Secne Time-- TIME=xx.xs Input By Outside Design Spot 575B™...
-
Page 24: Menu Functions
“Edit program”. You can edit the individual scenes under “Edit scenes”. With this function, you can run the individual scenes either automatically, i.e. with the adjusted Step-Time. 9.1.5. Music control With this function, you can run the internal program via sound. ©Elation Professional, Los Angeles CA. Design Spot 575B™ Design Spot 575B™... - Page 25 • The LCD will display “ON” or “OFF.” Were “ON” will reset the lamp time. • Press enter to confirm. • Press the Mode/Esc-button to return to the main menu. ©Elation Professional, Los Angeles CA. Design Spot 575B™ Design Spot 575B™...
- Page 26 With this function you can select if you can switch the lamp on via an external controller. Select “ON” by turning the LCD controls if you wish to enable this function or “OFF” if you ©Elation Professional, Los Angeles CA. Design Spot 575B™...
- Page 27 B. Run if no DMX – This function dictates how the fixture will function if it looses DMX signal during normal operation. The default function is set to hold, in which ©Elation Professional, Los Angeles CA. Design Spot 575B™ Design Spot 575B™...
- Page 28 70% and setting range from 0 % to 99 %. 9.4.2. Service Settings – These adjustments and settings should only be performed by a technician familiar with the functionality this fixture. Incorrect setting of these ©Elation Professional, Los Angeles CA. Design Spot 575B™ Design Spot 575B™...
- Page 29 9.4.6. Restore Default - With this function you can restore the factory settings of the device. All settings will be set back to the default values (shaded). Any edited ©Elation Professional, Los Angeles CA. Design Spot 575B™ Design Spot 575B™...
-
Page 30: Effect Adjust
Because improper use of this function can result in undesired operation this function has been password protected. The password is 050 and must ©Elation Professional, Los Angeles CA. Design Spot 575B™ Design Spot 575B™... -
Page 31: User Mode
9.8.4 Rec Controller - The Design Spot 575B features an integrated DMX recorder by pre-programmed scenes can be transmitted to the fixture via any standard DMX controller. -
Page 32: Dmx Addressing
4. “Address via DMX” is the function that turn the RDMX function on and off. 5. Press the UP button to display “ON” to activate this function, or “OFF” to deactivate this function. 6. Press ENTER to confirm. ©Elation Professional, Los Angeles CA. Design Spot 575B™ Design Spot 575B™... - Page 33 420, set channel 1 to a value of “7,” channel 2 to "8" and channel 3 to "164" (256+164=420). 4. Wait for approximately 20 seconds for the unit to complete the address reset function. ©Elation Professional, Los Angeles CA. Design Spot 575B™ Design Spot 575B™...
-
Page 34: Operation
11. OPERATION Operating Modes: The Design Spot 575B™ can operate in several different modes. This next section will detail the differences in the operating modes. • Auto Program Mode (Master) - The fixture will chase through the built-in programs, sending a DMX control signal to all other fixtures connect via DMX cables instruction for a synchronized light show. - Page 35 16 fixtures to be linked together to provide a synchronized light show without the use of a controller. Only use this when linking several Design Spot 575B together for use without a controller. Any fixture can act as a “Master or a “Slave.”...
-
Page 36: Working With Built-In Programs
You can repeat the procedure for all functions listed below: “Auto Program” – Allows access to all 15 of the channel’s DMX traits. “PAN” – pan movement. ©Elation Professional, Los Angeles CA. Design Spot 575B™ Design Spot 575B™... - Page 37 “Edit Programs” – “Edit Scenes” Using the UP and DOWN buttons to select a scene bank to store your scene. You may choose a bank from 1 ~ 250. ©Elation Professional, Los Angeles CA. Design Spot 575B™ Design Spot 575B™...
- Page 38 Operation” on page 36 for proper set-up instructions. Select “Alone” when running a single fixture or when multiple fixtures in stand-alone mode. See section 11.1 “Stand-Alone Operation” on page 34 for proper set-up instructions. ©Elation Professional, Los Angeles CA. Design Spot 575B™ Design Spot 575B™...
-
Page 39: Dmx Channel Traits
DMX channel functions and values (24 DMX channels): Mode/Channel Value 0-255 0-255 0-255 0-255 ©Elation Professional, Los Angeles CA. Function PAN Movement 8bit : Pan Movement Pan Fine 16bit Fine control of Pan movement TILT Movement 8bit : Tilt Movement... - Page 40 170-189 190-255 0-127 128-189 190-193 194-255 0-255 0-13 14-27 28-41 42-55 ©Elation Professional, Los Angeles CA. Color Wheel: Open / white Color 1 Color 2 Color 3 Color 4 Color 5 Color 6 Color 7 Color 8 Forwards rainbow effect from fast to slow...
- Page 41 224-231 232-239 240-247 248-255 0-255 0-255 0-31 32-63 ©Elation Professional, Los Angeles CA. Gobo 4 Gobo 5 Gobo 6 Gobo 7 Gobo 1 shake slow to fast Gobo 2 shake slow to fast Gobo 3 shake slow to fast Gobo 4 shake slow to fast...
- Page 42 120-139 140-159 160-179 180-199 200-219 220-239 240-255 ©Elation Professional, Los Angeles CA. Strobe effect slow to fast No function (shutter open) Pulse-effect in sequences No function (shutter open) Random strobe effect slow to fast No function (shutter open) Dimmer intensity:...
-
Page 43: Fuse Replacement
Gently pull out the bad fuse and discard of it properly and replace it with an exact match. Reassemble in reverse order. ©Elation Professional, Los Angeles CA. Design Spot 575B™... -
Page 44: Error Codes
(TILT-head movement error) This message will appear after the reset of the fixture if the head’s magnetic-indexing circuit malfunctions (sensor failed or magnet missing) or the stepping-motor is defective (or its driving IC on the main PCB). The TILT- movement is not ©Elation Professional, Los Angeles CA. Design Spot 575B™... - Page 45 (sensor failed or magnet missing) or the stepping-motor is defective (or its driving IC on the main PCB). The Shutter, Strobe -wheel is not located in the default position after the reset. ©Elation Professional, Los Angeles CA. Design Spot 575B™...
- Page 46 (sensor failed or magnet missing) or the stepping-motor is defective (or its driving IC on the main PCB). The Iris is not located in the default position after the reset. ©Elation Professional, Los Angeles CA. Design Spot 575B™...
-
Page 47: Cleaning And Maintenance
There are no user serviceable parts inside this fixture with the exception of the lamp. Please refer all other service related issues to an authorized Elation service technician. Should you decide to service the fixture yourself please order genuine Elation parts directly from Elation. ©Elation Professional, Los Angeles CA. Design Spot 575B™ Design Spot 575B™... -
Page 48: Warranty
B. For warranty service, send the product only to the Elation Professional shipping charges must be pre-paid. If the requested repairs or service (including parts replacement) are within the terms of this warranty, Elation Professional shipping charges only to a designated point within the United States. - Page 49 ® liable for any loss or damage, direct or consequential, arising out of the use of, or inability to use, this product. G. This warranty is the only written warranty applicable to Elation Professional Products ® and supersedes all prior warranties and written descriptions of warranty terms and conditions heretofore published.
-
Page 50: Photometric Data
Design Spot 575B™ 18. Photometric Data: ©Elation Professional, Los Angeles CA. Design Spot 575B™... -
Page 51: Gobo Patterns
Design Spot 575B™ 19. GOBOS: ©Elation Professional, Los Angeles CA. Design Spot 575B™... -
Page 52: Dimensional Drawings
Design Spot 575B™ 20. DIMENSIONAL DRAWINGS: ©Elation Professional, Los Angeles CA. Design Spot 575B™... -
Page 53: Circuit Schematic
Design Spot 575B™ 21. CIRCUIT SCHEMATIC ©Elation Professional, Los Angeles CA. Design Spot 575B™... -
Page 54: Technical Specifications
Starting DMX [001]. Pan / Tilt Pan - movement 630° in max. 2.0 seconds, 16 bit resolution Tilt - movement 265° in max. 1.5 seconds, 16 bit resolution Weights and Measures ©Elation Professional, Los Angeles CA. Design Spot 575B™ Design Spot 575B™... - Page 55 1m = 51.6 db (Lamp off) Please Note: Specifications and improvements in the design of this unit and this manual are subject to change without any prior written notice. ©Elation Professional, Los Angeles CA. Design Spot 575B™ Design Spot 575B™...
- Page 56 Elation Professional 6122 S. Eastern Ave. Los Angeles, CA. 90040 323-582-3322 / 323-832-9142 fax www.ElationLighting.com / Info@ElationLighitng.com Rev. 11/24/2009...
Need help?
Do you have a question about the Design Spot 575B and is the answer not in the manual?
Questions and answers