
Related Manuals for Elation MiniPatend


Summary of Contents for Elation MiniPatend
- Page 1 Instruction Manual Elation Professional Version 1.07 4295 Charter Street Los Angeles, CA 90058 E-mail: info@elationlighting.com Web site: www.elationlighting.com...
-
Page 2: Table Of Contents
3.9.1 Manual Drive ....................14 3.9.2 Lamp On automatically................15 3.9.3 Lamp Off via DMX..................15 3.9.4 DMX Input .......................15 3.9.5 Display......................16 3.9.6 Adjustments and Calibrations ..............16 3.9.7 Default Settings....................17 3.9.8 Error Code ......................17 3.10 Error and Information Messages................17 Elation Professionals wwww.ElationLighting.com Page... - Page 3 5.2 Realize the Lamp Change ..................21 5.3 Lamp adjustment......................22 MINI PATEND Maintenance and Cleaning the MINI PATEND ............23 6.1 Safety Regulations....................23 6.2 Circumference and Interval (rule-of-thumb)............23 6.3 Cleaning the Optical System ..................24 Technical Specification....................25 Index .............................28 Elation Professionals wwww.ElationLighting.com Page...
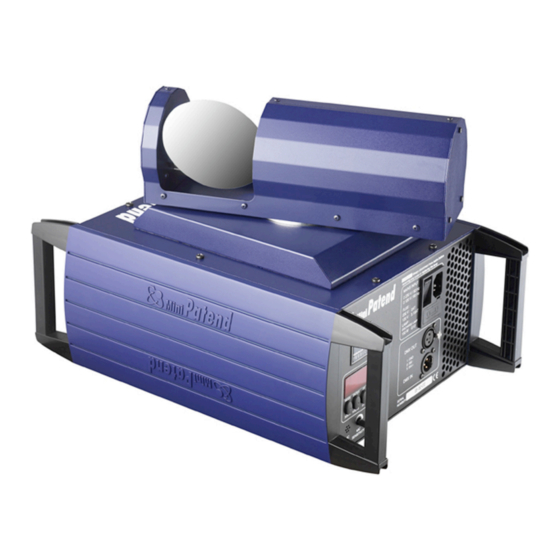
- Page 4 UNPACKING: Thank you for purchasing the Mini Patend™ by Elation Professional®. Every Mini Patend™ has been thoroughly tested and has been shipped in perfect operating condition. Carefully check the shipping carton for damage that may have occurred during shipping.
- Page 5 Extreme caution should be used when operated this or any fixture fitted with a gas discharge lamp. Never open this unit while in use. Elation Professionals wwww.ElationLighting.com Page...
-
Page 6: Description Of Device
1. Mode button 6. Microphone Sensitivity 10. Cooling Fan 2. Enter button 7. Software Update connector 11. Power On/Off 3. Up button 8. DMX Input 12. Fuse 4. Down button 9. DMX Output 13. LED- Display 5. Microphone Elation Professionals wwww.ElationLighting.com Page... -
Page 7: Safety Instructions
10. To reduce the risk of fire or electric shock, do not expose this unit rain or moisture. 11. To not attempt to operate this fixture if the power cord has been frayed or damaged. Elation Professionals wwww.ElationLighting.com Page... -
Page 8: Preparation And Installation
For a permanent installation of the MINI PATEND you can use an optional mounting plate to fix the unit on a wall. The plate uses 2x screws M6x10 and one M10x16 (the mounting plates are included in the delivery). Elation Professionals wwww.ElationLighting.com Page... -
Page 9: Secure The Mini Patend Mini Patend
Therefore you have to thread two safety wires through the two provided holes on the backside of the fixture and connect it with the truss-support. Pay attention: It is important to make a safe and proper fastening. The mounting plates will be connected by two M6x10 and one M10x16 screws. Elation Professionals wwww.ElationLighting.com Page... -
Page 10: Connections
230V / T 2A (EU) or 115V / T 3.15A (US) MINI PATEND Please see the printing on the MINI PATEND for more details. Attention: • Disconnect main power supply before replacing the fuse! • Replace fuse with same type and rating only! Elation Professionals wwww.ElationLighting.com Page... -
Page 11: The Menu Field
Calibration of the color wheel COLO Calibration of the gobo wheel GOBO Settings in the internal memory (super-user only) clre Calibration of the shutter SHTR Call on the default function values DFSE Correction of faults EFLG Elation Professionals wwww.ElationLighting.com Page... -
Page 12: Adjust The Dmx- Address
All others must be "Slave" Master = OFF. Notice: The Audio function is only working when NO DMX is connected. This can work as an emergency program. 2.3 The Test Program TEST Elation Professionals wwww.ElationLighting.com Page... -
Page 13: Lamp On/Off
Running time of the lamp (non destructible). 2.7 Invert Pan Movement RPAN This function allows you to invert the Pan movement. Use the Up/Down-buttons to select invert . Press Enter to confirm or Mode to cancel and return to the main menu. Elation Professionals wwww.ElationLighting.com Page... -
Page 14: Invert Tilt Movement
Gobo wheel GOBO 000 - 255 Dimmer/Shutter/Strobe function (the SHUT 000 - 255 lamp strikes at DMX 255) Focus FOCU 000 - 255 Speed Pan/Tilt SPED 000 - 255 Lamp Off, Reset, ... SPEC 000 - 255 Elation Professionals wwww.ElationLighting.com Page... -
Page 15: Lamp On Automatically
Up/Down-buttons to select desired channel and press Enter to read its value. Function Value Remark 0 - 255 Pan Position Tilt Position TILT 0 - 255 Pan Rotation RPAN 0 - 255 RTLT 0 - 255 Tilt Rotation Color wheel COLO 0 - 255 Elation Professionals wwww.ElationLighting.com Page... -
Page 16: Display
Mode to cancel and return to the menu. Use the Up/Down-buttons to set the adjustment values and confirm once more with the Enter-button or cancel with the Mode-button. Function Value Remark Color wheel COLO - 99 - + 99 Elation Professionals wwww.ElationLighting.com Page... -
Page 17: Default Settings
This message informs you that one of the unit functions wasn’t RsER able to do its reset correctly (magnetic sensor, stepping motor, driver on the PCB, cables, etc.). Repair the defect and start the fixture again. Elation Professionals wwww.ElationLighting.com Page... -
Page 18: Dmx Channel Selection (Dmx Protocol)
14 56..57 color 14 / color 15 58..59 color 15 60..61 color 15 / color 16 62..63 color 16 64..65 color 16 / color 17 66..67 color 17 68..69 color 17 / color 18 70..71 Elation Professionals wwww.ElationLighting.com Page... - Page 19 ‡ new Gobo Audio Gobo chaser fast each sound impulse ‡ new Gobo 9) Shutter Shutter closed 0..1 Dimmer, closed - open 2..125 Shutter open 126..12 Random Strobe 128..14 Audio Strobe 144..15 Strobe, slow - fast 160..13 Elation Professionals wwww.ElationLighting.com Page...
- Page 20 Special color chaser color -> color +1 slow - fast 64..79 Special color chaser color -> color +2 slow - fast 80..95 Pan/Tilt, audio-controlled slow 96..111 Pan/Tilt, audio-controlled fast 112..12 Pan/Tilt, random positioning 128..14 Lamp off after 3 sec. 230..24 Reset after 3 sec. 250.255 Elation Professionals wwww.ElationLighting.com Page...
-
Page 21: Change The Lamp
Attention: The glass bulb of the lamp can splinter. For that reason remove the lamp with safety gloves or some cloth. 4. Put the new lamp securely into the socket. Attention: Use only the original lamp type! MINI PATEND 5. Close the MINI PATEND in reverse order. Elation Professionals wwww.ElationLighting.com Page... -
Page 22: Lamp Adjustment
1, 2 and 3. Try to find the brightest position. Remark: A complete even beam can't be reached because of the design of the lamp. Elation Professionals wwww.ElationLighting.com Page... -
Page 23: Mini Patend
Soft cloth and glass cleaning fluid Dimmer/Shutter Yearly Vacuum cleaner, airbrush, etc. Inside lens Monthly Soft cloth no glass cleaning fluid Fan and air channel Monthly Vacuum cleaner, airbrush, etc. Reflector Never Lamp Never Moveable parts Yearly Suitable fatty oil Elation Professionals wwww.ElationLighting.com Page... -
Page 24: Cleaning The Optical System
4. Remove the inside optical plug-in by loosening the two hexagon socket screws and pull it out. 5. Clean all glasses, lenses and mirrors carefully. MINI PATEND 6. Before you put the MINI PATEND back into operation close the casing, otherwise your retina can be hurt! Elation Professionals wwww.ElationLighting.com Page... -
Page 25: Technical Specification
4 turns per second, 16 bit resolution Min- movement 1 turn in 5 minutes, 16 bit resolution Weights and measures Width of the base 425 mm Length of the base 285 mm Height (head vertical) 290 mm Weight (net) 11 kg Illumination Elation Professionals wwww.ElationLighting.com Page... - Page 26 ® defective parts at its expense, and will absorb all expenses for warranty service and repair labor by reason of defects in material or workmanship. The sole responsibility of Elation Professionals under this warranty shall be limited to the repair of the product, or ®...
- Page 27 ® liable for any loss or damage, direct or consequential, arising out of the use of, or inability to use, this product. G. This warranty is the only written warranty applicable to Elation Professionals products ® and supersedes all prior warranties and written descriptions of warranty terms and conditions heretofore published.
-
Page 28: Index
Index Measures............ 23 Mounting............7 Adjustments..........15 Mounting plate ..........7 aspheric lens..........21 Pan- movement........... 23 BGV C1 ............7 Permanent installation........7 Power supply ..........9 Calibrations ..........15 Connected load ..........9 Reset............12 Running time..........12 Description of Device........ - Page 29 „Elation Professionals‚ Elation World Headquarters: 4295 Charter Street Los Angeles, Ca. 90058 Tel: 323-582-3322 / Fax: 323-582-3108 Web: www.elationlighting.com / E-mail: info@elationlighting.com...
Need help?
Do you have a question about the MiniPatend and is the answer not in the manual?
Questions and answers