
Related Manuals for CyberData 010844D


Summary of Contents for CyberData 010844D
- Page 1 The IP Endpoint Company VoIP Ceiling Speaker and Cisco Call Manager Server Setup Guide CyberData Corporation • 2555 Garden Road • Monterey, CA • 93940 • T:831-373-2601 • F: 831-373-4193 www.CyberData.net...
-
Page 2: Setup Diagram
Figure 1-1 is a setup diagram for a single VoIP speaker configuration. In this configuration, the ceiling speaker acts as a standalone SIP telephony device. Figure 1-1. Setup Diagram CyberData VoIP Ceiling Speaker Cisco IP Phone IP Address:___________________ IP Address:___________________... -
Page 3: Test Setup Equipment
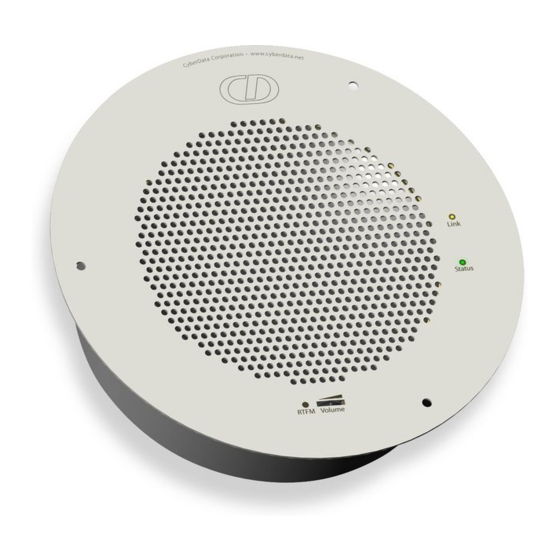
Software Version System Version 7.0.1.11000-2 3.0 Test Setup Equipment Table 3-1. Test Setup Equipment Equipment Model Version Cisco IP Phone 7940 Notes: CyberData VoIP Ceiling Speaker 010844D 4.01 Notes: Linksys EtherFast 10/100 8-port Workgroup Hub Notes: Notes: Notes: Notes: Notes:... - Page 4 Section 4.3, "Verify In Cisco Call Manager that the IP Voice Media Streaming Application is ● Activated" Section 4.4, "Obtain the MAC Address from the CyberData Device to be Added to the System" ● Section 4.5, "Setup a New User in Cisco Call Manager"...
- Page 5 1. Log in to Cisco Call Manager and you will see the screen in Figure 4-2. 2. Click on the Navigation drop-down menu and select Cisco Unified Serviceability. 3. Click on the Go button. Figure 4-2. Main Page Navigation Drop-down menu Server Setup Guide 930280B CyberData Corporation...
- Page 6 Activated. If the Activation Status does not display the word Activated, then click on the checkbox next to the Cisco IP Voice Media Streaming App service name to activate it. Figure 4-4. Cisco IP Voice Media Streaming App Cisco IP Voice Media Streaming App Server Setup Guide 930280B CyberData Corporation...
- Page 7 Administration. Figure 4-6. Navigation Menu Navigation menu (select Cisco Unified CM Administration) 8. Click on the Go button. Note You only need to complete Step 1 through Step 8 once for all CyberData devices. Server Setup Guide 930280B CyberData Corporation...
- Page 8 In order to complete some of the steps in this procedure, you will first need to get the ethernet address from the CyberData Ceiling Speaker Home Page. To obtain the MAC address from the CyberData Device to be added to the system, 1. Log into the CyberData Configuration Home page...
- Page 9 3. Go to the CyberData Ceiling Speaker Home Page (Figure 4-7)and write down the MAC Address number from it. Figure 4-7. CyberData Ceiling Speaker Home Page MAC address number Server Setup Guide 930280B CyberData Corporation...
- Page 10 1. Go to the Cisco Unified CM Administration page. On the Cisco Unified CM Administration page, go to the User Management menu and select End User. This will take you to the Find and List Users page. Figure 4-8. User Management Menu User Management menu (select End User) Server Setup Guide 930280B CyberData Corporation...
- Page 11 2. On the Find and List Users page, click on Add New (Figure 4-9). This will take you to the End User Configuration page. Figure 4-9. Find and List Users Page Add New Server Setup Guide 930280B CyberData Corporation...
- Page 12 On the Cisco Call Manager pages, only the fields with an asterisk will require input from you. Figure 4-10. End User Configuration Page Last name User ID CyberData Corporation 930280B Server Setup Guide...
- Page 13 4. Scroll down and click Save at the bottom of the page. After a few seconds you will see the screen shown in Figure 4-11. The screen Status will now say Add Successful. Figure 4-11. End User Configuration Page Add successful Server Setup Guide 930280B CyberData Corporation...
- Page 14 Device menu (select Phone) 2. In the Find and List Phones menu, click on Add New. This will take you to the Add a New Phone page. Figure 4-13. Find and List Phones Menu Add New CyberData Corporation 930280B Server Setup Guide...
- Page 15 3. On the Add a New Phone page go to the Phone Type drop-down menu, and select Third Party SIP Device (Basic). Figure 4-14. Phone Configuration Page Next button Phone Type drop-down menu 4. Click Next. This will take you to the Phone Configuration page. Server Setup Guide 930280B CyberData Corporation...
- Page 16 Table 4-1. Phone Configuration Page Settings Phone Device Parameter Selected Setting Mac Address field Type the number that you wrote down from the Ethernet Address field of the CyberData Ceiling Speaker Home Page (Figure 4-7). Description field Type any kind of description that you want. In...
- Page 17 5. On the Phone Configuration page (Figure 4-15), get the number that you wrote down from the Ethernet Address field of the CyberData Ceiling Speaker Home Page (Figure 4-7), and type it into the Mac Address field. Figure 4-15. Phone Configuration Page...
- Page 18 9. Scroll down to the Owner User ID drop-down menu (Figure 4-16). Select the name that you typed into the Description field in Step 3 Section 4.5, "Setup a New User in Cisco Call Manager". Figure 4-16. Phone Configuration Page Owner User ID CyberData Corporation 930280B Server Setup Guide...
- Page 19 Click on the Reset Phone Button to have the changes the following popup window that says take effect . Click on the OK button. Figure 4-18. Click on the Reset Phone Button Dialog Window Server Setup Guide 930280B CyberData Corporation...
- Page 20 Scroll down to the bottom of the page and press the Reset button. 16. A new Device Reset window appears (Figure 4-19). Click on the Reset button in the window, and then click on the Close button. Figure 4-19. Device Reset Window Reset Close CyberData Corporation 930280B Server Setup Guide...
- Page 21 17. After the reset is complete, you will see the page shown in Figure 4-20. The Status section on the page will say Add Successful. Figure 4-20. Association Information Section Add Successful Server Setup Guide 930280B CyberData Corporation...
- Page 22 To create a new directory number (DN) and associate it with the new phone device, 1. Underneath the Modify Button Items button, click on Line(1) - Add a new DN. Figure 4-21. Add a New Directory Number (DN) Association Information section CyberData Corporation 930280B Server Setup Guide...
- Page 23 Note Write this directory number down. You will need this directory number in order to complete some steps later in this procedure. 1600 Note In Figure 4-22, the number was typed into the Directory Number field. Figure 4-22. Directory Number Configuration Page Directory Number Server Setup Guide 930280B CyberData Corporation...
- Page 24 3. Scroll down and click on the Save button on the bottom of the page. Figure 4-23. Directory Number Configuration Page User Management menu (select Find) Save button CyberData Corporation 930280B Server Setup Guide...
- Page 25 1. On the Directory Number Configuration page, go to the User Management menu and select End User. 2. Click on Find. Figure 4-24. Directory Number Configuration Page User Management menu (select Find) Save button Server Setup Guide 930280B CyberData Corporation...
- Page 26 5. Click on the User ID that has the name of the user that you typed into the Description field in Step 3 Section 4.5, "Setup a New User in Cisco Call Manager". This action will take you to the End User Configuration page. CyberData Corporation 930280B Server Setup Guide...
- Page 27 6. On the End User Configuration page that appears, click on the Device Association button. This will take you to the User Device Association page. Figure 4-27. End User Configuration Device Association button Server Setup Guide 930280B CyberData Corporation...
- Page 28 8. Find the device by the mac address, and click on the check box next to it. 9. Click on Save Selected/Changes button. Figure 4-28. User Device Association Page Check box next to the Save Selected/Changes button Find button Related Links drop-down menu device by the mac address CyberData Corporation 930280B Server Setup Guide...
- Page 29 11. On the End User Configuration page, look at the Device Associations section and the Controlled Devices window to verify that the Cisco identifier for the speaker is now attached to the user. Figure 4-29. End User Configuration Page Cisco identifier attached to the user Server Setup Guide 930280B CyberData Corporation...
- Page 30 Figure 4-30, the number was selected for the primary extension. Figure 4-30. End User Configuration Page Primary Extension drop-down menu 13. Scroll down to the bottom of the page and click on Save button. CyberData Corporation 930280B Server Setup Guide...
- Page 31 4.9 Setup CyberData Device Parameters 4.9.1 Using the Operations Guide for Initial Configuration For the initial configuration of the Speaker, refer to the IP Speaker Operation Guide which can be found by completing the following steps: 1. Go to the Paging Endpoints webpage by either going to the following link or navigating...
- Page 32 CyberData VoIP products. CyberData’s VoIP Discovery Utility program is available at the following web address: http://www.cyberdata.net/support/voip/discovery_utility.html 2. Type the username and password to log into the CyberData Ceiling Speaker Home Page. CyberData Corporation 930280B...
- Page 33 3. On the CyberData Ceiling Speaker Home Page (Figure 4-34), click on the SIP Config button. This will take you to the SIP Configuration page (Figure 4-35). Figure 4-35. SIP Setup Page 10.0.5.10 1600 Speaker 3 Password Save button Server Setup Guide...
- Page 34 In the Password field, type in a password. • For SIP Registration, select Yes. • For the Unregister on Reboot field, select Yes. • In the Register expiration (minutes) field, type 2. 6. Click on the Save Settings button. CyberData Corporation 930280B Server Setup Guide...
- Page 35 10. When a connection is established (as indicated by a beep), speak into the phone and verify that you can hear your voice through the speaker. This step completes the procedure. Server Setup Guide 930280B CyberData Corporation...
- Page 36 CyberData Corporation 930280B Server Setup Guide...
Need help?
Do you have a question about the 010844D and is the answer not in the manual?
Questions and answers