Daikin WGZ030DW Operating And Maintenance Manual
Water-cooled scroll compressor chillers 30 to 200 tons, 105 to 700 kw r-410a 50-60 hertz
Hide thumbs
Also See for WGZ030DW:
- Installation and maintenance manual (64 pages) ,
- Installation, operation and maintenance manual (112 pages) ,
- Installation, operation and maintenance manual (80 pages)
Table of Contents
Advertisement
Advertisement
Table of Contents

Related Manuals for Daikin WGZ030DW


Summary of Contents for Daikin WGZ030DW
- Page 1 Operating and Maintenance Manual OMM 1130-2 Group: Chiller Part Number: OMM1130-2 Date: March 2014 Water-Cooled Scroll Compressor Chillers WGZ030DW to WGZ200DW, Packaged Water-Cooled Chiller WGZ030DA to WGZ200DA, Chiller with Remote Condenser 30 to 200 Tons, 105 to 700 kW R-410a 50-60 Hertz...
-
Page 2: Table Of Contents
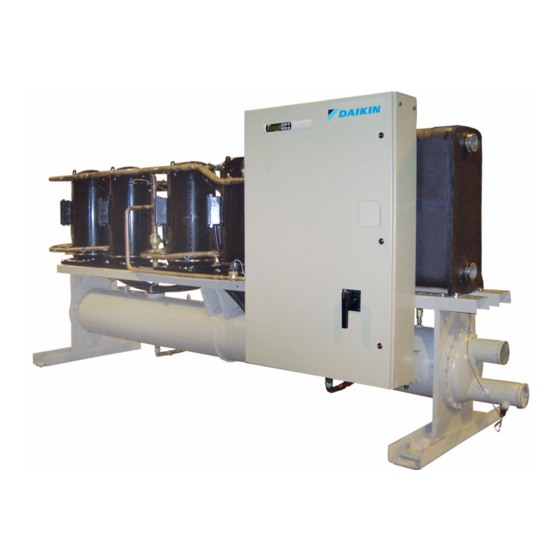
Cover Picture: WGZ130DW without piping insulation installed for clarity © 2014 Daikin Applied. Illustrations and data cover the Daikin Applied product at the time of publication and we reserve the right to make changes in design and construction at anytime without notice. -
Page 3: Introduction
Introduction General Description Daikin Type WGZ water chillers are designed for indoor installations Equipment room temperature for operating and standby conditions is 40°F to 122°F (4.4°C to 50°C). They are available with water-cooled condensers (Model DW), or arranged for use with remote air-cooled or evaporative condensers (Model DA). - Page 4 Figure 1, Evaporator Pressure Drop, WGZ030D – WGZ200D Minimum Flow & Pr. Drop Nominal Flow & Pr. Drop Maximum Flow & Pr. Drop Curve Model Inch-Pound S.I. Inch-Pound S.I. Inch-Pound S.I. WGZ030D 56.3 90.0 18.8 150.0 16.6 49.7 WGZ035D 64.9 10.8 103.8 26.3...
- Page 5 Figure 2, Condenser Pressure Drop, WGZ030D – WGZ200D Flow Rate (GPM) Min. Flow & PD Nom. Flow & PD Max. Flow & PD Unit Model WGZ030D 56.1 89.7 149.5 17.4 18.8 52.0 WGZ035D 64.9 10.2 103.8 25.7 173.0 23.9 10.9 71.4 WGZ040D 76.3...
-
Page 6: Components
Components Figure 3, Compressor Locations Evaporator and Evaporator Condenser Connections Circuit 2 Circuit 1 Control Panel NOTE: Models WGZ150 to WGZ200 add a #5 compressor to circuit #1 and a #6 compressor to circuit #2. WGZ030D through WGZ200D OMM 1130-2... -
Page 7: Unit Configuration
Unit Configuration The chiller units have two refrigerant circuits, Models WGZ 030 to WGZ 130 have two tandem scroll compressors (total of four), a single two-circuited brazed plate evaporator, a single two-circuited water- cooled condenser, interconnecting refrigerant piping and a control panel with associated sensors and transducers. -
Page 8: Field Wiring Diagrams
Field Wiring Diagrams Figure 5, WGZ030DW – WGZ200DW Field Wiring Diagram (Packaged Unit) WGZ030D through WGZ200D OMM 1130-2... - Page 9 Figure 6, WGZ030DA – WGZ200DA Field Wiring Diagram (Remote Condenser) OMM 1130-2...
-
Page 10: Control Panel Layout
Control Panel Layout Table 1, Typical Control Panel, 4-Compressor Unit (3) 120V/24V Microtech Transformers Controller LineV/120V Control Transformer (2) Circuit Mechanical Hi-Pressure Control Switch Relays Transformer Fuses, Primary Control (4) Compressor Transformer Fuse, Circuit Breakers Secondary Optional (4) Compressor Disconnect Contactors Switch Location for... -
Page 11: Start-Up And Shutdown
11. Make sure all wiring and fuses are of the proper size. Also make sure that all interlock wiring is completed per Daikin Applied diagrams. 12. Verify that all mechanical and electrical inspections by code authorities have been completed. - Page 12 Warranty Form” (Form No. 206036A) be completed to establish commencement of the warranty period. Be sure to list the pressure drop across both vessels. This form is shipped with the unit and after completion should be returned to Daikin Applied service department through your sales representative.
-
Page 13: Sequence Of Operation
11. Check that the MicroTech II controller is set to the desired chilled water temperature. 12. Check resets of all equipment protection controls. 13. Switch the unit circuit breakers to “on.” 14. Start the system by setting the system switch S1 to “on.” CAUTION Most relays and terminals in the control center are powered when S1 is closed and the control circuit disconnect is on. - Page 14 Start Up Temp is the LWT at which the first compressor starts. The start up temperature equals the stage up temperature plus the Start Delta temperature. A high Start Delta will keep the unit off longer and reduce unit cycling at low loads. However, this high Start Delta will cause a larger excursion from the LWT setpoint before the unit starts.
- Page 15 When staging down, one compressor on each circuit will be left on until each circuit has only one compressor running. In other words, the compressor, on either circuit, with the most run-hours will stop first. The compressor with the most run-hours on the other circuit will stop next. One compressor on each circuit will be running.
-
Page 16: Condenser Fan Control
directions and the sequence of operation can be found on page 65. Some means of discharge pressure control must be installed if the condenser water temperature can fall below 60°F (16°C). Condenser Fan Control Model AC chillers equipped with air-cooled or evaporative-cooled condensers usually require some form of discharge pressure control. -
Page 17: Microtech Ii Controller
MicroTech II Controller Controller Software Version This manual is based on software version WGZD20102F. The “02F” is the version descriptor. The version installed in a unit can be viewed by pressing the MENU and ENTER keys simultaneously, then pressing MENU to return to the regular menu screen. General Description The MicroTech II controller’s state-of-the-art design will not only permit the chiller to run more efficiently but will also simplify troubleshooting if a system failure occurs. - Page 18 Keypad/Display A 4-line by 20-character/line liquid crystal display and 6-key keypad is mounted on the unit controller. Its layout is shown below. Figure 8, Keypad and Display in MENU Mode Key to Screen Pathway Menu Key Air Conditioning < ALARM <...
- Page 19 Table 4, Analog Outputs Description Output Signal Range Cooling Tower Bypass Valve Position 0 to 10 VDC 0 to 100% Open Cooling Tower VFD Speed 0 to 10 VDC 0 to 100% Circuit #1 Electronic Expansion Valve 0 to 10 VDC 0 to 100% Circuit #2 Electronic Expansion Valve 0 to 10 VDC...
-
Page 20: Expansion I/O Controller
Table 6, Continued Description Type Load Output OFF Output ON Motor Control Relay #3 = Compr#3 Starter Compressor OFF Compressor ON Condenser Fan #3– Water Cooled =N /Tower Fan C1 / Fan Contactor Fan OFF Fan ON #2-Water Cooled=Y Motor Control Relay #5 = Compr#5 (R134a,R410a) Starter Compressor OFF Compressor ON... -
Page 21: Setpoints
The PW (password) column indicates the password level that must be active in order to change the setpoint. Passwords are as follows: O = Operator [0100] M = Manager [2001] * are set at Daikin Applied factory) Table 7, Setpoints (setpoints with Description Default... - Page 22 Table 7, Continued Description Default Range Expansion Valve Type Electronic Thermal, Electronic Circuit 1 EXV Control Auto Auto, Manual Circuit 1 EXV Position 0-100% Circuit 2 EXV Control Auto Auto, Manual Circuit 2 EXV Position 0-100% MaxOpPress 142 – 170 psig SuperheatTarg 8-12°F Alarms...
-
Page 23: Automatic Adjusted Limits
Automatic Adjusted Limits The following are set points that will be limited based on the option selected. Evaporator Leaving Water Temperature Mode Refrigerant Type Range Unit Mode = Cool R134a, R410A 40 to 60°F Unit Mode = Cool w/Glycol R134a 20 to 60°F Unit Mode = Cool w/Glycol R410a... -
Page 24: Dynamic Defaults
Dynamic Defaults Some set points will have a particular default value loaded when another setting is changed. Refrigerant Dependent Defaults Refrigerant Type Set Point R134a R410A Low Evaporator Pressure Hold 29 psi 101 psi 28 psi Low Evaporator Pressure Unload 100 psi 550 psi AC High Condenser Pressure Unload... - Page 25 When the alarm occurs due to this trigger, it can auto reset the first two times each day, with the third occurrence being manual reset. For the auto-reset occurrences, the alarm will reset automatically when the evaporator state is Run again. This means the alarm stays active while the unit waits for flow, then it goes through the recirculation process after flow is detected.
- Page 26 When the evaporator pressure goes below the Low Evaporator Pressure Unload set point, a timer starts. If this timer exceeds the freeze time, then a ‘Evap Press Low Cir N’ alarm trip occurs. If the evaporator pressure rises to the unload set point or higher, and the freeze time has not been exceeded, the timer will reset.
- Page 27 Action Taken: Normal stop all circuits Reset: This alarm can be cleared manually via the keypad, but only if the sensor is back in range. Suction Temperature Sensor Fault Alarm description (as shown on screen): SuctT Sensor Fail N Trigger: Sensor shorted or open AND Expansion Valve Type = Electronic Action Taken: Rapid stop circuit Reset: This alarm can be cleared manually via the keypad, but only if the sensor is back in range.
-
Page 28: Limit Events
Alarm Log An alarm log stores the last 25 alarms and/or events to occur. When an alarm or event occurs, it is put into the first slot in the alarm log and all others are moved down one, dropping the last entry. In the alarm log, the date and time the alarm occurred are stored, as well as a list of other parameters. - Page 29 High Condenser Pressure - Unload Event description (as shown on screen): CondPressHighUnloadN Trigger: This event is triggered if all of the following are true: • circuit state = Run • more than one compressor is running on the circuit • condenser pressure >...
- Page 30 Liquid Line Temperature Sensor Fail (TGZ unit only) Event description (as shown on screen): Low Source Temp Trigger: Sensor shorted or open. Action Taken: None. Reset: N/A Low Source Water Temperature (TGZ unit in ‘heat’ mode only) Event description (as shown on screen): LiqL Sensor Fail N Trigger: Unit is in heat mode and the leaving evaporator water temperature drops below the Low Source Temperature set point.
-
Page 31: Controller Operation
Controller Operation Calculations The Control Band defines the temperatures around the Controlling Leaving Water Temperature set point where compressors will be staged on or off. In cool mode, the controlling leaving water temperature set point will be Evap LWT. In heat mode, the controlling leaving water temperature set point will be Heat LWT. - Page 32 The Stage Down temperature is calculated as: Stage Down Temperature = Heat LWT + (Control Band/2) The Heat Start up and Shutdown temperatures are calculated from the Control Band. The Start Up temperature determines when the first compressor on the unit will start. The Start Up temperature calculation is shown below: Start Up Temperature = Stage Up Temperature - Start Up Delta Temperature The Shutdown temperature defines when the last running compressor will shutdown.
- Page 33 Parameters used: 1. Heating Leaving Water Temperature set point (Heat LWT) 2. Heating Maximum Reset set point (Htg MaxRes) 3. LWT Reset signal 4-20mA Reset is 0ºF and the active leaving water set point is equal to the Heat LWT set point if the reset signal is less than or equal to 4 mA.
- Page 34 Heating Mode Return Reset Heat LWT set point (140ºF) ‘Active’ Htg MaxRes set point Heat LWT (range of reset action) Set Point (10ºF) Heat LWT (–) Htg MaxRes (130ºF) 0ºF Htg StrtResDT setpoint Condenser Delta Temperature active heating leaving water set point is reset using the following parameters: 1.
- Page 35 Evaporator Saturated Temperature Evaporator saturated temperature is calculated from the evaporator pressure for each circuit. R410a Evaporator Saturated Temperatures When R410a refrigerant is selected the refrigerant pressure will be fitted to a curve made up of 24 straight-line segments. The accuracy of calculated saturated temperatures are less than +/- 0.5°F when compared to standard look up tables for R410a.
- Page 36 Changing the Unit Enable Set Point is accomplished according to the following table. NOTE: An “x” indicates that the value is ignored. Unit Off Control Source Remote Key- Unit Input Set Point Input pad Entry Request Enable SWITCHES SWITCHES KEYPAD KEYPAD NETWORK NETWORK...
- Page 37 Power Up Start Delay After powering up the unit, the motor protector modules may not reset for up to 150 seconds. After the control is powered up, no compressor can start for 150 seconds. Motor protect inputs are ignored during this time so as to avoid tripping a false alarm.
- Page 38 Unit State Diagram Power On Pumpdown Auto Evaporator Water Pump State Control (Evap State) The state-transition diagram shown below controls operation of the evaporator pump. Evaporator Pump State Diagram Unit State = Off AND Unit State=Auto OR No Evap Water Freeze Alarm Evap Water Freeze Alarm Unit State = Off AND No Evap Water Freeze Alarm...
- Page 39 Primary/Standby Pump Staging The pump designated as primary will start first. If the evaporator state is start for a time greater than the recirculate timeout set point and there is no flow, then the primary pump will shut off and the standby pump will start.
- Page 40 8-Fan Remote Condenser, R22, R407C Stage Fans Operating on Circuit 1 Fans Operating on Circuit 2 Fan 1 Fan 2 Fans 1, 3 Fans 2, 4 Fans 1, 3, 5 Fans 2, 6, 8 Fans 1, 3, 5, 7 Fans 2, 4, 6, 8 8-Fan Remote Condenser, R410A Stage Fans Operating on Circuit 1...
- Page 41 When stage down occurs or the saturated temperature rises back within the Stage Down dead band the Stage Down Error Accumulator is reset to zero. Forced Fan Stage at Start Fans may be started simultaneously with the compressor based on outdoor ambient temperature. When the compressor starts, and after compressor operation is verified by either a 1 psi drop in evaporator or 1 psi rise in condenser pressures, a Fantrol stage is forced based on the following table.
- Page 42 Auto – The primary pump is the one with the least run hours, the other is used as a backup. #1 Primary – Pump 1 is used normally, with pump 2 as a backup. #2 Primary – Pump 2 is used normally, with pump 1 as a backup. Primary/Standby Pump Staging The pump designated as primary will start first.
- Page 43 Additional stages can turn on (up to the number specified by the Tower Stages set point) when above conditions are met for the next stage plus the following condition: VFD Speed is > the Stage Up @ set point (only if Valve/VFD Control set point = VFD Stage OR Valve SP/VFD Stage) Down staging shall occur when the following conditions are met: The stage down timer completes...
- Page 44 Valve Stage Mode This mode is only operational when the Valve/VFD Control set point is set to Valve Stage. In this mode the valve output is controlled as for Valve Set Point mode (above) except that the active set point for the controlled parameter is selected according to the following table.
- Page 45 Stage Down Now The Stage Down Now flag is set based on the following tests: If Unit Mode = Cool AND LWT error < -0.5 * Control band AND More than one compressor running AND Stage down timer expired THEN Stage Down Now = True If Unit Mode = Cool AND LWT error <...
- Page 46 compressor will shutdown if the evaporator pressure gets down to 5.0 psi. For R410a, the absolute limit for low evaporator pressure is 20.0 psi. When the Low OAT Start Timer has expired, if the evaporator pressure is greater than or equal to the Low Evaporator Pressure Unload set point, the start is considered successful and normal alarm and event logic is reinstated.
-
Page 47: Unit Capacity Overrides
Hold Clear Reset Value = High Pressure Unload set point – [“Initial Offset” + [“Step-Increase” x [“number of occurrence”-1]]] Initial Offset & Step Increase Condenser No. of R22, Step R410A R134a Configuration Compressors R407C Increase 40 psi 30 psi 30 psi 10 psi Water-Cooled 32 psi... - Page 48 Network Limit The maximum unit capacity can be limited by a network signal. This function is only enabled if the unit control source is set to network. The maximum unit capacity stage is based on the network limit value received from the BAS, and is determined as shown in the following graph. Network Limit vs.
-
Page 49: Exv Control
• A normal stage down occurs, and only one compressor on the circuit is running • Unit mode = Ice AND the ice set point is reached Pump Down Procedure • If both compressors are running, shut off the appropriate compressor based on sequencing logic •... - Page 50 Manual EXV Control The EXV position can be set manually. Manual control can only be selected when the circuit is in the run state. At any other time, the EXV control set point is forced to auto. When EXV control is set to auto, the manual EXV position setting follows the auto control position. When EXV control is set to manual, the EXV position is equal to the manual EXV position setting.
-
Page 51: Using The Controller
Using the Controller Getting Started There are two basic procedures to learn in order to utilize the MicroTech II controller: • Navigating through the menu matrix to reach a desired menu screen and knowing where a particular screen is located. •... -
Page 52: Menu Screens
Figure 9, Display in the Shortcut (SCROLL) Mode and Keypad Layout MENU Key Air Conditioning VIEW UNIT STATUS Unit = COOL Compr. #1/#2=OFF/OFF Evap Pump = RUN ARROW ENTER Key ENTER Key Pressing the ENTER key changes the function of the ARROW keys to the editing function as shown below: LEFT key Default, changes a value to the factory-set default value. -
Page 53: Menu Descriptions
Figure 10, Menu Matrix “MENU” “VIEW” MENUS UNIT CIRCUITS REFRIGERANT FANS EVENTS VIEW EVENT (1) VIEW UNIT VIEW UNIT VIEW VIEW VIEW VIEW VIEW STATUS TEMP CIRC #1 CIRC #2 REFRIGERANT REFRIGERANT FAN/TOWER STATUS STATUS CIRCUIT #1 CIRCUIT #2 VIEW EVENT (n) VIEW UNIT VIEW UNIT VIEW... - Page 54 VIEW menu: VIEW < COMPRESSOR < UNIT < EVAPORATOR < FANS/TOWER VIEW UNIT menu: VIEW < TEMP UNIT < STATUS < REFRIGERANT SET menu: SET < ALARM LIMITS < UNIT SPs < COMPRESSOR SPs < FANS/TOWER SPs Screen Definitions – VIEW View Unit Status VIEW UNIT STATUS (1) Auto...
- Page 55 This menu gives the status of digital inputs (D.I.), 1=ON, 0=OFF. Numbers are 1 through 18. See Table 5 on page 19 for number reference. VIEW UNIT STATUS (6) Analog Output (volts x 100) 1 = 000.0 000.0 VIEW UNIT STATUS (7) Analog Output (volts x 100) 3 = 000.0...
- Page 56 VIEW UNIT TEMP Control Temps Start Up XX.X°F Stage Up XX.X°F VIEW UNIT TEMP Control Temps Stage Down XX.X°F Shut Down XX.X°F TGZ Unit Only in Cool Mode TGZ Unit Only in Heat Mode VIEW UNIT TEMP VIEW UNIT TEMP Cond LWT XX.X°F Cond LWT...
- Page 57 VIEW CIRCUIT#2 Comp 4 = OFF Hours = XXXXX Starts = XXXXX If # of Compresors = 6 Only f or R410A or R134a VIEW CIRCUIT 1 Comp6=Off Hours = XXXXX Starts = XXXXX View Refrigerant VIEW REFRG Cir 1 (1) Evap Press XXX.X psi Cond Press XXX.X psi R 134a, R22, R410A...
- Page 58 VIEW REFRG Cir 2 (1) Evap Press XXX.X psi Cond Press XXX.X psi R 134a, R22, R410A R407C VIEW REFRG Cir 2 (2) VIEW REFRG Cir 2 (2) Sat Evap XXX.X °F XXX.X °F Evap Dew Sat Cond XXX.X °F i XXX.X °F Cond.
- Page 59 Water Cooled = Y Only or TGZ Unit (R134a) VIEW TOWER (2) Bypass Valve = XXX% VFD Speed = XXX% The Bypass Valve value shall be “None” (in place of XXX%) if the Valve/VFD Control setpoint = None or VFD Stage. The VFD Speed value shall be “None” if the Valve/VFD Control setpoint = None, Valve Setpoint, or Valve Stage.
- Page 60 Screen Definitions – EVENT LOG EVENT LOG (X) Event Description Time Date Screen Definitions – SET Set Unit Setpoints SET UNIT SPs (1) Unit Enable = OFF Unit Mode = COOL Source = KEYPAD Unit Enable settings can be OFF and ON as determined from the Unit Enable setpoint. Unit Enable is an external signal or a keypad setting that keeps the unit off when the setting is OFF and allows it to run if there is a call for cooling when the setting is ON.
- Page 61 SET UNIT SPs Start Delta= XX.X°F Stop Delta= XX.X°F Demand Limit = ON See page 13 for an explanation of compressor staging. WGZ Units Only TGZ Units Only (R134a) SET UNIT SPs SET UNIT SPs Max Pulldn=X.X°F/min Max Pulldn=X.X°F/min Evap Recirc= XXX sec Evap Recirc= XXX sec Evap Pump = #1 Only Evap Pump = #1 Only...
- Page 62 SET UNIT SPs (9) SET UNIT SPs Units = °F/psi Units = °F/psi Lang = ENGLISH Lang = ENGLISH Refrig = R410A Refrig = R134a Refrigerant type is factory-set. SET UNIT SPs (10) Protocol = Modbus Ident Number=001 Baud Rate=9600 BAS interface settings, available mid-2003.
- Page 63 WGZ Unit (R22,R407C,R410A) TGZ Unit (Refrig = 134a) SET UNIT SPs (17) SET UNIT SPs (17) ENTER PASSWORD: XXXX Clg ResType = X Active Password Clg MaxRes = XX.X ºF Level: None Clg StrtRes = XX.X ºF TGZ Unit in Cooling Mode . TGZ Unit in Heat Mode.
- Page 64 # of Compressors = 4 # of Compressors = 6 SET COMP SPs SET COMP SPs Comp 1 = Enable Comp 1 = Enable Comp 3 = Enable Comp 3 = Enable Comp 5 = Enable # of Compressors = 4 # of Compressors = 6 SET COMP SPs SET COMP SPs...
- Page 65 The last action to take place is the shutoff of all compressors running when the LowEvPrStop setting is reached (default is 58 psi). Reducing these time intervals will increase detrimental compressor cycling. It is recommended that these settings not be changed. SET ALARM LMTS (2) High Cond Pressure Unload= XX.X°F...
- Page 66 Set Air-Cooled Condenser Fans Water-cooled = Off SET FANS SPs Fan Stages=X Speedtrol=Yes/No Water-cooled = Off SET FANS SPs Stage ON Deadband (°F) Stg2 Stg3 Stg4 Water-cooled = Off SET FANS SPs Stage Off Deadband (°F) Stg2 Stg3 Stg4 The SET FANS SP screens 2 through 5 establish the temperature that will stage the condenser fans on and off.
- Page 67 Bypass valve position is > the Stage Up @ setpoint (only if Valve/VFD Control setpoint = Valve Stage) Additional stages can turn on (up to the number specified by the Tower Stages setpoint) when above conditions are met for the next stage plus the following condition: VFD Speed is >...
- Page 68 Water-cooled = Y SET TOWER SPs (4) Valve/VFD Control= ValveSP/VFDStage Valve Type=NC to Twr Valve/VFD Control settings are None, Valve Setpoint, Valve Stage, VFD Stage, or ValveSP/VFDStage. Default is None which results in no control of the tower from the MicroTech II controller. Valve Setpoint, the valve will control (bypass tower) to hold the minimum temperature as established by the Set Tower SPs in screen (5) below.
- Page 69 Figure 11, Initial Valve Position Initial Valve Position (values are examples only) Max Position @ Setpoint (90°F) Min Position @ Setpoint (60°F) Min Start Position Max Start Position Setpoint (10%) Setpoint (90%) Operation After Start When the condenser pump is in the RUN state, the valve output shall be controlled in one of two modes as specified by the Valve/VFD Control setpoint.
- Page 70 TEST The test screens are only available when the unit is in TEST mode. Using these screens, any digital output can be controlled manually. R22, R407C R410A TEST UNIT TEST UNIT Alarm Signal =OFF Alarm Signal =OFF Evap Pump 1 = OFF Evap Pump 1 = OFF Evap Pump 2 = OFF # of Compressors = 4...
- Page 71 SET UNIT SPs (X) <D (data) <C (data) <+ (data) <- Additional fields can be edited by pressing the ENTER key until the desired field is selected. When the last field is selected, pressing the ENTER key switches the display out of “edit” mode and returns the arrow keys to “scroll”...
-
Page 72: Bas Interface
BAS Interface The BAS interface will use the supervisor port on the controller as a connection point. Protocols Supported The following building automation system (BAS) protocols are supported. It is possible to change the building automation interface without loading different software. BACnet®... -
Page 73: Parameter Details
Table continued Type Index Description LONworks BACnet Modbus Active alarms 11 Active alarms 12 Active alarms 13 Active alarms 14 Active alarms 15 Active alarms 16 Network chiller mode set point LON Chiller run mode Active chiller mode Network demand limit default set point Network chiller mode default set point Sequence Status Bit 1 –... - Page 74 Chiller Mode Applies to Integer 17 and Integer 19. Network Chiller Mode Set Point and Active Chiller Mode use the same numbering scheme to represent ice mode or cool mode. The output representing the mode is shown below for each protocol. Mode LONworks BACnet...
- Page 75 setting is checked. If this is set low, then the defaults for BAS cool set point, network limit, unit enable, and unit mode will be loaded. If the setting is set high, then no defaults are loaded and the status of the BAS enable set point is restored to the original value.
-
Page 76: Compressor Motor Protection Module
Compressor Motor protection Module The 20, 26, and 30 HP compressors are equipped with an module that provides protection against: • High motor temperature • High scroll temperature • Phase missing • Phase reversal • Low control circuit voltage The module also has a LED display in the upper right- hand corner that gives information on compressor operation. - Page 77 longer than 6 hours. Once the module has locked out the compressor, a power cycle or Modbus reset command will be required to clear the lockout. Code 3 – Short Cycling: The module will flash the red Alert LED three times indicating the compressor is locked out due to short cycling.
-
Page 78: Optional Controls
Optional Controls Phase/Voltage Monitor (Optional) The phase/voltage monitor is a device that provides protection against three-phase electrical motor loss due to power failure conditions, phase loss, and phase reversal. Whenever any of these conditions occur, an input relay is deactivated, disconnecting power to the thermostatic control circuit. The compressor does a rapid shutdown including a pump down cycle. -
Page 79: System Maintenance
System Maintenance General To provide smooth operation at peak capacity and to avoid damage to package components, a program of periodic inspections should be set up and followed. The following items are intended as a guide to be used during inspection and must be combined with sound refrigeration and electrical practices to provide trouble-free performance. -
Page 80: Poe Lubrication
Avoid prolonged exposure of POE oil to the atmosphere to prevent this problem. For more details on acceptable oil types, contact your Daikin Applied service representative. CAUTION POE oil must be handled carefully using proper protective equipment (gloves, eye protection, etc.) The oil... -
Page 81: Maintenance Schedule
Maintenance Schedule I. Compressor A. Performance Evaluation (Log & Analysis) * B. Motor • Meg. Windings • Ampere Balance (within 10%) • Terminal Check (tight connections, porcelain clean) • Motor Cooling (check temperature) C. Lubrication System • Oil Level • Oil Appearance (clear color, quantity) •... -
Page 82: System Service
System Service DANGER Service on this equipment is to be performed only by qualified refrigeration personnel. Causes for repeated tripping of equipment protection controls must be investigated and corrected. Disconnect all power before doing any service inside the unit or serious personal injury or death can occur. - Page 83 Table 8, Thermostatic Expansion Valve CAUTION Adjustment of expansion valve should only be performed by a qualified service technician. Failure to do so can result in improper unit operation. Note: Superheat will vary with compressor unloading, but should be approximately as follows: between 8°F and 12°F (4.4°C and 6.7°C) at full load;...
-
Page 84: Troubleshooting Chart
Troubleshooting Chart PROBLEM POSSIBLE CAUSES POSSIBLE CORRECTIVE STEPS Main switch, circuit breakers open. Close switch Fuse blown. Check electrical circuits and motor winding for shorts or grounds. Investigate for possible overloading. Replace fuse or reset breakers after fault is corrected. Thermal overloads tripped or fuses Overloads are auto reset. -
Page 85: Warranty Statement
PROBLEM POSSIBLE CAUSES POSSIBLE CORRECTIVE STEPS Lack of refrigerant. Check for leaks and repair. Add refrigerant. Compressor Velocity in risers too low (A-C only). Check riser sizes. Loses Oil 10. Oil trapped in line. Check pitch of lines and refrigerant velocities. - Page 88 Now that you have made an investment in modern, efficient Daikin Applied equipment, its care should be a high priority. For training information on all Daikin Applied HVAC products, please visit us at www.DaikinApplied.com and click on training, or call 540-248-9646 and ask for the Training Department.
Need help?
Do you have a question about the WGZ030DW and is the answer not in the manual?
Questions and answers