Table of Contents

Related Manuals for Daikin WSC


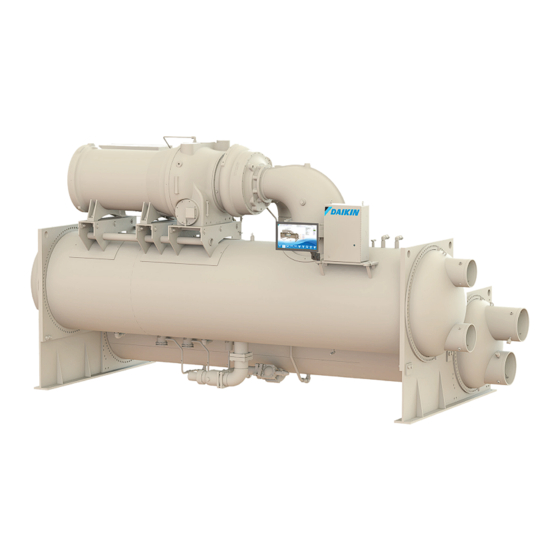
Summary of Contents for Daikin WSC
- Page 1 Installation, Operation, IOM 1274-3 and Maintenance Manual Group: Chiller Part Number: IOM1274-3 Date: July 2023 Centrifugal Chillers Model WSC, HSC, TSC - B Vintage 300 to 1350 Tons (1050 to 4748 kW) R-134a or R-513A Refrigerant 60/50 Hz...
-
Page 2: Table Of Contents
©2023 Daikin Applied, Minneapolis, MN. All rights reserved throughout the world.This document contains the most current product information as of this printing. Daikin Applied Americas Inc. has the right to change the information, design, and construction of the product represented within the document without prior notice. - Page 3 From starter to chiller unit (remote mounted) Centrifugal chillers with water cooled oil coolers must have a 115 volt normally closed water solenoid valve installed in the oil cooler water supply line. Daikin Applied recommends ASCO Type 8210B27 solenoid valve or approved equal and 40-mesh strainer. Daikin Applied does not supply these components.
-
Page 5: Introduction
Polyolester Oil, commonly known as POE oil is a synthetic oil used in many refrigeration systems, and may be present in this Daikin Applied product. POE oil, if ever in contact with PVC/CPVC, will coat the inside wall of PVC/ CPVC pipe causing environmental stress fractures. -
Page 6: General Description
Specific Each WSC/HSC/TSC unit has one compressor connected to a details of this warranty can be found in the warranty statement condenser and evaporator. The chillers use R-134a or R-513A furnished with the equipment. -
Page 7: Installation
BACK VIEW END VIEW NOTES: DAIKIN APPLIED IS NOT A LICENSED NOR CERTIFIED RIGGING SPECIALIST. IT IS THE CUSTOMER'S RESPONSIBILITY TO CONSULT A CERTIFIED RIGGING CONTRACTOR TO RIG, LIFT, AND MOVE COMPONENTS & SUBCOMPONENTS PROPERLY AND SAFELY. LIFT THE UNIT BY ATTACHING CHAIN HOISTS TO THE ROUND LIFTING HOLES LOCATED ON THE TUBESHEETS. -
Page 8: Location
NOTE: Units are shipped with refrigerant and oil valves closed to isolate these fluids for shipment. Valves Equipment room operating temperature: 40-104 °F (4.4-40 °C) must remain closed until start-up by the Daikin Equipment room temperature, standby, 40-104 °F (4.4-40 °C) Applied technician. -
Page 9: Operating Limits
40 (4.4) 104 (40) NOTES: Contact a Daikin Applied representative for performance at specific operating conditions, as some limits depend on unit configuration (including heating and heat recovery mode limits) Antifreeze temperature limits must have appropriate glycol concentration Depends on specific selection/rating conditions... -
Page 10: Heat Recovery Condenser Connections
Daikin Applied product. POE oil, if ever in contact with PVC/ flowing through the evaporator cannot exceed 100°F. Water... -
Page 11: Variable Fluid Flow Rates
Extremely high fluid flow rates and high tube operational issues may occur when the condenser water velocities will result in high fluid pressure drops, high pumping temperatures are either too high or too low. The WSC chiller www.DaikinApplied.com IOM 1274-3 • CENTRIFUGAL WATER CHILLERS... -
Page 12: Heat Recovery Chillers
(tower) cooling to mechanical cooling. condenser barrel if flow is present when the chiller is idle. Daikin Applied chillers will start with entering condenser water temperature as low as 55°F (42.8° C) providing the chilled Water Side Economizer Cycle Operation water temperature is below the condenser water temperature. -
Page 13: Relief Valves
Contact a Daikin Applied representative to review code requirements; where local codes do not apply, the latest specific heat recovery applications. -
Page 14: Oil Coolers
POE, including certain polymers (e.g. PVC/CPVC city water employed. and polycarbonate piping). Daikin Applied centrifugal chillers (models 079-126) have a factory-mounted, water-cooled oil cooler, temperature- controlled water regulating valve and solenoid valve per compressor. Centrifugal single compressor cooling water connections are located near the compressor and are shown on the specific unit certified drawings. - Page 15 Installation Figure 9: Oil Cooler Piping Across Chilled Water Pump - Models WSC/HSC/TSC 079-126 NOTE: Dotted lines indicate field supplied piping and components. Figure 10: Oil Cooler Piping With City Water - Models WSC/HSC/TSC 079-126 Oil Heater Figure 11: Oil Cooler - Oil Sump Water Connections...
- Page 16 Installation Figure 12: Typical Refrigerant Flow Diagram - Models WSC/TSC 079-126 FLOW CHART LEGEND P102 CHECK VALVE SUCTION LINE LIQUID INJECTION LINE ELECTRONIC EXPANSION VALVE MOTOR COOLING LINE COMPRESSOR TEMPERATURE SENSOR DISCHARGE LINE SIGHT GLASS P202 SHUTOFF VALVE HOT GAS BYPASS LINE (OPTONAL)
-
Page 17: Field Wiring
105°C rated conductors should be used for voltages greater controller. than 2000V. Refer to the unit nameplate and the Daikin Tools selection report for the correct electrical ratings. Figure 15: Wiring for Optional Display DANGER Qualified and licensed electricians must perform wiring. -
Page 18: Surge Capacitors
Use the electric data on the Starters supplied with the chiller or the chiller performance rating sheet – obtained from the Daikin Applied sales office – for generator Surge Capacitors sizing purposes. The reference data will show the RLA and LRA, which is for each compressor. -
Page 19: Field Wiring, Controls & Starters
115 Vac to 220 Vac is 12 gauge for a maximum head pressure. length of 50 feet. If greater than 50 feet, refer to Daikin 11. For VFD, Wye-Delta, and solid state starters connected Applied for recommended wire size minimum. Wire to six (6) terminal motors. - Page 20 Installation Figure 16: Centrifugal Field Wiring Schematic IOM 1274-3 • CENTRIFUGAL WATER CHILLERS www.DaikinApplied.com...
- Page 21 Installation Figure 17: Compressor Control Box www.DaikinApplied.com IOM 1274-3 • CENTRIFUGAL WATER CHILLERS...
- Page 22 Installation Figure 18: Unit Control Box IOM 1274-3 • CENTRIFUGAL WATER CHILLERS www.DaikinApplied.com...
-
Page 23: Long Term Storage
9. Restart by Daikin Applied service technicians will be damage or corrosion. A Daikin Applied service representative required and paid to Daikin Applied by the owner or must perform an inspection and leak test of unit on minimum contractor. It is prudent to take photos when the unit quarterly schedule, to be paid by the owner or contractor. -
Page 24: Retrofit Knockdown
Standard torque specs must be followed when re-installing refrigerant. bolts. Contact Daikin Applied service for this information. • Suction and discharge lines have bolt-on flanges. • Motor cooling line is brazed at mechanical connections. - Page 25 • Site reassembly must be supervised or completed • Unit ships with vessel and/or head insulation, if ordered. by Daikin Applied service personnel. Cost for unit • Unit ships with replacement refrigerant gaskets and reassembly and supervision by Daikin Applied service O-rings, stick-on wire ties, and touch-up paint.
- Page 26 NOTE: Drawings, dimensional values, and other information may change depending on options or configurations selected. INE TO TOP EDGE OF TOP STARTER BRACKET) Refer to the as-built submittal drawings provided by a Daikin Applied sales representative for configuration-specific PLATE TO OUTSIDE FACE OF STARTER BRACKET) details.
- Page 27 Installation Table 8: Centrifugal Single Compressor Knockdown Dimensions Dimensions - inches (mm) Label 079/087 E2612/C2212 E2612/C2612 E3012/C2612 E3012/C3012 E3612/C3012 E3612/C3612 E3612/C3012 35.9 (912.) 40.9 (1039) 40.9 (1039) 44.9 (1141) 43.9 (1115) 50.9 (1293) 43.9 (1115) 49.0 (1245) 51.5 (1308) 56.2 (1429) 59.8 (1520) 77.0 (1955) 83.0 (2108)
- Page 28 Follow lifting lug will vary depending on size of the waterbox and rigging and moving instructions carefully. Daikin Applied is not nozzle configuration. Rolling dollies may also be used. a licensed nor certified rigging specialist. It is the customer’s •...
- Page 29 Refer to the as-built submittal drawings the discharge nozzle and evaporator connection points. provided by a Daikin Applied sales representative for Care must be taken when brazing or removing lines to configuration-specific details.
-
Page 30: Unit Reassembly
Installation Unit Reassembly Separating Vessel Stacks After removing compressor and associated lines for Type The level of disassembly required for unit installation will be A knockdown, the liquid line connecting the evaporator varied. For all steps, use new refrigerant gaskets and o-rings and condenser as well as the oil sump would need to be provided. - Page 31 Installation Figure 28: Liquid Line Assembly - Representative Placement Shown Figure 29: Oil Sump/Oil Cooler Assembly - Models WSC/TSC/HSC 079-126 www.DaikinApplied.com IOM 1274-3 • CENTRIFUGAL WATER CHILLERS...
- Page 32 DEPENDING ON COMPRESSOR SIZE. JUNCTION BOX NOT ON ALL UNITS. MOTORS. CONNECT LEAD 155 TO TERMINAL SECOND HEATER CABLE FROM IF 2 BOX IS NOT COMPR. ON WSC / WDC / WCC USED. 079-087 ONLY. HIGH PRESSURE SWITCH VFD / STARTER CONTROL CABLE...
- Page 33 Installation Figure 32: Unit Electrical and Sensor Locations Figure 33: Unit Electrical and Sensor Locations www.DaikinApplied.com IOM 1274-3 • CENTRIFUGAL WATER CHILLERS...
- Page 34 Installation Figure 34: Unit Electrical and Sensor Locations IOM 1274-3 • CENTRIFUGAL WATER CHILLERS www.DaikinApplied.com...
-
Page 35: Operation
Electric shock hazard. Can cause personal injury or equipment and should be completed prior to startup. The Daikin Applied damage. This equipment must be properly grounded. startup technician is responsible for checking the wiring and Connections to and service of the MicroTech control panel making the appropriate control changes. -
Page 36: Sequencing
Training courses for centrifugal maintenance and operation The Daikin Applied technician can set up different strategies are held through the year at the Daikin Learning Institute in for starting and stopping networked compressors, chillers, and Verona, Virginia. The school curriculum includes instruction on pumps depending on site requirements. -
Page 37: Human Machine Interface (Hmi)
Operation Disabling Chiller Operation Without the HMI Each of the four switches located on the unit have a different The Human Machine Interface (HMI) communicates with the functionality in terms of disabling. The descriptions below apply unit control processor, displaying data and transmitting touch if the “Control Source”... - Page 38 Operation Figure 37: Home View Screen The Home View Screen (Figure 37) shows the basic operating Table 12: Compressor Status Possibilities condition of the chiller. Note that the chiller displayed on all Complete STATUS Text screens will be representative of the actual chiller, showing Notes (in priority sequence) either one or two compressors depending on the chiller model.
- Page 39 Figure 42. Chiller Model “WCF” is the general software category for WSC, WDC, WCC, TSC, TDC, and HSC models (see “Figure 54: Settings View - Modes” on page 48). Figure 40: BAS Network Source If a Technician level password is entered, two additional tabs will follow the Detail Tab.
- Page 40 Operation Figure 43: Evaporator Information Figure 44: Compressor Details NOTE: Chiller data will populate in the Power box if the Full Metering capability has been installed and wired. IOM 1274-3 • CENTRIFUGAL WATER CHILLERS www.DaikinApplied.com...
- Page 41 CLOSING speed to unload the compressor. The same compressor capacity. For WSC 079-126 models, the vane adjustment method applies - clockwise to decrease closing, movement occurs in response to oil flow from the vane load/ counterclockwise to increase vane closing.
- Page 42 Network Limit variable. While this override is in effect, WSC models 079-126 units utilize a water-cooled oil cooler chiller capacity is continuously adjusted to keep the % RLA for the compressor.
- Page 43 Operation Figure 46: Typical Oil Flow Diagram - Models WSC/TSC/HSC 079-126 www.DaikinApplied.com IOM 1274-3 • CENTRIFUGAL WATER CHILLERS...
- Page 44 Operation Figure 47: Condenser Information Figure 48: Expansion Valve Information IOM 1274-3 • CENTRIFUGAL WATER CHILLERS www.DaikinApplied.com...
- Page 45 1. WATER, sets leaving water temperature setpoint, start • T = Technician Level (The password number for and stop delta-T, resets, etc. technician level is only provided to Daikin Applied 2. MODES, selects various unit parameters such as liquid technicians.) injection, timers, pump staging, control source, unit mode, etc.
- Page 46 Many setpoints are interactive. Changes may have an adverse operator level. The technician level password number is effect on chiller operation. Only trained operators should be only provided to Daikin Applied technicians.) There is a allowed to change chiller setpoints. small delay between pressing the keypad and recording NOTE: Setpoints that have a technician level password the entry.
- Page 47 Operation Figure 51: Settings View - Water Figure 52: Water Setpoints Description Default Range Comments Reset Type = Return: Sets the maximum LWT reset that can occur. Maximum Reset Delta-T 0.0 °F 0.0 to 20.0 °F Reset Type = 4-20 mA: Sets amount of reset at 20 mA input. Start Reset Delta-T 10 °F 0.0 to 20.0 °F...
- Page 48 Cool/Heat, Heat Only No. of Compressors 1 to 2 WSC models will be set to 1. Any other value will be ignored. Max Compressors On 0 to 8 Max number of compressors that can be on local pLan chiller network...
- Page 49 Operation Figure 55: Settings View - Motor Table 15: Motor Setpoints Description Default Range Comments Nominal Capacity 100 tons 0-2000 tons Sets nominal capacity rating of an individual compressor for staging decisions. Compressor Start: Sets minimum delta between oil sump temp and evaporator Oil No Start Differential 40.0 °F 30 TO 60 °F...
- Page 50 Operation Table 16: Tower Setpoint Settings Description Default Range Comments Valve Position (Bypass) 100% Valve Control Slope Gain 0 to 99 Control gain for temperature (or lift) slope Valve Control Error Gain 0 to 99 Control gain for temperature (or lift) error Valve Control Range (Max) 100% 0 to 100%...
- Page 51 MicroTech® would recommend for proper head STAGE, (II) VALVE SP, (III) VALVE STAGE, (IV) NONE, and control on the WSC unit. Setup instructions for each of the five (V) VALVE SP / VFD STAGE. These control strategies are tower control strategies are provided next.
- Page 52 Operation Figure 58: Strategy (I) VFD STAGE - VFD Speed vs. Temp flow through the tower until the last fan is staged off. 7. Set Valve Deadband - Lift. The default of 1.0 psi is a recommended initial setting. 8. Set the Valve Control Range to the minimum position to which the valve can go.
- Page 53 Operation Strategy (III) VALVE STAGE: As shown in Figure 62, the default minimum and maximum valve opening positions are 10% and 90%, respectively. These This control strategy is tower staging (up to three stages) with minimum and maximum positions are adjustable anywhere a stage-controlled bypass valve.
- Page 54 Operation Figure 63: Strategy (IV) - NONE Figure 66: Strategy (V) VALVE SP / VFD STAGE - Percent vs. Temperature Cooling Tower Fan Staging (Up to 3 fans) Tower Control Panel MicroTech ® Controller Condenser Temperature (°F) % VFD Speed (3 Fan Stages) % VFD Speed (1 Fan Stage) Figure 64: Strategy (IV) NONE - Temp vs.
- Page 55 Operation Figure 68: Settings View - Alarms Table 17: ALARMS Setpoint Settings Description Default Range Comments Sets the value of condenser saturated temperature below which the condenser pump is forced Condenser Freeze Protect 34.0 °F -9.0 to 45.0 °F ON - occurs when unit is off and chiller senses need to provide flow to address a chiller limit alarm - see “Table 23: Warning Alarms and Informative Messages”...
- Page 56 Operation Figure 69: Settings View - Timers Table 18: Timer Settings Description Default Range Password Comments Evap Recirculate 0.5 min 0.2 - 5 min Time that evaporator pump must run before compressor start Full Load Timer 59 sec 0 to 999 sec Time compressor must load (without unloading) before vanes are considered fully open.
- Page 57 Failure to do so will result in incorrectly labeled History files. The version numbers shown are the controllers’ software identification. These numbers may be required by Daikin Applied to answer questions about unit operation or to assist in possible future upgrades of software.
-
Page 58: Trend History Screen
Operation Trend History Screen 18 alarms for the current date with the most current alarms listed on top. Each alarm displays the date stamp, action taken, The Trend History Screen (Figure 72) is accessed by clicking and the cause of the alarm. See the Alarm tables starting the TREND button at the bottom of any screen. - Page 59 (Trend.csv and AlarmHistory.csv, ) must be sent together drive. “Copy Service Trends” is only available with the to Daikin Applied. Any other file formats are NOT accepted. technician level password. “Copy Customer Trends” is available for all password levels.
- Page 60 Operation Table 22: Critical Alarms Screen Text Action Taken Troubleshooting Clear Low or No Evaporator Water Flow. Low refrigerant level in evaporator. Incorrect setpoint value for Evaporator Pressure Low Rapid Stop Manual leaving water temperature. Discharge Pressure High Rapid Stop Low or no condenser water Flow Manual Vanes Not Closed...
- Page 61 Operation Table 23: Warning Alarms and Informative Messages Screen Text Action Taken Troubleshooting Clear No flow indicated with Evaporator Pump #1 ON AND [the other pump is Evaporator Pump #1 Fault Warning available (per the evaporator Pump SP) AND has not faulted]. Manual Check for loose wires or failed sensor No flow indicated with Evaporator Pump #2 ON AND [the other pump is...
-
Page 62: Controller Inputs And Outputs
Operation Controller Inputs and Outputs As outlined below, inputs and outputs vary between the unit controller and the compressor controller. Unit Controller Inputs and Outputs The following tables list the unit controller inputs and outputs, both analog and digital, as well as the stepper motor outputs. Table 24: Unit Controller, Analog Inputs Description Wiring... - Page 63 Operation Compressor Controller Inputs and Outputs The following tables list analog inputs and digital outputs for the compressor controller as well as the stepper motor outputs. Table 28: Compressor Controller, Analog Inputs Description Source Signal Sensor Range Oil Sump Pressure 0.5 to 4.5 VDC nominal Oil Feed Pressure to Compressor 0.5 to 4.5 VDC nominal...
-
Page 64: Unit Startup And Maintenance
Dyes used for refrigerant leak detection are not tested or recommended for which to compare future tests. The local service office can use in Daikin Applied chillers. Use of these products may damage and/or recommend suitable facilities for performing these tests. - Page 65 They should be energized whenever power is available to the control Daikin Applied chillers are at positive pressure at all times circuit, when the oil temperature sensor calls for heat, and do not leak contaminated moist air into the refrigerant and when the compressor is inoperative.
- Page 66 It is recommended that the service of a reliable water Pumping Down treatment company be used. Daikin Applied assumes no responsibility for the results of untreated or improperly If it becomes necessary to pump the system down, extreme treated water.
-
Page 67: Oil Analysis
WSC water chillers are leak tested at the factory and shipped A pressure regulating valve must always be used on the drum with the correct charge of refrigerant as indicated on the unit being used to build the system pressure. - Page 68 Professional judgment must be exercised under unusual circumstances, for example, it might be desirable to There is no zinc used in the bearings on Daikin Applied chillers. sample the lubricating oil shortly after a unit has been placed IOM 1274-3 • CENTRIFUGAL WATER CHILLERS...
- Page 69 If the flow sensor is to be mounted away from the unit, the The thermal dispersion flow switch supplied by Daikin Applied, sensor should be mounted on the wall of the inlet pipe of...
- Page 70 Unit Startup and Maintenance TechResponse@DaikinApplied.com. Figure 78: Automatic Teach of Setpoint Figure 77: Remote Mounting Guidelines for Flow Switch 3. After the ‘Teach’ function is completed and the outer LEDs flashed, the flow switch will indicate a new set point based upon the current flow which should still be at the steady state minimum desired operating flow.
- Page 71 Unit Startup and Maintenance Table 33: Flow Volume Calculation US GPM at the velocities indicated below Inside Pipe GPM adjustment Default Pipe Size Diameter per '+' or '-' key (inch) (inch) 20 cm/sec 30 cm/sec 50 cm/sec 75 cm/sec 100 cm/sec 150 cm/sec 200 cm/sec 250 cm/sec 300 cm/sec input 2.06 6.86...
- Page 72 Optional Controls in this type of test. Consult Daikin Applied service for Hot Gas Bypass (verify operation) recommendations. IOM 1274-3 • CENTRIFUGAL WATER CHILLERS...
- Page 73 www.DaikinApplied.com IOM 1274-3 • CENTRIFUGAL WATER CHILLERS...
- Page 74 IOM 1274-3 • CENTRIFUGAL WATER CHILLERS www.DaikinApplied.com...
- Page 75 (collectively “Owner”) that Company, at it’s option, will repair or replace defective parts in the event any product manufactured by Company, including products sold under the brand name Daikin and used in the United States or Canada, proves defective in material or workmanship within twelve (12) months from initial startup or eighteen (18) months from the date shipped by Company, whichever occurs first.
- Page 76 Now that you have made an investment in modern, efficient Daikin Applied equipment, its care should be a high priority. For training information on all Daikin Applied HVAC products, please visit us at www.DaikinApplied.com and click on Training, or call 540-248-9646 and ask for the Training Department.
Need help?
Do you have a question about the WSC and is the answer not in the manual?
Questions and answers
what type of filter do I use
The compatible oil filter for the Daikin WSC chiller must be of the manufacturer’s recommended quality. Using a substitute quality oil filter can damage the equipment.
This answer is automatically generated