Table of Contents

Related Manuals for Daikin Magnitude WME Series


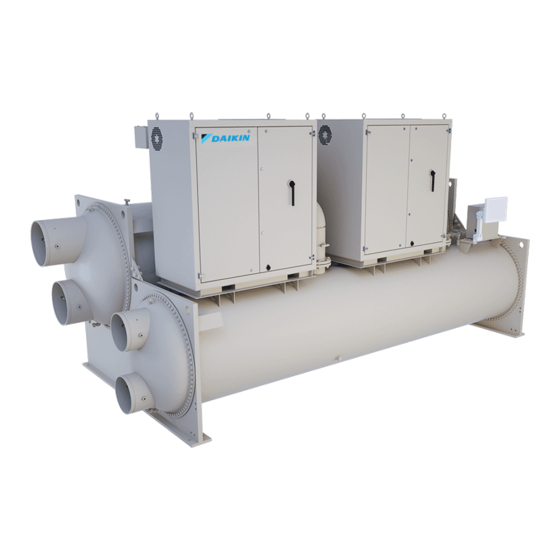
Summary of Contents for Daikin Magnitude WME Series
- Page 1 Installation, Operation, IOM 1266-2 and Maintenance Manual Group: Chiller Part Number: IOM1266-2 Date: July 2019 Magnitude ® Magnetic Bearing Centrifugal Chillers Model WME, C-vintage 400 to 1600 Tons (1400 to 5600 kW) HFC-134a Refrigerant...
-
Page 2: Table Of Contents
Manufactured in an ISO 9001 & ISO 14001 certified facility ©2019 Daikin Applied. Illustrations and data cover the Daikin Applied product at the time of publication and we reserve the right to make changes in design and construction at any time without notice. - Page 3 From starter to chiller unit (remote mounted) Centrifugal chillers with water cooled oil coolers must have a 115 volt normally closed water solenoid valve installed in the oil cooler water supply line. Daikin Applied recommends ASCO Type 8210B27 solenoid valve or approved equal and 40-mesh strainer. Daikin Applied does not supply these components.
- Page 4 Intentionally Left Blank...
-
Page 5: Introduction
Operation of this equipment in a residential area is likely to cause harmful interference in which case the owner will be required to correct the interference at the owner’s own expense. Daikin Applied disclaims any liability resulting from any interference or for the correction thereof. HAZARD IDENTIFICATION INFORMATION DANGER Dangers indicate a hazardous situation, which will result in death or serious injury if not avoided. -
Page 6: General Description
® a single condenser along with either one or two compressors All Daikin Applied centrifugal chillers must be commissioned by depending on the model. a factory-trained Daikin Applied service technician. Failure to Magnitude chillers are designed for indoor, non-freezing follow this startup procedure can affect the equipment warranty. -
Page 7: The Control System
nTroduCTIon The Control System The MicroTech unit controller also communicates with the HMI for graphic display and is located in the unit control panel, as The MicroTech ® control system consists of a Human Machine shown in Figure 4. The on-board compressor controllers are Interface (HMI), a microprocessor-based unit controller, and located in each compressor control panel, shown in Figure 3. -
Page 8: Installation
If the drawings all mechanical room equipment. are not available, consult the local Daikin Applied sales office for assistance. Radiant heat from boilers or piping that would adversely raise component surface temperatures beyond ambient limits must also be avoided. -
Page 9: Long Term Storage
Daikin Applied service representative must perform an checked for compliance. inspection and leak test of the unit on a minimum quarterly schedule, to be paid by the owner or contractor. Daikin Mounting Applied will not be responsible for any refrigerant loss during... -
Page 10: Unit Dimensions And Shipping Weight
nsTallaTIon 5. Dimensions shown are for units (evaporator/condenser) 9. If main power wiring is brought up through the floor, this with standard design pressures. The waterside design wiring must be outside the envelope of the unit. pressure is 150 psi (1034 kPa). Consult the factory for 10. -
Page 11: Retrofit Knockdown
CAUTION refrigerant. Standard torque specs must be followed when re-installing • Suction and discharge lines have bolt-on flanges. bolts. Contact Daikin Applied service for this information. • Motor cooling line is brazed at mechanical connections. www.DaikinApplied.com IOM 1266-2 • MAGNITUDE MODEL WME CHILLERS ®... - Page 12 • Site reassembly must be supervised or completed prior to attempting to open any connection. by Daikin Applied service personnel. Cost for unit • All free piping ends are capped. Blockoffs will cover all reassembly and supervision by Daikin Applied service compressor and vessel openings.
- Page 13 nsTallaTIon Unit Knockdown Dimensions Figure 10: Unit Dimensional Diagram for Typical WME Knockdown - Single Compressor Models TOP VIEW TOP VIEW TOP VIEW (E30/C2612 ONLY) (E30/C2612 ONLY) (E30/C2612 ONLY) FRONT VIEW RIGHT VIEW FRONT VIEW FRONT VIEW RIGHT VIEW RIGHT VIEW LEFT VIEW LEFT VIEW LEFT VIEW...
- Page 14 nsTallaTIon Figure 11: Unit Dimensional Diagram for Typical WME Knockdown - Dual Compressor Models EVAPORATOR CONDENSER TOP VIEW FRONT VIEW TYPICAL UNIT REPRESENTATION 334981973 LEFT END VIEW RIGHT END VIEW NOTE: See page 10 for overall unit length, width, and height dimensions for WME models. IOM 1266-2 •...
- Page 15 nsTallaTIon Table 2: Label Descriptions for Unit Dimensional Diagrams Label Description Width (Condenser Tubesheet with Mounting Brackets) Width (Evaporator Tubesheet with Mounting Brackets) Width (Mounting Foot with Mounting Brackets) Width (Center of Outside Foot Mounting Hole to Center of Suction #1) Width (Center of Outside Foot Mounting Hole to Center of Suction #2) Height (Mounting Foot with Mounting Brackets) Height (Condenser Tubesheet with Mounting Brackets)
- Page 16 nsTallaTIon Compressor Rigging Requirements Figure 14: Compressor Removal Preparation To properly rig the compressor, install swivel lifting eye-bolts in the two holes on the top of the compressor (see Figure 15, flag #9). Use a spreader bar between the two chain hoists, as shown in Figure 13, to safely lift the compressor.
-
Page 17: Water Piping
Daikin product. POE oil, if ever in contact with PVC/ 9. Use front tapped lifting hole on the compressor motor CPVC, will coat the inside wall of PVC/CPVC pipe causing... - Page 18 Strainers must be used to condenser water temperatures as low as 40°F (4.4°C). The protect the chiller systems from water-borne debris. Daikin will WME chillers can also start and maintain operation with not be responsible for any water-borne debris damage or water...
-
Page 19: Condenser Water Temperature Control
2. Two-Way Valve Operation maintain suitable condenser head pressure. Another condenser control method is to use a modulating Contact your local Daikin Applied representative for more two-way control valve located on the outlet connection of information on this application. the condenser. The valve will be nearly closed at startup to restrict water flow, which keeps generated heat in www.DaikinApplied.com... -
Page 20: Relief Valves
nsTallaTIon Relief Valves Figure 18: Three-Way Valve, Front Seated Position As a safety precaution and to meet code requirements, each chiller is equipped with pressure relief valves located on the condenser and evaporator for the purpose of relieving excessive refrigerant pressure (caused by equipment malfunction, fire, etc.) to the atmosphere. -
Page 21: Field Insulation
CMPR BOX #1 E-PORT1 DOOR ETR3 SEE DWG 336078103 be used for power wiring. Refer to the unit nameplate and the Daikin Tools selection report for the correct electrical ratings. FIELD WIRING EXV BOARD CAL FOR BACNET-MSTP OR MODBUS DANGER... - Page 22 nsTallaTIon RapidRestore and RideThrough Power Panel Short Circuit Current ® ® Ratings WME chillers have the capability for chillers to restart and reach full load operation quickly in the event of a power loss. Available short circuit current ratings (SCCR) are shown in Table 10.
- Page 23 nsTallaTIon Figure 24: WME Field Wiring Schematic www.DaikinApplied.com IOM 1266-2 • MAGNITUDE MODEL WME CHILLERS ®...
- Page 24 nsTallaTIon Figure 25: WME Unit Wiring Schematic 01-2 C1/2 01-2 Vbat EEWT ELWT C3/4/5 CEWT BLK(3) C3/4/5 CLWT 01-4 01-4 ALARM NO/NC 24/120V VDC OR VAC 24N-8 SENSOR 01-5 RED(3) +5Vref 01-10 24-18 SENSOR BLK(3) 01-10 +Vdc +Vtwrm UNIT MOTOR CURRENT OUTPUT TxL/RxL Tx-/Rx- 0-10V...
-
Page 25: Operation
During 5. Compressor start the initial startup of the chiller, the Daikin Applied technician will be available to answer any questions and instruct the proper The compressor is started and comes up to the operating procedures. -
Page 26: Unit Enabling/Disabling And Overrides
peraTIon Unit Enabling/Disabling and 5. Lead compressor start The compressor is started and comes up to the Overrides calculated Start RPM and IGV. From this point the vanes are opened and then speed is increased to match There are multiple options that will override normal operation of the cooling load. -
Page 27: Human Machine Interface (Hmi)
peraTIon Human Machine Interface Navigation Summary (HMI) The Home View Screen, see Figure 27, is the main information page for the chiller. This screen contains the AUTO and STOP buttons in the upper right-hand corner, which are used to start The HMI is turned on/off with a switch located at the lower and stop the unit when in “User”... - Page 28 peraTIon Figure 27: Home View Screen Figure 29: Digital Remote Switch Source Home View Screen The Home View Screen (Figure 27) shows the basic operating condition of the chiller. Note that the chiller displayed on all screens will be representative of the actual chiller, showing Figure 30: BAS Network Source either one or two compressors depending on the chiller model.
- Page 29 peraTIon Additional HMI View Screens (III) Additional Home View Trend Data Graphs • Entering and leaving evaporator water temperatures Pressing the Detail Tab on the top of the Home View Screen provides specific unit operating parameters shown in Figure • Entering and leaving condenser water temperatures 32.
- Page 30 peraTIon Figure 33: Power Information Figure 34: Evaporator Information Figure 35: Compressor Details IOM 1266-2 • MAGNITUDE MODEL WME CHILLERS www.DaikinApplied.com ®...
- Page 31 peraTIon The Compressor State Information on the right side of the the shut down process, the sequence transitions back to "Off" screen is a compilation of events the chiller sequences through and the highlight color will switch to black. at startup. A green light indicates that a particular sequence The left-side information displays the status of the compressor requirement has been satisfied.
- Page 32 9. INTERFACE - sets the network protocol and associated connecting a laptop.) Appropriate setpoints are factory set and options. checked by a Daikin Applied service representative during 10. UPDATER - allows upload of software file updates. commissioning; however, adjustments and changes are often required to meet job conditions.
- Page 33 NOTE: Setpoints that have a technician level password delay between pressing the keypad and recording the (T) should only be changed by a Daikin Applied technician. Contact a Daikin Applied service entry. Be sure that an asterisk appears in the window representative for more information.
- Page 34 peraTIon Figure 40: Settings View - Water Table 13: Water Setpoints Description Default Range Comments Reset Type = Return: Sets the maximum LWT reset that can occur. Maximum Reset Delta T 0.0°F 0.0 to 20.0°F Reset Type = 4-20 mA: Sets amount of reset at 20 mA input. Start Reset Delta T 10°F 0.0 to 20.0°F...
- Page 35 peraTIon Figure 42: Settings View - Modes Table 14: Modes Setpoints Description Default Range Comments 1.7 for WME092 Max pressure ratio for which a lead-lag start will be performed. A higher pressure Tandem Pressure Ratio Limit 1-3.5 2.0 for WME106 ratio will trigger a tandem start.
- Page 36 peraTIon Figure 43: Settings View - Motor Table 15: Motor Setpoints Description Default Range Comments Dual to Single Target -5 to -100 Hysteresis for staging compressors up or down based on the efficiency curves Single to Dual Target 5 to 100 Dual to Single Factor 0.7 to 1.3 Scaling factor when transitioning from dual to single compressor operation...
- Page 37 peraTIon Table 16: Tower Setpoint Settings Description Default Range Comments Valve Control Slope Gain 10 to 99 Control gain for temperature (or lift) slope Valve Control Error Gain 10 to 99 Control gain for temperature (or lift) error Valve Control Range (Max) 0 to 100% Maximum valve position, overrides all other settings Valve Control Range (Min)
- Page 38 peraTIon Tower Control Settings Figure 45: Strategy (I) - VFD STAGE There are five possible tower control strategies: (I) VFD Cooling Tower STAGE, (II) VALVE SP, (III) VALVE STAGE, (IV) NONE, Fan Staging (Up to 2 fans) and (V) VALVE SP/VFD STAGE. These control strategies Tower Control are selected from the TOWER Setpoint Screen (see...
- Page 39 peraTIon 1. Set Valve Deadband - Temp. The default of 2.0°F is a Figure 48: Strategy (II) VALVE SP - Valve Opening vs. Temp good place to start. 2. Set the Valve Control Range to the minimum position to which the valve can go. The default is 10%. 3.
- Page 40 peraTIon Figure 50: Strategy (III) VALVE STAGE - condenser EWT is desired to operate. The Valve Opening vs. Temperature default values of 70°F, 75°F, and 80°F are a good place to start in climates with moderate wet bulb temperatures. The number of Stage Fan On setpoints used must be the same as the number of Cooling Tower Stages.
- Page 41 peraTIon Strategy (V) VALVE SP/VFD STAGE: BAS Alternate This control strategy is tower fan control with a VFD and bypass valve In control strategies (I) through (V), the chiller MicroTech ® control. See Figure 53 Figure is directly controlling the cooling tower fan staging, variable To set up in HMI: frequency drives, and bypass valves.
- Page 42 peraTIon Figure 56: Settings View - Valves Table 17: Valve Setpoint Settings Description Default Range Comments EXV Gain 20-400 Gain selection based on chiller size and valve type. Figure 57: Settings View - Offsets Table 18: Offsets Setpoint Settings Description Default Range Comments...
- Page 43 peraTIon Figure 58: Settings View - Alarms Table 19: ALARMS Setpoint Settings Description Default Range Comments Sets the value of condenser saturated temperature below which the condenser pump is forced Condenser Freeze Protect 34.0°F 34.0 to 38.0°F ON - occurs when unit is off and chiller senses need to provide flow to address a chiller limit alarm - see "Table 23: Critical Alarms"...
- Page 44 The version numbers shown towards the bottom left of the screen are the controllers’ software identification. These numbers may be required by Daikin Applied to answer questions about unit operation or to assist in possible future upgrades of software. Compressor Capacity Control...
- Page 45 peraTIon Figure 61: Settings View - Updater Figure 62: Trend History Screen Trend History Screen The Trend History Screen (Figure 62) is accessed by clicking When the Unit Control Processor is powered on after being off, the TREND button at the bottom of any screen. The Trend the Trend History Screen will only display the history starting History Screen allows the user to view the various parameters from the time the Unit Control Processor was powered on.
-
Page 46: Alarms
peraTIon Alarms Clearing an Alarm There are two different indicators that the chiller will generate The Alarm information (Figure 63 and Figure 64) is accessed when conditions arise that are affecting the chiller operations. by touching the ALARM icon at the bottom of the HMI and then Warnings are indicated in yellow on the HMI and communicate the Active or History tabs at the top of the screen. - Page 47 (Trend.csv and AlarmHistory.csv, ) must be sent together files have been successfully transferred to the USB drive. to Daikin Applied. Any other file formats are NOT accepted. 5. Repeat this process for each desired day of history. Each day must be downloaded individually. It is not possible to download multiple days of history at once.
- Page 48 peraTIon Table 23: Critical Alarms Screen Text Trigger Condition Evaporator Pressure (or lowest Suction Pressure if Evaporator Pressure Transducer is detected as bad or disconnected) Low Evaporator Pressure is less than Low Evaporator Pressure Alarm Setpoint. Causes: Low or No Evaporator Water Flow. Low refrigerant level in evaporator.
-
Page 49: Controller Inputs And Outputs
peraTIon Controller Inputs and Outputs As outlined below, inputs and outputs vary between the unit controller and the compressor controller. Unit Controller Inputs and Outputs The following tables list the unit controller inputs and outputs, both analog and digital, as well as the stepper motor outputs. Table 25: Unit Controller, Analog Inputs Description Wiring... - Page 50 peraTIon Compressor Controller Inputs and Outputs The following tables list, for each compressor controller, analog inputs and digital outputs as well as the stepper motor outputs. Table 29: Compressor Controller, Analog Inputs Description Source Signal Sensor Range Compressor Suction Temperature NTC Thermistor 10k @ 25°C -40 to 125°C...
-
Page 51: Building Automation Systems (Bas)
VFD data plate or supplied with the chiller performance rating Modbus or BACnet ® ® sheet – obtained from the Daikin Applied sales office – for Daikin Applied unit controllers strictly conform to the generator sizing purposes. The referenced data will show the interoperability guidelines of the LonMark Interoperability ®... -
Page 52: Startup And Maintenance
Complete the pre-start checklist at the front of If the flow sensor is to be mounted away from the unit, the this manual and return to Daikin Applied prior to startup date. sensor should be mounted on the wall of the outlet pipe of... - Page 53 TarTup and aInTenanCe If needed, the adapter is threaded into the pipe using pipe Figure 69: Automatic Teach of Setpoint sealant appropriate for the application. The flow sensor is mounted onto the adapter using silicone grease. Carefully apply lubricant to the inside threads and O-ring so temperature probe does not become coated with lubricant.
- Page 54 TarTup and aInTenanCe Table 33: In Step 3, the ‘Teach’ function re-adjusted the flow switch SP while flow was at the minimum desired operating flow. The chiller will not operate at this flow because the flow switch is OPEN after performing the ‘Teach’ function. The benefit of the ‘Teach’ function is to quickly set the setpoint within the desired operating range.
-
Page 55: Chiller Maintenance
Special tube and water head material power from the unit before opening any compressor access may be required to reduce damage from corrosion. Daikin covers. The DC link capacitors store enough energy to cause Applied is not responsible for damage or faulty operation from electrocution. -
Page 56: Maintenance Schedule
TarTup and aInTenanCe Maintenance Schedule Table 34 provides an overview of recommended maintenance procedures along with how frequently these procedures should be performed. Table 34: Recommended Maintenance Schedule I . Compressor A. Analyze Compressor Fault Log B. Check IGV operation C. -
Page 57: Appendix
ppendIx Definitions ppendIx Active LWT Setpoint Maximum Compressor Speed The active LWT (leaving water temperature) setpoint is the The maximum compressor speed is a fixed value based on the actual target value for leaving water temperature in effect at impeller size. any given time. -
Page 58: Temperature/Pressure Chart
ppendIx Temperature/Pressure Chart Table 35: R-134a Temperature/Pressure Chart R-134a Temperature/Pressure Chart °F PSIG °F PSIG °F PSIG °F PSIG 41.1 97.0 187.3 10.8 43.2 100.6 192.9 12.0 45.4 104.3 198.7 13.2 47.7 108.1 204.5 14.4 50.0 112.0 210.5 15.7 52.4 115.9 216.6 17.1... -
Page 59: Limited Product Warranty
(collectively “Owner”) that Company, at it’s option, will repair or replace defective parts in the event any product manufactured by Company, including products sold under the brand name Daikin and used in the United States or Canada, proves defective in material or workmanship within twelve (12) months from initial startup or eighteen (18) months from the date shipped by Company, whichever occurs first. - Page 60 Daikin Applied Training and Development Now that you have made an investment in modern, efficient Daikin Applied equipment, its care should be a high priority. For training information on all Daikin Applied HVAC products, please visit us at www.DaikinApplied.com and click on Training, or call 540-248-9646 and ask for the Training Department.
Need help?
Do you have a question about the Magnitude WME Series and is the answer not in the manual?
Questions and answers