Table of Contents
Advertisement
Quick Links
Purchaser's Reference Information
IT IS IMPERATIVE THAT YOU FILL IN THE FOLLOWING INFORMATION AND REFER TO IT SHOULD THE
NEED FOR SERVICE ARISE.
Product Name:
Serial Number:
To Activate Warranty:
1.
REGISTER YOUR WARRANTY AT www.diamondbackfi tness.com OR
2.
COMPLETELY FILL OUT THE ATTACHED WARRANTY CARD (SEE BACK COVER) AND RETURN TO
DIAMONDACK WITHIN 15 DAYS OF THE DATE OF PURCHASE. FAILURE TO COMPLY WITH THE
WARRANTY ACTIVATION PROCEDURE MAY VOID THE MANFACTURER'S WARRANTY.
Dealer Name: _________________________________________________________________________________________
Dealer Address: _______________________________________________________________________________________
Dealer Telephone Number: ( _____ ) ____________________________________________________________________
Dealer Contact Name: _________________________________________________________________________________
Date Purchased: ______________________________________________________________________________________
Shipping Materials:
Diamondback recommends that you retain the original packing materials (box and packing items) for
future shipping needs.
1000Sr OM.indd 2
1000Sr OM.indd 2
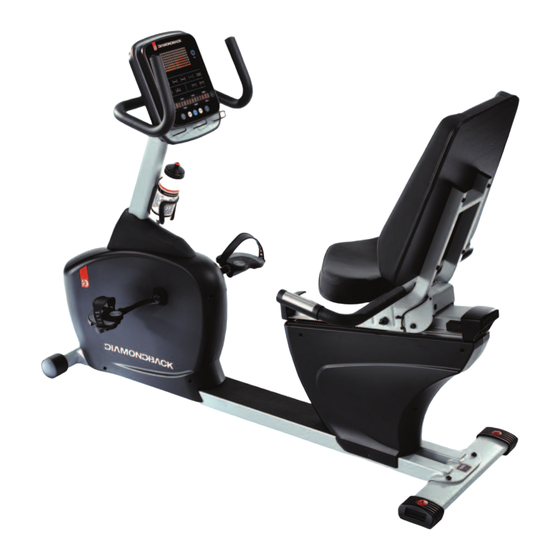
Diamondback 1000Sr Step-Thru
T __ __ __ __ __ __ __ __ __ __
Serial Number Location
Serial Number Sticker
2
7/7/2008 2:27:48 PM
7/7/2008 2:27:48 PM
Advertisement
Table of Contents

Related Manuals for Diamondback 1000Sr Step-Thru


Summary of Contents for Diamondback 1000Sr Step-Thru
-
Page 1: Purchaser's Reference Information
Dealer Telephone Number: ( _____ ) ____________________________________________________________________ Dealer Contact Name: _________________________________________________________________________________ Date Purchased: ______________________________________________________________________________________ Shipping Materials: Diamondback recommends that you retain the original packing materials (box and packing items) for future shipping needs. 1000Sr OM.indd 2 1000Sr OM.indd 2 7/7/2008 2:27:48 PM... -
Page 2: Table Of Contents
Table of Contents Purchaser’s Reference Information ......................2 Introduction ..............................4 Safety Instructions and Warnings ......................5 Assembly Drawing .............................6 Assembly Instructions ..........................7 Workout Guidelines ............................9 Maximum Heart Rate & Training Zone ....................10 Quantity & Quality ..........................10 Heart Rate Monitoring Devices Pulse Hand Grips ............................12 Chest Strap ..............................12 Console Glossary of Terms .............................12... -
Page 3: Introduction
You can count on your Diamondback equipment to provide years of pleasure and improvement in your fi tness level. The solid construction and techno-savvy electronics are guaranteed to provide you with the ultimate workout experience. -
Page 4: Safety Instructions And Warnings
Drink fl uids if you exercise for twenty or more minutes. Place the unit on a solid, level surface when in use. Never operate the unit if it is damaged or broken. Contact your local authorized Diamondback Fit- ness dealer for service. -
Page 5: Assembly Drawing
Assebly Drawing 1000Sr OM.indd 6 1000Sr OM.indd 6 7/7/2008 2:27:54 PM 7/7/2008 2:27:54 PM... -
Page 6: Assembly Instructions
Assembly Instructions Tools Required: 5mm Allen key wrench (included) 6mm Allen key wrench (included) Phillips head screwdriver Two open-ended adjustable wrenches for seat slide adjustment. The assembly drawing on the preceding page highlights each step for easy identifi cation. Bolts, screws, and washers in the included hardware kit are arranged according to each step below. - Page 7 Assembly Instructions (Continued) Then, slide the entire seat frame into the rear end of the seat track channel while holding the seat frame adjusting handle up, making sure the three rollers on each side of the seat frame assembly are inside the channel. Then, release the adjusting handle to lock the seat frame in position. 5-3.
-
Page 8: Workout Guidelines
Workout Guidelines Good health is an exercise in common sense The Surgeon General released a study in 2001, The Surgeon General’s Call To Action To Prevent and De- crease Overweight and Obesity. It indicates that 61% of American adults are either overweight or obese. The study states that overweight increases the risk of health problems, such as heart disease, certain type of cancer, type 2 diabetes, etc. -
Page 9: Maximum Heart Rate & Training Zone
Physical activity should be initiated slowly and the intensity should be increased gradually. You should select activities that you enjoy and can fi t into your daily life. Having Diamondback equipment at home certainly gives you the comfortable and convenient workout you want. - Page 10 Workout Guidelines (Continued) • An activity that uses large muscle groups, maintained continuously, and is rhythmical and aerobic in nature. • Duration: 20 to 60 minutes of continuous aerobic activity, including a warm-up and cool-down period for each exercise session. •...
-
Page 11: Heart Rate Monitoring Devices Pulse Hand Grips
TV, Radio...) The receiver of the wireless ECG system is built into the console unit of the Diamondback 1000Sr equip- ments. While using heart rate control modes, the computer monitors the exact measurement of and control over the activity if the heart. -
Page 12: Default User
Console • Watts = the rate of energy currently being expended. • Work = the amount of energy expended during exercise. • Intensity level = the resistance provided by this Step-Thru. The resistance gradually increases as the level goes up. Default User This console requires a user to be selcted when entering a program. - Page 13 Console fl ash the new program’s name. » If Enter key is pressed, it will enter this program setup mode. The message display will prompt the next setting message. » If Start key is pressed, the new program will begin, but Warm Up mode will be skipped.
-
Page 14: Console Layout
Console Layout Dot Matrix User Zone display Pulse Indicator Program keys Custom Program Keys Data Alphanumeric Display message Select display Function Keys 1000Sr OM.indd 15 1000Sr OM.indd 15 7/7/2008 2:27:59 PM 7/7/2008 2:27:59 PM... -
Page 15: Displays
Console Layout (Continued) Displays Dot Matrix Display It displays the program profi le during the program setup and executing modes. • Displays the Intensity profi le. • Displays the % Max HR profi le during the HR interactive programs. Profi le defi nitions: •... -
Page 16: Function Keys
Console Layout (Continued) Function Keys Level Up/Down Keys During program setup, press “Level Up/Down key” to select a user and to adjust the workout time. After a program is started, press “Level Up/Down key” to adjust the intensity level or HR setting. Enter Key After program selecting, press “Enter”... -
Page 17: Edit Profi Le
Console Layout (Continued) Press the USER ZONE key. The message “SELECT FUNCTION” will be fl ashed in the message display then the message “USER SETUP” will come up next. Press the ENTER key when the User Setup message is in the message display. -
Page 18: Clear Totals
Console Layout (Continued) Press the USER ZONE key. Press the ENTER key when the “USER SETUP” message comes on, in the message display. Using either the UP or DOWN keys fi nd your profi le and press the ENTER key. Press either the UP or DOWN keys until the message “REVIEW TOTALS”... -
Page 19: Workout Programs
Workout Programs Warm Up Getting Started Your unit will automatically initiate a Warm Up mode for 3 minutes (or for the time specifi ed in the users profi le) at the beginning of each program. This mode is designed to prepare your body for an intensive workout and to reduce the possibility of injury during workout. -
Page 20: Workout Summary
Workout Programs (Continued) Beginning the Program Cool Down is active as soon as a program ends or Stop key is pressed during program executing. The message window will fl ash a message of “PROGRAM COMPLETE” “COOL DOWN” and this mode will be started. -
Page 21: Quick Start
Workout Programs (Continued) TOL CAL = XXX.X as total calories burned. AVG HR = XXXBPM as average heart rate over the program period. MAX HR = XXXBPM as maximum heart rate during this program. (There is no AVG HR or MAX HR displayed if there was no heart rate detected during the program.) •... -
Page 22: Classic Programs Manual
Workout Programs (Continued) Adjustment Press Level UP or DOWN key to adjust the intensity level from 1 to 16. The dot matrix window will update the intensity profi le accordingly. Ending the Program • When 30-minute duration is up or STOP key is pressed, this program will end and Workout Summary will be active. - Page 23 Workout Programs (Continued) Enter Age The message window will fl ash a message of “ENTER AGE”, then “AGE = 35” with the number blinking. You may press UP or DOWN keys to adjust the age. After age adjustment, the message display will switch to display “PRESS ENTER”...
-
Page 24: Random
Workout Programs (Continued) Random Getting Started The Random program is designed to allow the user to choose from an unlimited number of computer generated profi les. Beginning the Program During idle mode, the message window displays a message “SELECT A PROGRAM”. To begin this program, press the “RANDOM”... -
Page 25: Strength
Workout Programs (Continued) After time adjustment, the message display will switch to display “SET UP COMPLETED”, then “PRESS START”. Press, START key to begin this program. During the Program Once the Enter or Start key is pressed, the Warm Up will be active. See Warm Up section for details. After Warm Up is over your program will start. - Page 26 Workout Programs (Continued) When your profi le comes up press ENTER key. Enter your workout time: The message window will fl ash a message of “ENTER TIME”, then “TIME = 30 MIN” and the 30 will be blinking. You may press UP or DOWN key to adjust the time.
-
Page 27: Hill
Workout Programs (Continued) Ending the Program • When program time is up or STOP key is pressed, this program will end and Cool Down will be active. • The message display will fl ash a message “PROGRAM ENDED” & “COOL DOWN”. See Cool Down for details. -
Page 28: Interval Trainer
Workout Programs (Continued) Enter Weight The message window will fl ash a message of “ENTER WEIGHT”, then “WEIGHT = 155 LB” with the number blinking. (WEIGHT = 70 KG” for metric system) You may press UP or DOWN key to adjust the weight. After weight adjustment, the message display will switch to display “PRESS ENTER”... - Page 29 Workout Programs (Continued) Beginning the Program During idle mode, the message window displays a message “SELECT A PROGRAM”. To begin this program, press the “INTERVAL TRAINER” program key, the LED indicator above it will light up. Entering the program When the message display fl ashes, “INTERVAL TRAINER” and “PRESS ENTER”, it indicates you are about to select the Interval Trainer program.
-
Page 30: Hr Interactive Programs
Workout Programs (Continued) Displays • Once the program is started, the message display will turn into workout data display and display: Time, Level, Pulse & Calories. • Press DATA SELECT key to the right of the display to switch the date display to display: RPM, Speed, Distance &... -
Page 31: Target Hr
Workout Programs (Continued) Target HR Getting Started The Target Heart Rate program is designed to keep you training at your chosen heart rate level. The computer will adjust the intensity level automatically to ensure the target heart rate is achieved and maintained during the entire program. A HEART RATE MONITORING DEVICE MUST BE USED FOR THIS PROGRAM. -
Page 32: Hr Intervals
Workout Programs (Continued) Enter your workout time: The message window will fl ash a message of “ENTER TIME”, then “TIME = 30 MIN” and the 30 will be blinking. You may press UP or DOWN key to adjust the time. When the time setting reaches 60 minutes, the display will show “TIME = 1HR 00MIN”... - Page 33 Workout Programs (Continued) Beginning the Program During idle mode, the message window displays a message “SELECT A PROGRAM”. To begin this program, press the HR INTERVALS program key, the LED indicator above it will light up. Entering the program When the message display fl ashes, “HR INTERVALS” and “PRESS ENTER”, it indicates you are about to select the HR Intervals program.
-
Page 34: Custom Programs
Workout Programs (Continued) Display • When warm up mode is completed, the console will detect if there is a valid pulse before starting this problem. If there is none, this program will not be started. The messages display will scroll “NO VALID PULSE”, and “CHECK PULSE SENSOR”... - Page 35 Workout Programs (Continued) Target HR setting if it is a HR Interactive program • If there was a program saved in the Custom 1 or Custom 2 before, the new program will overwrite the pervious program. Beginning the Program During Idle mode, the message window displays a message “SELECT A PROGRAM”. To begin one of these programs press CUSTOM 1 or CUSTOM 2 program key, the LED indicator above it will light •...
- Page 36 Workout Programs (Continued) During the Program Once the Enter or Start key is pressed, the Warm Up will be active. See Warm Up section for details. After Warm Up is over your program will start. Display When Warm Up is completed, the console will start program-executing mode, depending on what type of program that was saved is how the displays will behave;...
- Page 37 Notes 1000Sr OM.indd 38 1000Sr OM.indd 38 7/7/2008 2:28:11 PM 7/7/2008 2:28:11 PM...
- Page 38 Notes 1000Sr OM.indd 39 1000Sr OM.indd 39 7/7/2008 2:28:11 PM 7/7/2008 2:28:11 PM...
-
Page 39: Maintenance
Repair or replace any damaged or worn parts,tighten all loose hardware. As part of Diamondback’s normal installation and set-up process, all pedal cranks must be tightened af- ter 8 to 10 hours of initial riding to ensure parts are properly seated to axle. This is standard initial “break- in”... -
Page 40: Domestic Warranty Information
Who is covered: The Warranty is extended to the individual or legal entity whose name appears on the Warranty registra- tion card fi led with Diamondback and may not be transferred to any other individual or legal entity. To obtain service: To obtain service you must contact your authorized Diamondback Fitness dealer. - Page 41 Parts & Service: Contact the authorized Diamondback dealer where unit was originally purchased. If you have moved, or that retailer is unavailable, use our dealer locator at www.diamondbackfi tness.com to help fi nd another authorized dealer. Diamondback is not responsible for arranging Warranty service and/or honoring extended warranties provided by dealers.
-
Page 42: Warranty Card
Warranty Card IMPORTANT! IMPORTANT! IMPORTANT! IMPORTANT! Warranty card must be completed and returned to Diamondback within 15 days of purchase. Failure to comply may void manufacturer’s Warranty. Or, you may register your product at www.diamondbackfi tness.com. Your Name: _____________________________________________________________________ Address: _______________________________________________________________________ City: ___________________________________State: ________________ Zip: _____________ Daytime phone No.: ___________________Evening phone No.: _____________________...
Need help?
Do you have a question about the 1000Sr Step-Thru and is the answer not in the manual?
Questions and answers