Pitney Bowes DM1100 Operator's Manual
Dm series digital mailing system
Hide thumbs
Also See for DM1100:
- Networking manual (14 pages) ,
- Resetting normal presets (2 pages) ,
- Instructions (2 pages)
Table of Contents
Advertisement
Quick Links
Download this manual
See also:
Network Manual
Advertisement
Chapters
Table of Contents

Subscribe to Our Youtube Channel
Related Manuals for Pitney Bowes DM1100


Summary of Contents for Pitney Bowes DM1100
- Page 1 DM1100™ DM Series Digital Mailing System ™ Operator Guide Canada English Version...
- Page 3 AccuTrac, Ascent, DM1100, DM Series, E-Z Seal, IntelliLink, WEIGH-ON-THE-WAY (WOW) Postage By Phone and Pitney Bowes Supply Line are trademarks or registered trademarks of Pitney Bowes Inc. ENERGY STAR® is a registered trademark of the United States Environmental Protection...
- Page 4 Use only a shielded interface cable to operate this equipment with a scale or other peripheral device CAUTION: Changes or modifications to this equipment not expressly approved by the party responsible for compliance (Pitney Bowes) could void the user’s authority to operate the equipment.
- Page 5 If trouble is experienced with this IntelliLink® Control Centre please contact the help desk for repair or warranty information. Refer to the Pitney Bowes Contact Information List in this guide for the number of the help desk. If the equipment is causing harm to the telephone network, the telephone company may request that you disconnect the equipment until the problem is resolved.
-
Page 7: Table Of Contents
Table of Contents Pitney Bowes Contact Information List Chapter 1 - Read this First Chapter 2 - Meet the DM Series Digital Mailing System Chapter 3 - Mail in a Minute Chapter 4 - Running Mail Chapter 5 - Mailing System Setup... -
Page 9: Pitney Bowes Contact Information List
For direct questions, call: 1.800.672.6937. Customer Service Represen- Our Help Desk tatives are available Monday through Friday, 8AM - 8:00PM EST. To contact, call 1.800.672.6937. Postage By Phone® To order Pitney Bowes approved supplies, call our PB Supply Line™ at Pitney Bowes 1.800.672.6937. Supplies SV62220 Rev. A... - Page 11 1 • Read This First What’s in this Guide ................1-2 Other Information ................. 1-2 What You Need to Know ..............1-3 Safety Requirements................1-3 Important Information About Powering Off Your DM Series™ Digital Mailing System ..................1-6 SV62220 Rev. A...
-
Page 12: Chapter 2 - Meet The Dm Series Digital Mailing System
Stacker module of your system. • Our Help Desk - For a list of the Pitney Bowes web sites, refer to the Pitney Bowes Contact Information List located at the front of this guide. 1 - 2... -
Page 13: What You Need To Know
• If you move to another Postal Code location, you must update the Postal Code. You can do this by calling your local Pitney Bowes support line. • Each time you add postage through the IntelliLink Control Centre, the Postage By Phone®... - Page 14 Pitney Bowes Service Representative. • Use only Pitney Bowes approved supplies, e.g., inks, tapes, and clean- ers. Call the Pitney Bowes Supply Line™ listed in the Pitney Bowes Contact Information List at the front of this guide. •...
- Page 15 To obtain Pitney Bowes supplies, please contact our Pitney Bowes Sup- ply Line™. Material Safety Data Sheets can be obtained on the web or from our Pitney Bowes Supply Line™. Refer to the Pitney Bowes Con- tact Information List at the front of this guide for phone numbers and web site information.
-
Page 16: Important Information About Powering Off Your Dm Series™ Digital Mailing System
1 • Read This First • Be certain the area in front of the wall receptacle into which the machine is plugged is free from obstruction. • To prevent overheating, do not cover the vent openings. • Read all instructions before attempting to operate the equipment. •... - Page 17 2 • Meet the DM1100™ Digital Mailing System Introducing the DM Series™ Mailing System ........2-2 Features and Benefits ................2-2 Parts of the Mailing System..............2-5 SV62220 Rev. A...
- Page 18 "sleep mode" if not used for a preset interval of time. This keeps energy consumption low, while maintaining the high state of readiness you expect from Pitney Bowes mail- ing equipment. ENERGY STAR qualified office and imaging products use as much as 60% less electricity than standard equipment.
- Page 19 • Ability to download some graphic images (such as special ad slogans) • Ability to download rate change and software updates You can use the following Pitney Bowes equipment with your mailing sys- Ability to Use tem: Other Pitney Bowes U7PS Power Stacker.
-
Page 20: Chapter 7 - Standard Accounting
Advertisements dard advertisements are included with your mailing system. You can order customized ads by calling the Pitney Bowes Supply Line™ (refer to the Pit- ney Bowes Contact Information List at the front of this guide for the phone number). For information on ordering ads, refer to Chapter 11, Supplies and Options in this guide. - Page 21 DM1100™ Digital Mailing System Operating Guide This section describes the parts of your DM1100 ™ mailing system and Parts of the includes: Mailing System • The Mailing System Exterior • The Mailing System Interior • The IntelliLink® Control Centre •...
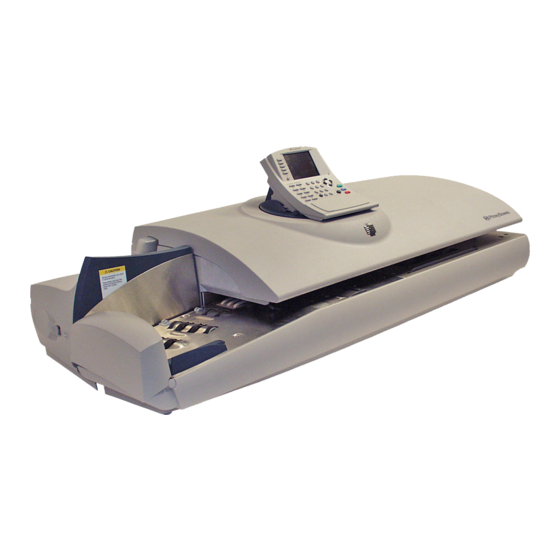
- Page 22 2 • Meet the DM1100™ Digital Mailing System The Digital Mailing System Exterior see inset 2 - 6 SV62220 Rev. A...
- Page 23 DM1100™ Digital Mailing System Operating Guide Refer to the diagram for the location of each component. Mailing System Interior Roll tape - The tape supply is located here. Print digital indicias on tape for pieces of mail that cannot go through the system. You can also print reports on tape.
- Page 24 2 • Meet the DM1100™ Digital Mailing System The Digital Mailing System Interior (see inset) USB Ports (USB network adapter can be plugged in here) Power Stacker Port USB Network Adapter and LAN Cable Serial Port 2 - 8 SV62220 Rev. A...
- Page 25 DM1100™ Digital Mailing System Operating Guide This section describes all of the function keys on the IntelliLink Control The IntelliLink® Centre, the control centre Main Screen, and the connectors on the back of Control Centre the control centre used to connect it to the AC adapter and to internal and external phone lines.
- Page 26 2 • Meet the DM1100™ Digital Mailing System Enter Key - Press to enter the information you have selected for the mailing system. Arrow Keys - Moves you to new menus, or scrolls menus and selects options. Start Key - Begins processing mail with the options you have selected.
- Page 27 DM1100™ Digital Mailing System Operating Guide The Main Screen The content of the main screen depends upon the current mode of the machine. Main screens are the only screens that contain a digital digital indicia replica area and a main status area.
- Page 28 Internal Analog Phone Line Connector Use this to connect directly to an analog phone line IntelliLink® Control Centre installed on a DM1100™ Digital Mailing System base. Dotted line indicates AC Adapter Receptacle is covered by base 2 - 12 SV62220 Rev. A...
- Page 29 3 • Mail in a Minute Mail in a Minute ..................3-2 Preparing Your Mail................3-2 Running the Mail .................. 3-3 Printing Postage Tapes ................ 3-4 Test Print/Zero Dollar Indica..............3-5 SV62220 Rev. A...
-
Page 30: Mail In A Minute
3 • Mail in a Minute This chapter explains how to quickly and easily get your system up and Mail in a Minute running to process mail or print a postage tape. Refer to the Specifications, Mailing Material in Chapter 12 in this guide to make sure your mail is compatible with your mailing system. -
Page 31: Running The Mail
DM1100™ Digital Mailing System Operating Guide 5. Use the thickness adjustment Normal Mail Setting knob to adjust for envelope thickness. • For thicker pieces of mail (3/8” to 5/8”), or mail contain- ing several inserts, use the thick mail setting. For most mail under 3/8", use the nor-... -
Page 32: Printing Postage Tapes
To use this feature you must know the amout of postage you want to print. You can easily determine this using a scale. CAUTION: Use only fresh rolls of Pitney Bowes tape to avoid distortion or stalls in the mechanism and possible loss of post- age. -
Page 33: Test Print/Zero Dollar Indica
For instructions on other ways of running your mail, see Chapter 4, Run- ning Mail. From time to time you or a Pitney Bowes Service Technician may want to Test Print/Zero conduct a test print to determine if your DM Series™ print mechanism is Dollar Indica operating correctly. - Page 34 3 • Mail in a Minute This page is intentionally blank. SV62220 Rev. A...
- Page 35 4 • Running Mail Navigating Hints ................... 4-2 Applying Postage and Running Mail ............ 4-3 Determining the Correct Postage Mode ..........4-4 Preparing Your Mail................4-6 Selecting the Postage Mode and Running the Mail ......4-10 Selecting or Deselecting an Account ..........4-16 Selecting the Class, Carrier, Special Services or Options ....
-
Page 36: Navigating Hints
4 • Running Mail • The maximum number of options displayed is 5. To view more options, Navigating press the down arrow key. Hints • You can select a numbered option either by pressing the screen key next to the option, or by pressing the corresponding number on the key- board and then pressing the Enter key. -
Page 37: Applying Postage And Running Mail
DM1100™ Digital Mailing System Operating Guide To apply postage and run mail on the DM1100™ mailing system, follow the Applying procedures listed here. Postage and You must follow procedures 1 and 2 before you run mail through the sys- Running Mail tem and apply postage. - Page 38 4 • Running Mail Determining Feeding Mail or Printing Tape? 1. If your mail requires no application of postage, see Chart C on the fol- the Correct lowing page to choose your mode. Postage 2. If your mail requires postage, you must determine if you can print Mode directly on your mail.
- Page 39 DM1100™ Digital Mailing System Operating Guide Chart B - Postage Tape Mode Then use this mode: Attached Scale You do not know the weight of your piece of (An option you may be able to mail. purchase. Not available on all systems.)
-
Page 40: Preparing Your Mail
4 • Running Mail If you intend to run pieces of mai through your system, read About Running Preparing Mail below. If you are going to print postage tapes, read About Printing Your Mail Postage Tapes in this section. Then, proceed to instructions for selecting the mode and running the job. Refer to Chapter 12, Specifications in this guide to make sure your mail is compatible with your mailing system. - Page 41 DM1100™ Digital Mailing System Operating Guide 4. Use the thickness adjustment Normal Mail Setting knob to adjust for envelope thickness. • For thicker pieces of mail (3/8” to 5/8”), or mail contain- ing several inserts, use the thick mail setting. For most mail under 3/8", use the nor-...
- Page 42 4 • Running Mail • Presealed Envelopes: If you are using presealed envelopes, make Tips on Feeding sure you press the Seal key on the IntelliLink® Control Centre and Mail select Sealer off or the envelopes will jam. • Pieces of mail that are 5/8" thick: If you are running pieces of mail that are each 5/8”...
- Page 43 The mailing system is designed to use a special pressure sensitive adhe- sive tape made exclusively for it. CAUTION: Use only fresh rolls of Pitney Bowes® tape to avoid distortion or stalls in the mechanism and possible loss of postage.
- Page 44 4 • Running Mail Once you decide the appropriate mode for Selecting running your mail job, you select the mode Select Mode the Postage on your mailing system. To access the Reduced Speed Mode and modes, press the Mode key on the WOW - Weigh on the Way Running the IntelliLink®...
- Page 45 DM1100™ Digital Mailing System Operating Guide The WOW™ feature increases your productivity by weighing the piece of Mode Selection: mail and applying the correct postage as it travels through the mailing WOW™ - WEIGH- machine. ON-THE-WAY™ WARNING! Do not lean on or disturb the system while it is process- ing mail in this mode.
- Page 46 4 • Running Mail This option is available on your system if it has an attached external scale. Mode Selection: Differential This option allows you to place all of the mail on the scale at once, then remove each piece, one at a time and run it through the system. The sys- Weighing tem calculates the postage for each piece of mail you remove from the scale and applies the postage to the piece as it goes through the mailing...
- Page 47 DM1100™ Digital Mailing System Operating Guide To perform manual weight entry: Mode Selection: 1. Press the Mode key. Manual Weight 2. Select Manual Weight Entry. Entry • For Imperial weight: Enter number of pounds. Press theright arrow key to enter the number of ounces.
- Page 48 4 • Running Mail If the attached scale is particularly sensitive, run this mode with the Auto- Mode Selection: scale feature set to Off. This will prevent the system from automatically Attached Scale reverting to Attached Scale mode when WOW™ mode is in use. Use this option If the AutoScale feature is set to Off.
- Page 49 DM1100™ Digital Mailing System Operating Guide Time Date Stamping mode allows you to print the current time and date, Mode Selection: along with the word “Received” on incoming mail. Time and Date The time and date will remain the same during a single transaction Stamping (whether you process a single envelope or 100 envelopes.) The system will...
-
Page 50: Selecting Or Deselecting An Account
4 • Running Mail If you use Standard Accounting, you must select an account. If you are Selecting or using Budget Manager or Business Manager refer to the operator guide or Deselecting help system provided with those applications. an Account You can select an account manually by scrolling through the entire list of Selecting an accounts on your system. - Page 51 DM1100™ Digital Mailing System Operating Guide 4. Select the account you want to use: • Press Enter to select the account that most closely matches the characters you searched on; or • If a list of account names appear on the screen, press the screen key that corresponds with the account you want to use.
-
Page 52: Selecting The Class, Carrier, Special Services Or Options
4 • Running Mail Each carrier has its own set of classes and each class has its own set of Selecting special services. When you select a class or carrier, only those options the Class, available for that selection display in the main screen. Carrier, NOTE: When selecting a class/carrier: Special... -
Page 53: Selecting The Meter Stamp Options
DM1100™ Digital Mailing System Operating Guide The Meter Stamp Options selection allows Selecting you to change the elements printed on your Meter Stamp Options the Meter piece of mail or tape. Date Stamp You access the Meter Stamp Options by... - Page 54 4 • Running Mail You can have a variety of advertisements appear on your mail. Meter Stamp Options: To add more advertisements, refer to Performing Updates or Adding Fea- tures in Chapter 9 in this guide. Advertisement 1. Press the Menu key. 2.
-
Page 55: Adding Postage Or Changing The Date
DM1100™ Digital Mailing System Operating Guide If you do not have the correct postage on a piece of mail, you can add more Adding postage directly on a piece of mail. If you prefer, you can print the correc- Postage or tions on at a tape instead and then apply it to the piece of mail. -
Page 56: Advancing The Date
4 • Running Mail 7. Turn your mail piece around 180 degrees so that the original digital indi- cia is in the lower left corner as shown here: 8. Then place the envelope in the feed deck with the flap facing down and press the Start key. - Page 57 DM1100™ Digital Mailing System Operating Guide 5. Place the envelope in the feed deck with the flap facing down and press the Start key. If you would prefer to print a tape to evidence the date correction, press the Tape key and apply the tape to the appropriate place on the mail piece.
-
Page 58: Clearing The Batch Count
4 • Running Mail 4. Enter the appropriate amount for your manifest statement and the press Enter a second time to return to the main screen. 5. Place a mail piece on the scale or enter weight manually depending on the current mode of your system. - Page 59 5 • Mailing System Setup Navigating Hints ................... 5-2 Overview of Mailing System Set Up ............. 5-3 Setting the Display Language .............. 5-4 Adjusting Display Contrast ..............5-4 Adjusting the Feeder Deck Sensor ............5-4 Setting the Date and Time of Day ............5-5 Setting Up a Supervisor Password ............
-
Page 60: Navigating Hints
5 • Mailing System Setup • The maximum number of options displayed is 5. To view more options, Navigating press the down arrow key. Hints • You can select a numbered option either by pressing the screen key next to the option, or by pressing the corresponding number on the key- board and then pressing the Enter key. -
Page 61: Overview Of Mailing System Set Up
DM1100™ Digital Mailing System Operating Guide Follow the other procedures listed here as needed. Overview of For details on each procedure, refer to the section number listed here. Mailing System Set Up Set the Display Language. Adjusting the Display Contrast. -
Page 62: Setting The Display Language
4. Press the Enter key to save this setting. The feeder deck sensitivity adjustments improve mail piece sensing capa- Adjusting bilities on DM1100™ mailing systems, eliminating the need to press down the Feeder on the hopper mail stack to activate the feeder. -
Page 63: Setting The Date And Time Of Day
DM1100™ Digital Mailing System Operating Guide If your mail is picked up at a certain time each day, you can set your system Setting the to advance the date at the mail pickup time. Date and Time of Day NOTE: The date on the digital indicia should correspond to the date when your mail goes to the post office. -
Page 64: Setting Up A Supervisor Password
5 • Mailing System Setup You can limit access to the following operations by creating a supervisor Setting Up a password. Supervisor • Adding Postage (Refill) Password • Clearing Batch Information (the number of pieces of mail your system processes) •... -
Page 65: Setting Up The Scale And Selecting Rates
Refer to the documentation that arrived with the scale, or contact the Pitney Bowes Help Desk. Refer to the Pitney Bowes Contact Information List at the front of this guide for the phone number. - Page 66 5 • Mailing System Setup You can set the WOW™ weight limit to prevent the system from printing Scale/Rates: postage on pieces of mail that exceed a set weight. WOW™ Weight 1. Press the Menu key on the control centre and select Set Up. Press the Limit down arrow key and select Scale/Rates.
- Page 67 DM1100™ Digital Mailing System Operating Guide Use this option to set the system to prompt you to select a new destination Scale/Rates: (Postal Code, Zone code or country) for each piece of mail weighed, or to Destination if keep the last destination used.
-
Page 68: Setting Up Postage By Phone
Set Up: PBP ber is supplied by Pitney Bowes when you order your system. Account # Do not change this unless you are directed to do so by Pitney Bowes. NOTE: Features/ Services may vary by model and or country. - Page 69 DM1100™ Digital Mailing System Operating Guide Use this option to enter your local phone number (the number to which your Phone/Network mailing system is connected). Set Up: My 1. Press the Menu key on the control centre. Select Set Up from the main Phone # screen, then select Phone/Network Set Up.
- Page 70 Set Up: Network Changing these parameters may result in errors CAUTION: Settings when trying to contact Pitney Bowes. Contact your Pitney Bowes representative or call the Help Desk if you are not sure. Refer to NOTE: Features/ at the front of this...
-
Page 71: Configuring High/Low Funds Warning
DM1100™ Digital Mailing System Operating Guide Configuring Setting the Low Funds Warning Value Use this option to set a value at which the mailing system warns you that High/Low the funds remaining in the meter are getting low. Funds NOTE: This option does not appear if the Automated Meter Refill feature is Warning turned on. -
Page 72: Configuring System Timeouts
5 • Mailing System Setup This section describes how to set various Configuring system timeouts for your mailing system. Timeouts System 1. To access the system timeouts, press Timeouts Display Sleep the Menu key on the control centre, and System Sleep select Set Up. - Page 73 DM1100™ Digital Mailing System Operating Guide The normal preset timer option allows you to specify how much time you Timeouts: want to allow the system to remain idle before it returns to the Normal Pre- Normal Preset set settings (refer to Define Preset section in this chapter for more informa- Timer tion on Normal Presets).
-
Page 74: Defining Presets
5 • Mailing System Setup You can define up to 10 sets (0-9) of preset mailing system values, with Defining each set having different values for such items as the account name, post- Presets age value, class, carrier, a special service, a mode such as Seal Only or Differential Weighing, and the like. - Page 75 This feature may be offered as a standard or optional feature and is not Store Advance available on all Pitney Bowes solutions. Please contact your local account Date in a Custom representative to determine if this option is accessible on your system.
- Page 76 5 • Mailing System Setup • if you recall the preset on the next day (Thursday) it will print Saturday's date on your postage. * To set advance date, press the Menu button, select Meter Stamp Options, then select Advance Date. Example 2 - If you have previously set up your system so that it automati- cally advances the date at 3 PM*, and you created a custom preset with the Advance Date set to zero (that is, you did not advance the date), then:...
-
Page 77: Taking The Intellilink® Control Centre Out Of Service
Start key. To print on a tape, simply press the Tape key. You can connect a Pitney Bowes IE08 printer to your mailing system. To Adding an... -
Page 78: Configuring The Optional Barcode Scanner
5 • Mailing System Setup If you have a barcode scanner attached to your mailing system, you can Configuring configure it to scan: the Optional • account names, Barcode • account codes (Business Manager only), Scanner • speed codes (Budget Manager only), •... - Page 79 DM1100™ Digital Mailing System Operating Guide If you are using an accounting system on your mailing system you can set Setting the up the scanner so that it knows what field is scanning without using a prefix Default Scan code. Your selection of Account Name or Account Code depends on your Type accounting system.
- Page 80 5 • Mailing System Setup If you are going to scan multiple fields, you will need to create barcodes Adding Barcode that contain a 1 or 2 digit prefix. This prefix identifies the field you are scan- Prefixes ning. You may use this if you are transferring accounts from a different accounting system like the Paragon®, or from a set of pre-printed barcode labels that have a prefix as part of the barcode.
- Page 81 DM1100™ Digital Mailing System Operating Guide If you need to combine multiple barcode scans into a single barcode, use Combining this setup option. For example, the typical barcode scanner can only Barcodes accept a maximum of 30 characters. If you want to scan an account name that contains more than 30 characters, say 50 characters, you add a "join...
- Page 82 5 • Mailing System Setup You can set up your system so that after it scans in a barcode value and Setting displays it on the IntelliLink® Control Centre screen, it requires you to press Auto-Enter the Enter key to accept that value. You can do this if you want to be sure that an operator verifies that the correct barcode has been scanned.
- Page 83 6 • Adding Postage Postage By Phone®................6-2 Your Postal Security Device (PSD) ............6-2 Connection Alternatives ............... 6-3 Postal Requirements: Rekeying ............6-3 Managing Your Postage Funds ............6-4 Connecting Your IntelliLink® Control Centre to a LAN......6-4 Connecting Your IntelliLink® Control Centre to an Analog Phone Line6-5 Checking Available Funds in Your System...........
-
Page 84: Postage By Phone
IntelliLink® Control Centre even more convenient. Postage By Phone® Phone is a Pitney Bowes service that you use to add postage to your sytem. You can access Postage By Phone 24 hours a day, 7 days a week through your IntelliLink®... -
Page 85: Connection Alternatives
Shared Analog Connection - the phone line comes out of the wall, but may be used for a fax machine. The phone line is either detached from the fax machine and used for the Pitney Bowes connection, or a splitter is installed to facilitate a connection to this shared line. -
Page 86: Managing Your Postage Funds
Automated Postage Refill. Follow this procedure to set up automatic postage refills on your IntelliLink® Control Centre. Adding postage funds to your system is fast, easy, and convenient. Con- Connecting nect to Pitney Bowes through the internet using your organization’s Local Your Area Network (LAN). IntelliLink®... - Page 87 IntelliLink® Control Centre installed on a DM1100™ Digital Mailing System base. Dotted line indicates AC Adapter Receptacle is covered by base If you need to connect to an analog phone line that is not located near your Connecting Your mailing system, you can remove the IntelliLink®...
-
Page 88: Checking Available Funds In Your System
6 • Adding Postage 7. Add or check your postage funds as described in Checking Your Postage By Phone® Account Balance in this chap- ter. 8. Unplug the telephone cord and the A/C Adapter. 9. Reinstall the IntelliLink® Con- trol Centre by sliding it into the docking station on top of the mailing system until you hear it click into place. -
Page 89: Chapter 8, Reports
(up to $1000). Use whole dollars only; do not key in cents. Your meter automatically adds two decimal places. 6. Press the Enter key. The system contacts Pitney Bowes to connect to your account and begins to add the postage to your meter. - Page 90 Refer to the Contact List at the beginning of this guide for the number. Your system will dial Pitney Bowes and automat- ically connect to your Pitney Works account. Simply add up to the Funds Available amount displayed on the main screen.
- Page 91 LAN connection using an approved Ethernet device. When this feature is enabled, your system will automatically initiate contact with Pitney Bowes to refill your meter according to the values you establish in the system. Your mailing system will only initiate a refill when the system powers down (Sleep Mode), wakes up (if it was turned off), or if your Intel- liLink®...
- Page 92 6 • Adding Postage 1. Press the Menu key. Setting the Low 2. Select Set Up then select Basic Settings. The Basic Settings screen Funds Value appears. 3. Press the down arrow key and select Low Funds Value. 4. Press the Clear key and then enter the amount you want to activate the automatic refill.
- Page 93 7 • Standard Accounting Navigating Hints ................... 7-2 Overview of Accounting ............... 7-3 Using the Account Setup Procedures ..........7-4 Viewing Accounts ................. 7-5 Creating Accounts ................7-5 Editing Accounts .................. 7-7 Setting an Account Period..............7-7 Turning Standard Accounting On or Off ..........7-8 Deleting Accounts ................
-
Page 94: Navigating Hints
7 • Standard Accounting • You can access all of the accounting features by pressing the Navigating Accounts key on the IntelliLink® Control Center. The system displays Hints the account names in the format shown here (Standard Accounting): Select Account 0. -
Page 95: Overview Of Accounting
DM1100™ Digital Mailing System Operating Guide The information in this chapter describes how to set up the Standard Overview of Accounting package provided with your mailing system. If you purchased Accounting the enhanced accounting package, Budget Manager, or if your system is connected to an AccuTrac™... -
Page 96: Using The Account Setup Procedures
7 • Standard Accounting The following is a list of all the account setup procedures. For details on Using the each procedure, refer to the section number listed here. Account Setup Procedures Viewing Accounts. Creating Accounts. Editing Accounts. Setting an Accounting Period. Turning Accounting On or Off. -
Page 97: Viewing Accounts
DM1100™ Digital Mailing System Operating Guide 1. Press the Accounts key. Viewing 2. Press the right arrow key to enter the “Set Up Accounts” screen. Accounts 3. Select View Accounts. 4. The names of your top level accounts appear. Select the account you want. - Page 98 7 • Standard Accounting 1. Press the Accounts key. Creating a New 2. Press the right arrow key to enter the “Set Up Accounts” screen. Subaccount or 3. Select Create Account/Sub. Subsubaccount 4. Select Add to an Existing Account. The system displays a list of all of the accounts and prompts you to select the account to which you would like to add a subaccount or subsubaccount.
-
Page 99: Editing Accounts
DM1100™ Digital Mailing System Operating Guide You can change the name of an account, make the account inactive (or Editing active), add a password or change an existing one, and clear (reset) all Accounts data from the account. 1. Press the Accounts key. -
Page 100: Turning Standard Accounting On Or Off
7 • Standard Accounting To turn the standard accounting package provided with your system on or Turning off: Standard 1. Press the Accounts key. Accounting 2. Press the right arrow key to enter the “Set Up Accounts” screen. On or Off 3. -
Page 101: Resetting (Clearing) All Accounts
DM1100™ Digital Mailing System Operating Guide When you reset or clear your accounts, you completely remove all of the Resetting data in all of your accounts. Once you clear the data, you cannot retrieve it. (Clearing) To keep a record of your data, be sure and print a Multi-Account Summary all Accounts Report. -
Page 102: Transferring Funds
7 • Standard Accounting To transfer funds: Transferring 1. Press the Accounts key. Funds 2. Press the right arrow key to enter the “Set Up Accounts” screen. 3. Select Transfer Funds. The system displays a list of your chargeable accounts. You can transfer funds used and piece count among accounts, subaccounts and subsubaccounts only if they are working accounts (the lowest, or sole link in the account chain). -
Page 103: Selecting An Accounting Type
DM1100™ Digital Mailing System Operating Guide To select and accounting type, or to disable the accounting feature on your Selecting an mailing system, follow the procedure here. Accounting 1. Press the Accounts key. Type 2. Press the right arrow key to enter the “Set up Account” screen. -
Page 104: Your Accounting System Features
7 • Standard Accounting You can configure your mailing system to track and account for postage Your used by departments or individuals within your organization. Your system Accounting stores the following information for each account. System • Account name (alphanumeric) Features 32 characters for top level accounts 16 characters for subaccounts... - Page 105 DM1100™ Digital Mailing System Operating Guide • If you create subsubaccounts for subaccounts, the subsubaccounts become the end links and identify the departments that are charged for postage. EXAMPLES: Account - Engineering, Subaccount - Software, Subsubaccount - Software Testing Account - Engineering, Subaccount - Software,...
- Page 106 7 • Standard Accounting Hierarchal Reporting Structure ACCOUNT Total funds used and Engineering pieces processed for all accounts below. SUBACCOUNTS Industrial Total funds used Software Design and pieces processed for all accounts below. User Software Software Graphics Friendly Testing Design Layout Testing SUBSUBACCOUNTS...
- Page 107 8 • Reports Introduction ..................8-2 Viewing a Report .................. 8-2 Printing a Report .................. 8-2 Single Account Report ................. 8-3 Multi-Account Summary Report ............8-4 Last Five Refills Report ................ 8-6 Account List Report (External Printer Required) ........8-7 Funds Report ..................
-
Page 108: Introduction
8 • Reports Creating a report is quick and easy on your mailing system. With the capa- Introduction bility to print out reports on roll tape or envelopes using the internal mailing system printer, you can easily keep an accurate record of all your mailing activities. -
Page 109: Single Account Report
DM1100™ Digital Mailing System Operating Guide The Single Account Report gives the total pieces of mail and the postage Single Account for a selected account. After you select Single Account Report the last Report account used is displayed. To view another account, press the screen key for Select Another Account. - Page 110 8 • Reports Multi-Account Internal Printer Version The Multi-Account Summary supplies the total pieces and postage for all Summary enabled accounts. Report You can view and print the Multi-Account Summary report sorted by NOTE: Reports may account number, as well as by account name. When viewing this report, vary by model and or press the left arrow key to toggle between the account name and account country.
- Page 111 DM1100™ Digital Mailing System Operating Guide This version of the Multi-Account Summary can only be printed on an External Printer attached external printer. Account numbers are only assigned to the lowest Version level of the account hierarchy or transaction level. Account numbers will NOTE: Reports may only appear if the account does not have subaccounts.
-
Page 112: Last Five Refills Report
8 • Reports The Last Five Refills Report lists the last five refills for any enabled account Last Five Refills and prints the information on a single envelope or strip of tape. The refills Report are displayed in chronological order. NOTE: Reports may vary by model and or country. -
Page 113: Account List Report
DM1100™ Digital Mailing System Operating Guide The Account List Report lists the names and numbers of all accounts that Account List are set up in your mailing machine. Report (External Printer Screen Display Required) Account List NOTE: Reports may Number... -
Page 114: System Set Up Report
Accounting Set Up: Accounting Feature on/off, System, Passwords, Number of Accounts. • Modem Set Up: Dial Out Prefix, Dial Method, Local Number, Pitney Bowes Number, PBP Account, Initialization String. • Scale Settings: Adjustment for Motion, AutoScale, Trip Weight, Units, Origin, Location Code, AutoClear, Clear Zone If New Class, Code/Zone Prompt, Dis- count Code, Scale Capacity. -
Page 115: Error Report
This feature may be offered as a standard or optional feature and is not Error Report available on all Pitney Bowes solutions. Please contact your local account NOTE: Reports may representative to determine if this option is accessible on your system. -
Page 116: Job Report
This feature may be offered as a standard or optional feature and is not Job Report available on all Pitney Bowes solutions. Please contact your local account NOTE: Reports may representative to determine if this option is accessible on your system. -
Page 117: Installed/Pending Rates Report
DM1100™ Digital Mailing System Operating Guide This report displays only on the screen. Installed/ Pending Rates Rate: Report Description (name) File Name NOTE: Reports may Part Number vary by model and or Version country. Service level Effective date Active or Inactive This report displays only on the screen. - Page 118 8 • Reports 8-12 SV62220 Rev. A...
- Page 119 9 • Maintaining and Updating Items to Keep On Hand ................9-2 Cleaning the Exterior ................9-2 Tape Maintenance ................9-3 E-Z Seal® Sealing Solution Maintenance ..........9-4 Printer Maintenance ................9-5 Replacing the Ink Cartridge ..............9-7 Changing the Printhead................9-9 Changing the Wiper Blade Assembly ..........9-11 Performing Updates or Adding Features ..........9-12 SV62220 Rev.
-
Page 120: Items To Keep On Hand
9 • Maintaining and Updating The following is a list of items you should keep on hand: Items to Keep On Hand • Ink Cartridge • Tape Roll • E-Z Seal® Sealing Solution Refer to Chapter 11, Supplies and Options for details on how to order these items. -
Page 121: Tape Maintenance
Replace the tape when the stripe appears. To order new tape, refer to Chapter 11, Supplies and Options in this guide. CAUTION: If you do not use Pitney Bowes supplied tape, you will not be able to determine when the tape is running out and this may cause a jam. -
Page 122: E-Z Seal Sealing Solution Maintenance
50 envelopes. Solution Maintenance CAUTION: • Pitney Bowes recommends using E-Z Seal® Solution because it helps keep your moistener tank clean and improves sealing efficiency. To order E-Z Seal® Solution, refer to Chapter 11, Supplies and Options in this guide. •... -
Page 123: Printer Maintenance
If the print quality deteriorates and you cannot improve it with the proce- dures in this chapter, contact the Pitney Bowes Help Desk. Refer to the Pitney Bowes Contact Information List at the front of this guide for the phone number. - Page 124 9 • Maintaining and Updating If you notice the digital indicia is not printing completely and there are white Cleaning the lines going through it, you will need to perform printer maintenance. First, Printhead clean the printer nozzle. Nozzles Good Poor 1.
-
Page 125: Replacing The Ink Cartridge
DM1100™ Digital Mailing System Operating Guide • If the test pattern has missing or incomplete lines as shown here, press No, clean the print nozzle screen key. Go to step 7. Poor Quality Test Pattern 6. The “Cleaning Print Nozzle” screen displays until the cleaning operation completes. - Page 126 9 • Maintaining and Updating 1. Lift up the main cover and Ink Cartridge Lid locate the ink cartridge lid. 2. Push the tab on the front of the cartridge lid. Lift the lid up and push toward the back of the machine. 3.
-
Page 127: Changing The Printhead
DM1100™ Digital Mailing System Operating Guide If you have cleaned the printer nozzle and changed the print cartridge and Changing the the digital indicia is still not satisfactory, replace the printhead. Printhead CAUTION: Do NOT attempt to clean the printhead. - Page 128 9 • Maintaining and Updating This exposes the print- Printhead Cover head cover. 6. Grasp the printhead cover and pull as shown here. Printhead Standoff 7. Grasp the printhead stand-off and lift the printhead up and out. 8. Discard the old print- head.
-
Page 129: Changing The Wiper Blade Assembly
DM1100™ Digital Mailing System Operating Guide When you change the printhead, you must also replace the wiper blade Changing the assembly. Wiper Blade Instructions for replacing the wiper blade assembly are included with each Assembly replacement and are repeated here for your convenience. -
Page 130: Performing Updates Or Adding Features
2. Select Set Up and then press the down arrow key. Adding 3. Select Updates and Add-Ons. Features 4. Select Check for Updates. The system connects to Pitney Bowes and requests a list of updates. • If no updates are available, click OK to exit the screen. - Page 131 10 • Troubleshooting How to Troubleshoot your Mailing System ......... 10-2 Width Sensor Warnings..............10-2 Hopper Sensitivity Adjustments............10-2 Ink Waste Tray Full Warning .............. 10-3 Envelope Sealing Problems ............... 10-4 Envelope Feeding Problems .............. 10-5 Tape Feeding Problems ..............10-9 IntelliLink®...
-
Page 132: How To Troubleshoot Your Mailing System
Desk or you can schedule a request for service at our web site. Refer to the System Pitney Bowes Contact Information List at the front of this guide for the phone number of the Help Desk and the web site addresses. -
Page 133: Ink Waste Tray Full Warning
DM1100™ Digital Mailing System Operating Guide The Ink Waste Tray Full Warning appears when you power up or exit sleep Ink Waste Tray mode on the mailing system. It indicates that the ink waste tray is Full Warning approaching maximum capacity. Contact your customer service represen- tative to schedule replacement of the ink waste tray. -
Page 134: Envelope Sealing Problems
Tighten the solution bottle cap. leaking. secured tightly. Solution was poured Call the help desk. Refer to the Pitney Bowes Contact directly into the tank or Information List in this guide for more information. there is a leak in the solu- tion tubing. -
Page 135: Envelope Feeding Problems
DM1100™ Digital Mailing System Operating Guide Envelope Feeding Problems Description Possible Causes Solution More than one enve- Too many envelopes are on the • Remove some of the envelope and test lope is feeding. feed deck; envelopes are not with a smaller stack. - Page 136 10 • Troubleshooting Envelope Feeding Problems Description Possible Causes Solution Mail is not feeding Light mail/postcard knob is not at • Turn the knob to the left for postcards and into the system cor- the proper setting. light mail. rectly. •...
- Page 137 DM1100™ Digital Mailing System Operating Guide Envelope Feeding Problems Description Possible Causes Solution Mail transport stall. • Envelopes dimensions are Refer to the Specifications section in this guide outside the acceptable range for the acceptable envelope dimensions. (piece of mail is too thick,...
- Page 138 10 • Troubleshooting Envelope Feeding Problems Description Possible Causes Solution Mail transport stall. • Envelopes dimensions are To clear a stall in the transport area: (continued) outside the acceptable range 1. Lift the main cover. (piece of mail is too thick, 2.
-
Page 139: Tape Feeding Problems
Tape track is dirty or clogged. Call the Help Desk for help clearing the tape Adhesive is on track. track. Refer to the Pitney Bowes Contact Infor- mation List in the guide for more information. SV62220 Rev. A 10-9... - Page 140 10 • Troubleshooting Tape Feeding Problems Description Possible Causes Solution Tape does not Tape is sticking to dried glue on Remove brush and clean under cold water. remove easily. moistening brush. Refer to the Moistener Maintenance section in Chapter 10, Maintaining and Updating for more information.
- Page 141 4. Pull out brush and readjust to longer length. 5. Reinstall brush and release holder to return original position. Valve in moistener bottle cap is Call the Help Desk. Refer to the Pitney Bowes not working. Contact Information List in the guide for more information Low E-Z Seal®...
- Page 142 10 • Troubleshooting Tape Feeding Problems Description Possible Causes Solution Adhesive tape gets Wet/dry lever set into wet position. Set wet/dry lever down to dry position. wet. Moistener brush is set too high. Remove tape brush and reset at a lower posi- tion in its holder.
-
Page 143: Intellilink® Control Centre Problems
DM1100™ Digital Mailing System Operating Guide IntelliLink® Control Centre Problems Description Possible Causes Solution IntelliLink® Control • Make sure the AC adapter is plugged into No power is going to IntelliLink® Centre does not Control Centre. the back of the control centre. -
Page 144: Weigh-On-The-Way™ Problems
10 • Troubleshooting IntelliLink® Control Centre Problems Description Possible Causes Solution Wrong ad, yet Mailing system is reset to factory 1. Select desired graphic. appears in menu list. default mode. 2. Push the Menu key. 3. Select Meter Stamp Options. 4. -
Page 145: Printing Problems
Postal Inspection is required. Your Add postage. If you do not need to add postage mailing system performs an auto- at this time, simply connect to the Pitney Bowes matic postal inspection every time Data Centre and check for updates. The sys- you do a refill. - Page 146 10 • Troubleshooting Printing Problems Description Possible Causes Solution Digital indicia imprint The printer nozzle requires main- Clean the printer nozzle and run a test print as is streaked or tenance. described in Chapter 10 in this guide. incomplete; poor You need to change the print- If you have already cleaned the printer nozzle print quality:...
-
Page 147: Postage Refill Problems
DM1100™ Digital Mailing System Operating Guide Postage Refill Problems Description Possible Causes Solution Refill operation fails Reconnect the phone line to the back of the Phone line is not connected to an when IntelliLink® analog line or is loose. IntelliLink® Control Centre. -
Page 148: Getting Help
If you are unable to find a solution for your problem, you can visit our web site or call for service. Refer to the Pitney Bowes Contact Information List at the front of this guide for all contact phone numbers and web addresses. - Page 149 11 • Supplies and Options Ordering Supplies................11-2 Ordering a Pitney Bowes Supply Catalog .......... 11-2 Printhead Kit and Wiper Blade Replacments ........11-2 Accessories You Can Order ............... 11-3 SV62220 Rev. A...
- Page 150 Pitney Bowes web site. Refer to the Pitney Bowes Supplies Contact Information List at the front of this guide for the Pitney Bowes Sup- ply Line™ phone number and the web site addresses. The Pitney Bowes web site features a wide assortment of genuine Pitney Bowes supplies at attractive prices.
- Page 151 Accessories Advertisements A number of advertisements are included with your mailing machine. Call You Can Order the Pitney Bowes Supply Line™ for a catalog at or visit our web site: • to order additional advertisements, or • to get information about customized advertisements.
- Page 152 11 • Supplies and Options 11 - 4 SV62220 Rev. A...
-
Page 153: Chapter 12 - Specifications
12 • Specifications Equipment Specifications ............... 12-2 Accounting Features ................12-4 Mailing Materials ..................12-4 SV62220 Rev. A... -
Page 154: Equipment Specifications
12 • Specifications Equipment Specifications Dimensions Length without a Drop or Power Stacker 58.5 in. (1485.8mm) Length with a Drop Stacker 77 in. (1955.8mm) Length with a Power Stacker 88" (2235.2mm) 104.5" (2654.3mm) when stacker is fully extended Width 24 in. (609.6mm) Height (cover closed) 21 in. - Page 155 DM1100™ Digital Mailing System Operating Guide Ink Capacity 45,000 pieces with no advertisements or permits, 30,000 pieces with advertisements or permits 1.5 years shelf/installed life Ink Usage Messages • Order Ink - This message indicates that there are approximately 10 days of ink remaining. This message is drop count controlled and calculated by a chip within the print head carriage.
-
Page 156: Accounting Features
12 • Specifications Accounting Features Standard Accounting • Up to 300 accounts • Up to 15 operators • 2 custom reports • Up to 4,000 transactions Optional Budget Manager • Up to 1500 accounts • Up to 50 operators • 1-32 custom carriers •... - Page 157 DM1100™ Digital Mailing System Operating Guide 15 in. (381 mm) 3 7/8 in. (98.4mm) Maximum 13 in. (330 mm) 5 in. (127 mm) 1 in. (25.4 mm) 3.5 in. (88.1 Minimum SV62220 Rev. A 12-5...
- Page 158 12 • Specifications 12-6 SV62220 Rev. A...
-
Page 159: Appendix A - Glossary
A • Glossary Glossary SV62220 Rev. A... - Page 160 Press to clear an entry or if no data has been entered press to take you to the previous screen. Communications Port Place to connect an optional Pitney Bowes scale, printer, or a PC. Control Centre The IntelliLink® Control Centre is the module mounted on top of the mailing machine that contains the graphic display, function keys, alpha, and numeric keys and the Postal Security Device (PSD).
- Page 161 A plug on the machine that allows you to connect an optional external device, such as a scale or a PC. E-Z Seal® Sealing The envelope moistening solution you can order from the Pitney Bowes Solution Supply Line™. Feed Deck The area of the mailing machine where you feed the envelopes.
- Page 162 Mode Key Press to choose from a variety of mail processing modes. Modem That part of the mailing system that dials the Pitney Bowes Postage By Phone® centre and transfers information over the phone. Numeric Keys The part of the IntelliLink® Control Centre that you use to enter amounts and numbers.
- Page 163 DM1100™ Digital Mailing System Operating Guide Stacker The holder at the end of the feeder path where mail is deposited. Two types of stackers are available: tabletop drop-stacker and power-stacker. Supervisor Password Code that restricts access to certain mailing system operations.
- Page 164 A • Glossary A - 6 SV62220 Rev. A...
-
Page 165: Index
2-4 11-2 Accounting set up mode 7-2 turning off accounting 7-11 Catalog Accounting and Reporting 2-4 ordering a Pitney Bowes Supply catalog 11-2 Accounts Class accessing features 7-2 selecting class, carrier, special services 4-18 adding subaccounts to 7-5 Class key... - Page 166 Index Loading a tape roll 9-3 Lock button Features description and location 2-9 adding new features 9-12 Low Funds Value 6-9 6-10 Funds Low funds warning setting the high value warning 5-13 description 5-13 setting the low value warning 5-13 setting up 5-13 tranferring account funds 7-10 Funds key...
- Page 167 7-5 funds 8-7 Permit installed or pending rates 8-11 defined 2-4 job 8-10 Pitney Bowes Supply Line™ 2-4 last 5 refills 8-6 Postage By Phone last rates downloaded 8-11 checking funds in account 6-6 multi-account summary 8-4...
- Page 168 Index Tape installing 9-3 lever, wet/dry 2-5 ordering 11-2 roll 2-7 specifications 12-4 Thickness adjustment knob location 2-7 Time and Date Stamping Mode 4-15 Timeouts display sleep 5-14 feeding timeout 5-15 normal preset timer 5-15 system sleep 5-14 transaction timeout 5-15 Troubleshooting display problems 10-14 weighing problems 10-14...
-
Page 170: Sv62220 Rev. A
5500 Explorer Drive Mississauga, ON L4W 5C7 www.pitneybowes.ca For Service or Supplies Web Site: www.pitneybowes.ca Customer Support: 1-800-672-6937 Product Name: DM1100 Model Number: DM1100 PB Form SV62220 Rev. A 09/08 © 2008 Pitney Bowes Inc. All Rights Reserved *sv62220reva*...
Need help?
Do you have a question about the DM1100 and is the answer not in the manual?
Questions and answers