Pitney Bowes DM100i Series Quick Install Manual
Hide thumbs
Also See for DM100i Series:
- Operator's manual (218 pages) ,
- Service manual & parts list (64 pages) ,
- Quick install manual (48 pages)
Advertisement
Quick Links
Shipping and Mailing
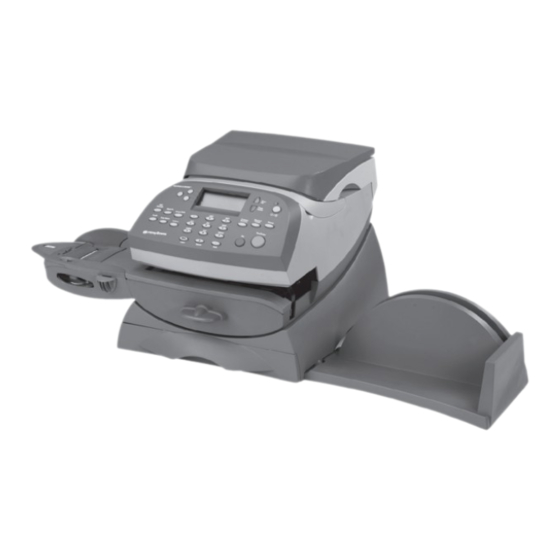
Franking Machines
Digital Mailing System
DM100i and DM200i series
Read Me First!
Your new system has been
designed to let you set it
up on your own, so you can
begin processing mail in just
a short time.
It is important that you
carefully read and follow the
sequence of steps in this guide
to successfully install this
product.
Quick Install Guide
UK Version
Advertisement

Related Manuals for Pitney Bowes DM100i Series


Summary of Contents for Pitney Bowes DM100i Series
- Page 1 Read Me First! Shipping and Mailing Franking Machines Digital Mailing System DM100i and DM200i series Your new system has been designed to let you set it up on your own, so you can begin processing mail in just a short time. It is important that you carefully read and follow the sequence of steps in this guide...
-
Page 2: Before You Begin
(some models) • Check that the Mailing Machine 'Meter #' matches the meter number on the side of the packaging: If the numbers do not match, contact Pitney Bowes immediately and do not continue with the steps in this guide. - Page 3 Mailing Machine onto the base unit now. Step Connection Method You have to connect to the Pitney Bowes Data Centre to add postage funds, get software updates, and perform required Postal Authority inspections. Pitney Bowes recommend connecting via a Smartlink Communication Device.
- Page 4 Step Connection Method (continued) An alternative connection method is connection using PC Meter Connect™ which uses a connection via your PC. If you have connected via Smartlink please proceed to Step 3. • To install PC Meter Connect™, go to... europe.pb.com/PCMeterConnect/setup.exe Choose the 'Run' option to install the software and be sure to select 'English (UK)' as your installation language.
- Page 5 Step Set Time After powering on your machine, you will need to set the time. Key in the hour (in 24 hour format), then select Continue to confirm. Key in the minutes, then select Continue to confirm. CURRENT LOCAL TIME Check the 14:25 displayed time...
- Page 6 Step Install the Print Head (continued) Remove print head from Remove tape strip packaging. DO NOT from print head. touch the contacts on the print head. Contacts Slide the print head pegs down into the grooves. Tabs Squeeze the tabs on the sides of the print head and push the print head flush against the wall.
- Page 7 Step Install the Ink Cartridge Ridge Ridge Groove Unwrap the new ink Lower the cartridge into the cavity. The cartridge. Make sure ridges on either side that the tape on the bottom of the cartridge of the cartridge will slide into the grooves. is removed if it doesn't come away with the wrapping.
- Page 8 Step Create a Test Pattern When prompted, insert a spare envelope or a tape sheet for a test print. To print correctly, position mail flush against rear registration wall and gently slide mail to the right on feed deck. Registration The system will wall detect the envelope...
- Page 9 Step Check Your Account Balance Your system will automatically connect to the Postage By Phone Data Centre and after a brief delay, display your Postage By Phone balance. • Select Continue. PBP Balance Prepaid * * * * . * * Continue Step Load Postage Into Your System...
- Page 10 Check that the Postage by Phone account number printed on the receipt matches the account number on the despatch note received with the system. The numbers should match, if they don't, contact Pitney Bowes before using the system.
-
Page 11: Update Software
Step Update software NOTE: You will be informed that a system software update is available. UPDATE REQUIRED This s/w required to continue operation Get update now • Select Get update now. Any additional features and options that you selected as part of your order will take a few minutes to download. - Page 12 Step Install Weighing Platform Your system is INSTALLATION now installed, but SUCCESSFUL! you must still fit and configure the weighing platform. • Select OK. Position the weighing platform as shown. Plug the connector on the weighing platform into the matching connector on the machine.
- Page 13 Enter 2 digit scale Key in the correct scale code for your code supplied by PB location from the _ _ (1-31) map below Continue • Select Continue. Orkney Code 24 CODE 24 Shetland Code 25 CODE 23 Edinburgh Glasgow CODE 22 Belfast Manchester...
- Page 14 Install Additional Components Install any other items supplied with your machine: Moistener If you have a moistener unit with your machine, position the moistener on the left side of the transport deck as shown. Solution Level The moistener will click Fill the moistener reservoir into place.
-
Page 15: Troubleshooting
Troubleshooting Cannot Reach Data Centre - If you are using Smartlink, make sure that the cables are connected correctly and that the lights are showing ready. If you are using PC Meter Connect™, make sure the USB cable is connected between the mailing system and PC and that the PC can connect to the internet. - Page 16 PB Form SDC569G (10-16) © Pitney Bowes Limited, 2016 We have made every reasonable effort to assure the accuracy and usefulness of this guide, however we cannot assume responsibility for errors or omissions or liability for the misuse or misapplication of our products.
Need help?
Do you have a question about the DM100i Series and is the answer not in the manual?
Questions and answers