Table of Contents
Advertisement
Quick Links
DELTA
GNSS Receiver
Operator's Manual
Version 1.4
Last Revised May 4, 2009
All contents in this manual are copyrighted by JAVAD GNSS.
All rights reserved.The information contained herein may not be used, accessed, copied,
stored, displayed, sold, modified, published, or distributed, or otherwise reproduced without express
written consent from JAVAD GNSS.
Advertisement
Table of Contents

Related Manuals for Javad DELTAGNSS Receiver


Summary of Contents for Javad DELTAGNSS Receiver
-
Page 1: Gnss Receiver
Version 1.4 Last Revised May 4, 2009 All contents in this manual are copyrighted by JAVAD GNSS. All rights reserved.The information contained herein may not be used, accessed, copied, stored, displayed, sold, modified, published, or distributed, or otherwise reproduced without express... - Page 2 www.javad.com...
-
Page 3: Table Of Contents
2.1. Installing JAVAD GNSS Software ........ - Page 4 5.5.2. Using TriVU to Clear NVRAM ........64 www.javad.com...
- Page 5 Appendix C. Warranty Terms ..........91 www.javad.com...
- Page 6 www.javad.com...
-
Page 7: Preface
Please read these Terms and Conditions carefully. Terms and Conditions USE – JAVAD GNSS receivers are designed to be used by a professional. The user is expected to have a good knowledge and understanding of the user and safety instructions before operating, inspecting or adjusting. - Page 8 You may terminate the license at any time by destroying the Software and Manual. JAVAD GNSS may terminate the license if you fail to comply with any of the Terms or Conditions. You agree to destroy the Software and manual upon termination of your use of the DELTA receiver.
-
Page 9: Weee Directive
MISCELLANEOUS – The above Terms and Conditions may be amended, modified, superseded, or canceled, at any time by JAVAD GNSS. The above Terms and Conditions will be governed by, and construed in accordance with, the laws of the State of California, without reference to conflict of laws. -
Page 10: Declaration Of Conformity
Directive 1999/5/EC. Español Por medio de la presente JAVAD GNSS declara que el DELTA Receiver [Spanish] cumple con los requisitos esenciales y cualesquiera otras disposiciones aplicables o exigibles de la Directiva 1999/5/CE. - Page 11 överensstämmelse med de väsentliga egenskapskrav och övriga relevanta bestämmelser som framgår av direktiv 1999/5/EG. Íslenska Hér með lýsir JAVAD GNSS yfir því að DELTA Receiver er í samræmi [Icelandic] við grunnkröfur og aðrar kröfur, sem gerðar eru í tilskipun 1999/5/EC.
- Page 12 (R&TTE) and the mutual recognition of their conformity and carries the CE marking accordingly 1) These products were tested in a typical configuration with JAVAD GNSS, Inc. products San Jose, January, 14, 2008 Vladimir Zhukov, Product Regulations Manager European contact for regulatory topics only: ALLSAT GmbH Am Hohen Ufer 3A, 30159 Hannover, Germany USA contact: Javad GNSS, Inc 1731 Technology Drive, San Jose, CA 95110.
-
Page 13: Manual Conventions
This manual includes sample screen captures. Your actual screen can look slightly different from the sample screen due to the receiver you have connected, operating system used and settings you have specified. This is normal and not a cause for concern. www.javad.com... -
Page 14: Technical Assistance
Initially, the customer contacts support to report a problem. Please refer to support: Question section on www.javad.com. If support determines the problem cannot be resolved over e-mail/ internet, it will authorize the return of the unit for repair or replacement, depending on the nature of the problem. -
Page 15: Chapter 1. Introduction
Several other features provide under-canopy and low signal strength reception. The DELTA receiver provides the functionality, accuracy, availability, and integrity needed for fast and easy data collection. www.javad.com... -
Page 16: Principles Of Operation
• Control – Ground stations located around the Earth that monitor the satellites and upload data, including clock corrections and new ephemerides (satellite positions as a function of time), to ensure the satellites transmit data properly. • User – The community and military that use GNSS receivers to calculate positions. www.javad.com... -
Page 17: Calculating Absolute Positions
• For post-mission applications, the simultaneous measurements from reference and rover stations are normally recorded to the receiver’s internal memory (not sent over communication link). Later, the data are downloaded to computer, combined, and processed. www.javad.com... -
Page 18: Essential Components For Quality Measuring
– Five or more visible satellites for only GPS or only GLONASS; six or more satellites for mixed scenarios. – Satellite Based Augmentation Systems (WAAS, EGNOS, etc.) creates and transmit, along with DGPS corrections, data integrity information (for example, satellite health warnings). – Current ephemerides and almanacs. www.javad.com... -
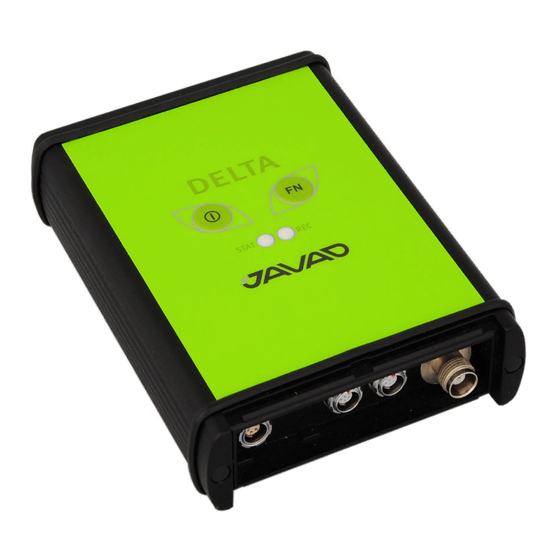
Page 19: Getting Acquainted
• During the first second of pressing the FN button, the REC LED is orange. • Pressing the FN button for more than one and less than five seconds will start/stop data recording. • During data recording the REC LED is green or orange. www.javad.com... -
Page 20: Data And Power Ports
The body of the connector on the corresponding cable is red. • Serial – used for communication between the receiver and an external device. The body of the connector on the corresponding cable is green. www.javad.com... -
Page 21: Connectors
(hand-held controller or computer) p/n 14-578103-01 Receiver-to-SAE power cable – connects the receiver’s power port and the power supply’s SAE connector or the extension cable’s SAE connector p/n 14-578101-01 SAE-to-SAE cable extension – connects SAE connectors over longer distances p/n 14-578102-01 www.javad.com... -
Page 22: Literature
Receiver options remain intact when clearing the NVRAM or resetting the receiver. The OAF enables the following kinds of functions. For a complete list of available options and details, visit the JAVAD GNSS website (http:// www.javad.com) or consult your dealer. -
Page 23: Chapter 2. Pre-Measuring Preparation
Use the TriVU software programs for configuring and maintaining the receiver. This software is available on the JAVAD GNSS website. If downloading the program(s) from the website, extract the program’s files into a folder on your hard drive. The following sections describe installing this software, and other sections throughout the manual describe using this software with the receiver. -
Page 24: Powering The Receiver
The external power supply needs to be Listed for US and Certified for EU countries, it needs also to be a Limited Power Source and have an output rated for 4,5...35 V DC, not less than 2A. This may not be the same range as other JAVAD GNSS products with which you are familiar. -
Page 25: Turning On/Off The Receiver
TriVU: • an RS232 cable and a computer/controller • a USB cable and a computer/controller with the JAVAD GNSS USB driver installed Once you have established a connection between the receiver and the computer/controller, you will be able to configure the receiver and its components, send commands to the receiver, download files from the receiver’s memory;... -
Page 26: Establishing An Rs232 Cable Connection
Figure 2-2. Connection via RS-232 2.3.2. Establishing a USB Cable Connection Make sure the computer has JAVAD GNSS’s USB driver installed (available from www.javad.com) before continuing. 1. Using the USB cable, connect the USB port on the receiver to a USB port on the computer. - Page 27 Pre-measuring Preparation Connecting the Receiver and a Computer Establishing a USB Cable Connection 3. Connect to the desired configuration software (TriVU). Figure 2-3. Connection via USB www.javad.com...
-
Page 28: Collecting Almanacs And Ephemerides
• After loading a new OAF. Note: If 15 minutes have passed and the receiver does not lock on to satellites, clear the NVRAM. See for details. • After loading new firmware. • After clearing the NVRAM. • Before measuring. www.javad.com... -
Page 29: Chapter 3. Configuration
When configuring receivers for post-processing measuring, use the following list to ensure the receivers are properly set up: • Perform pre-measuring functions as described in Chapter 2. • Configure one receiver as a Base station and the other receiver as a Rover. See “Configuring the Receiver” on page 30. www.javad.com... -
Page 30: Configuring The Receiver
TriVU: • use an RS232 cable • use a USB cable and a computer with the JAVAD GNSS USB driver installed (available on the JAVAD GNSS website) TriVU is a software used to manage the various functions of your receiver. The full range of TriVU configuration and function is outside the scope of this manual. - Page 31 Computer” on page 25. 2. Start TriVU. Select the COM port and click Ok (Figure 3-1). Figure 3-1. Connection Parameters 3. Click Configuration Receiver. Note: Click Apply after making any configuration change; otherwise, the receiver will not register the change. www.javad.com...
- Page 32 Table 3-1. Receiver Parameters for the MinPad Tab Parameter Base Receiver Rover Receiver Recording interval Enter 15 seconds. Elevation mask angle Enter 15 degrees. File name prefix Enter a unique ID, such as the last 3 digits of receiver’s serial number. www.javad.com...
- Page 33 6. Click the Positioning tab and set the Elevation mask to 15 (Figure 3-4), then click Apply. Figure 3-4. Configure Receiver Positioning – Elevation Mask 7. For the Base receiver, click the Base tab and set the following parameters (Figure 3-5 on page 34), then click Apply. • GPS/GLO at one time – enable www.javad.com...
- Page 34 – Delay is for 1 Hz high precision RTK applications. The Rover RTK engine will compute either a delayed RTK position (for the epoch to which the newly received RTCM/CMR message corresponds) or the current standalone position (while waiting for new RTCM/CMR messages coming from the base). www.javad.com...
- Page 35 (Leave the default.) Select the same differential correction format selected for the Base. Output Select the type and format of Select “None”. differential corrections. Period (sec) Enter the interval at which the n/a (Leave the default.) receiver will transmit differential corrections. www.javad.com...
- Page 36 Figure 3-7. Base and Rover Configuration for RTK – Ports - If external modem is used 10. Click the Advanced tab and then the Multipath tab. Set the following parameters and click Apply (Figure 3-8 on page 37). • Code multipath reduction – enable www.javad.com...
- Page 37 12. Continue with other configuration activities or click File Disconnect, then File Exit to quit TriVU. Disconnecting before exiting ensures proper port management. Note: Disconnect the receiver from TriVU before exiting to eliminate possible conflicts with the management of the computer’s serial ports. www.javad.com...
-
Page 38: Deltad Systems Configuration
Antennas must be rigidly attached to the vehicle. There are no any special restrictions on their mutual location. However, antennas should not shade each other. Also, inverse proportional dependency of the error RMS on the between antennas distance should be taken into account. www.javad.com... -
Page 39: How To Work With Deltad-G2/G2D
Two angles that define orientation between antennas base line are available as shown in the Figure 3-11. • The heading angle is the angle between the projection of the base line onto the local horizon plane and the North direction. www.javad.com... -
Page 40: Standalone Setup
• The pitch angle is the angle between the base line vector and the local horizon plane. North Heading Pitch East Figure 3-11. Local horizon coordinate frame Standalone Setup The standalone position of the antenna ‘a’ or ‘b’ is available along with two orientation angles. North ‘a’ ‘b’ Figure 3-12. Standalone operation of the unit www.javad.com... -
Page 41: Differentially Corrected Setup
1. Setting of the standalone setup. The following set of commands must be sent to the unit: set,rover/mode/,off set,base/mode/,off set,pos/elm,10 set,raw/msint,200 set,pos/msint,200 set,pos/mode/cur,pd set,pos/pd/period,1 set,pos/pd/mode,extrap set,pos/pd/aflevel,medium set,pos/pd/dyn,1 set,pos/pd/usebasedop,off set,pos/pd/hd/mode,on Next two settings can be used or not used www.javad.com... -
Page 42: Angle Messages
- UTC time indicator, V means valid, N means that UTC time is not valid, - UTC time, - True heading [deg], - Pitch [deg], - Base line solution status: R for fixed, F for float, empty field means ‘not available’, - Check sum. $PTPSR,ATT,V,173311.00,284.548,0.240,R*39 Example: www.javad.com... -
Page 43: Tripad Configuration
• Turn the receiver on/off. • Turn data recording on or off (FN button). • Show the status of satellites being tracked (STAT LED). • Show data recording status (REC LED). • Show each time data records to internal memory (REC LED). www.javad.com... - Page 44 • Elevation mask for log file on page 45. • File name prefix on page 45. • Always append to the file on page 46. • Files Creation mode on page 46. • Automatic File Rotation Mode (AFRM) on page 46. www.javad.com...
- Page 45 This parameter specifies what prefix will be added to the names of the receiver files created when pressing FN. The prefix can be up to 20 characters long. The default value is log. Log file names have the following structure: <prefix><month><day><sequential alphabet letter> www.javad.com...
- Page 46 AFRM has been enabled, pressing FN will disable this mode. Automatic File Rotation Mode (AFRM) parameters JAVAD GNSS receivers are capable of automatically rotating log files. During a “file rotation” event, the receiver closes the current file and opens a new one according to a user-defined schedule.
- Page 47 Also, if Always is enabled, your receiver will automatically start logging data (to a newly created or an existing file) in the following three cases: • After pressing the Power button to turn on the receiver. • After resetting the receiver (with TriVU). • After taking the receiver out of Sleep Mode. www.javad.com...
- Page 48 Configuration TriPad Configuration How to Work with DELTAD-G2/G2D www.javad.com...
-
Page 49: Chapter 4. Setup And Measuring
2. Measure the antenna height, as described in “Measure Antenna Height” on page 50. 3. Record the antenna height, point name, and start time in the field notes. 4. Attach the flexible RF cable from the external antenna to the antenna connector on the bottom panel of the receiver. www.javad.com... -
Page 50: Measure Antenna Height
The offsets are different because of the difference in location between the slant measuring point and the vertical measuring point. 1. Measure the antenna height above the control point or marker, either the slant height or the vertical height. 2. Record the antenna height, point name, and start time in the field notes. www.javad.com... -
Page 51: Tripad Operation
At least two receiver antennas, plumbed over measuring marks, simultaneously collect raw data at each end of a baseline during a certain period of time. These two receivers track four or more common satellites, have a common data logging rate (5–30 seconds), and the www.javad.com... -
Page 52: Kinematic (Stop & Go) Measuring For Rover Stations
After the measuring completes, data the receivers collect can be downloaded onto a computer and processed using post-processing software (for example, JAVAD GNSS Justin). 4.4. Kinematic (Stop & Go) Measuring for Rover Stations In a kinematic, stop and go measuring, the stationary receiver (Base station) is set up at a known point such as a measuring monument, or an unknown point. -
Page 53: Real Time Kinematic Measuring
• RTK fixed – where the Rover receiver computes current relative coordinates, with ambiguity fixing, in differential mode. The LQ field reflects the status of the received differential messages and contains the following information: • Data link quality in percentage www.javad.com... - Page 54 • Total number of received corrupt messages (dependent on the message type received) If the receiver is not (for some reason) receiving differential corrections, or if none of the ports has been configured to receive differential corrections, the LQ field will either be empty or it will look like this: 100%(999,0000,0000). www.javad.com...
-
Page 55: Chapter 5. Receiver And File Maintenance
As project expectations expand, the receiver’s OAF may need to be updated to provide expanded operation and functionality. The receiver requires firmware to properly operate and provide appropriate functionality. As JAVAD GNSS releases firmware updates, loading these updates into the receiver will ensure that the receiver operates at its full potential. - Page 56 File Manager, then click the Download path tab on the File Manager dialog box. 4. Navigate to or create (using the Create button) the folder in which to download and store files (Figure 5-2). Figure 5-2. Download path tab www.javad.com...
- Page 57 Figure 5-3. Download Files 7. Click the Download button. During the download, status indicators display next to each file (Figure 5-4 on page 58). • Red indicator – file currently downloading. • Green indicator – file has successfully downloaded. www.javad.com...
-
Page 58: Deleting Files
9. Continue with other operations. Or, click File Disconnect, then File Exit to quit TriVU. 5.2. Deleting Files Use the following steps to delete files from your receiver. 1. Connect your receiver and computer. See “Connecting the Receiver and a Computer” on page 25 for this procedure. www.javad.com... - Page 59 (Figure 5-6). Figure 5-6. Current log files tab 4. To select multiple files, hold down the shift key and click on nonsequential files to select several files at once; or hold down the Ctrl key and click on individual files. www.javad.com...
-
Page 60: Managing Receiver Options
5.3.1. Checking an OAF Note: For a complete list of options and their details, visit the JAVAD GNSS website. You can check the status of your receiver's options, and load any new OAFs, using the RS232 cable, a computer, and TriVU. Refer to the TriVU Software Manual for a more complete description of the TriVU software. - Page 61 • -1 or “-----” – the firmware version does not support this option • 0 – the receiver option is disabled • positive integer – the option is enabled • yes or no – the option is either enabled or disabled. Figure 5-8. View Option manager www.javad.com...
-
Page 62: Loading Oafs
Managing Receiver Options Loading OAFs 5.3.2. Loading OAFs JAVAD GNSS dealers provide customers with OAF files. For any OAF related questions, E-mail at support@javad.com. Please have your receiver ID number available (see “Checking Firmware Version” on page 65). 1. To load a new OAF, follow steps 1-3 in “Checking an OAF” on page 60. -
Page 63: Managing Receiver Memory
Note that after clearing the NVRAM, the receiver’s SAT LED will flash yellow for a few seconds indicating that the receiver is scanning and checking the file system. 5.5.1. Using TriPad to Clear NVRAM 1. Press the power button to turn off the receiver. 2. Press and hold the FN button. www.javad.com... -
Page 64: Using Trivu To Clear Nvram
1. Connect your receiver and computer. See “Connecting the Receiver and a Computer” on page 25 for this procedure. 2. Start TriVU. Select the COM port and click Ok (Figure 5-7). Figure 5-10. Connection Parameters 3. Click the Tools Clear NVRAM (Figure 5-11). Figure 5-11. Clear NVRAM www.javad.com... -
Page 65: Checking Firmware Version
1. Connect your receiver and computer. See “Connecting the Receiver and a Computer” on page 25 for this procedure. 2. Start TriVU. Select the COM port and click Ok (Figure 5-7). Figure 5-12. Connection Parameters 3. Click on Help About TriVU (Figure 5-13). Figure 5-13. Help->About www.javad.com... -
Page 66: Loading New Firmware
5.7. Loading New Firmware Base and Rover receivers must be loaded with the same firmware version. Use the latest firmware version, available for download from the JAVAD GNSS website, to ensure your receiver has the most recent updates. The receiver uses Firmware Loader to load firmware onto the receiver. - Page 67 Receiver and File Maintenance Loading New Firmware Using TriVU to Clear NVRAM 4. Select the COM port receiver is connected to. Click the Test button to ensure the receiver is connected. Click Next>> (Figure 5-15). Figure 5-15. Connection Parameters www.javad.com...
- Page 68 Receiver and File Maintenance Loading New Firmware Using TriVU to Clear NVRAM 5. Select the ZIP archive, or any file from unzipped set of firmware images, or one image to load. Click Next>> (Figure 5-16). Figure 5-16. Firmware Source www.javad.com...
- Page 69 Receiver and File Maintenance Loading New Firmware Using TriVU to Clear NVRAM 6. Open the required firmware folder. Select the .zip file and click Open (Figure 5-17): Figure 5-17. New firmware package www.javad.com...
- Page 70 Figure 5-18. Files to load 8. Click Exit to quit Firmware Loader. 9. Clear the receiver’s NVRAM (see “Clearing the NVRAM” on page 63) and update the almanac (“Collecting Almanacs and Ephemerides” on page 39) after loading new firmware. www.javad.com...
-
Page 71: Chapter 6. Troubleshooting
• Check all power sources. • Check that the most current software is downloaded onto the computer and that the most current firmware is loaded into the receiver. Check the JAVAD GNSS website for the latest updates. Then, try the following: •... -
Page 72: Receiver Problems
• See “Managing Receiver Options” on page 60 for details on how to check current options. • Order a new OAF with the desired options activated to enable or extend validity of the corresponding receiver options. Contact your dealer or visit the JAVAD GNSS website for details. - Page 73 • See “Managing Receiver Options” on page 60 for details on how to check current options. • Order a new OAF with the desired options activated to enable or extend validity of the corresponding receiver options. Contact your dealer or visit the JAVAD GNSS website for details.
- Page 74 • Check that the radio modem’s antenna is securely and properly connected to the antenna connector. • Check that the radio modem’s antenna is undamaged. If damaged, contact your JAVAD GNSS dealer to replace the antenna. The specified baud rate is incompatible with the baud rates the receiver supports.
-
Page 75: Technical Support
If the troubleshooting hints and tips in this Operator’s Manual fail to remedy the problem, contact JAVAD GNSS Support. Before contacting JAVAD GNSS Customer support about any problems with the receiver, see “Check This First!” on page 71 for some solutions that may fix the issue. - Page 76 Troubleshooting Technical Support www.javad.com...
-
Page 77: Appendix A. Specifications
Appendix A PECIFICATIONS This JAVAD GNSS product is a 216-channel GNSS receiver with a rugged magnesium housing complete with TriPad and cable connectors. Note: Performance specifications assume a minimum of 6 GPS satellites above 15 degrees in elevation and adherence to the procedures recommended in this manual. - Page 78 Geoid and Magnetic Variation models RAIM Different DATUMs support Output of grid coordinates Technology Low signal tracking Advanced Multipath mitigation KFK WAAS/EGNOS (SBAS) Adjustable PLL and DLL parameters In-Band Interference Rejection (IBIR) (DELTAS-G3TAJ only) NMEA NMEA version Ver. 2.1, 2.2, 2.3, 3.0 www.javad.com...
- Page 79 The receiver can record raw data at another interval during RTK operation Status Fix, Float, DOP, Data Link Status, Receiver Latency, Common satellites, Percentage of fixing Results RTK coordinates, HRMS, VRMS, Covariance Matrix Ambiguity fixing level Selectable thresholds Low: 95%; Medium: 99.5%; High: 99.9% Measuring Modes www.javad.com...
- Page 80 Advanced Multipath Reduction technique reduces this harmful effect. 3. The accuracy estimate is applicable to base lines up to several hundreds of km. But normally RTK works predictable on base lines up to 50 km. www.javad.com...
-
Page 81: Gnss Board Details
Rise, Fall Period 10 to 1000000000 ms Offset -500000000 to 500000000 msec Reference time GPS, GLONASS, UTC (USNO), UTC (SU) Event Marker (optional) Number of event Marker ports Edge Rise, Fall Reference time GPS, GLONASS, UTC (USNO), UTC (SU) www.javad.com... -
Page 82: Connector Specifications
Table A-3 gives power connector specifications. Table A-3. Power Connector Specifications Number Signal Name Details Power_INP 10 to 30 volts DC input Power_INP 10 to 30 volts DC input Power_GND Ground, power return Power_GND Ground, power return Not used www.javad.com... -
Page 83: Serial Rs-232C Connector
The RS232 connectors (Figure A-2) are sealed receptacle, 7 pin, ODU p/n G80F1C-T07QC00- 0000. Figure A-2. RS-232C Connector Table A-4 gives the RS-232C cable connector specifications. Table A-4. RS-232C Cable Connector Specifications Number Signal Name Details Signal ground Clear to send Request to send Receive data Transmit data Not used www.javad.com... -
Page 84: Usb Connector
Rimmed in black, the USB connector is a sealed receptacle, 5 pin, ODU p/n G80F2C-P05QF00- 0000 (Figure A-3). Figure A-3. USB Connector Table A-5 gives the USB connector specifications. Table A-5. USB Connector Specifications Number Signal Name Details USB_PWR Bus power Ground USB D+ Data plus USB D- Data minus www.javad.com... -
Page 85: Ethernet Connector
Figure A-4. Ethernet Connector Table A-6. Ethernet Connector Specifications Number Signal Name Details Not used Power_GND Signal ground TXD+ Transmit data plus TXD- Transmit data minus RXD+ Receive data plus RXD- Receive data minus LAN LED External LAN LED anode www.javad.com... -
Page 86: Rs422 And Can Connector
. RF input from LNA, 100 mA at 5.0 volts DC output. 6001-7051-003 EVENT and 1PPS Connectors (Optional) The EVENT and 1PPS connectors are coaxial female receptacles of BNC series, Kings Electronics part number KC-79-108. These connectors are optional. www.javad.com... -
Page 87: Appendix B. Safety Warnings
• Apparatus shall not be exposed to dripping or splashing and no objects filled with liquids, shall be placed on the apparatus. www.javad.com... -
Page 88: General Warnings
The external power supply needs to be Listed for US and Certified for EU countries, it needs also to be a Limited Power Source and have an output rated for 4,5...35 V DC, not less than 2A. This may not be the same range as other JAVAD GNSS products with which you are familiar. -
Page 89: Usage Warnings
Do not connect or disconnect equipment with wet hands, you are at risk of electric shock if you The owner should periodically test this product to ensure it provides accurate measurements. Inform JAVAD GNSS immediately if this product does not function properly. Only allow authorized JAVAD GNSS warranty service centers to service or repair this product. www.javad.com... - Page 90 Safety Warnings Usage Warnings www.javad.com...
-
Page 91: Appendix C. Warranty Terms
JAVAD GNSS’ Authorized Dealers During the warranty period, JAVAD GNSS will, at its option, repair or replace this product at no additional charge. Repair parts and replacement products will be furnished on an exchange basis and will be either reconditioned or new. - Page 92 1731 Technology Drive, San Jose, CA 95110 USA Phone: +1(408)573-8100 Fax: +1(408)573-9100 www.javad.com Copyright © JAVAD GNSS, Inc., 2009 All rights reserved. No unauthorized duplication.
Need help?
Do you have a question about the DELTAGNSS Receiver and is the answer not in the manual?
Questions and answers