Advertisement
Quick Links
Advertisement

Related Manuals for Javad TRIUMPH-2


Summary of Contents for Javad TRIUMPH-2
- Page 1 Last revised - July 30, 2018 TRIUMPH-2 Start Guide...
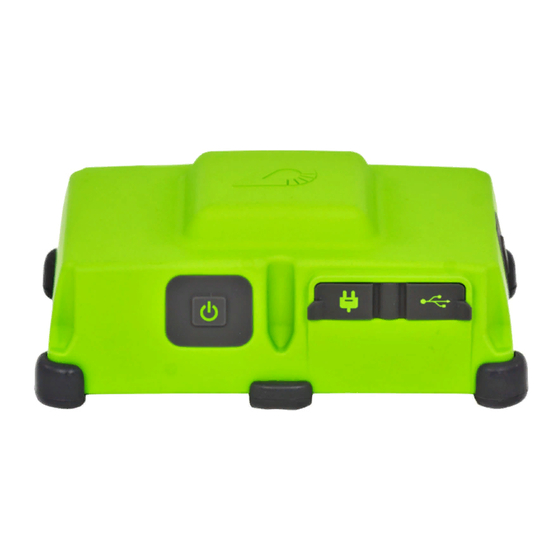
- Page 2 4. Wait till all LEDs will flashing yellow (except battery LED). 5. Release the Record button. The bottom 1/4-20” thread connector allows mounting TRI- UMPH-2 on the monopode, install 1/4-20” to 5/8-11” adapt- er to mount TRIUMPH-2 on the pole.
- Page 3 HPT401BT/HPT404BT. Actually in the field they keep reliable connection Bluetooth® capable up to 130 ft (~40 m). TRIUMPH-2 and radio are paired at the factory, so they external radio like either automatically connect together after power applied.
- Page 4 TRIUMPH-2 START GUIDE 1.Blinking every 1 sec according to the battery means receiver is ON without external power. LED solid according to the battery means external power is connected. 2. Effective number of satellites are total number of satellites tracked minus the number of non-GPS sys- tems tracked.
- Page 5 7. Set the DHCP parameters: client to off, and server to on. Click Apply. 8. Open Server tab (Figure 2). Configure ac- cess to the TRIUMPH-2: enter TCP Port (e.g. 8002) and your own TCP/FTP Password (e.g. “apple”). Click Apply.
- Page 6 10. Select Static and type in the IP address, subnet mask, DNS the same you have assigned for TRIUMPH-2 in NetView&mo- dem. 11. Now you can connect to the TRIUMPH-2. In the list of available WiFi networks tap Figure 3. WiFi Settings triumph103.
- Page 7 TRIUMPH-2 START GUIDE site finishing without closing receiver file (it is may be useful for Stop&Go surveying but unnecessary for OPUS processing). To start the Static site surveying or Kine- matic Trajectory surveying, tap the need- ed button. The Surveying page will appear, and you will be able to monitor your sur- veying progress (Figure 5).
- Page 8 TRIUMPH-2 START GUIDE I means Invalid), elevation and azimuth, signal-to-noise rations for each satellite signal. There is the status code with its de- scription for each satellite at the end of the table. On the SkyPlot screen the sign for the sat-...
-
Page 9: Data Exchange
TRIUMPH-2 START GUIDE Figure 9. Sending files to a server Data exchange FTP Connection There are two abilities to get the data from To get data from your iPhone/iPad use the the application: you can export loaded files embedded FTP server. You can switch to... - Page 10 2. If the Bluetooth connection is select- Connection to TRIUMPH-2 ed, the application starts searching for 1. Run the JAVAD Post.Proc for Android ap- available devices. Select TRIUMPH-2 in the plication (available at Google Play) and se- blue list (Figure 10). The Bluetooth PIN- lect the preferred connection type on the code will be required.
- Page 11 TRIUMPH-2 START GUIDE can save all settings to the profile. Next time you need to select the profile from list of profiles. Note: Each connection will be stored as a connection profile. List of the connection profiles are on the top of the connection screen.
- Page 12 TRIUMPH-2 START GUIDE Downloading raw data from TRIUMPH-2 The raw data can be downloaded from TRIUMPH-2 with File Manager. There are two buttons: Delete and Download. Check the needed file(s) and tap Download, to download it from receiver to your Android device, or tap Delete to delete the file(s).
- Page 13 TRIUMPH-2 START GUIDE CONFIGURING TRIUMPH-2 AS RTK BASE WITH AN EXTERNAL MODEM Note: How to connect modem to the re- TRIUMPH-2 can be configured as RTK Base using NetView&Modem application. ceiver see Appendix B. To setup receiver and modem use NetView&Modem.
- Page 14 TRIUMPH-2 START GUIDE UHF modem configuration 1000 2000 4000 Open UHF Radio tab and set parameters: 10000 15000 20000 25000 32000 35000 • Output power for base: a value in dBm with 1 dB step in UHF Modem Output Pow- •...
- Page 15 Then set Modem Mode to auto. Click Apply again. You will see fast blinking modem’s Bluetooth blue FH modem configuration LED indicating that TRIUMPH-2 is configuring the Open FH Radio tab and set parameters: modem. • Specify zone in the Zone drop-down list 5.
- Page 16 TRIUMPH-2 START GUIDE APC->ARP. If you want to transmit WGS 84(ITRF2008) corrections, but the coordinates entered are expressed in different datum, ensure that the correct Datum ID is selected. W84 (WGS84(ITRF2008)) - is default. If you want to transmit corrections in an- other datum (e.g.
-
Page 17: Appendix A. How To Connect
CMR message type. TRIUMPH-2 and a modem. 8. Your receiver starts send corrections and 1. Connect TRIUMPH-2 to PC using USB your external modem should blink with Tx port and connect the modem to a PC’s se- LED. - Page 18 900 Rock Avenue, San Jose, CA 95131, USA Phone: +1(408)770-1770 Fax : +1(408)770-1799 www.javad.com All rights reserved © JAVAD GNSS, Inc., 2018...
Need help?
Do you have a question about the TRIUMPH-2 and is the answer not in the manual?
Questions and answers