
Subscribe to Our Youtube Channel
Related Manuals for Convaid CuddleBug


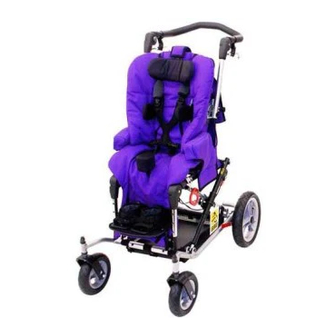
Summary of Contents for Convaid CuddleBug
- Page 1 ENGLISH User’s Guide CuddleBug Tilt-In-Space Wheelchair READ INSTRUCTIONS BEFORE USING SAVE THIS BOOK FOR FUTURE REFERENCE...
-
Page 2: Serial Number
Convaid, Inc. Use only Convaid accessories and parts on Convaid products. Convaid parts are not interchangeable with other manufacturers’ products. Replace any worn parts immediately. -
Page 3: Table Of Contents
Table of Contents Unpacking ..........1 Setting Up Unfolding . -
Page 4: Unpacking
CONVAID USER’S GUIDE Setting Up Unpacking Check to see that the following items are included with the chair: • Left and right footplates. • Accessories as ordered. • Hex wrench (5/32”). Unfolding 1. Lay chair down with seat facing upward. Fig. 1 2. - Page 5 SETTING UP 4. Squeeze the lever located on the back of the seat and pull up on chair. Fig 4 5. Adjust handles and foot plate into desired position. Fig.4 6. Apply wheel locks before placing individual in chair. Fig. 5 Fig.5...
-
Page 6: Folding
CONVAID USER’S GUIDE Folding 1. Before folding, the front wheels of chair should be in a forward facing position for best results. Fig. 6 2. Tilt chair in upright position. 3. Push in grey detent buttons on the footplate, and swing footplate out and upward until parallel with the ground. - Page 7 SETTING UP 6. Once the chair is in the Lo position, locate the red loop next to the Hi/Lo lever and pull to the far left with an index finger. Fig. 10 7. While holding the red loop, squeeze the recline lever on the right side of the chair's handle and recline the back all the way down.
-
Page 8: Seat Depth
CONVAID USER’S GUIDE Fitting Guide Correct seating and positioning encourages good posture, which in turn aids cir- culation, breathing and digestion. Please take the time to properly adjust the chair to fit the user. Seat Depth Measure from the most posterior... -
Page 9: Seat Width
FITTING GUIDE Seat Width Proper seat width enables the user to sit comfortably and prevents problems from developing. While user is seated on a flat surface, measure from hip to hip. Fig. 15a The user should have enough room to prevent hips and thighs from rubbing against the frame. -
Page 10: Seat-To-Footplate Height Adjustment
CONVAID USER’S GUIDE Seat-to-Footplate Height Adjustment Seat-to-footplate height is measured from the back of the knee to the Fig.17a bottom of the heel. Soles of the feet or heels should rest comfortably on top of footplates. Fig. 17a The soles of the feet or heels should rest comfortably on top of the foot- plates. -
Page 11: Footplate Depth Adjustment
FITTING GUIDE To achieve comfortable foot place- ment, the footplate angle may be adjusted. First loosen the four bolts on the outer edge of the leg rest where the footplate tubes are located. Angle the footplate for maximum comfort and tighten the bolts. Fig. 17c Fig.17c Footplate Depth Adjustment To adjust the depth of the footplate,... -
Page 12: Positioning Belt
CONVAID USER’S GUIDE Positioning Guide Positioning Belts The Cuddle Bug comes with either a two-point or a three-point positioning belt. Both can be attached to the back of the seat (to achieve a 45 degree lap belt angle) or to the sides of the seat pan (to achieve a 60 degree lap belt angle) Fig. -
Page 13: Depth Adjustable Crotch Strap
POSITIONING GUIDE To tighten: Tighten the positioning by pulling on the metal loop located on the end of the strap. Fig. 23 To loosen: Grasp buckle and pull away from chair. Fig. 24 Fig.24 Fig.23 Depth Adjustable Crotch Strap The 3-point positioning belt comes with a depth adjustable crotch strap. -
Page 14: Anterior Trunk Support Vest
CONVAID USER’S GUIDE Anterior Trunk Support Vest The Anterior Trunk Support helps the user to retain upright trunk position, and prevents forward slumping. Fig. 27-28 Anterior Trunk Support Height Adjustment: Locate the two small metal retainers on the upper portion of the shoulder straps behind the seat back. -
Page 15: Lateral Thoracic Supports
POSITIONING GUIDE Lateral Thoracic Spports Lateral thoracic supports are used to maintain midline positioning of the trunk. To Open: Press latch located at top of thoracic support and pull outward until it snaps into place. Fig. 30 Height Adjustment: Loosen two adjustable levers on the back of the chair by rotating them counter clockwise. -
Page 16: Hip Inserts
CONVAID USER’S GUIDE Hip Guides Hip guides help to stabilize the pelvis. To adjust the width: Velcro the desired number of foam positioning pads to each side of the seat to achieve desired width. Fig. 34 Fig.34 Medial Thigh Support (Pommel) The pommel separates the legs at the knees for proper seating. -
Page 17: Adjustable Contour Headrest
POSITIONING GUIDE Adjustable Contour Headrest Depth adjustment: Loosen the two nuts located on the upper portion of the headrest. Slide the front bracket to the desired depth and retighten the nuts. (A) Height adjustment: Loosen the two nuts located behind the back pan and slide the back bracket to the desired height then retighten the nuts. -
Page 18: Height Adjustable Armrest
CONVAID USER’S GUIDE Height Adjustable Armrest To adjust height of armrests, loosen the two round knobs and slide armrest to desired position, re-tighten knobs. Fig. 38 Fig.38 Foot Positioner The foot positioner holds the foot securely in place. To attach, select desired location on the footplate and press down to Velcro. -
Page 19: Height Adjustable Push Handle
POSITIONING GUIDE Height Adjustable Push Handle Angle Adjustment: Press and hold the grey detent button. Fig. 40 While holding the detent button, adjust the handle to desired angle and release button. Fig. 41 Fig.40 Fig.41 Height Adjustment: Pull the black knob located on the bottom of the push handle’s arms and turn one quarter of the way. -
Page 20: Tilt-In-Space
CONVAID USER’S GUIDE Frame Positioning Options Tilt: To tilt, squeeze the lever on the left side of the chair's handle and push down. Fig. 44 Release the lever when desired angle of tilt has been achieved. Fig. 45 Fig.45 Fig.44... -
Page 21: Hi/Lo
FRAME POSITIONING OPTIONS Hi / Lo Adjustment: Secure wheel locks prior to adjusting the height of the seat. Squeeze the lever located on the back of the seat. Using your body weight, press down at a forward angle. Fig. 48 Release the lever when desired height of seat has been achieved. Fig. -
Page 22: Under Seat Storage Tray
CONVAID USER’S GUIDE Fig.51 Fig.52 Under Seat Storage Tray The storage tray, which attaches to the chair frame under the seat, is designed to hold disposables, miscella- neous medical items and other sup- plies. The tray is made of mesh fabric for easy cleaning and includes a removable plastic base to prevent sag. -
Page 23: Headrest Cover
ACCESSORIES Headrest Cover (Canopy) To attach canopy, rotate push handle down Fig. 54 & Fig. 55, then insert canopy rod into socket tubes located on the sides of the back pan and rotate handle to desired position. Fig. 56 & Fig. 57 Fig.54 Fig.55 Fig.56... -
Page 24: Removal
CONVAID USER’S GUIDE Upholstery Fabric Removal Chair fabric may be removed to facilitate cleaning. To remove seat upholstery and seat pad, unfasten the Velcro strips. 1. Remove accessories and unfasten belts/vest. 2. Unfasten snap buttons located at the top of the upholstery near headrest. -
Page 25: Cleaning
Then lightly scrub the area and rinse thoroughly with clean water. All soap residues must be removed. Wheels Specifications The CuddleBug comes standard with 6" and 8" solid tires. When ordering replacements, please have the following information available: • Chair name • Wheel size •... -
Page 26: Locking And Unlocking
CONVAID USER’S GUIDE Fig.66 Fig.65 Locking and Unlocking Toggle Wheel Locks To lock, push down on rear lever of wheel lock. Fig. 67 To unlock, press down on front lever of wheel lock. Fig. 68 Fig.67 Locked Fig.68 Unlocked... -
Page 27: Wheel Lock Adjustment
POSITIONING GUIDE Wheel Lock Adjustment Set wheel locks to locked position. Push chair with light pressure on the rear wheels. If wheel rotates, adjust tension by turning the adjustment nut until wheels no longer rotate while locked. Fig.69 Caution: Wheel lock adjustment should be Fig.69... -
Page 28: Operating And Safety Instructions
CONVAID USER’S GUIDE Important Information Maintenance, Operating & Safety Instructions • READ ALL INSTRUCTIONS BEFORE USING THE PRODUCT • ALWAYS FOLLOW THESE SAFETY INSTRUCTIONS • SAVE SAFETY INSTRUCTIONS FOR FUTURE REFERENCE CAUTION: • For increased safety, the seat belt should be used at all times. - Page 29 Tiedown and Occupant Restrain System (WTORS) following the requirements of SAE J2249. Follow tie-down harness manufacturer’s instructions carefully and refer to Convaid’s ‘Transit Guide’ for specifics. • When going up a curb or step, face forward and tilt the chair back to lift the front wheels over the curb.
- Page 30 5. User Maintenance The following maintenance procedures should be conducted on a regular basis: Examine your Convaid product visually from time to time for possible wear and tear. Lubricant* should be applied to frame and moving parts to maintain easy folding and adjustment.
- Page 31 Seat-/ back upholstery**/tautness • Armrests & foam • Frame Contacting a Convaid representative • for service or repair*** * Use a non-toxic, hypoallergenic lubricant for all moving parts of the frame ** Follow cleaning instructions for appropriate user hygiene *** NOTE: Repair or replacement of non-removable, worn or broken parts must be performed by a qualified service facility.
- Page 32 Before extended storage periods, and before reuse, the entire chair needs to be serviced, cleaned and disinfected. 8. Reuse Your Convaid chair should undergo a wipe-down disinfection before reuse. Please use a non-toxic, biodegradable disinfectant solution suitable for sur- face disinfection.
- Page 33 CONSUMER INFORMATION 9. Repairs User: The user can replace easily removable parts or accessories, e.g. foot- plates and footrest assemblies, heel loops, all fabric items, hand grips, etc. Manufacturer/Service Facility: Repair or replacement of permanently attached, worn or broken parts must be performed by a qualified service facil- ity.
- Page 34 CONVAID USER’S GUIDE 12. Functional Tests All four wheels should make contact with the floor. With the chair empty, push it forward on a smooth level surface with enough momentum to travel six feet (2 m). The chair should not veer to the left or right more than six inches (15 cm).
- Page 35 NOTES...
-
Page 36: Warranty
Limited Lifetime Warranty Convaid warrants to the original retail purchaser of the Convaid product, that if any part thereof proves functionally defective in material or workmanship within the specified warranty period, such defective part will be repaired or replaced (at Convaid’s discretion) free of charge.
Need help?
Do you have a question about the CuddleBug and is the answer not in the manual?
Questions and answers