
Subscribe to Our Youtube Channel
Related Manuals for Convaid Safari tilt


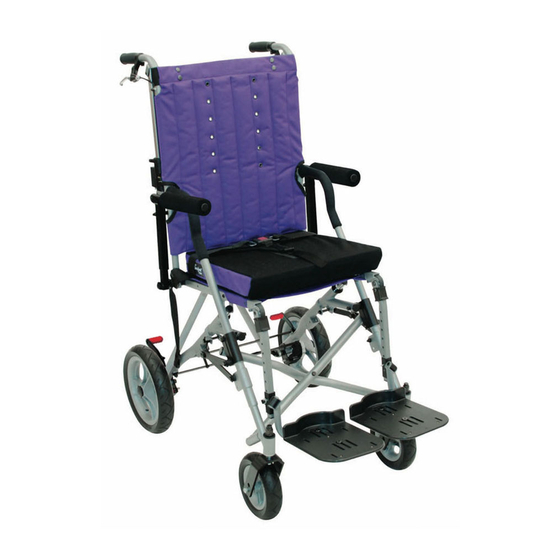
Summary of Contents for Convaid Safari tilt
- Page 1 ENGLISH User’s Guide Safari Tilt Tilt-In-Space Positioning Chairs READ INSTRUCTIONS BEFORE USING SAVE THIS BOOK FOR FUTURE REFERENCE...
- Page 2 Convaid, Inc. Use only Convaid accessories and parts on Convaid products. Convaid parts are not interchangeable with other manufacturers’ products. Replace any worn parts immediately.
-
Page 3: Table Of Contents
Table of Contents Unpacking ..........1 Setting Up Unfolding . -
Page 4: Unpacking
CONVAID USER’S GUIDE Setting Up Unpacking Check to see that the following items are included with the chair: • Left and right footplates, • Hex key (5/32) or one-piece footplate • Seat cushion • Accessories as ordered Unfolding Step 1 Unfasten closure strap. - Page 5 SETTING UP Fig.4 Fig.5 Step 4 Step 5 Push down with your foot on the Attach the seat cushion by pushing rear lock brace until it is in the firmly into the back of seat, then locked position. Fig. 4 pressing down onto Velcro®.
-
Page 6: Folding
CONVAID USER’S GUIDE Folding Fig.11 Step 2 Flip up armrests. Fig. 11 Fig.10 Step 1 Place foot on rear lock brace and bring the chair to the most upright Fig.12 Step 3 position (until you hear a “click”). Remove seat cushion. Fig. 12 Fig. -
Page 7: Caution: Keep Fingers Free Of Folding Mechanism
SETTING UP Fig.16 Fig.15 Step 5 Step 6 Unlock rear lock brace by pushing Lean chair back on push handles up on center of brace with foot. and lower chair to ground. Walk to Fig. 15 front of chair and push down on tubing above front tires until chair is folded. -
Page 8: Tilt And Recline
CONVAID USER’S GUIDE Tilt and Recline To Tilt: If chair has both tilt & recline options, release lock by squeezing trigger on left handle. Tilt to desired angle and release triggers. If chair has tilt only, release lock by squeezing trigger on both han- dles. -
Page 9: Seat Back Height
FITTING GUIDE Fitting Guide Convaid’s lightweight, folding chairs are designed to be more than just a convenient chair. Order the correct size chair by first determining the user’s height, weight and seating measurements. Properly fitted, Convaid chairs will provide years of comfortable use. -
Page 10: Seat Width
CONVAID USER’S GUIDE Seat Width Proper seat width enables the user to sit comfortably and prevents problems from developing. While user is seated on a flat surface, measure from hip to hip. Fig. 21 The user should have enough room to prevent hips and thighs from rubbing against the frame. -
Page 11: Armrest Height Adjustment
FITTING GUIDE Armrest Height Adjustment To attach armrest, remove existing bolts. Attach armrest with the bolts provided. Fig. 25 Fig.25 To change height of armrest, remove top mounting bolt, slide armrest up or down as desired. Reattach bolt. Fig. 26 Fig.26 Seat-to-Back Angle Adjustment Partially fold the chair to... -
Page 12: Three-Point Positioning Belt
CONVAID USER’S GUIDE Positioning Guide Convaid offers a wide variety of supports to help properly position the user. Note: The user must be fitted correctly into the chair to achieve optimal posture and comfort. Three-Point Positioning Belt The three-point positioning belt is standard. Adjust so the user stays securely in position. -
Page 13: Cushioned Shoulder Harness
POSITIONING GUIDE Cushioned Shoulder Harness The cushioned shoulder harness helps the user retain upright trunk position. To adjust, insert the bolt at the end of the strap through the grommet hole in the seat back. Grommet hole choice should be level with or higher than the top of the shoulders. -
Page 14: Footplate Adjustment
CONVAID USER’S GUIDE Footplate Adjustment The Safari comes standard with a one-piece footplate, which is non-folding and non-elevating. Fig. 32 Elevating legrests with swing-away footplates are available as an option. Fig. 33 Fig.32 Fig.33 Seat-to-Footplate Height Adjustment Seat-to-footplate height is measured from the back of the knee to the bottom of the heel. -
Page 15: Footplate Depth Adjustment
POSITIONING GUIDE Footplate Depth Adjustment The tilt-in space frame offers adjustable footplate depth. Use a hex key to loosen the two bolts located on the top of the footplate. Slide footplate forward or rearward to desired depth. Retighten bolts. Fig. 36 Fig.36 Legrest Adjustment Pull down on slide lock. -
Page 16: Foam Wedges
CONVAID USER’S GUIDE Foam Wedge Use wedge to modify seating or positioning or to correct posture. Fig. 38-41 Fig.38 Fig.41 Fig.40 Fig.39 Angle Adjustable Footplates Angle adjustable footplates can be moved fore and aft, sideways, and rotated vertically and horizontally. To adjust the angle, loosen the bolts on the footplate and move to desired position. -
Page 17: Foot Positioner
POSITIONING GUIDE Foot Positioner The foot positioner holds the foot securely in place. Fig. 46 To attach, thread strap through footplate as shown in Fig. 47, then bolt strap to underside of footplate. Fig.47 Fig.46 Footplate Securement Strap The securement strap holds individual foot- plates together to prevent them from flipping up and down. -
Page 18: Anatomic Back Support Frame
CONVAID USER’S GUIDE Anatomic Back Support Frame The anatomic back support frame stabilizes the neck and head in a functional position to assist the develop- ment of neck and head righting reflexes. The anatomic back frame is optional from the factory and must be ordered with the chair. -
Page 19: Lateral Thigh Support (Adductor)
POSITIONING GUIDE Lateral Thigh Support (Adductor) Pulls thighs together, improving hip alignment and stabilizing seating position. Degree of adduction can be varied and can favor one side. Fold the adductor flaps over the thighs, wrap the straps under and around the armrest tube and attach with buckle. -
Page 20: Padded Headwings
CONVAID USER’S GUIDE Padded Headwings Adjustable padded headwings provide soft foam support for midline positioning. Fig. 57 The padded insert can be attached at any height by wrapping the straps around the frame and securing at the back of the chair. Secure headwing height by tying laces to the chair frame, headrest extension or through the grommet holes in the back of the seat fabric. -
Page 21: Sensiform Seat Cushions
SENSIFORM SEAT CUSHIONS Sensiform Seat Cushions The Convaid Sensiform™ Cushions provide excellent support, stability and comfort for a variety of seating and positioning needs. Each cushion is easy to clean and maintain. Fig. 61 Layer 1: The rigid wooden insert creates an excellent foundation for postural support. -
Page 22: Cushion Types
CONVAID USER’S GUIDE Cushion Types Safari Support: General Use Cushion Flat foam with wooden insert. Fig. 62 • Promotes stability and posture control and provides comfort for the user. • Waterfall front eliminates pressure points at the back of the knees. -
Page 23: Fitting Guide
SENSIFORM SEAT CUSHIONS Fitting The fitting of the cushion should be done by an experienced clinician. When fitted cor- rectly, the cushion will help provide stable support and promote good posture. Consult the clinician for questions regarding individual needs. While in the seated position, select the cushion size to match the user’s hip width. The cushion length should equal the distance from the back of the buttocks to the back of the knees (plus 1 inch). -
Page 24: Upper Extremity Support Surface (Tray)
CONVAID USER’S GUIDE Accessories Upper Extremity Support Surface (Tray) 1. Depress spring button on underside of armrest until tray mount pops out. Fig. 65 2. Grasp tray mount and extend until locked into position. You may need to turn the tube slightly to snap the spring button into the hole. -
Page 25: Headrest Cover (Canopy)
ACCESSORIES Headrest Cover (Canopy) 1. Move rubber spacers to Folding Canopy: adjust height of the canopy. 1. Peel back 2. Insert into socket rod. Fig. 68 fringe of canopy. Note: 2. Push down Partially on pivot to fold chair begin fold. before installing canopy. -
Page 26: Bus Transport Models
3-point occupant restraint system in accordance with SAE J2249. 3. The wheelchair tiedown straps are to be securely attached from the vehicle floor points to anchor points on the chair. All Convaid anchors are clearly identified by their red color. -
Page 27: Fabric Removal
PO Box 9435 Trenton, NJ 08650 Q’Straint, Sure-Lok, Unwin and Ortho Safe specialize in crash-tested tie-down systems. They are in no way associated with Convaid, Inc. Miscellaneous Fabric Removal Partially fold the chair to relieve fabric tension (see fold instructions on page 3). -
Page 28: Locking And Unlocking
CONVAID USER’S GUIDE Wheels Locking and Unlocking Hand Wheel Locks To lock, pull down on handle. Fig. 73 To release lock, pull up on handle. Fig. 74 Fig.73 Locked Fig.74 Unlocked... -
Page 29: Wheel Specifications
WHEEL Specifications Safari Tilt wheels come standard with 6” and 11” solid tires. When ordering replacements, please have the following information available: • Chair model and size • Wheel size • Tire type - ribbed or knobby Pneumatic Tire Sizes: Size: 6”... -
Page 30: Wheel Lock Adjustment
CONVAID USER’S GUIDE Wheel Lock Adjustment Set wheel locks to locked position. Push chair with light pressure on the rear wheels. If wheel rotates, adjust tension by turning the adjustment nut until wheels no longer rotate while locked. Fig. 75... -
Page 31: Operating And Safety Instructions
SAFARI TILT Important Information Maintenance, Operating & Safety Instructions • READ ALL INSTRUCTIONS BEFORE USING THE PRODUCT • ALWAYS FOLLOW THESE SAFETY INSTRUCTIONS • SAVE SAFETY INSTRUCTIONS FOR FUTURE REFERENCE CAUTION: • For increased safety, the seat belt should be used at all times. - Page 32 CONVAID USER’S GUIDE 3. Suitable Environment The chair is intended for both indoor and outdoor use. If the chair is used in the rain, the excess water should be wiped off with a soft cloth. If the chair is splashed with mud or...
-
Page 33: Step
Tiedown and Occupant Restrain System (WTORS) following the requirements of SAE J2249. Follow tie-down harness manufacturer’s instructions carefully and refer to Convaid’s ‘Transit Guide’ for specifics. • When going up a curb or step, face forward and tilt the chair back to lift the front wheels over the curb. - Page 34 5. User Maintenance The following maintenance procedures should be conducted on a regular basis: Examine your Convaid product visually from time to time for possible wear and tear. Lubricant* should be applied to frame and moving parts to maintain easy folding and adjustment.
- Page 35 SAFARI TILT 6. Cleaning and disinfection Clean all areas that come in contact with user or caregiver with a disinfectant solution. To prevent the spread of germs, disinfectant wipes should be used on a regu- lar basis. Keep frame dry and apply a non-toxic, hypoallergenic and biodegradable lubricant to all moving parts.
- Page 36 CONVAID USER’S GUIDE 8. Reuse Your Convaid chair should undergo a wipe-down disinfection before reuse. Please use a non-toxic, biodegradable disinfectant solution suitable for surface disinfection. Please check the following components (see MAINTENANCE CHART) for operation, intactness, etc. and replace if necessary: •...
- Page 37 SAFARI TILT 11. Spare Parts If the user is unable to visit a Service Facility to describe the problem, they can request a diagram of the product be sent to them, so they can draw an arrow to the part needing replacement. If not under warranty, they will receive an estimate of the cost and, if necessary, shipping instructions for return of the chair.
-
Page 38: Limited Warranty
WARRANTY REPAIR: Simply send the chair to Convaid by UPS Next Day Air (prepaid). It will be fixed and shipped out within 48 hours by UPS Next Day Air at Convaid’s expense. NON-WARRANTY REPAIR: The time to repair and ship the chair back to the user will be extended by the length of time it takes to reach the user for approval of estimated repair costs.
Need help?
Do you have a question about the Safari tilt and is the answer not in the manual?
Questions and answers