
Related Manuals for Convaid Rodeo RD10


Summary of Contents for Convaid Rodeo RD10
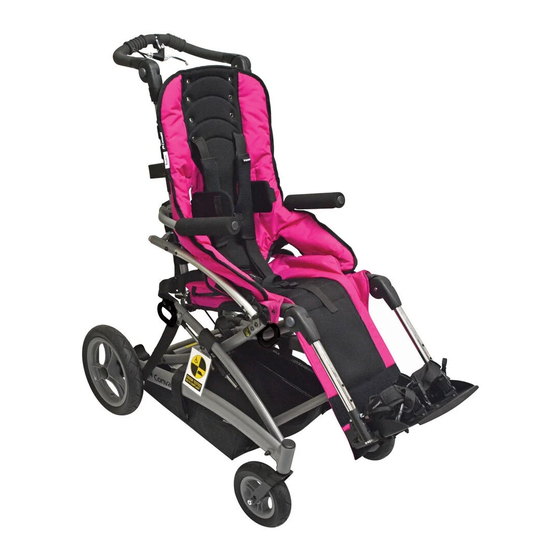
- Page 1 ENGLISH User’s Guide Rodeo Lightweight Tilt-In-Space Chair READ INSTRUCTIONS BEFORE USING ENCE SAVE THIS BOOK FOR FUTURE REFER...
-
Page 2: Table Of Contents
Table of Contents Unpacki ng ......... 1 Setting Up Unfoldi ng . -
Page 3: Unpacking
SETTI NG UP Setting Up Unpacking Check to see that the followi ng i tems are i ncluded wi th the chai r: • One-pi ece footplate. • Accessori es as ordered • Hex wrench (5/32) Unfolding SIZE / MODEL CHART Rodeo Si ze Model No. - Page 4 SETTI NG UP Fig. 4 Fig. 5 4. Apply wheel locks. Fig. 4 5. Push i n gray detent buttons on push handle, and li ft upward unti l handle i s at a 90-degree angle wi th chai r. Fig. 5 6.
-
Page 5: Folding
CONVAI D USER’S GUI DE Folding 1. Before foldi ng, front wheels of chai r should be i n a forward faci ng posi ti on. Fig. 7 2. Apply wheel locks by pushi ng wheel lock bar downwards. Fig. 8 3. - Page 6 SETTI NG UP 4. Push i n gray detent buttons on legrest extensi ons, swi ng them upward unti l parallel wi th the ground. Fig. 10 Detach the calf panel and fold up footplate. Fig. 11 5. Usi ng left hand, move red safety lock to the ri ght, and at the same ti me, li ft up on foldi ng lock bar - hold i n posi ti on unti l fold begi ns.
-
Page 7: Seat Back Hei Ght
CONVAI D USER’S GUI DE Fitting Guide Correct seati ng and posi ti oni ng encourages good posture, whi ch i n turn ai ds ci rculati on, breathi ng and di gesti on. Please take the ti me to properly adjust the chai r to fi t the user. If the user i s not correctly posi ti oned, check the accessori es secti on of thi s manual to see i f one or more of our accessori es would help to faci li tate posture or consult a physi cal therapi st. -
Page 8: Seat Depth
FI TTI NG GUI DE Seat wi dth i s measured from the i nsi de edge of the seat frame. Fig. 21 Fig. 21 Seat Depth Measure from the most posteri or porti on of the buttocks to the back of the knee. Subtract from that measurement 1-2”... - Page 9 CONVAI D USER’S GUI DE Seat Depth Adjustment 1. Push the gray detent buttons on the legrest extensi ons; swi ng them upward unti l parallel wi th the ground.Fig. 23a 2. Peel off seat upholstery from the mesh seat support. Fig. 23b 3.
-
Page 10: Three-Point Positioning Belt
FI TTI NG GUI DE Three-Point Positioning Belt The 3-poi nt belt keeps the user secure i n the wheelchai r. To Buckle: Sli p the metal clasp on the belt strap i nto the crotch strap buckle. Fig. 24 To Release: Press the gray button on the buckle and pull out the clasp. -
Page 11: H-Harness With Padded Covers
CONVAI D USER’S GUI DE H-Harness with Padded Covers H-harness shoulder straps help the user retai n upri ght trunk posi ti on. To adjust, i nsert the bolts on the end of the strap through the grommet holes on the back upholstery, and secure wi th the threaded knob. -
Page 12: Footplate Adjustment
FI TTI NG GUI DE Footplate djustment Fig. 30a All Convai d footplates are hei ght adjustable. To determi ne the correct seat-to-footplate hei ght, measure from the back of the knee to the bottom of the heel. Fig. 30a Note: By flipping the footplate upside-down, it allows you to accommodate shorter... -
Page 13: Foot Positioners
CONVAI D USER’S GUI DE Depth Adjustment: To adjust the depth of the footplate, loosen the #2 & #3 bolts on each si de of the footplate. Sli de the foot- plate to the desi red depth, and ti ghten the bolts. Fig. 32 Fig. -
Page 14: Addi Ti Onal Supports
Convai d offers a wi de vari ety of supports to help properly posi ti on the user. Note: Convaid’s chairs provide a semi-contour fit around the body. The user must be fitted correctly into the chair to achieve optimal posture and comfort. -
Page 15: Medi Al Thi Gh Support (Abductor)
CONVAI D USER’S GUI DE Fold or Swing- way Lateral Supports To fold or swi ng-out the lateral trunk supports, squeeze the latch located at the bottom of Lateral Support Bar, and fold the pad i nwards or outwards. Fig. 37 &... -
Page 16: Calf Panel
FI TTI NG GUI DE Calf Panel The calf panel provi des support for the lower legs. To attach, wrap the calf panel around legrest extensi ons and Velcro to the back of the panel. Make sure i t velcros to the calf panel support (seat upholstery leg extensi on) Fig. -
Page 17: Padded Headwi Ng And Occi Headwi Ng
CONVAI D USER’S GUI DE Padded Headwing The padded headwi ng provi des fi rm support for mi dli ne posi ti oni ng. Fig. 43 The headwi ng can be attached at any hei ght by wrappi ng the Velcro straps around the back of the frame or headrest extensi on. -
Page 18: Headrest Extension
FI TTI NG GUI DE Fig. 47 Fig. 48 Fig. 49 Fig. 50 Headrest Extension Extends back hei ght to provi de head support of taller i ndi vi duals. The Headrest Extensi on fi ts easi ly i nto sockets of the back frame. To adjust hei ght, move rubber grommets on the mounti ng posts to desi red posi ti on. -
Page 19: Hei Ght Adjustable Fli P-Up Armrests
CONVAI D USER’S GUI DE Height djustable Flip-Up rmrests The hei ght adjustable fli p-up armrests provi de added support and posi ti oni ng. Armrests “fli p-up” out of the way for easy access i nto the chai r, and adjust i n hei ght for added comfort. -
Page 20: Seat Cushions
FI TTI NG GUI DE Seat Cushions Support: General Use Cushion Flat foam wi th wooden i nsert Fig. 55 • Promotes stabi li ty and posture control and provi des comfort for the user. • Waterfall front eli mi nates pressure poi nts at the back of the knees. - Page 21 CONVAI D USER’S GUI DE Fitting The fi tti ng of the cushi on should be done by an experi enced cli ni ci an. When fi tted correctly, the cushi on wi ll help provi de stable support and promote good posture.
-
Page 22: Upper Extremity Support Surface (Tray)
ACCESSORI ES Accessories Upper Extremity Support Surface (Tray) The trays are great for feedi ng and for trunk stabi li zati on. They feature a safety li p and are easy to clean. 1. Depress spri ng button on undersi de of armrest unti l tray mount tube pops out. -
Page 23: Heavy Duty Under Storage Basket
CONVAI D USER’S GUI DE Heavy Duty Under Storage Basket The Heavy Duty Under Storage Basket i s desi gned for large or heavy support equi pment, such as a venti lator. It i s made of texteli ne mesh and durable plasti c and suspends from the chai r frame by Velcro straps. -
Page 24: Attendant Hand Brake
ACCESSORI ES Optional ttendant Hand Brake Hand brakes help to mai ntai n control of the chai r when goi ng down an i ncli ne. A moderate squeeze to the lever wi ll slow the chai r; a fi rm squeeze wi ll stop the chai r. Fig. -
Page 25: Anti -Ti P Tubes
CONVAI D USER’S GUI DE nti-Tip Tubes 1. To i nstall the anti -ti p tube, ali gn the tube wi th the end of the round frame tubi ng located next to the rear wheel. Fig. 72A 2. Push the detent pi n whi le posi ti oni ng the anti -ti p tube onto the round frame tubi ng, and then push unti l the “release button”... -
Page 26: Bus Transport Models
SAE J2249. 3. The wheelchai r ti e-downs must be securely Caution: attached to the four red anchor poi nts on Convaid belts and the chai r. See arrows i n above photo for shoulder straps are anchor poi nts. -
Page 27: Fabric Removal
CONVAI D USER’S GUI DE Miscellaneous Fabric Removal Chai r upholstery may be removed to faci li tate cleani ng. Removing seat upholstery and under seat mesh support: Fig. 76-79 1. Remove screws at the front of seat tube. 2. Unfasten the Velcro on the seat upholstery and the under seat mesh support located at the back of the seat. -
Page 28: Specifications
WH EELS Wheels Specifications The Rodeo comes standard wi th 7.5 x 2 front and 12.5 x 2.5 rear soli d ti res. When orderi ng replacements or pneumati c wheels, please have the followi ng i nformati on avai lable: •... -
Page 29: Rear Tire Removal
CONVAI D USER’S GUI DE Rear Tire Removal Rear Wheel Locking Pin Fig. 85 Fig. 86 Grasp wheel, press down and hold the rear wheel locki ng pi n and pull wheel out of rear axle. Rear Tire Installation Fig. 87 Fig. -
Page 30: Caster Lock
TI LT & RECLI NE nti-Shimmy In event that the front wheels develop a shi mmy, use a wrench (3/4”) to ti ghten the stem nut. Adjust the stem nut clockwi se unti l the shi mmy di sappears. Fig. 89 & 90 Fig. -
Page 31: Recli Ne Adjustment
CONVAI D USER’S GUI DE Recline Function HELPFUL HINT: For ease of use, lift the push handle upwards during the entire recline proces Upright Position Step: 1 Rotate Push Handle downward: Push-i n the Grey Push Buttons located on the si de of the Push Handle, at the same ti me, rotate the Push Handle Fig. -
Page 32: Operati Ng And Safety I Nstructi Ons
CONSUMER I NFORMATI ON Important Information Maintenance, Operating & Safety Instructions • READ ALL INSTRUCTIONS BEFORE USING THE PRODUCT • ALWAYS FOLLOW THESE SAFETY INSTRUCTIONS • SAVE SAFETY INSTRUCTIONS FOR FUTURE REFERENCE C UTION: • For increased safety, the seat belt should be used at all times. •... - Page 33 CONVAI D USER’S GUI DE 4. Safety Instructions • Follow foldi ng/unfoldi ng i nstructi ons. • Never leave occupi ed chai r unattended. • Do not attempt to take occupi ed chai r up or down stai rs, escalators, steep i ncli nes, or icy or sli ppery surfaces.
- Page 34 CONSUMER I NFORMATI ON • When goi ng down a curb, approach the curb backwards. Lower the rear wheels down the curb and conti nue backwards, taki ng the wei ght off the front wheels so they can be gently lowered. •...
- Page 35 CONVAI D USER’S GUI DE Every 3 Every 6 MAINTENANCE CHART Weekly As necessary months months • Ri ms, ti res and ti re pressure • Wheel locks and hand brakes • Accessori es • Front and rear wheel axles •...
- Page 36 CONSUMER I NFORMATI ON Cleaning of wheels and brakes: Wheels should be kept free of di rt or mud so as to not i nterfere wi th push- i ng the chai r. The brakes are to be kept free of di rt or mud, so as not to i nterfere wi th locki ng.
- Page 37 CONVAI D USER’S GUI DE 9. Repairs User: The user can replace easi ly removable parts or accessori es, e.g. foot- plates and footrest assembli es, heel loops, all fabri c i tems, hand gri ps, etc. Manufacturer/Servi ce Faci li ty: Repai r or replacement of permanently attached, worn or broken parts must be performed by a quali fi ed servi ce faci li ty.
- Page 38 CONSUMER I NFORMATI ON 12. Functional Tests All four wheels should make contact wi th the floor. Wi th the chai r empty, push i t forward on a smooth level surface wi th enough momentum to trav- el si x feet (2 m). The chai r should not veer to the left or ri ght more than si x i nches (15 cm).
Need help?
Do you have a question about the Rodeo RD10 and is the answer not in the manual?
Questions and answers