
Subscribe to Our Youtube Channel
Related Manuals for Convaid Cruiser CX10T


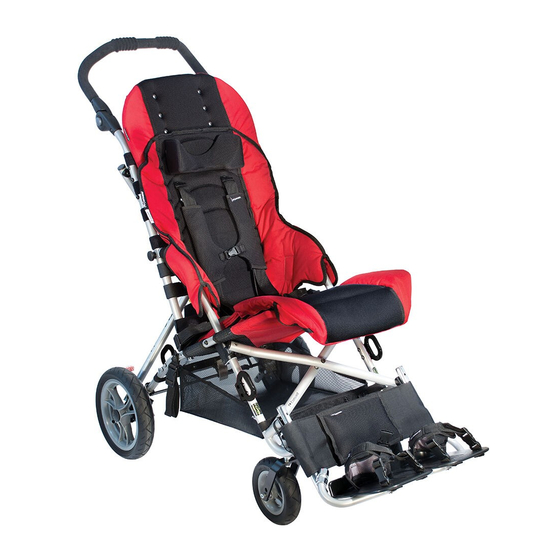
Summary of Contents for Convaid Cruiser CX10T
- Page 1 ENGLISH User’s Guide Cruiser Fixed-Tilt Wheelchair READ INSTRUCTION BEFORE USING SAVE THIS BOOK FOR FUTURE REFERENCE...
- Page 2 Convaid. Use only Convaid accessories and parts on Convaid products. Convaid parts are not interchangeable with other manufacturers’ products. Replace any worn parts immediately.
-
Page 3: Table Of Contents
CONVAID USER’S GUIDE Table of Contents Product Overview Definition of Symbols…………………………………………………….. Cruiser Overview………………………………………………………….. Specifications……………………………………………………………..Cruiser Product Line……………………………………………………… Warnings……………………………………………………………………. Setting Up Contents in the box……………………………………………………… How To Remove Chair from box…………………………………….. Preparing the Chair for Use…………………………………………… Unfolding the Chair……………………………………………………… Folding the Chair ………………………………………………………… Lifting/Carrying the Chair……………………………......Fitting Guide Seat Back Height …………………………………………………... Seat Width………………...……………………………………………….. Seat Depth…………………………………………………………………. Seat Depth Tubes Replacement……………………………………..Attaching Support Strap for Seat Extension Tubes………....Two Piece Seat……………………………………………………………… Wheels Quick Release Wheels…………………………........Anti-Shimmy Adjustment……………………………………………..Locking and Unlocking………………………………………………….. Attendant Hand Brake…………………………………………………..Operating Three-Point Positioning Belt……………………………………………. Depth Adjustable Crotch Strap………………………………………..H-Harness with Padded Covers………………………………………… Seat Back Angle Adjustment…………………………………………..Footplate Height Adjustment……………………………………………. Angle Adjustable Footplates…………………………………………..Foot Positioners……………………………………………………………... - Page 4 CONVAID USER’S GUIDE Accessories & Options Swing-Away Lateral Support with Scoliosis Strap………….... Lateral Trunk Support……………………………………………………. Full Torso Swing-Away Support Vest……………………………..Lateral Thigh Support (Adductor)…………………………………..Medial Thigh Support (Abductor)…………………………………..Padded Headwings……………………………………………………….. Headrest Extension………………………………………………………. Occi-Headwing…………………………………………………………….. Adjusting the Pelvic Belt Strap………………………………………..Adjusting the Crotch Strap……………………………………………... Seat Cushions…………………………………………………………….. Upper Extremity Support Surface (Tray)………………………..Saddle Bags……………………………………………………………..Under Seat Storage Basket……………………………………………... Headrest Cover (Canopy)……………………………………………….. Heavy-Duty Reinforced Upholstery………………………………..Reducer Seat Insert……………………………………………………..Rear Anti-Tip Tubes……………………………………………………..Utility Bag………………………………………………………………..Transit Models Transit Models…………………………………………………………….. Transportation Mode Instructions……………………………………... Recommended Clear Zones in Vehicle……………………………..Providing Clear Space & Padding……………………………………... Cruiser Transit Anchor Installation……………………………………. Proper Use of Equipment……………………………………………….. Restraining the Wheelchair Occupant ……………………………..Using Postural Belts & Supports……………………………………..Trays & Other Wheelchair Components……………………………..WTORS Manufacturers………………………………………………..Miscellaneous Fabric Removal…………………………………………………………..Adjustable Tension Back………………………………………………... Scout Options Wheel Lock Adjustment & Hand Brakes………………………..Important Information Maintenance, Operating & Safety Instructions…………………..
- Page 5 If instructions are not clear and further explanation is necessary, please contact your Convaid provider. If you do not follow all instructions and warnings, damage to the chair or serious injury may occur. The latest version of all instructions and product safety notice are available on the Convaid website www.
- Page 6 CONVAID USER’S GUIDE This symbol indicates a wheelchair which cannot be used in motor vehicle as vehicle seat. This wheelchair does not comply with WC19 (RESNAWC-4:2012 or ISO7176-19:2008) and cannot be used as a vehicle seat to transport the user in a vehicle.
- Page 7 Push Handle* Chair Warning Label Never leave occupant unattended. Failure to read and follow user guide instructions could result in serious injury. To obtain a replacement user’s guide email sales@convaid.com or call 888-266-8243 Serial Number Label Self-Tensio ® Foot Operated...
- Page 8 CONVAID USER’S GUIDE Cruiser CX10 CX12 CX14 CX16 CX18 Overall Length 1220 mm 1120 mm 1250 mm 1320 mm 1400 mm Overall Width 560 mm 600 mm 650 mm 700 mm 720 mm Overall Height 940 mm 970 mm 940 mm...
- Page 9 CONVAID USER’S GUIDE Cruiser Product Line Cruiser 18 Cruiser Cruiser Scout...
- Page 10 CONVAID USER’S GUIDE General Warnings WARNING: The operator/caregiver must read and understand this manual prior to operating this equipment. If you are unable to understand any part of the manual, contact your supplier for assistance. WARNING: Please keep packaging material away from children. Plastic packaging presents the danger of suffocation.
- Page 11 CONVAID USER’S GUIDE WARNING: Do not go up or down stairs without the assistance of another person or with user in the chair. If devices such as ramps or elevators are available, please use them. If they are not available, then the chair should be carried over the obstacle by two people without the user in the chair.
- Page 12 CONVAID USER’S GUIDE WARNING: Ensure the wheels are installed properly. You will hear a “click” when wheel locks into place. WARNING: Do not leave/store the chair in direct sun/heat over a long \ period of time. Check the temperature of the chair prior to usage.
- Page 13 Convaid recommends the initial fitting, adjustments, and setup take place with the help of your Convaid Representative and/or Convaid Service Dealer. However, if the instruc- tions contained in this manual are followed carefully, a caregiver or attendant will be able to set up and assemble the chair.
-
Page 14: Unfolding The Chair
CONVAID USER’S GUIDE Unfolding the Chair Note: One-Piece Push Handle will unfold as the chair opens. 1. Lay chair flat on ground and unbuckle closure strap.Fig.2 2. Stand chair on front caster, grasp side of Push Handle and push down on Seat Tube. Fig.3 3. Press down firmly on seat tubes to ensure the chair is completely unfolded. Fig.4 4. Using your foot, push down on Lower Rear Lock Brace until it locks into a straight position. - Page 15 CONVAID USER’S GUIDE Folding the Chair 1. Swing footplates to the side. Fig.10,11 2. Press grey buttons on each side of Push Handle and rotate Push Handle down completely. Fig.12,13 3. Unlock Rear Lock Brace by kicking up on center of brace with foot. Fig.14 4.
- Page 16 CONVAID USER’S GUIDE Lifting/Carrying the Chair To Lift/Carry the Chair: 1. To safely lift or carry the chair, always use both hands. 2. With one hand hold the chair by the front x- brace bar. Fig. 19 3. With the other hand hold the chair by the back x-brace. Fig. 20 Fig.
- Page 17 CONVAID USER’S GUIDE Fitting Guide Convaid’s lightweight, folding chairs are designed to be more than just a convenient chair. Order the correct size chair by first determining the user’s height, weight and seating measurements. Properly-fitted, Convaid chairs will provide years of comfortable use. As your child grows, refer back to this Fitting Guide to adjust the dimensions of the chair. Correct seating and positioning encourages good posture, which in turn aids circulation, breathing and digestion. Please take the time to properly adjust the chair to fit the user.
-
Page 18: Seat Depth
CONVAID USER’S GUIDE Seat Depth Measure the distance from the To change seat depth: most posterior portion of the buttocks to the back of the knee. 1. Partially fold the chair to relieve Subtract from that measurement fabric tension. Undo the Velcro ® 1-2” (25-51mm) to allow ade- back panel of the two-piece seat. -
Page 19: Attaching Support Strap For Seat Extension Tubes
CONVAID USER’S GUIDE Attaching Support Strap for Seat Extension Tubes 1. Remove Seat Upholstery. Fig.28,29 2. Change and Install Seat Depth Tubes. 3. Press spring button and move Seat Depth Tube to desire setting. Fig.30 4. Install Support Strap. Note: Make sure rough, shiny side of strap is facing out. - Page 20 CONVAID USER’S GUIDE Wheels Quick Release Wheels TIRE REMOVAL 1. To remove, press down and hold the Rear Wheel Locking Pin. Grasp wheel and pull. Fig.40,41 2. No tools are required to remove tire. Fig. 42 Fig. 40 Fig. 41 Fig. 42 WARNING: Ensure the wheels are installed properly.
-
Page 21: Locking And Unlocking
CONVAID USER’S GUIDE Locking and Unlocking Convaid manufactures two types of wheel locks: hand operated and foot operated. Check to see which type of wheel locks is on your chair. WARNING: Proper care and maintenance must be taken to ensure proper function of the foot operated brakes. -
Page 22: Attendant Hand Brake
CONVAID USER’S GUIDE For All Cruiser Size 18 and Cruisers with Scout Option Toggle Wheel Locks To Release Lock: To Lock: Pull up on red handle. Fig.48 Pull down on red handle. Fig.49 Fig. 48 Fig. 49 WARNING: Be careful not to get your fingers caught Fig. 50 Attendant Hand Brake Handbrakes help to maintain control of the chair when going down an incline. -
Page 23: Operating Instructions
Operating Instructions Three-Point Positioning Belt The three-point positioning belt is optional with every Convaid chair. Adjust the belt so the user stays securely in position. The quick-release buckle is attached to the crotch strap, and joins the crotch strap to both belts. -
Page 24: Depth Adjustable Crotch Strap
CONVAID USER’S GUIDE Depth Adjustable Crotch Strap The crotch strap can be adjusted by threading the strap through the desired slot. Fig.54 H-Harness with Padded Covers Fig. 54 H-harness shoulder straps help the user retain up- right trunk position. To adjust, insert the bolt at the end of the strap through the grommet hole in the seat back. -
Page 25: Seat Back Angle Adjustment
CONVAID USER’S GUIDE Seat Back Angle Adjustment Cruiser seat back angle can be adjusted in 5 degrees increments from 85~95 degrees relative to the seat base angle. These adjustments can be performed without hand tools by following the directions below. Fig.59 95° WARNING: Check knob regularly to ensure 90°... - Page 26 CONVAID USER’S GUIDE CX-18 Seat Back Angle Adjustment 1. Turn knob on inner seat back tube counter-clockwise to fully remove from J-bolt. 2. Remove J-bolt from seat tube and catch all hardware that may fall out in the process. 3. Install J-bolt into desire seat back angle position with proper hardware. Fig. 64 4.
-
Page 27: Footplate Height Adjustment
Seat-to-footplate height is measured from the back of the knee to the bottom of the heel. Feet or heels should rest comfortably on top of footplate. Fig. 65 All Convaid footplates are height adjustable. Footplates Seat to footplate height swing away for access or folding. -
Page 28: Angle Adjustable Footplates
CONVAID USER’S GUIDE WARNING: Keep fingers away from adjustment holes Fig. 73 Angle Adjustable Footplates Angle adjustable footplates can be moved fore and aft, sideways, and rotated vertically and horizontally. To adjust the angle, loosen the bolts on the footplate and move to desired position. Retighten the bolts. - Page 29 CONVAID USER’S GUIDE Foot Positioners Foot Positioners may be crisscrossed over the foot to secure the whole foot Fig.80 or can be converted into simple ankle straps. To attach foot positioner, thread strap through footplate as shown in Fig.81,82, then bolt strap to underside of footplate.
-
Page 30: Caster Locks
CONVAID USER’S GUIDE Caster Locks Caster locks hold the swivel wheels in a forward facing position to prevent the wheels from turning side to side. (For 2’’/50mm wide tires only) Fig. 85 Fig. 85 Calf Panel 1. Lay Calf Panel flat and unfasten the Velcro straps. Fig.86 2. Attach Velcro straps a round Footrest Extension Tube. -
Page 31: Swing-Away Lateral Support With Scoliosis Strap
CONVAID USER’S GUIDE Additional Accessories Convaid offers a wide variety of accessories to help properly position the user. Note: Convaid’s chairs provide a semi-contour fit around the body. The user must be fitted correctly into the chair to achieve optimal posture and comfort. Swing-Away Lateral Support with Scoliosis Strap Single Flap Adjustable trunk support stabilizes the trunk and maintains mid-line positioning. It can be pulled to one side for scoliosis correction if used with scoliosis strap. Scoliosis strap comes standard with all trunk supports. - Page 32 CONVAID USER’S GUIDE Attaching Lateral Trunk Support Single Flap 1. Attach the Lateral Trunk Support to the chair by wrapping the two rear straps around the back of the chair and securing with Velcro ® 2. Attach the single flap, by wrapping the strap on the left flap around the side tubing of the frame, and securing with Velcro (repeat steps ®...
- Page 33 CONVAID USER’S GUIDE Attaching Lateral Trunk Support Double Flap The Double Flap Lateral Trunk Support brings the trunk to midline position. • The Inner flaps mobilize the trunk. • The Outer flaps centralize the trunk and keep the arms in the front of the chair. • The Scoliosis strap aligns the spine. 1. Attach the Lateral Trunk Support to the chair by wrapping the two rear straps around the back of the chair and securing with Velcro .
-
Page 34: Full Torso Swing-Away Support Vest
CONVAID USER’S GUIDE Fig. 106 Fig. 107 Fig. 108 Fig. 109 Fig. 110 Fig. 111 Full Torso Swing-Away Support Vest An adjustable support vest keeps the user in place Comfortably and securely. It helps to maintain midline seating position and prevents forward slumping. The... -
Page 35: Medial Thigh Support (Abductor)
CONVAID USER’S GUIDE Medial Thigh Support (Abductor) Separates the thighs to improve hip alignment and stabilize sitting posture. Degree of abduction can be varied and can favor one side. The abductor flaps wrap over the user’s thighs from the inside to the outside. The straps buckle around the seat tube or the arm rest. -
Page 36: Headrest Extension
CONVAID USER’S GUIDE Headrest Extension To Install Insert Headrest Extension Tubes into the Headrest Holding Brackets and push down. Fig.117-119 Cordura Upholstery. Fig.117-119 Textilene Upholstery. Fig. 120-121 Fig. 117 Fig. 118 Fig. 119 Fig. 120 Fig. 121 Occi Headwing Occi Head-wing supports and positions the head at the occipital area. - Page 37 CONVAID USER’S GUIDE 5-Point Harness ADJUSTING THE STRAPS 1. Release the Rear Lock Brace by lifting up on the center of brace. Fig.123 2. Press in the silver snap button on the Rear Lock Brace Fig.124 then pull the lock brace off of 3.
-
Page 38: Adjusting The Pelvic Belt Strap
CONVAID USER’S GUIDE Adjusting the Pelvic Belt Strap To Tighten: Tighten the pelvic belt straps by pulling on the loop located at the end of the strap. Fig.131 To Loosen: Fig. 132 Loosen the pelvic belt strap by pushing the gray button on the Strap Adjustment. -
Page 39: Seat Cushions
CONVAID USER’S GUIDE Seat Cushions Support: General Use Cushion Flat foam with wooden insert Fig.135 Promotes stability and posture control and provides comfort for the user. Water-fall front eliminates pressure points at the back Fig. 135 of the knees. Position: Medial Thigh Support and Anti-Thrust Cushion Contoured foam with wooden insert Fig.136... - Page 40 CONVAID USER’S GUIDE Fitting The fitting of the cushion should be done by a physician. When fitted correctly, the cush- ion will help provide stable support and promote good posture. Consult your physician for questions regarding individual needs. Select the cushion size to match the seat width and depth of the chair. Measure the distance between the back of the buttocks and the back of the knees. Subtract 1-2” (25- 51mm) to allow for adequate clearance between the seat and the back of the knees.
-
Page 41: Upper Extremity Support Surface (Tray)
CONVAID USER’S GUIDE Accessories Upper Extremity Support Surface (Tray) ATTACHING THE TRAY 1. Raise front of the tray with the tray supports completely unfolded. Fig.137 2. Engage knobs on side of chair with tray hooks underneath. Fig.138 3. Lower tray until supports are positioned over the outside of the front legs. -
Page 42: Saddle Bags
CONVAID USER’S GUIDE Saddle Bags To Install 1. Insert Front Button Strap into opening in Mesh Seat Bottom and over Seat Tube. Fig.140 2. Verify the strap is in front of the Seat Tube Retaining Bolt, then snap button shut. Fig.141 Fig. 140 Fig. -
Page 43: Headrest Cover (Canopy)
CONVAID USER’S GUIDE Headrest Cover (Canopy) ATTACHING CANOPY 1. Remove Canopy from box. Fig.149 2. Align Canopy Retaining Clips with upper tubing on back of the chair. Fig.150 Push on clips with the palm of your hand until the canopy frame snaps into place. Fig.151 3. -
Page 44: Heavy-Duty Reinforced Upholstery
CONVAID USER’S GUIDE Heavy-Duty Reinforced Upholstery Heavy-duty, reinforced, padded seat and seat back come with pockets which have removable plastic stiffeners. Use when extra firmness is required. Stiffeners easily lift out of pockets for custom-forming with a heat gun. Fig.157 Fig. 157 Reducer Seat Insert The Reducer Seat Insert provides proper positioning in an oversized wheelchair. -
Page 45: Utility Bag
CONVAID USER’S GUIDE Utility Bag The Utility Bag attaches to the back of the chair, but can be removed and converted to a tote bag. Fig.163,164 To attach: Hook clasps onto straps. Fig. 162 WARNING: Do not overload bag. Fig.162 Fig. 163... -
Page 46: Transit Models
CONVAID USER’S GUIDE Transit Models The optional wheelchair transport model has been crash tested and performed satisfactorily at 30 mph/20g deceleration. The optional models conform to RESNA WC-19 or ISO 7176-19 standards. Dummy weights are: All Cruiser Models Model CX10T..66lbs / 30kg Model CX12T..66lbs / 30kg Model CX14T..100lbs / 45.5kg... -
Page 47: Transportation Mode Instructions
CONVAID USER’S GUIDE Wheelchair Lateral Stability and Belt Restraint Accommodations Ratings Wheelchair Mass (Weight) of Test Lateral Model Wheelchair Rating Stability** (lbs./kg) (in./mm) CX-10T 27/12 Acceptable 0.25/6.4 CX-12T 27/12 Acceptable 0.35/8.9 CX-14T 28/13 Acceptable 1.18/30.0 CX-16T 32/14.5 Acceptable 1.97/50.0 CX-18T 30/13.6 Acceptable 1.57/39.9 ** “Lateral stability” is the displacement of point P (the center of gravity on the loaded wheelchair) when a platform with the loaded wheelchair is tilted 45º... - Page 48 WARNING: Do not use the chair if it has been involved in a crash. In the event that your Cruiser is involved in a crash, please contact the Convaid Service Dealer or Convaid Customer Service Representative in order to arrange an evaluation of your Cruiser. For information on how to contact your representative please see page 66.
-
Page 49: Recommended Clear Zones In Vehicle
CONVAID USER’S GUIDE RECOMMENDED CLEAR ZONES IN VEHICLE Side View Top View Fig. 166 Fig. 167 The rear clear zone is measured from the rearmost point on an occupant’s head. The front clear zone is measured from the frontmost point on an occupant’s head. -
Page 50: Cruiser Transit Anchor Installation
WARNING: Follow the instructions provided to securely install the transit anchors to your wheelchair. WARNING: Only use high strength fasteners provided by Convaid to attach the transit anchors. WARNING: The transit anchors are to be installed one time only using the hardware provided. - Page 51 CONVAID USER’S GUIDE Fig. 177 Fig. 178 WARNING: Specialized hardware is designed for one time use only. Reinstalling will weaken the fittings of the hardware. Anchor Logo Sticker Place anchor hook sticker labels to the frame and the seating module. Fig.179 Serial Label Sticker Place the transit ready sticker over the non-transit hook symbol on the serial label sticker.
-
Page 52: Proper Use Of Equipment
Fig. 169. Fig. 170 Your Convaid transit wheelchair can be easily secured by four-point strap- type tiedowns by attaching the hook end fittings of the tiedown straps to the four red securement-point brackets located on the four tubular legs of the wheel- chair or by threading tiedown straps through the openings in the securement points. - Page 53 CONVAID USER’S GUIDE Once all four tie-down straps are attached to the wheelchair: Inspect all tie-down straps for signs of wear to the webbing and replace any straps that are worn and Tighten the straps to remove any excess slack and provide tension between the front...
-
Page 54: Restraining The Wheelchair Occupant
The optional belt, which has been dynamically tested in accordance with Annex A of WC19, may be ordered from Convaid at a nominal additional cost. To attach the lap belt to the wheelchair, secure the metal clips at the ends of the lap belt. to the pin/bushing connectors located on the wheelchair’s rear securement-point brackets. - Page 55 CONVAID USER’S GUIDE If the wheelchair is purchased without the optional lap belt or if the wheelchair user elects not to use the belt, a vehicle-anchored lap and shoulder belt must be used. As with the wheelchair-anchored lap belt, it is very important to position the vehicle-anchored lap belt low over the pelvis so that the angle of the lap belt is within the preferred zone of 45º...
-
Page 56: Using Postural Belts & Supports
CONVAID USER’S GUIDE Be sure that the shoulder belt crosses the chest and the middle of one shoulder and that belt restraints are not held a way from the body by wheelchair components or parts, such as arm rests or wheelchair legs. (See Fig.186 Thread the lap belt under the frame tubes located directly under the user’s elbows and pull the belt snug against the pelvis. -
Page 57: Wtors Manufacturers
CONVAID USER’S GUIDE WTORS Manufacturers Convaid is a wheelchair manufacturer and does not offer wheelchair tie-down and occupant restraint systems (WTORS). However, products that comply with current WTORS standards can be obtained from the following companies that specialize in crash-tested WTORS: Q’Straint, Sure-Lok, Unwin and Ortho Safe specialize in crash-tested tie-down... -
Page 58: Fabric Removal
CONVAID USER’S GUIDE Miscellaneous Fabric Removal Partially fold the chair to relieve fabric tension (see fold instructions on page 9).The lower seat panel is attached to the back panel with Velcro . Remove Velcro from the top of the seat bottom. - Page 59 CONVAID USER’S GUIDE Full Torso Swing-Away Support Vest An adjustable support vest keeps the user in place comfortably and securely. It helps maintain midline-seating position and prevents forward slumping. The vest is attached to the chair with straps that wrap around the seat back and connect with Velcro , and shoulder straps that screw ®...
-
Page 60: Wheel Lock Adjustment & Hand Brakes
CONVAID USER’S GUIDE Scout Options Wheel Lock Adjustment Set wheel locks to locked position. Push chair with light pressure on the rear wheels. If wheel rotates, adjust tension by turning the adjustment nut until wheels no longer rotate while locked. Fig.197 Fig. 197 Fig. - Page 61 CONVAID USER’S GUIDE Lever Adjustment To increase brake pressure, turn adjusting nut (A) counter clockwise, then turn locknut (B) clockwise to secure nut (A) in position. Fig. 201 Note: Adjust when lever pressure is too high. Fig. 201 Inner Pad Adjustment Turn nut clockwise to move pad closer to disk (wheel should spin and not grab).
- Page 62 CONVAID USER’S GUIDE Removal of Brake Pads Remove calipers from the axle brackets by unscrewing Hex bolts (A) & (B) with a 5mm wrench. Fig.205 Fig. 205 Remove outer pad first by pulling tab downward. Fig.206 Fig. 206 To remove inner pad, insert a 2.5mm Allen wrench into screw (A) and turn clockwise until the back of the pad is clear of its housing.
- Page 63 CONVAID USER’S GUIDE With a small screw driver, press the pad downward until it is clear of its housing. Fig.208 Remove the two springs from the old pad assembly Fig.209. Attach the two springs to the new pad assembly making certain that the hooks are properly seated over the two sheet metal steps.
- Page 64 CONVAID USER’S GUIDE Install outer pad by dropping the spring side over the small post. Push upward until the spring clips lightly onto the post. Fig.213 Fig. 213 Replacing Pads Note: A brake system needs some time to break in. Initially, the rubbing of the pad on the disc may cause some noise.
-
Page 65: Important Information
CONVAID USER’S GUIDE Important Information Maintenance, Operating & Safety Instructions • READ ALL INSTRUCTIONS BEFORE USING THE PRODUCT • ALWAYS FOLLOW THESE SAFETY INSTRUCTIONS • SAVE SAFETY INSTRUCTIONS FOR FUTURE REFERENCE WARNING: • For safety reasons, the seat belt should be used at all times. - Page 66 CONVAID USER’S GUIDE IMPORTANT INFORMATION 4. Safety Instructions • Follow folding/unfolding instructions. • Never leave occupied chair unattended. • Do not attempt to take occupied chair up or down stairs, esca- lators, steep inclines, icy or slippery surfaces. Fig.217,218 • To avoid tipping, do not overload the chair, or hang heavy Fig.
- Page 67 CONVAID USER’S GUIDE IMPORTANT INFORMATION When going down a curb, approach the curb backwards. Lower the rear wheels down the curb and continue backwards, taking the weight off the front wheels so they can be gently lowered. Fig.221 Fig. 221 When transferring user to or from chair, apply foot wheel locks.
- Page 68 Armrests & foam • Frame • Contacting a Convaid Dealer for service or repair*** Use a non-toxic, hypoallergenic lubricant for all moving parts of the frame Follow cleaning instructions for appropriate user hygiene NOTE: Repair or replacement of non-removable, worn or broken parts must be performed by a qualified service facility.
- Page 69 After extended storage periods, and before reuse, the entire chair needs to be serviced, cleaned and disinfected. 8. Re-use Your Convaid chair should undergo wipe-down disinfection before re-use. Please use a non-toxic, biodegradable disinfectant solution suitable for surface disinfec- tion. Please check the following components for intactness before operation(see MAINTE-...
- Page 70 (included) 11. Spare Parts If you need any spare parts for your chair, please visit or call your Convaid Service Dealer you purchased this chair from If the part is not under warranty, you will receive an estimate of the cost and, if necessary, shipping instructions for the return of the chair for repairs.
-
Page 71: Warranty
CONVAID USER’S GUIDE 13. Authorized Service Dealer 14. CE Mark Authorized Representative B.S. Partnership 41 Dan-Y-Coed Road, Cardiff, CF23 6NB, UK... -
Page 72: Limited Warranty
Limited Warranty Convaid warrants to the original retail purchaser of the Convaid product, that if any part thereof proves functionally defective in material or workmanship within the specified warranty period, such defective part will be repaired or replaced (at Convaid’s discretion) free of charge. Warranty service may be performed by an authorized service center or (at Convaid’s discretion) the factory.
Need help?
Do you have a question about the Cruiser CX10T and is the answer not in the manual?
Questions and answers