Sign In
Upload
Download
Table of Contents
Contents
Add to my manuals
Delete from my manuals
Share
URL of this page:
HTML Link:
Bookmark this page
Add
Manual will be automatically added to "My Manuals"
Print this page
×
Bookmark added
×
Added to my manuals
Manuals
Brands
Convaid Manuals
Wheelchair
EZ Rider 18
User manual
Convaid EZ Rider 18 User Manual
Ez rider series
Hide thumbs
1
2
Table Of Contents
3
4
5
6
7
8
9
10
11
12
13
14
15
16
17
18
19
20
21
22
23
24
25
26
27
28
29
30
31
32
33
34
35
36
37
38
39
40
41
42
43
44
45
46
47
48
49
50
51
52
53
54
55
56
57
58
59
60
page
of
60
Go
/
60
Contents
Table of Contents
Bookmarks
Table of Contents
Table of Contents
Definition of Symbols
Warnings
EZ Rider Overview
Specifications
Contents in the Box
How to Remove Chair from Box
Preparing the Chair for Use
Tools Required
Unfolding EZ Rider Models
Folding
Locking
Lifting/Carrying
Fitting Guide
Seat Back Height
Seat Width
Seat Depth
Seat Depth Tube Replacement
Attaching Support Strap for Seat Extension Tubes
Two-Piece Seat
Wheels
Quick Release Wheels
Anti-Shimmy Adjustment
Locking and Unlocking
Operating Instructions
Three-Point Positioning Belt
H-Harness with Padded Covers
Depth Adjustable Crotch Strap
Footplate Height Adjustment
Angle Adjustable Footplates
Footplate Depth Adjustment
Caster Locks
Calf Panel
Accessories
Swing-Away Lateral Support with Scoliosis Strap
Attaching Lateral Trunk Support Single Flap
Fig
Attaching Lateral Trunk Support Double Flap
Fig
Pull out Detent Pin and Remove the Footplate Extension Tube from the Frame. Fig
Full Torso Swing-Away Support Vest
Lateral Thigh Support (Adductor)
Medial Thigh Support (Abductor)
Press the Spring Button, then Pull the Footplate Assembly Apart. Fig
Padded Headwings
Headrest Extension
Insert the Footplate into the Opposite End of the Footplate Extension and Reassemble. Fig
Height Adjustable Flip-Up Armrests
Occi Headwing
5-Point Harness
Seat Cushions
Fitting
Headrest Cover (Canopy)
Heavy Duty Reinforced Upholstery
Reducer Seat Insert
Rear Anti-Tip Tubes
Utility Bag
Transit Models
Transit Mode Instructions
Recommended Clear Zones in Vehicle
Providing Clear Space & Padding
Proper Use of Equipment
Restraining the Wheelchair Occupant
Using Postural Belts & Supports
Trays & Other Wheelchair Components
WTORS Manufacturers
Miscellaneous
Adjustable Tension Back
Important Information
Maintenance, Operating & Safety Instructions
Warranty
Advertisement
Quick Links
1
Specifications
2
Folding
3
Maintenance, Operating & Safety Instructions
Download this manual
ENGLISH
User's Guide
Europe
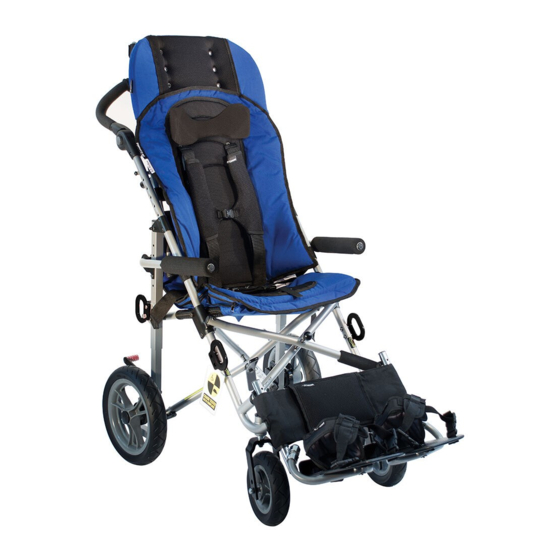
EZ Rider
Upright Wheelchair
READ INSTRUCTIONS BEFORE USING
SAVE THIS BOOK FOR FUTURE REFERENCE
Table of
Contents
Previous
Page
Next
Page
1
2
3
4
5
Advertisement
Table of Contents
Need help?
Do you have a question about the EZ Rider 18 and is the answer not in the manual?
Ask a question
Questions and answers
Related Manuals for Convaid EZ Rider 18
Wheelchair Convaid Rodeo RD10 User Manual
Lightweight tilt-in-space chair (38 pages)
Wheelchair Convaid Rodeo RD 12 User Manual
Lightweight tilt-in-space wheelchair (64 pages)
Wheelchair Convaid Rodeo User Manual
Lightweight tilt-in-space chair (40 pages)
Wheelchair Convaid Rodeo User And Service Manual
Lightweight tilt-in-space wheelchair (60 pages)
Wheelchair Convaid EZ Rider 16 User Manual
Ez rider series (60 pages)
Wheelchair Convaid EZ Rider 14 User Manual
Ez rider series (60 pages)
Wheelchair Convaid EZ Rider 12 User Manual
Ez rider series (60 pages)
Wheelchair Convaid WC19 User Manual
Wc19-compliancy transit policy (20 pages)
Wheelchair Convaid Rodeo Transit Kit Installation
(3 pages)
Wheelchair Convaid Lite Rider User Manual
(48 pages)
Wheelchair Convaid Cruiser User Manual
(48 pages)
Wheelchair Convaid Cruiser CX10 User Manual
Transit chair (19 pages)
Wheelchair Convaid Cruiser 12 Replacement Parts & Accessories Manual
(112 pages)
Wheelchair Convaid Cruiser CX10T User Manual
Cruiser series fixed-tilt wheelchair (72 pages)
Wheelchair Convaid trekker Troubleshooting Manual
(12 pages)
Wheelchair Convaid Trekker User Manual
Lightweight tilt-in-space wheelchair (75 pages)
This manual is also suitable for:
Ez rider 14
Ez rider 12
Ez rider 16
Table of Contents
Print
Rename the bookmark
Delete bookmark?
Delete from my manuals?
Login
Sign In
OR
Sign in with Facebook
Sign in with Google
Upload manual
Upload from disk
Upload from URL


Need help?
Do you have a question about the EZ Rider 18 and is the answer not in the manual?
Questions and answers